Using the mqtt nodes in Node-Red on the Raspberry Pi
Good Morning! In my previous post I went over how to install the mosquitto mqtt broker on the Raspberry Pi and a brief explanation of how I use Node-Red to send and receive mqtt messages. In this post I'll go through the Node-Red mqtt subscribe and publish nodes in greater detail.
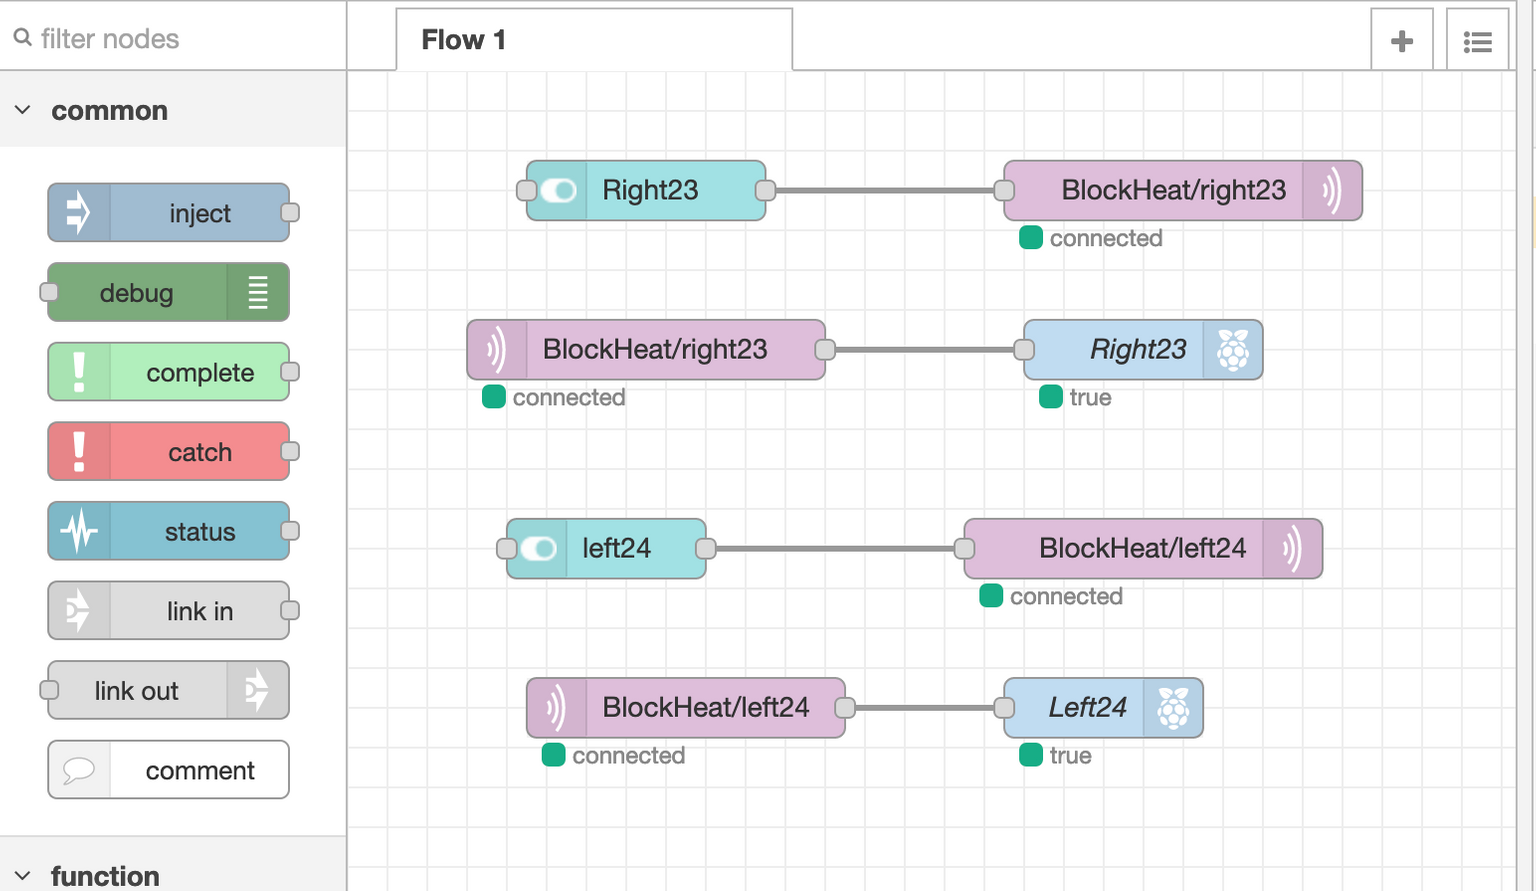
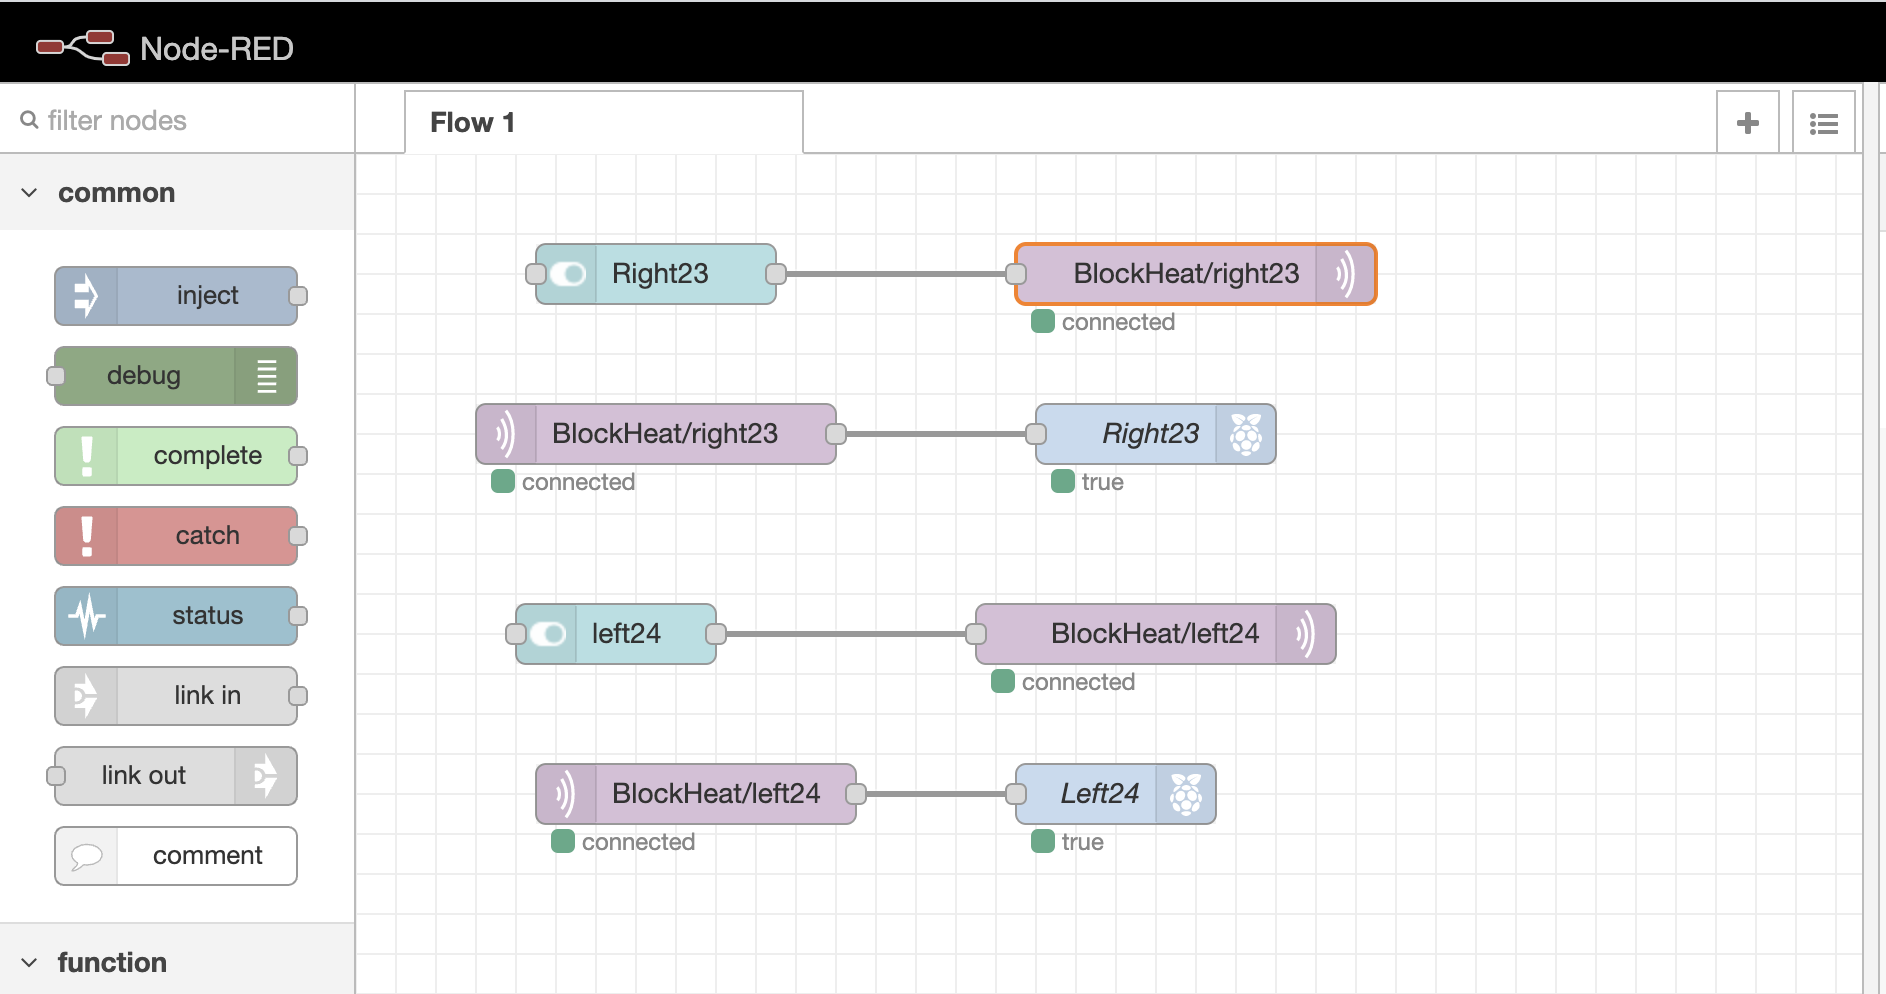
Let's look at the upper right publish node, BlockHeat/right23, which is my label to let me know that this topic is on my "BlockHeat" Pi and is specifying GPIO pin 23, which controls the relay on the right hand extension cord.... Seriously I have 2 extension cords remotely switched by this device and one is on the right side of my yard and one is on the left. So I wanted an easy way to know which one I was switching on or off when looking out my front window (grin).
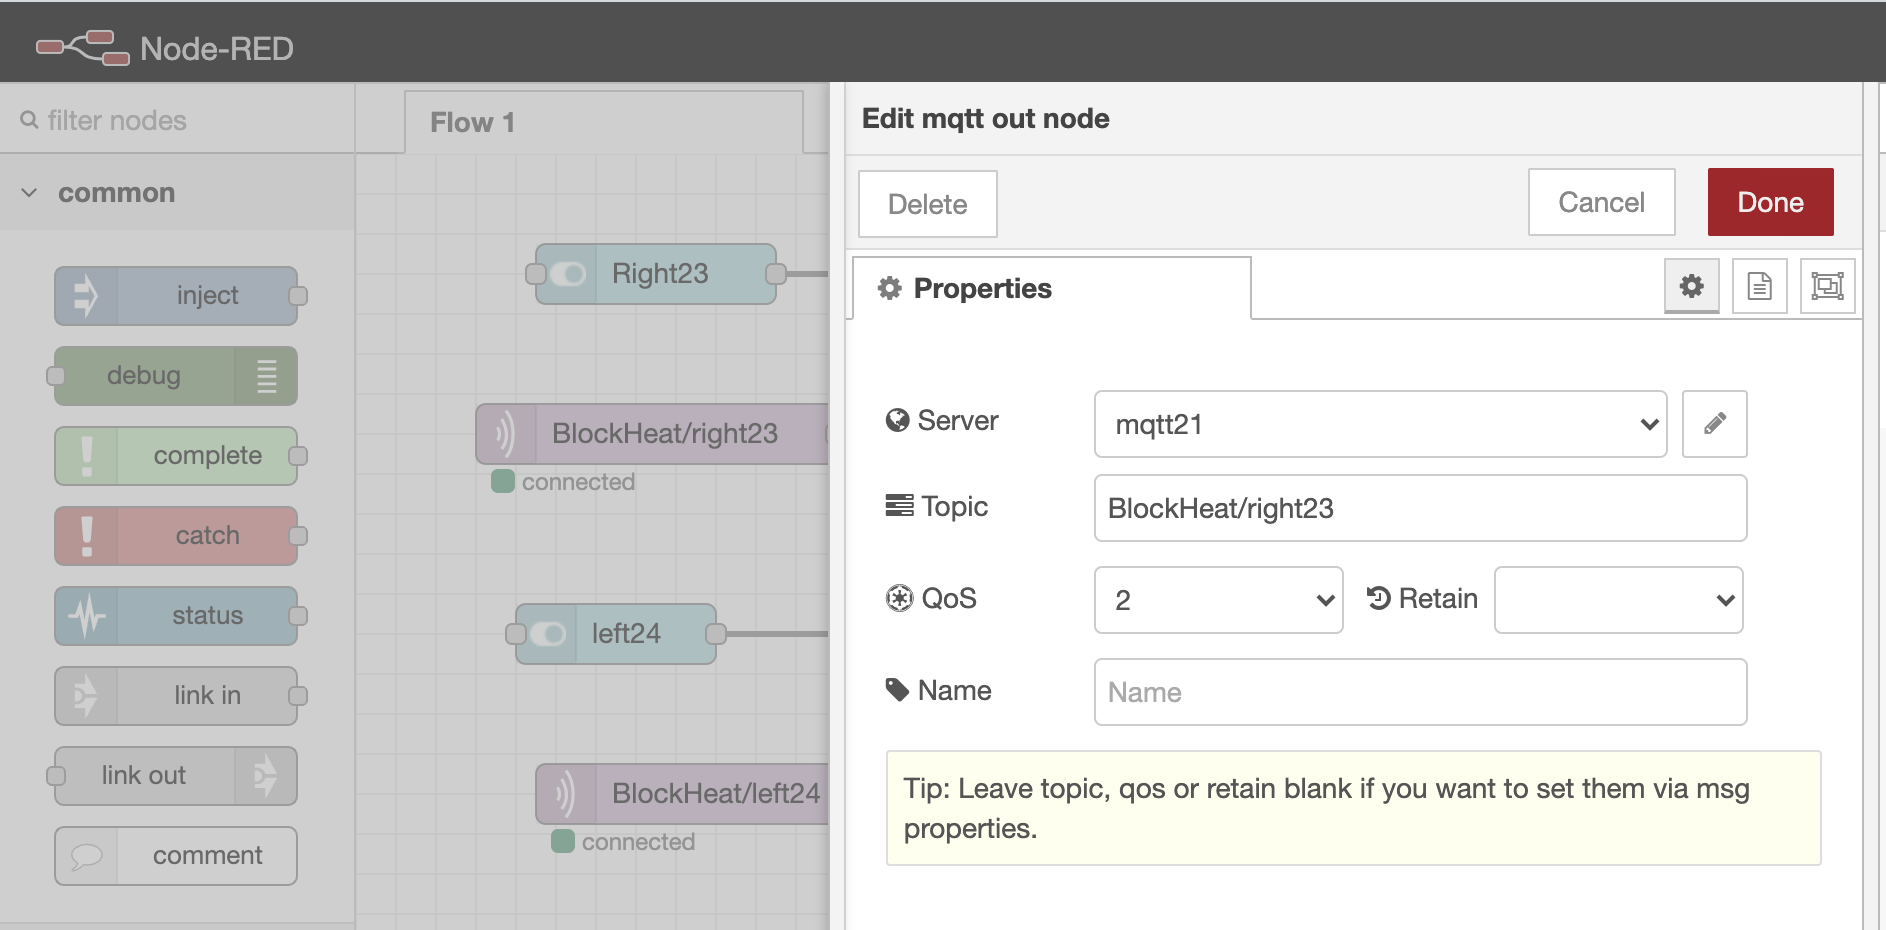
Clicking on the upper right pink BlockHeat/right23 node brings up this window where you can choose your Server (mqtt broker), set the topic that you're publishing to and set the QOS (quality of service). Briefly, QOS can be 0, 1, or 2
- QOS 0 takes the least bandwidth, and is the least reliable, and no guarantee of delivery. The client publishes the data and doesn't request a response from the broker confirming it was received.
- QOS 1 takes a little more bandwidth, and is a little more reliable, and guarantees delivery. The client publishes the data and waits for a response from the broker. If a response isn't received then it sends it again, so there could be duplicate messages sent and additional traffic on the network.
- QOS 3 takes even more bandwidth, is the most reliable, and also guarantees delivery.
Here is a great explanation of QOS from Steves-Internet-Guide

Clicking on the pencil beside the Server name will bring up this screen and if you don't have a server setup it will allow you to input the info you need. I named my Server (mqtt broker) mqtt21 which tells me that this Pi is my mqtt broker and it's IP address is 192.168.200.21. I setup DHCP reservations in my router so that my Pi's always get the same IP addresses even if I change the SD cards & repurpose them. Most important to note is that I use the IP address of the PI rather than the local name (mqtt21.local). I found a few instances where DNS name resolution didn't always work in my home network of wireless router, several AP's and various switches. Also, I found that the broker wasn't 100% reliable when connected to my network via wifi, so I only use a wired connection on my broker. I leave the Client ID, keep alive and clean session values at their defaults. Here is a great explanation of the Client ID & Keep Alive values on Steves-Internet-Site.
So why publish to mqtt when the switch is pushed and activate the GPIO output on the Pi when it receives the subscribed message on the same topic? Why not just go straight from the switch to the GPIO output as I had shown in my earlier post?
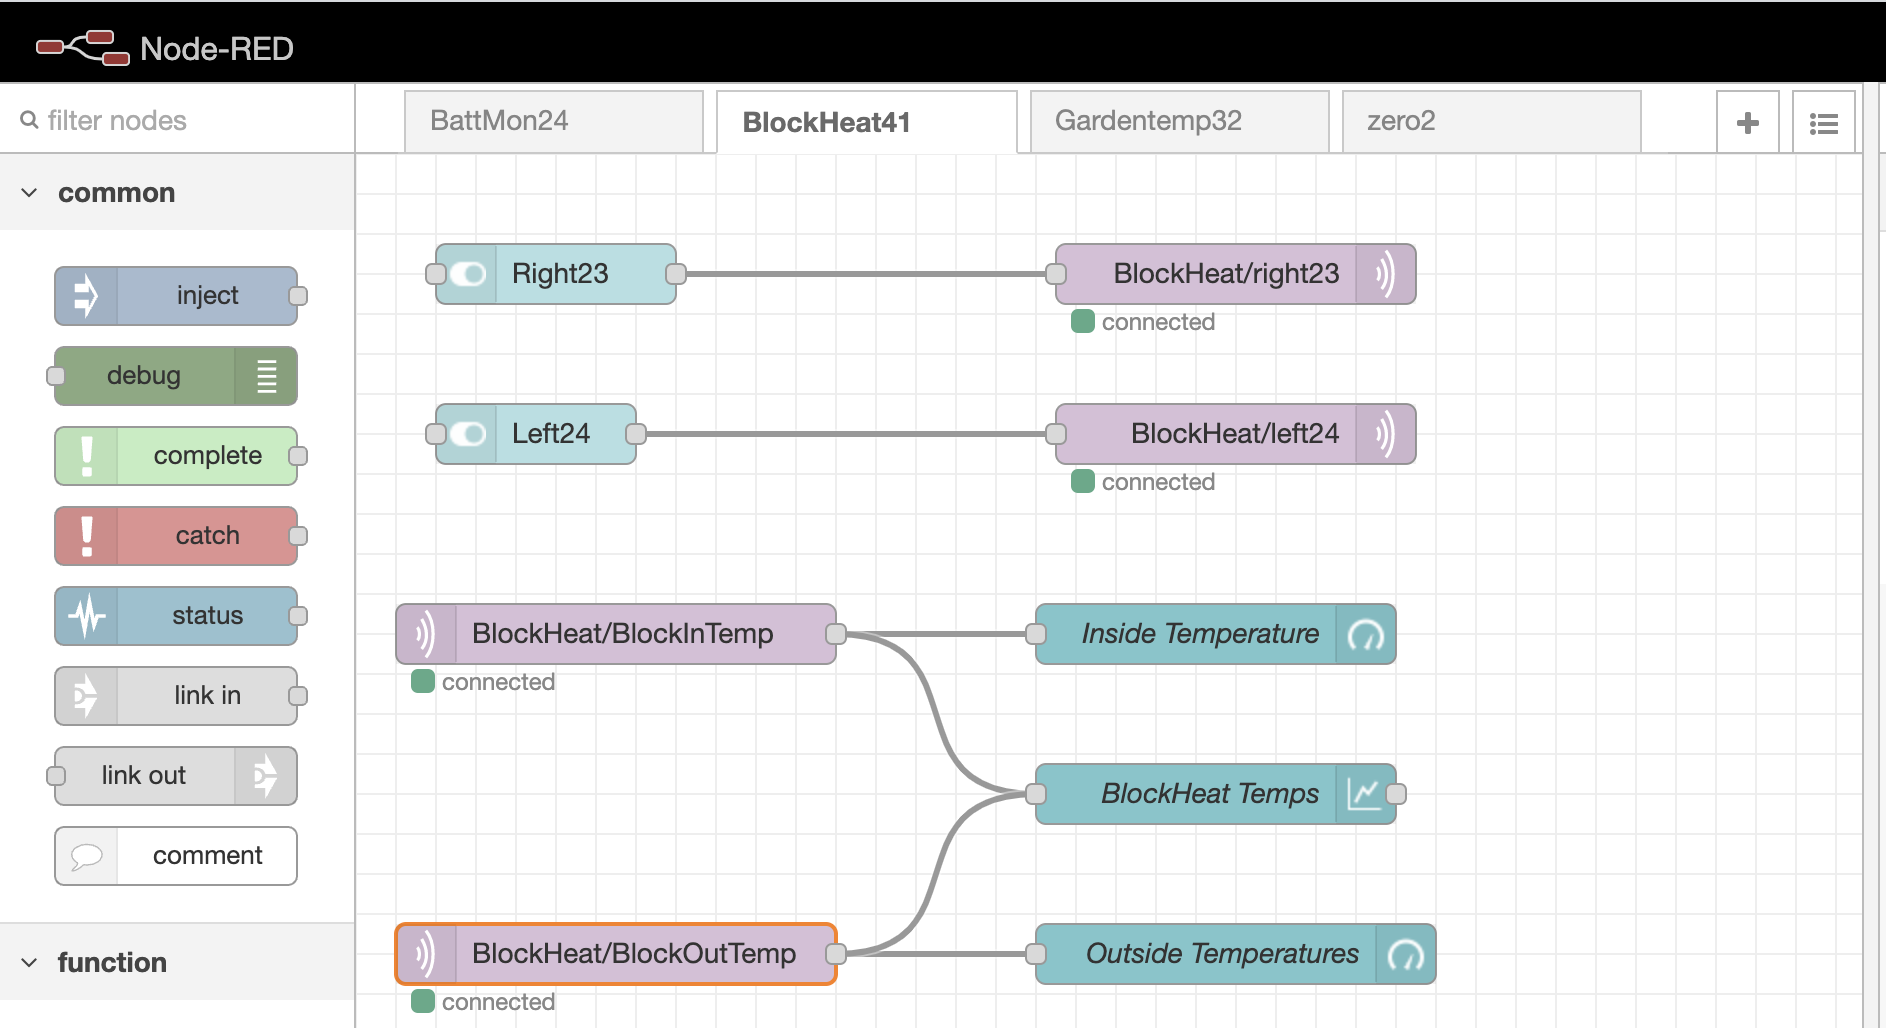
Because I want to be able to control those GPIO pins from any device, and here is a pic of my Node-Red flow from a different Pi. You can see that by publishing to that topic when the switch is pushed allows control from many different devices. I don't want to have to access the dashboard on each individual Pi when I'm controlling it, so I've grouped them all together (you can see the different tabs across the top; BattMon24, BlockHeat41, Gardentemp32, zero2) on one Pi and simply tab between them. Also as mentioned earlier in partVI of the Home Automation series, the Pi ZeroW isn't able to run Node-Red and so I'm able to control the GPIO pins on the Pi ZeroW by publishing to the mqtt topic via Node-Red and the ZeroW is subscribed to the mqtt topic via a Python3 program.
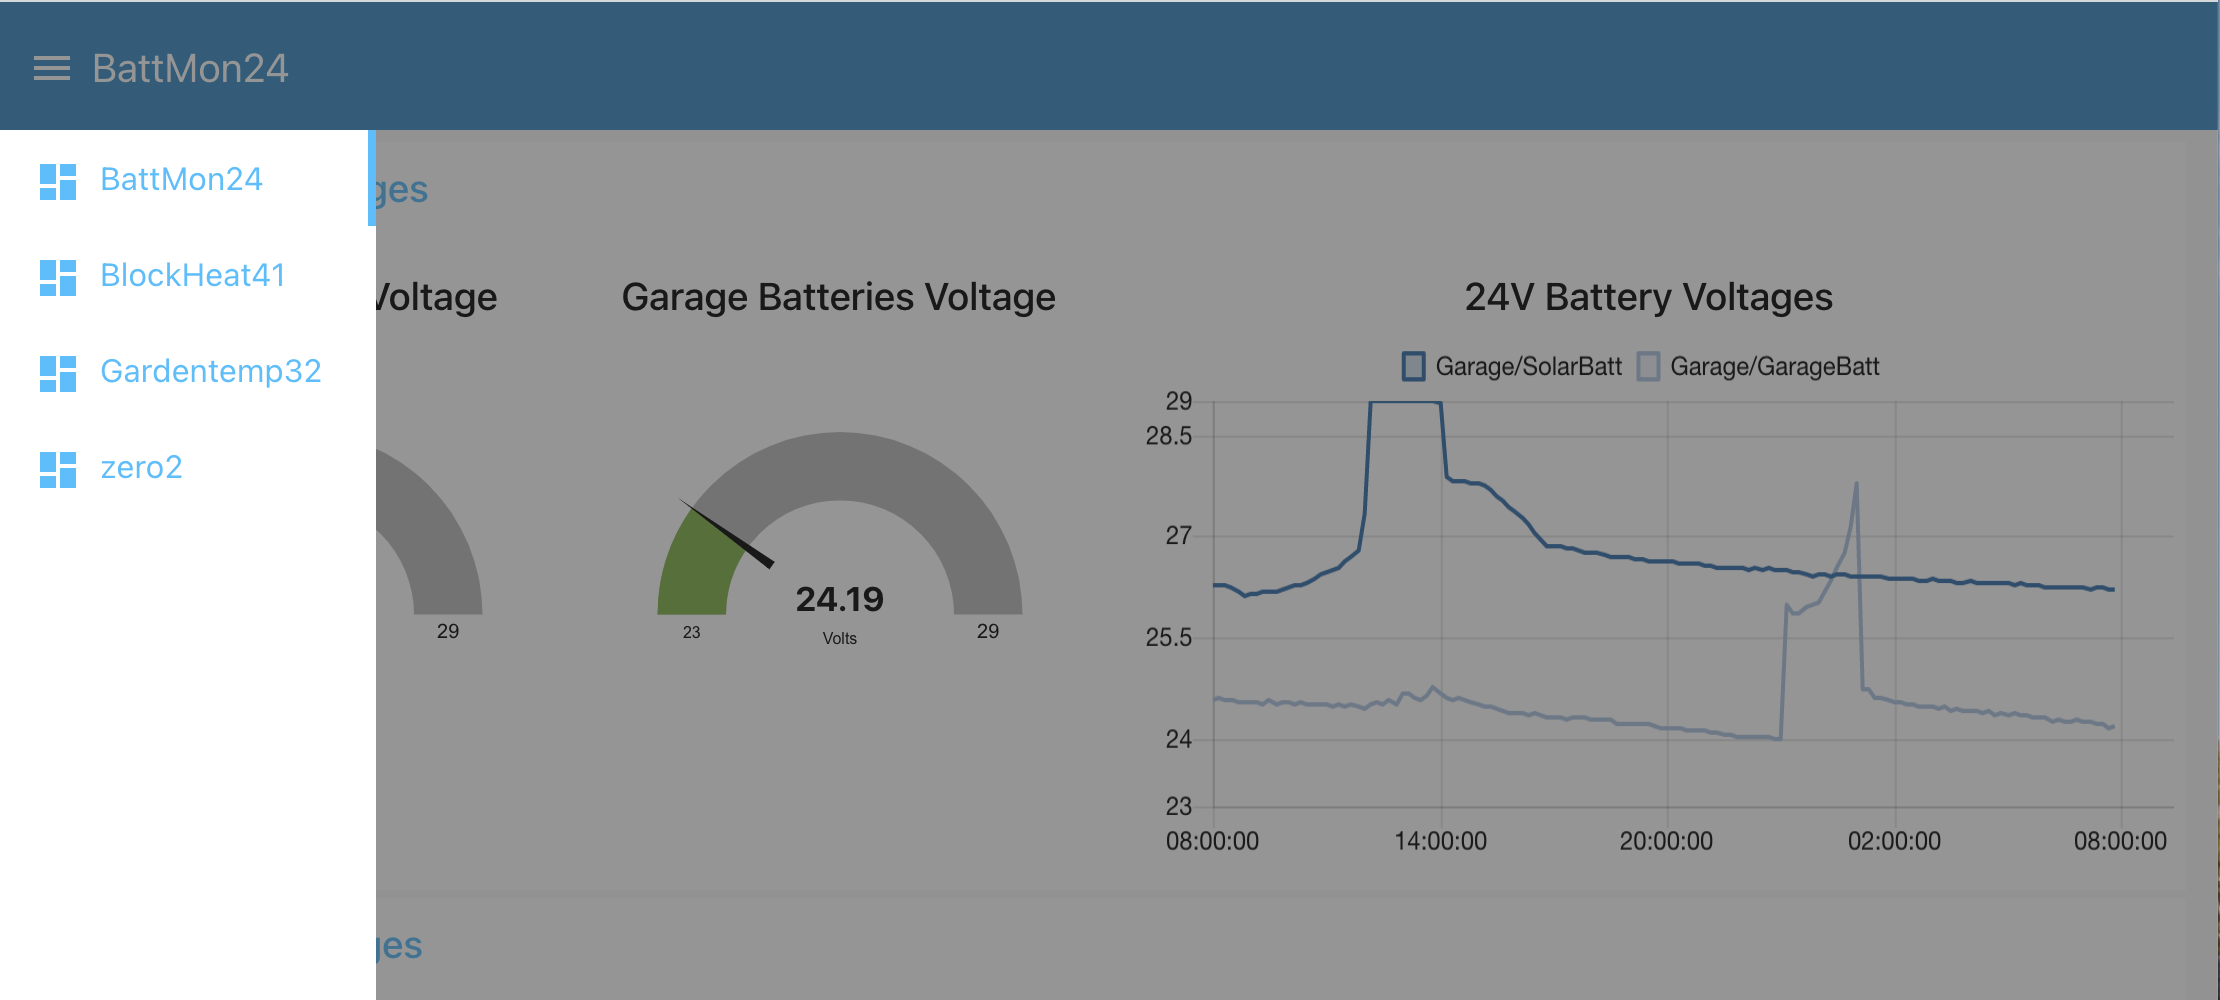
How do you tab between the different Pi's? Remember when we setup the Node-Red groups and tabs using the name of "Home" in our earlier example? Well that tab name will allow you to separate the views into separate dashboard webpages, and simply click on the upper left hand name to bring up a list of all of the tabs that you have setup!
Thanks for viewing!
Robin
Posted with STEMGeeks
You know, I can be all over the software/process side of automation, but the hardware still eludes me. I have a crap tonne of motors of all sorts that I keep wanting to do something with but have no idea how to really use them properly. I might need to bug you to help me out sometime.
That is the same feedback that I get from so many students taking my Basic Electricity & Electronics classes! "I can learn how to program online, but how do I actually hook up the devices without blowing them up?"(grin). Anytime you want to ask about hooking up the devices to Pi's or ESP's etc. please let me know and I'd be happy to write something up! I've spent so many years as an Electronics Tech servicing consumer electronics that I think I take much of that information/skill for granted!
So now I need to ask how to assign different flows to unique tabs on the UI.
I guess I should RTFM, but asking questions here is more fun.
What a great suggestion for tomorrow's post (grin)! Stay tuned!