Raspberry Pi Home Automation Part VI
In my fifth post we went over the basics of Node-Red, how to install it in a Raspberry Pi and some of the webpages generated by it and the controls utilized on the dashboard.
Today I want look a bit deeper at the raspberry pi nodes and how I incorporate the Pi ZeroW devices that aren't able to run the Node-Red software.
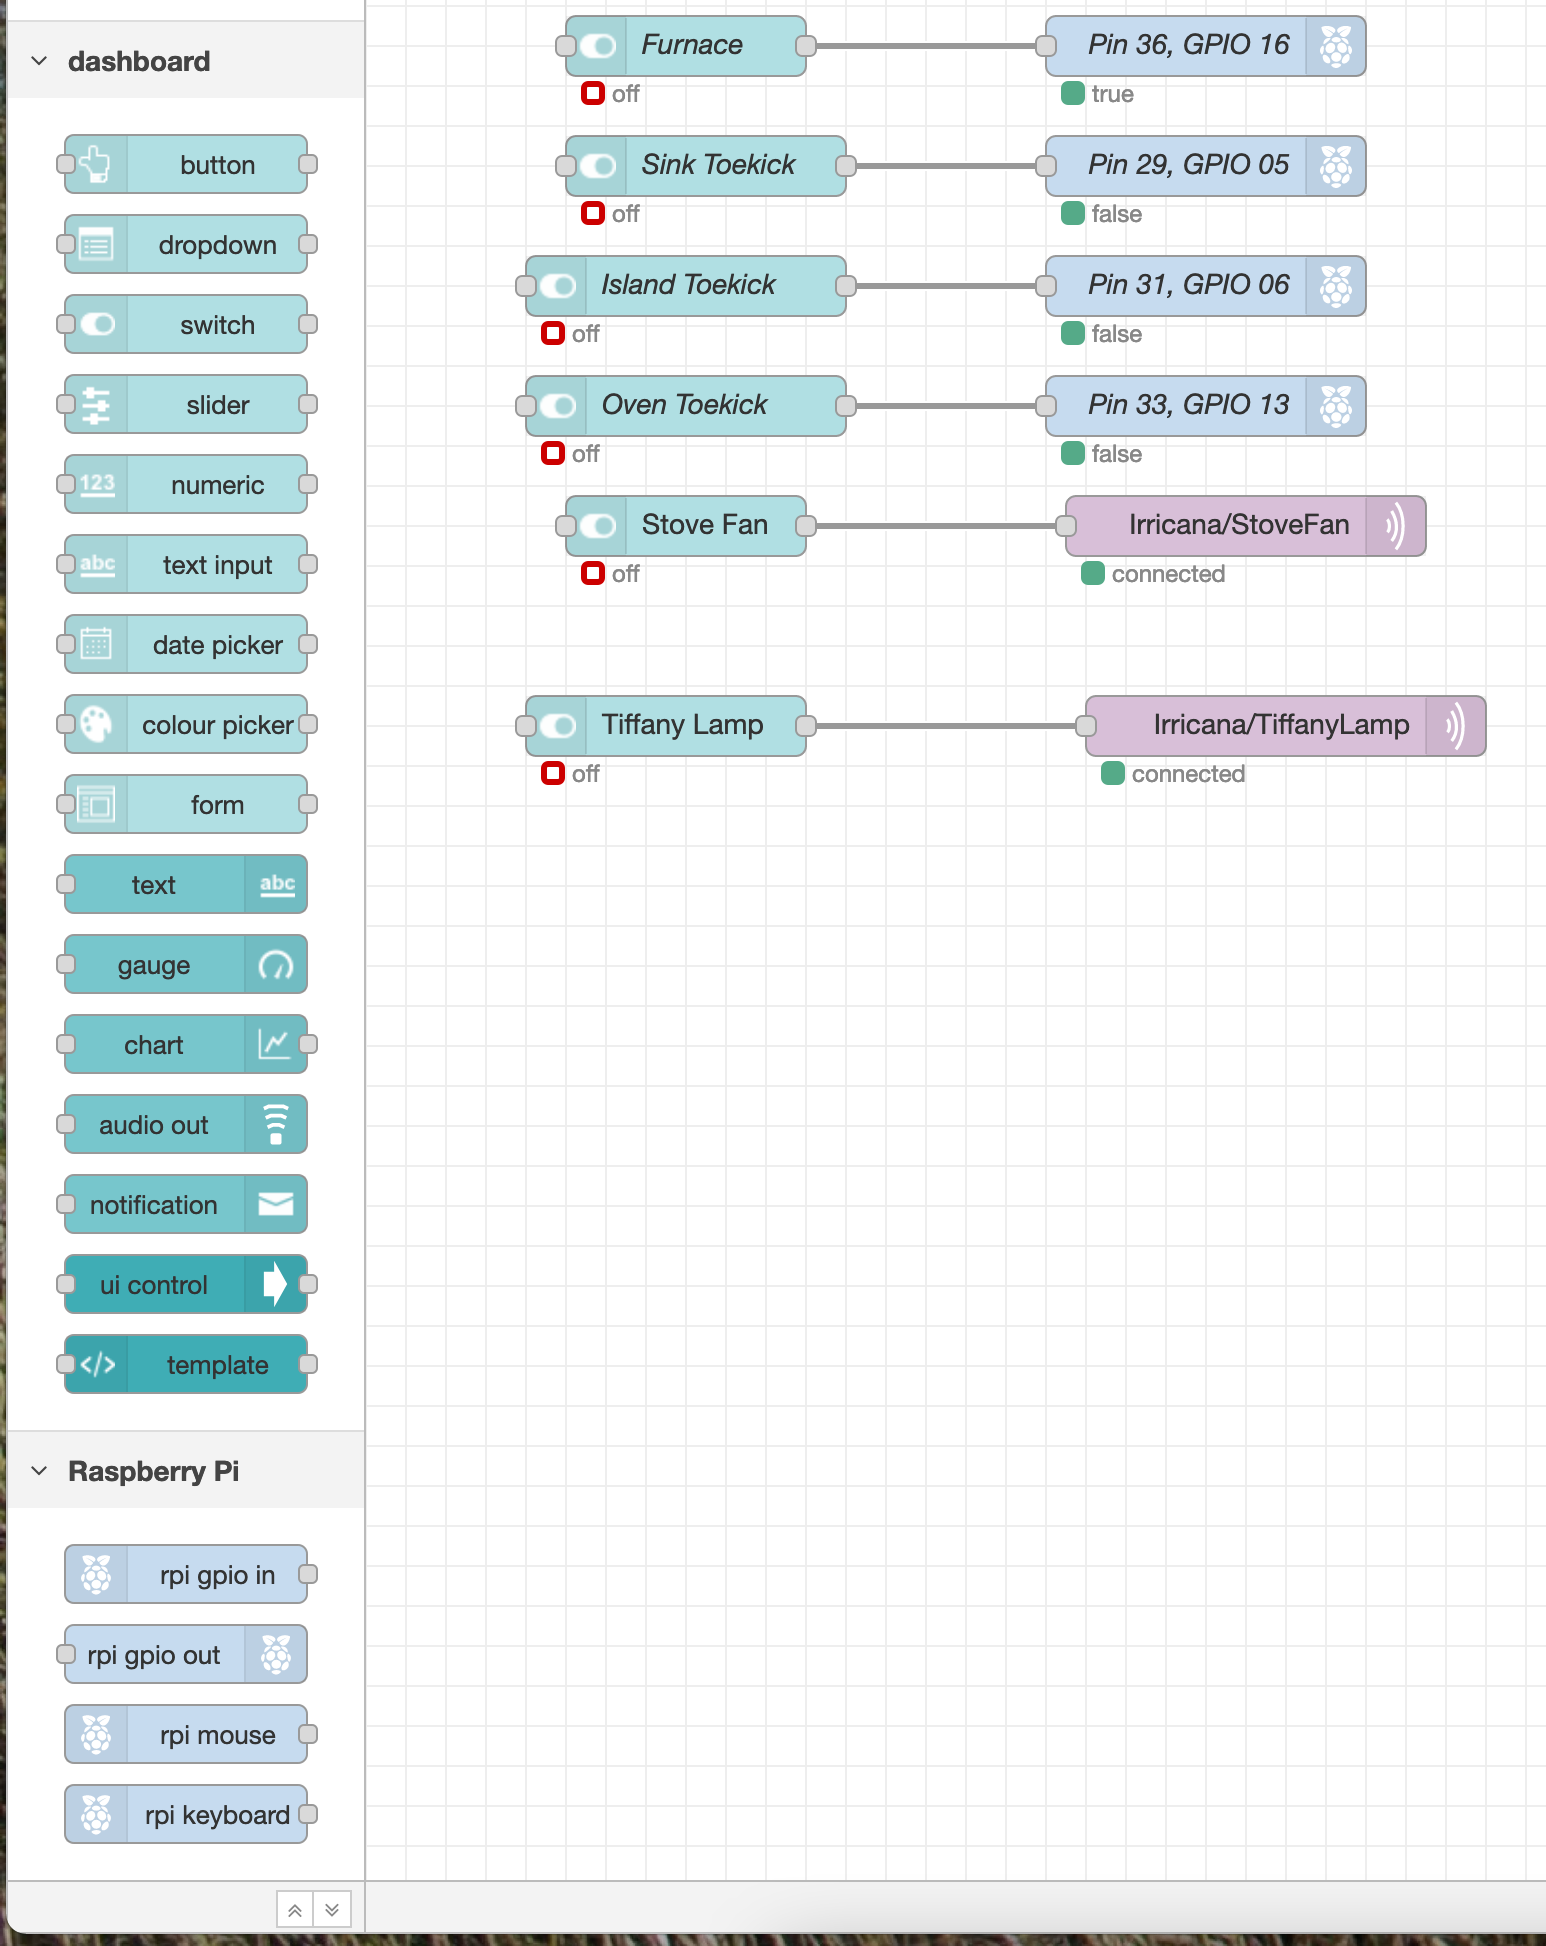
On the bottom left of my Node-Red flow setup screen are the nodes that are imported when you install the dashboard, and the nodes that are setup with you run the raspberry pi setup that I had shown in post V. It really is as easy as dragging them into the flow, joining them together and then setting them up.
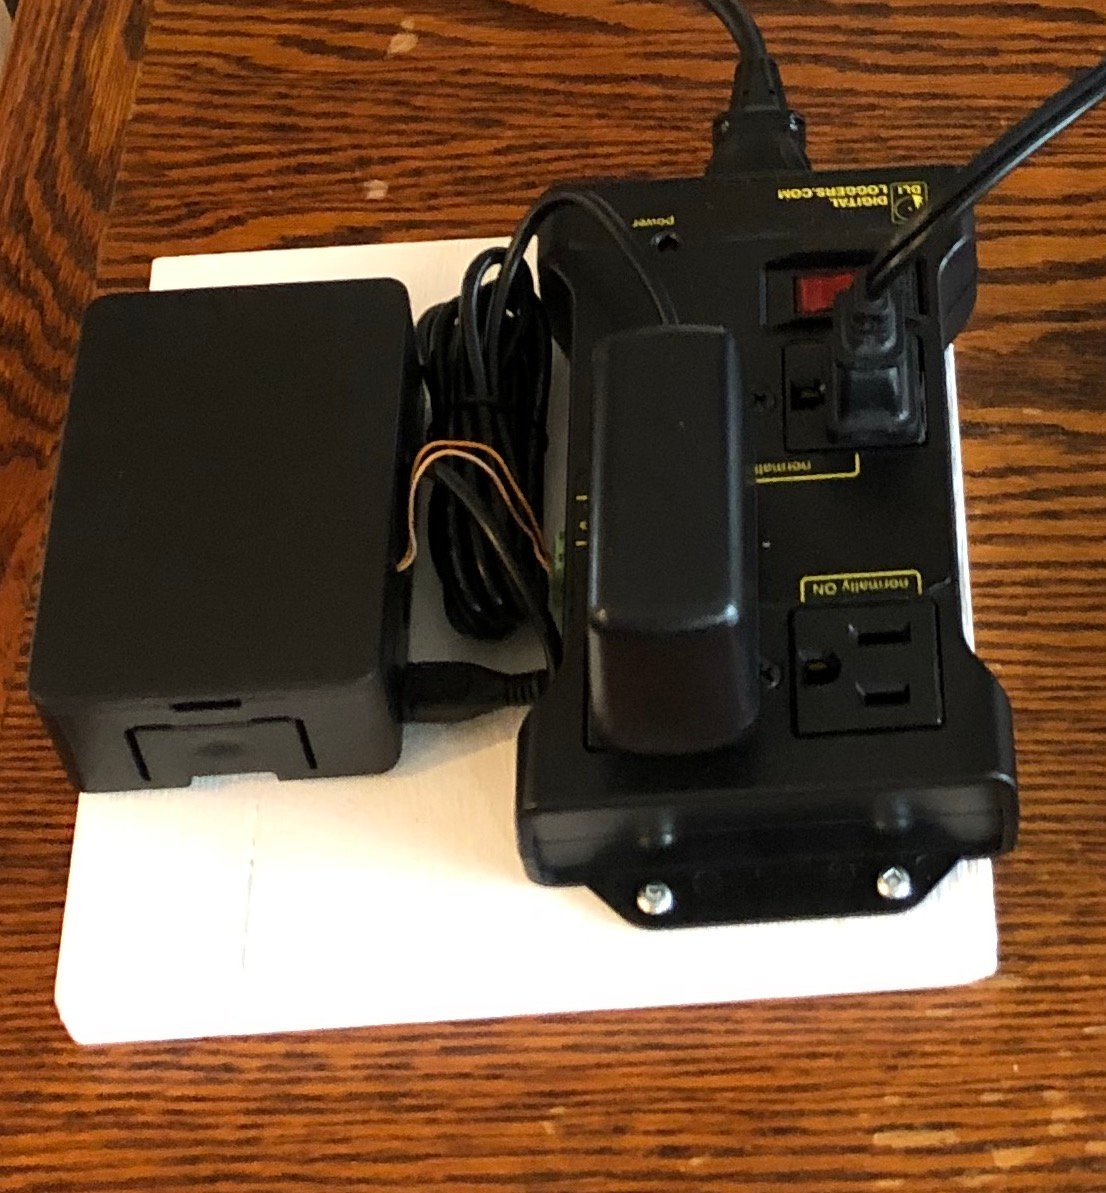
This was the very first picture I posted when I joined HIVE last year. This is a Pi3 connected to an IoT relay. This "power bar" has outputs that can be switched on and off with the 3.3V coming out of the Pi or 5V coming out of an Arduino or ESP-32. It is a great way for users to safely control 120VAC devices. This system worked great for me to control the Tiffany Lamp that we have hanging in our living room for example.
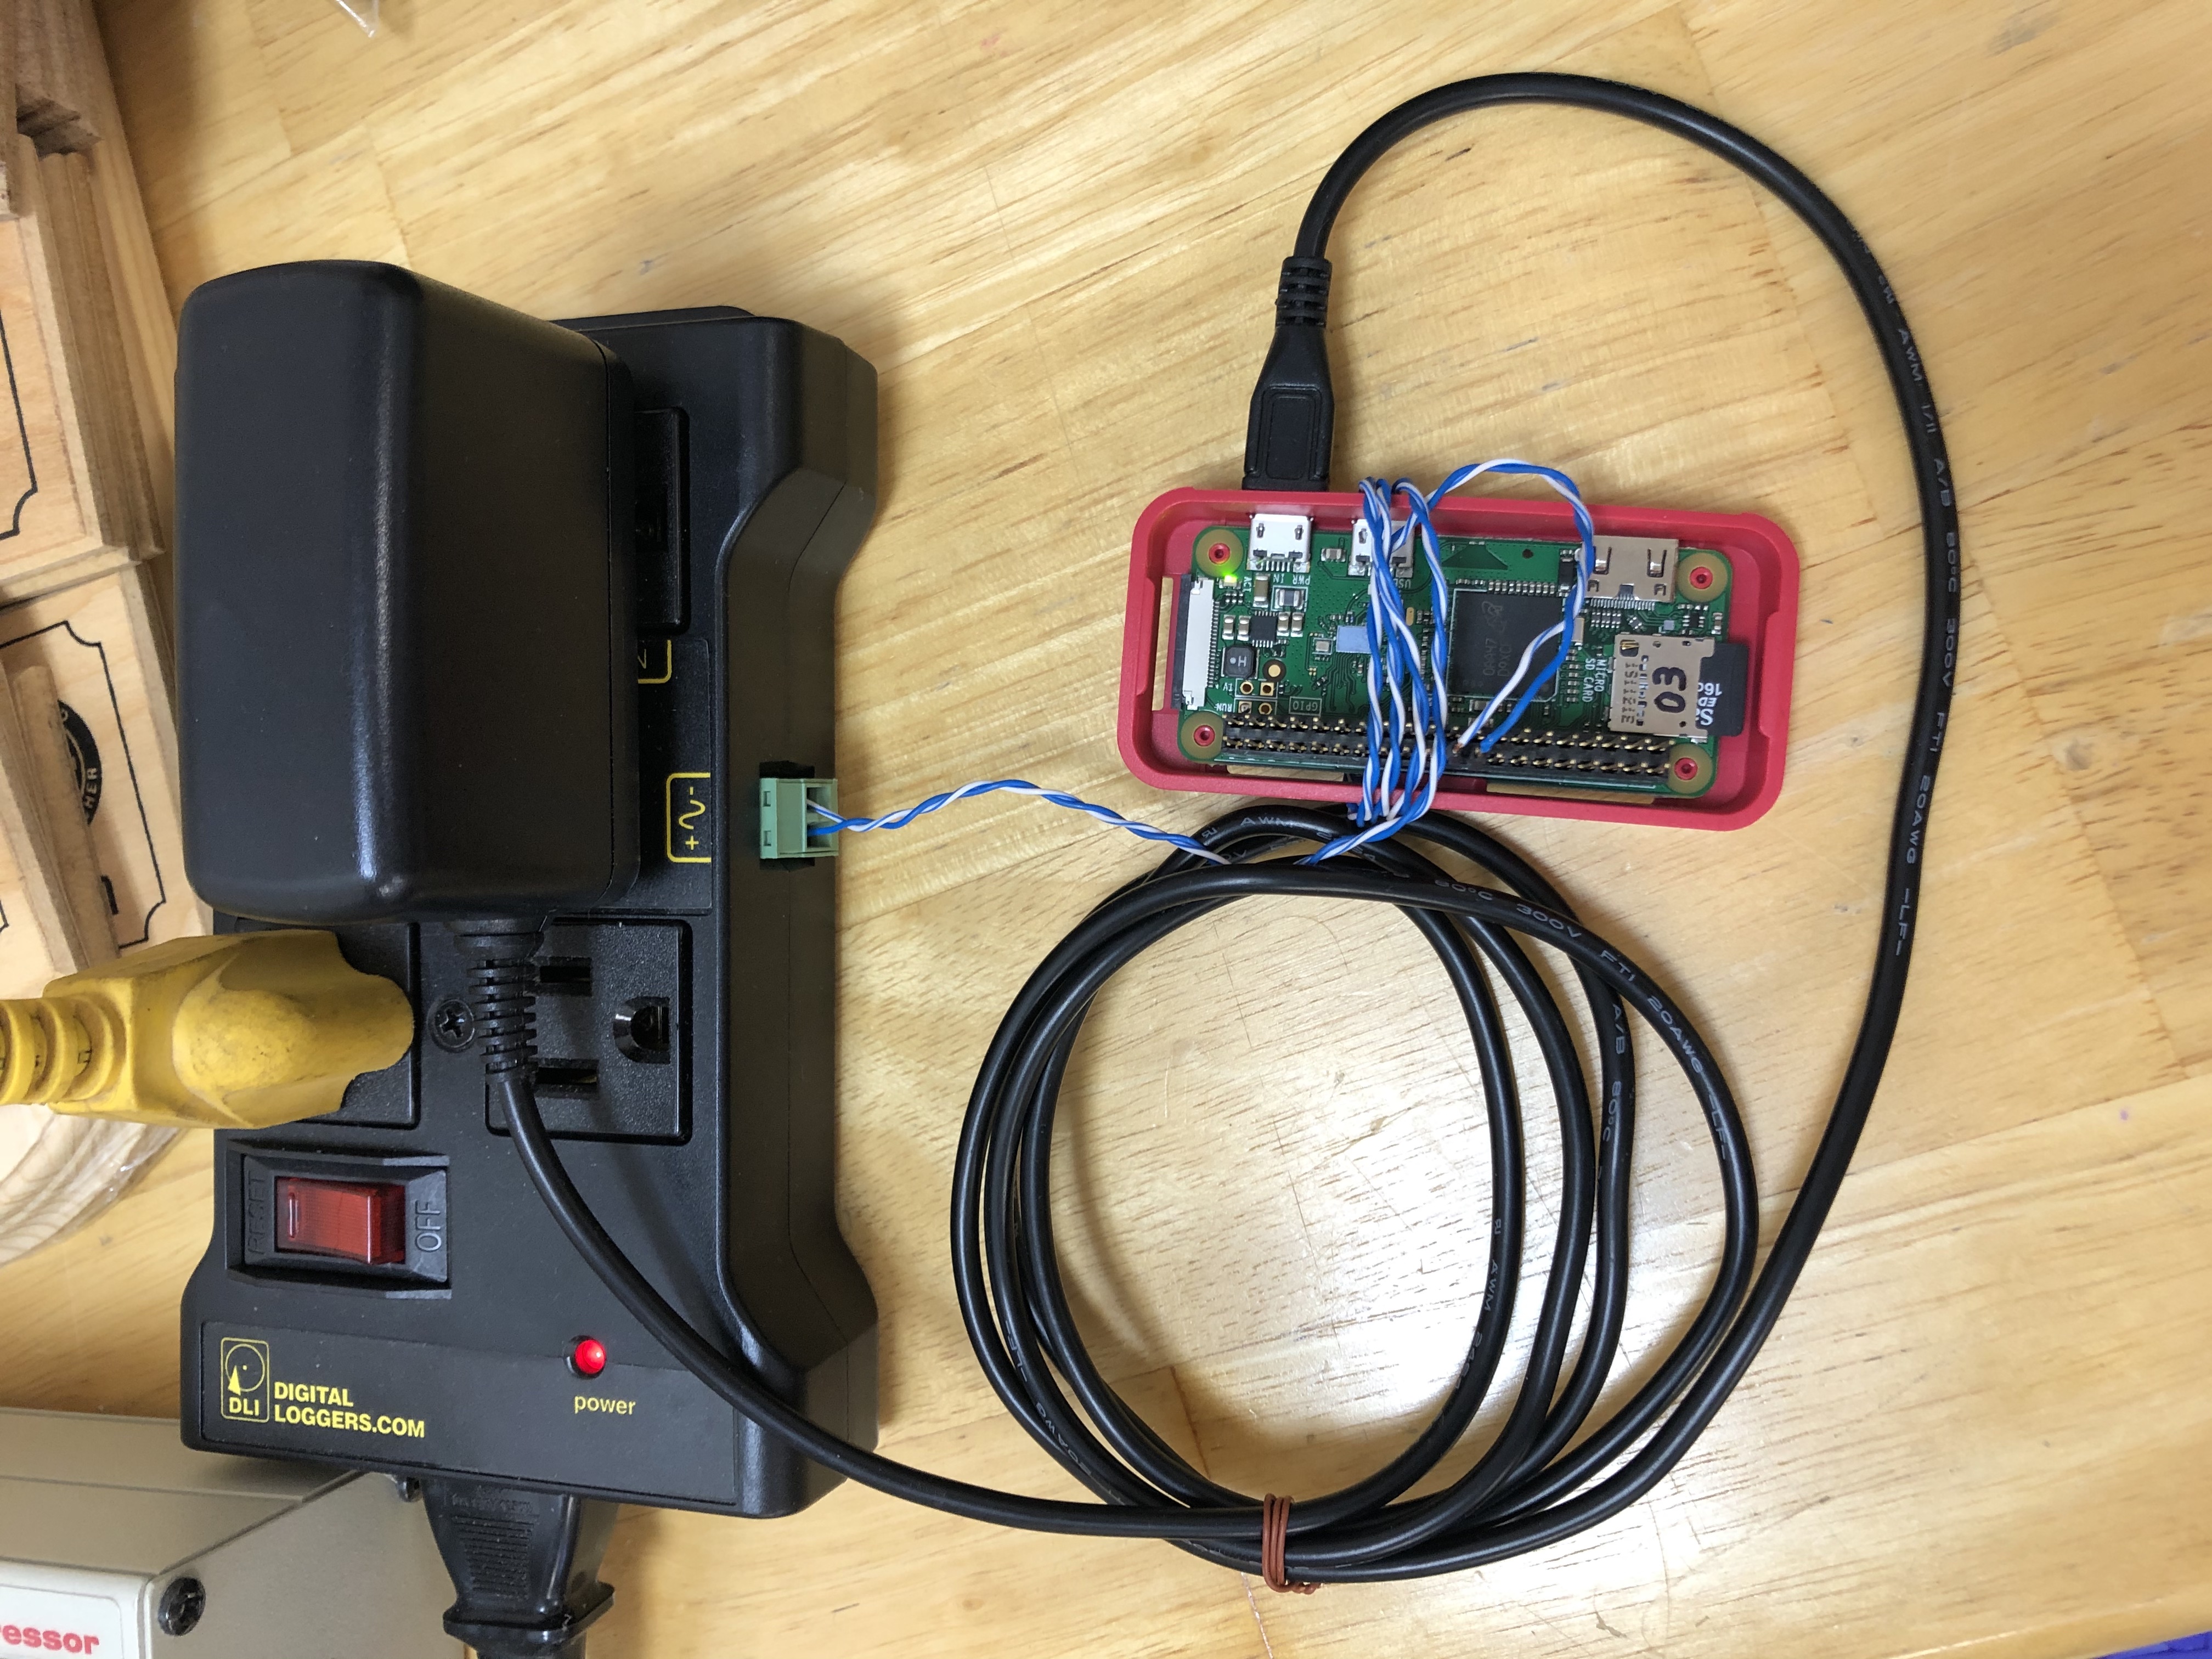
But what if I want to use a Pi ZeroW instead? These small powerhouses are so inexpensive ($15 - $19 at buyapi.ca). and while they one have a single core processor, they are great for these applications where they are simply controlling one device. However as @wwwiebe and I were discussing in the comments a couple of days eariler, the Pi ZeroW doesn't run Node-Red because, if I recall correctly, the processor isn't able to run the newer version of node.js necessary for Node-Red.
So what do you do? Well you run all of your devices through mqtt of course! It is a publish/subscribe protocol that allows different devices to communicate with one another with very small packets of information. The best site that I have found on the internet to learn about mqtt is Steves Internet Guide. Steve's got courses setup for Python, Node-Red, and of course mqtt. Very well laid out and easy to follow!
Here is a very basic description of how mqtt works. You setup a broker which is a Raspberry Pi running the Mosquitto mqtt broker software (very easy to setup). This broker is responsible for managing all of the mqtt publishing and subscribing messages that will be passed back and forth. Essentially you setup a Pi to subscribe to a topic, for example "house/lights/tiffany" for my Tiffany Lamp. The python program that is running is looking for an "on" or "off" message on the topic of "house/lights/tiffany". A different Pi can publish an "on" message on the same topic. That message will be sent to the broker Pi and it will then send that message off to any devices that have subscribed to the topic "house/lights/tiffany".
- The Python3 software in my Pi ZeroW has subscribed to the "house/lights/tiffany" topic on the Pi running the Mosquitto mqtt broker software
- When my wife presses the "Tiffany Lamp" button on the Node-Red webpage it sends a publish "on" message to the Mosquitto mqtt broker software.
- The broker software then sends that publish "on" message to any devices that have subscribed to that topic.
- The Pi ZeroW Python3 software receives the "on" message and energizes the GPIO pin that I have connected to the IoT relay and the lamp turns on!
This is a very, very simplistic description of what mqtt can do. You can set the QOS (Quality of Service) if your message is critical (but will require more overhead). Or set the Last Will & Testament if you want a device to default to a particular setting if it doesn't hear from the originating device for a period of time.
mqtt allows me to use the Pi ZeroW's in my Home Automation journey. While I refer to using these devices on my Pi's, your broker can be running on your PC, you can send and receive mqtt data from your laptop, or Arduino, or ESP8266 / ESP-32. So much power!
In tomorrow's post I'd like to go through the installation of Node-Red on the Pi and the setup of a basic on / off control as I did with the Pi 3 controlling the IoT relay.
Please if you have any questions on my posts, or would like further information on any of it, don't hesitate to post a comment and ask!
Thanks for viewing!
Robin
Posted with STEMGeeks
Congratulations @robingreig! You have completed the following achievement on the Hive blockchain and have been rewarded with new badge(s) :
You can view your badges on your board and compare yourself to others in the Ranking
If you no longer want to receive notifications, reply to this comment with the word
STOPDo not miss the last post from @hivebuzz:
That's sweet! Node-RED and MQTT and definitely built for the great-ole' Internet of Things.
My knowledge of Node-RED actually helped me land a job that I'm starting at the end of the month, too. Real world applications! The job itself won't actually be using Node-RED, alas, but being able to understand flow-based procedures is apparently good knowledge to have.
That's very cool! AND congrats on the new job! When I think of all of the school students learning some form of programming in school, I see the value not in learning the language, but in learning how to think in a logical progression! As in your case where it's the process, not necessarily the language that is of value!