First Node-Red Flow on a Raspberry Pi
Good Morning! In the last post we covered how to install or update the Node-Red software in your Raspberry Pi as well as install the dashboard that will allow us to generate those awesome webpages. If you wanted to see how Node-Red can be used in my Raspberry Pi Home Automation system, the posts start here
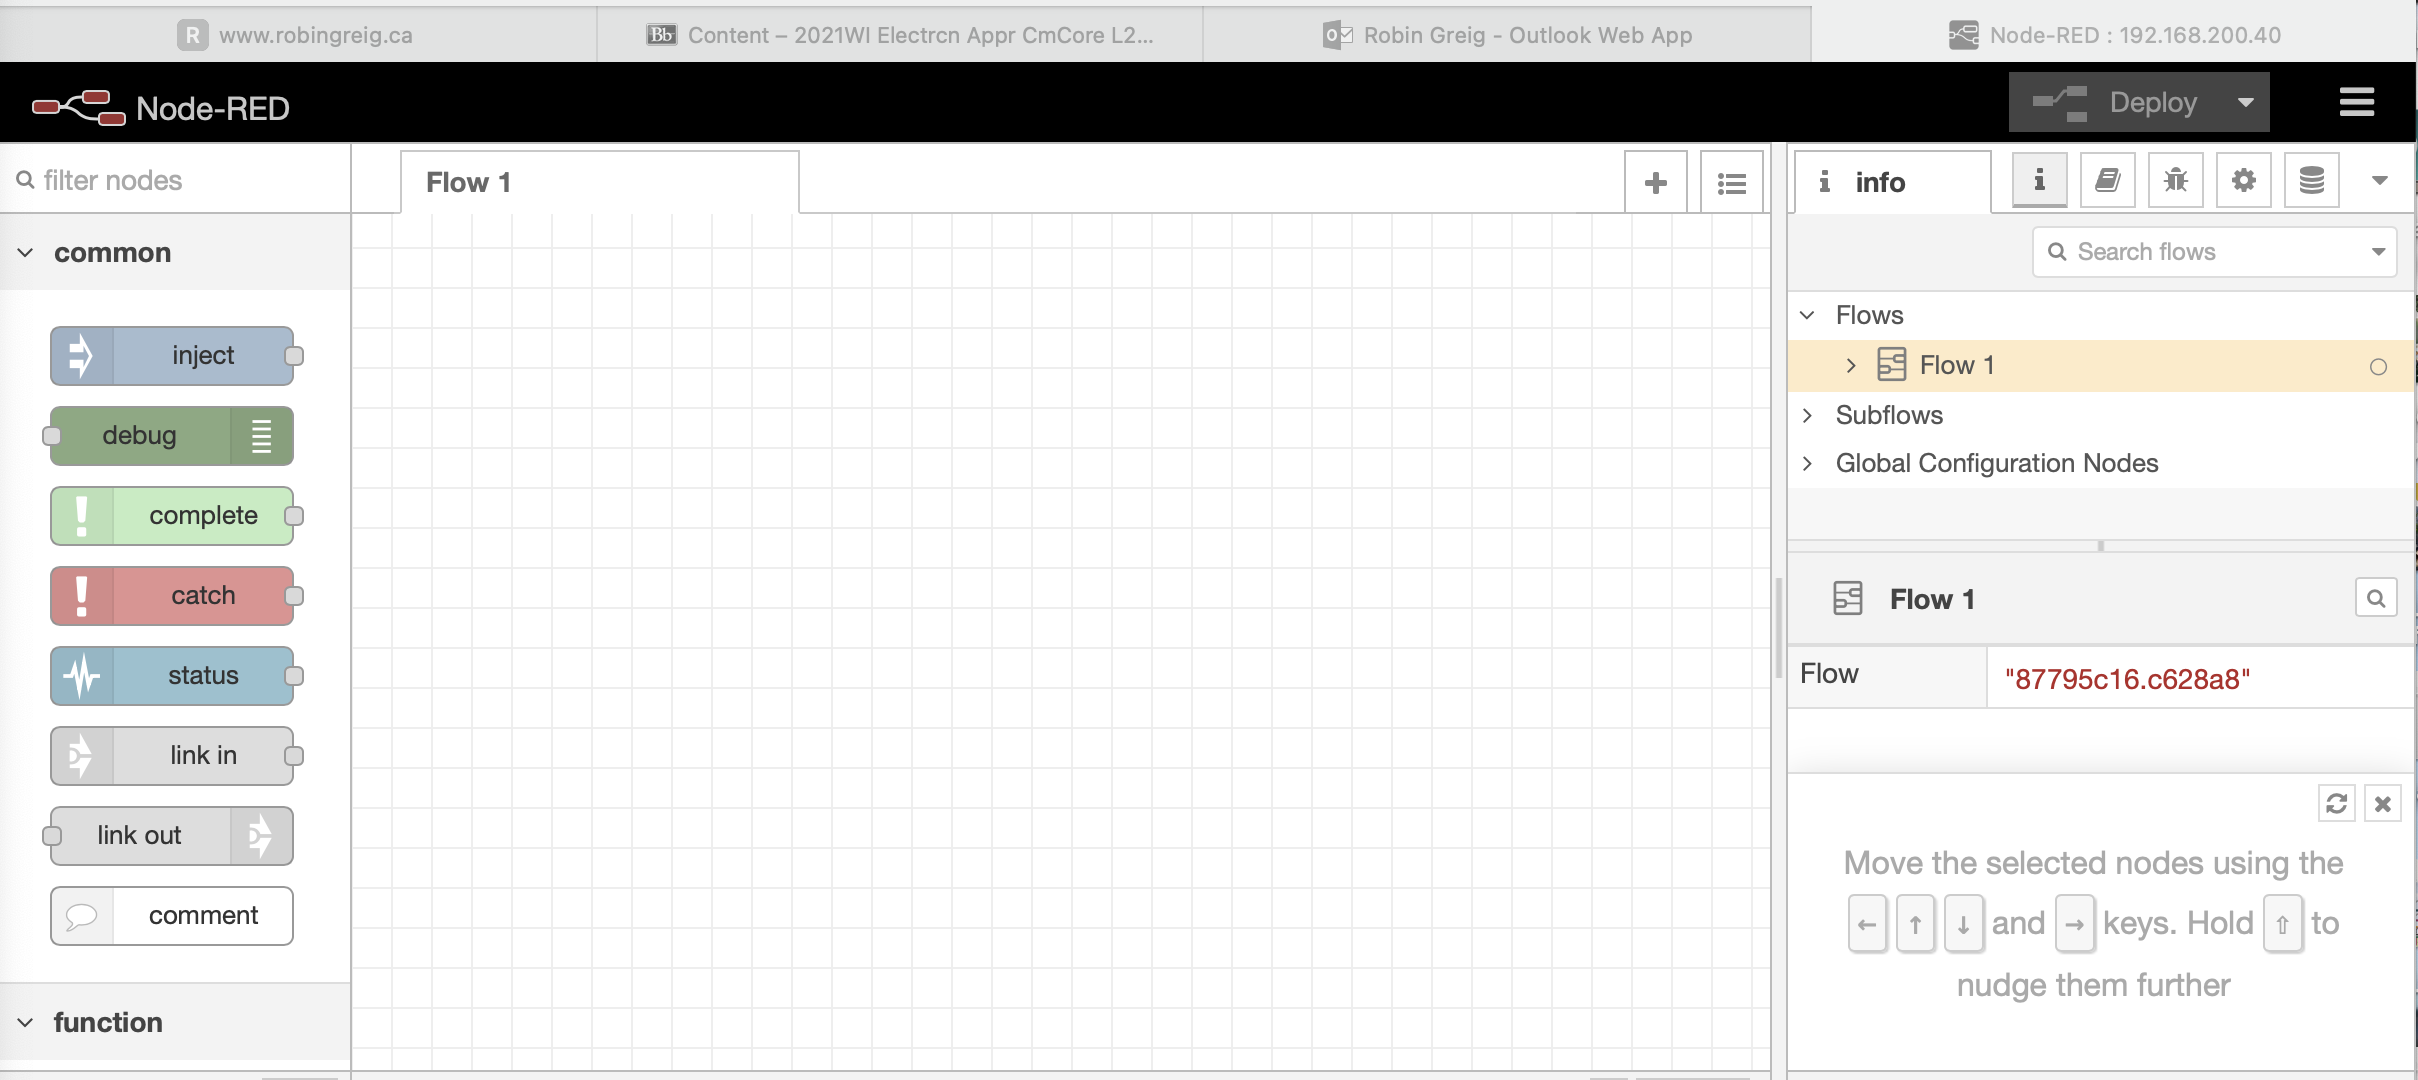
Today I want to design a basic Node-Red circuit that will control a GPIO output on the Pi from a switch on a webpage. When you first open the Node-Red Palette "localhost:1880", there should be a tab in the upper left corner labeled "Flow 1" and a blank grid. I also want to share with you my #1 mistake when using Node-Red. Notice in the upper right corner the "Deploy" button is greyed out? Whenever you make changes to your flow the button will turn red and you have to select it in order to upload your changes. I'll often make changes and forget to deploy them and wonder why they aren't working......
Now scroll down the list of nodes on the left hand side until you get to the dashboard nodes, and drag the switch node to the palette, and scroll down to the bottom and drag a rpi gpio out node over as well (the label on the node will change from rpi gpio in to PIN:). Now hover your mouse over the small circle on the right side of the switch node and click and drag a line over to the small circle on the left side of the rpi gpio out node. This will establish the connection between the nodes. Also note that the "Deploy" button has turned red:
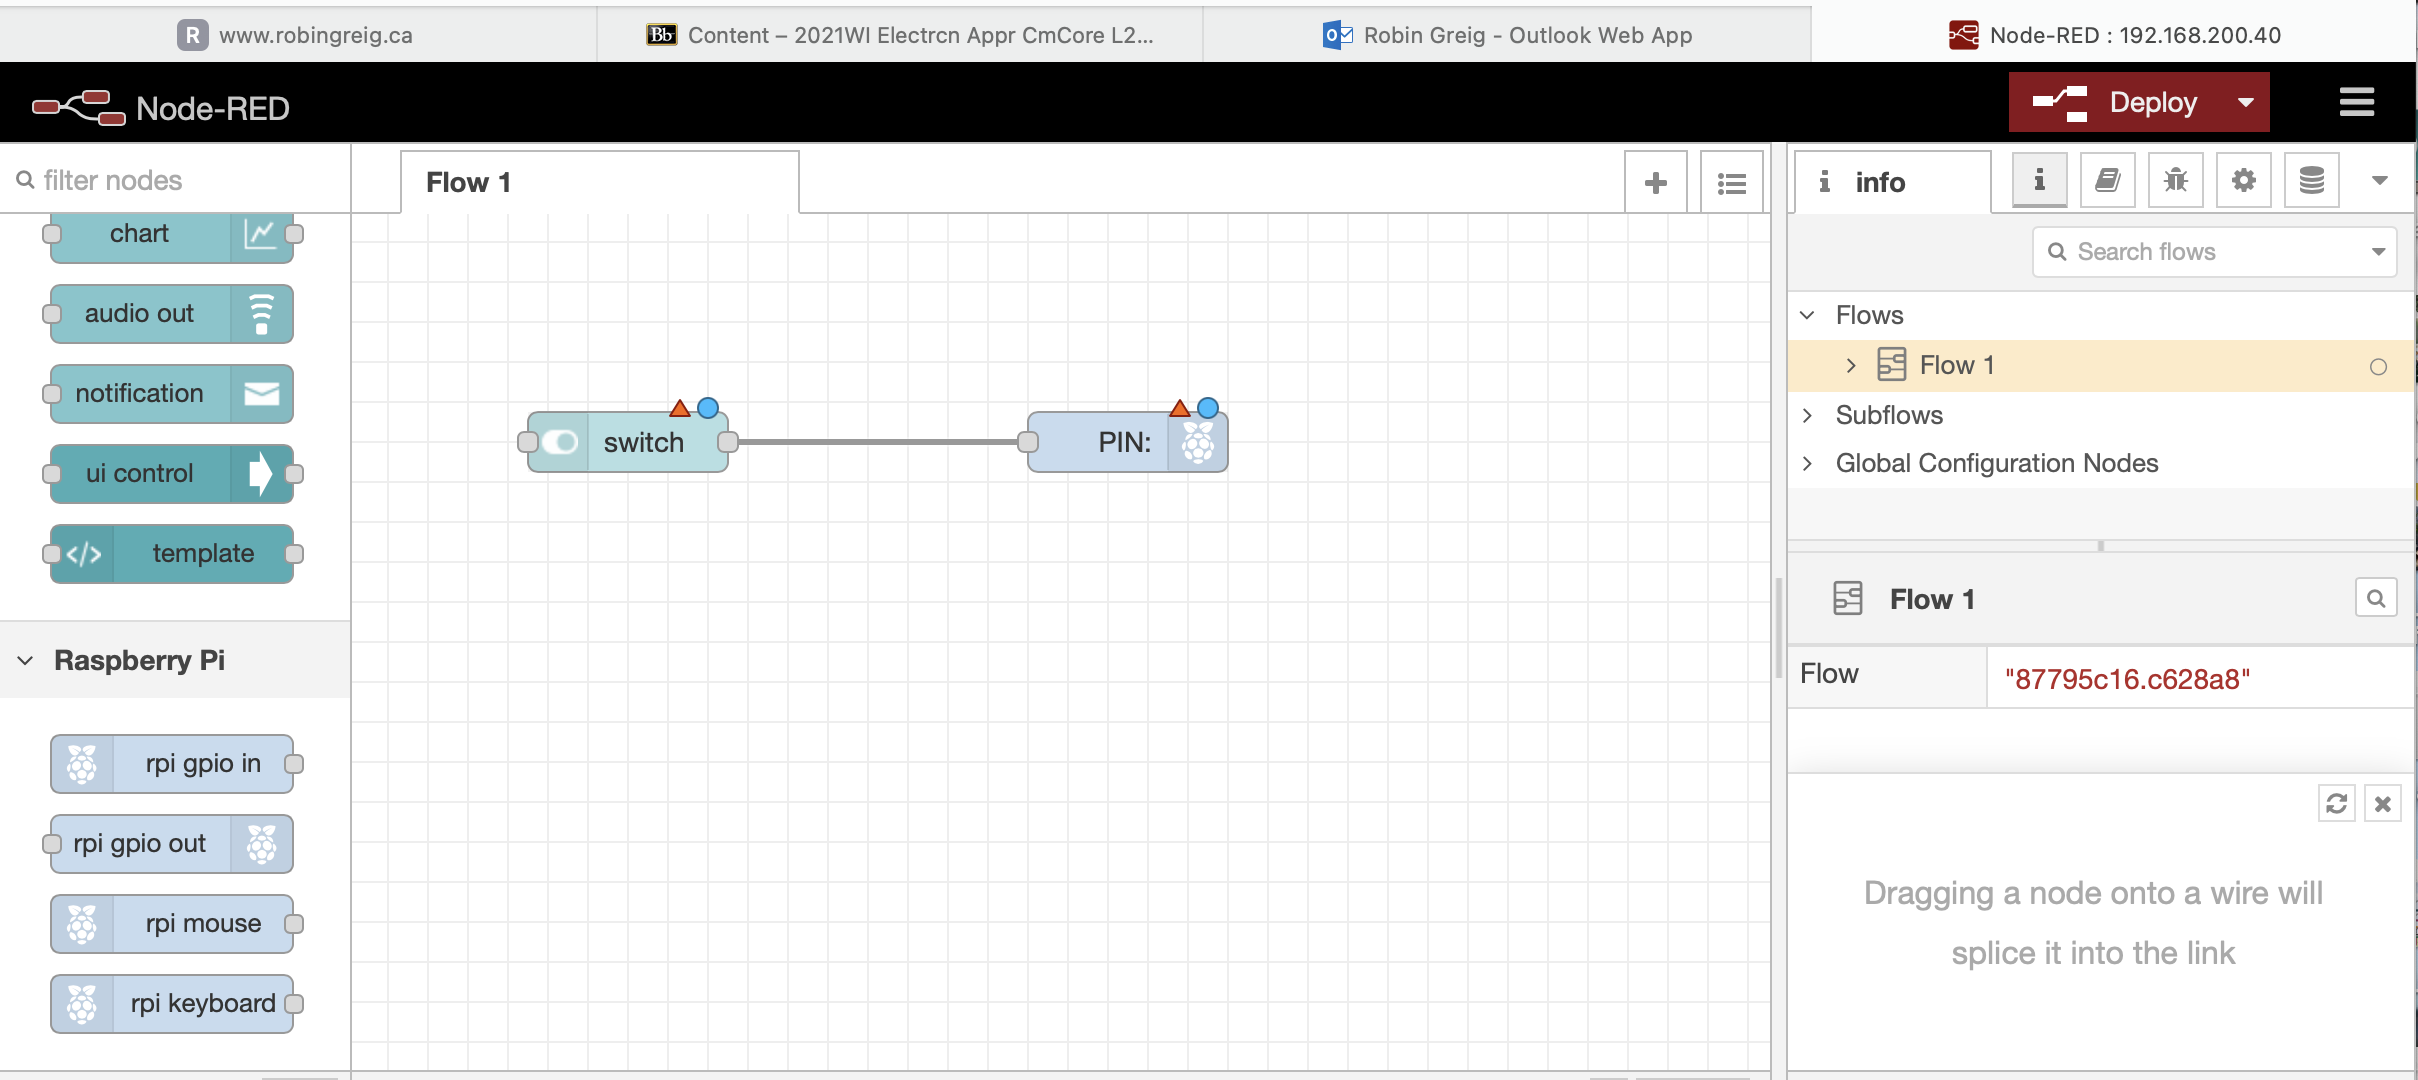
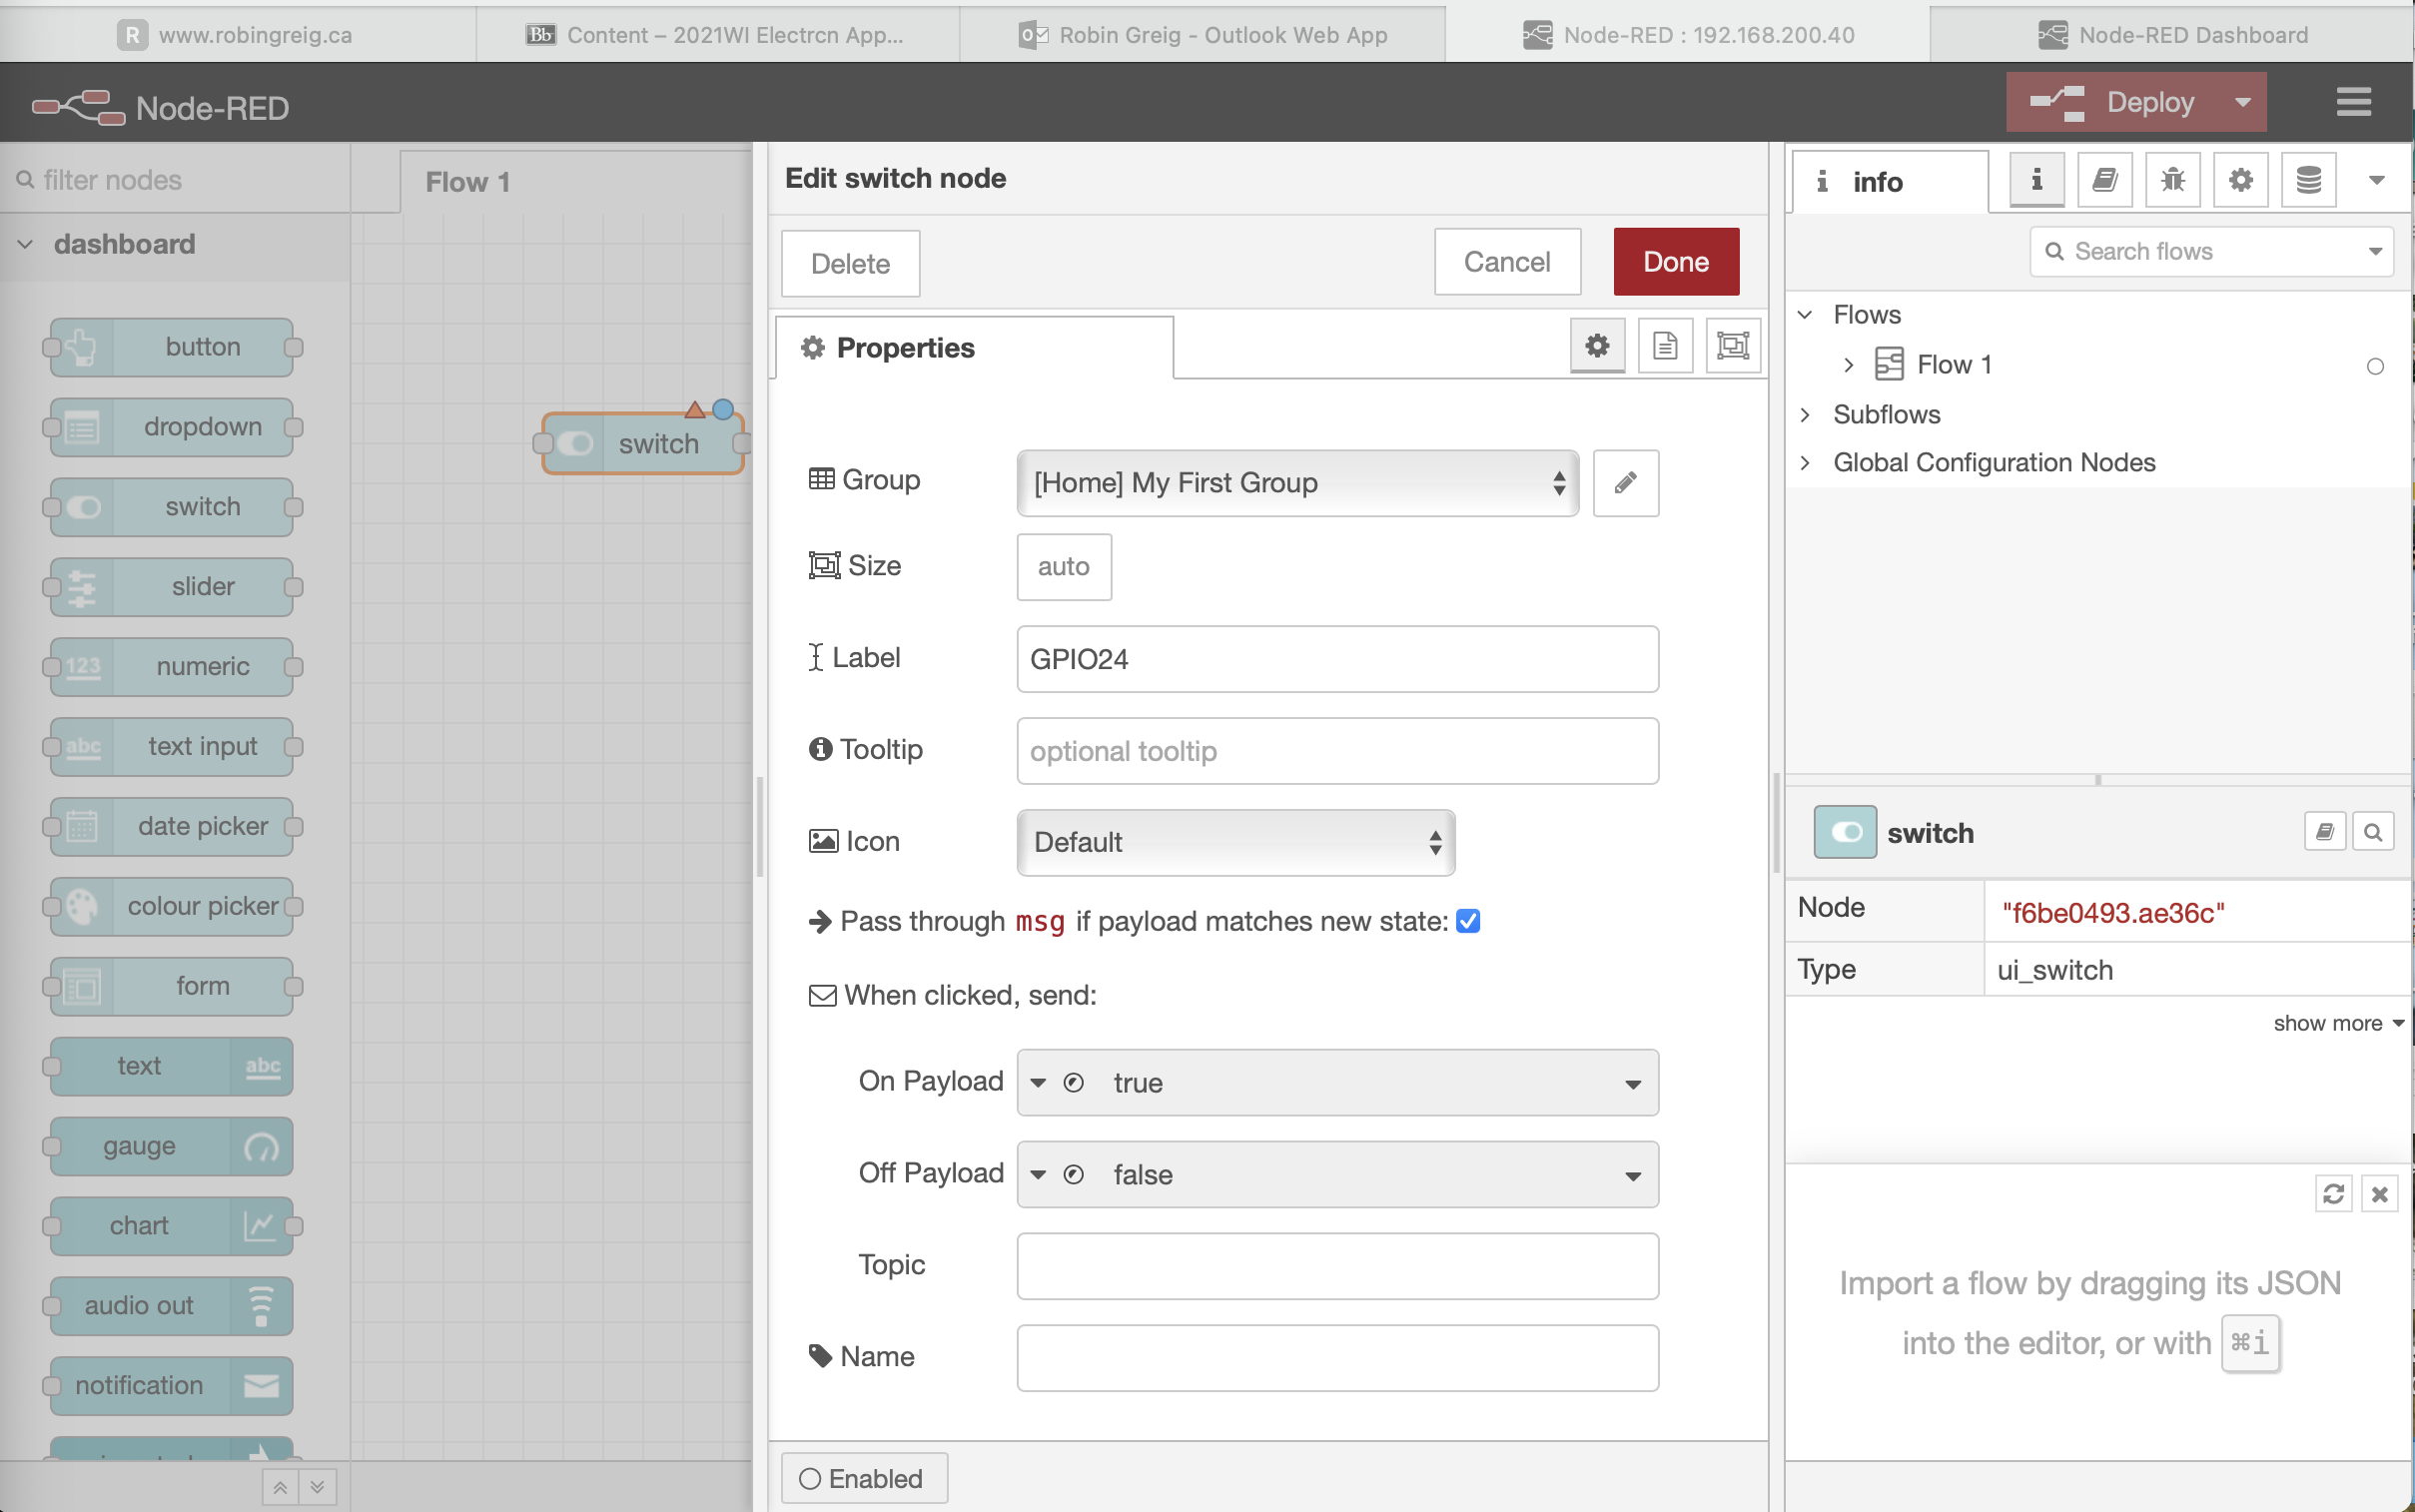
Now they are connected, and we need to configure them, you'll see the red triangle and the blue circle above them letting you know that they are missing information. So click on the switch node and you should see this screen:

In our case with only one switch, setting up the proper group and tab won't be important, but I'll show you what they represent. In my battery voltage flow, the groups I made were called "24V Battery Voltages" and "12V Battery Voltages" to enable me to group those items together on the webpage. The tab was called "BattMon24" in the upper left corner, because I access several Pi's running Node-Red and this allows me to tab between them.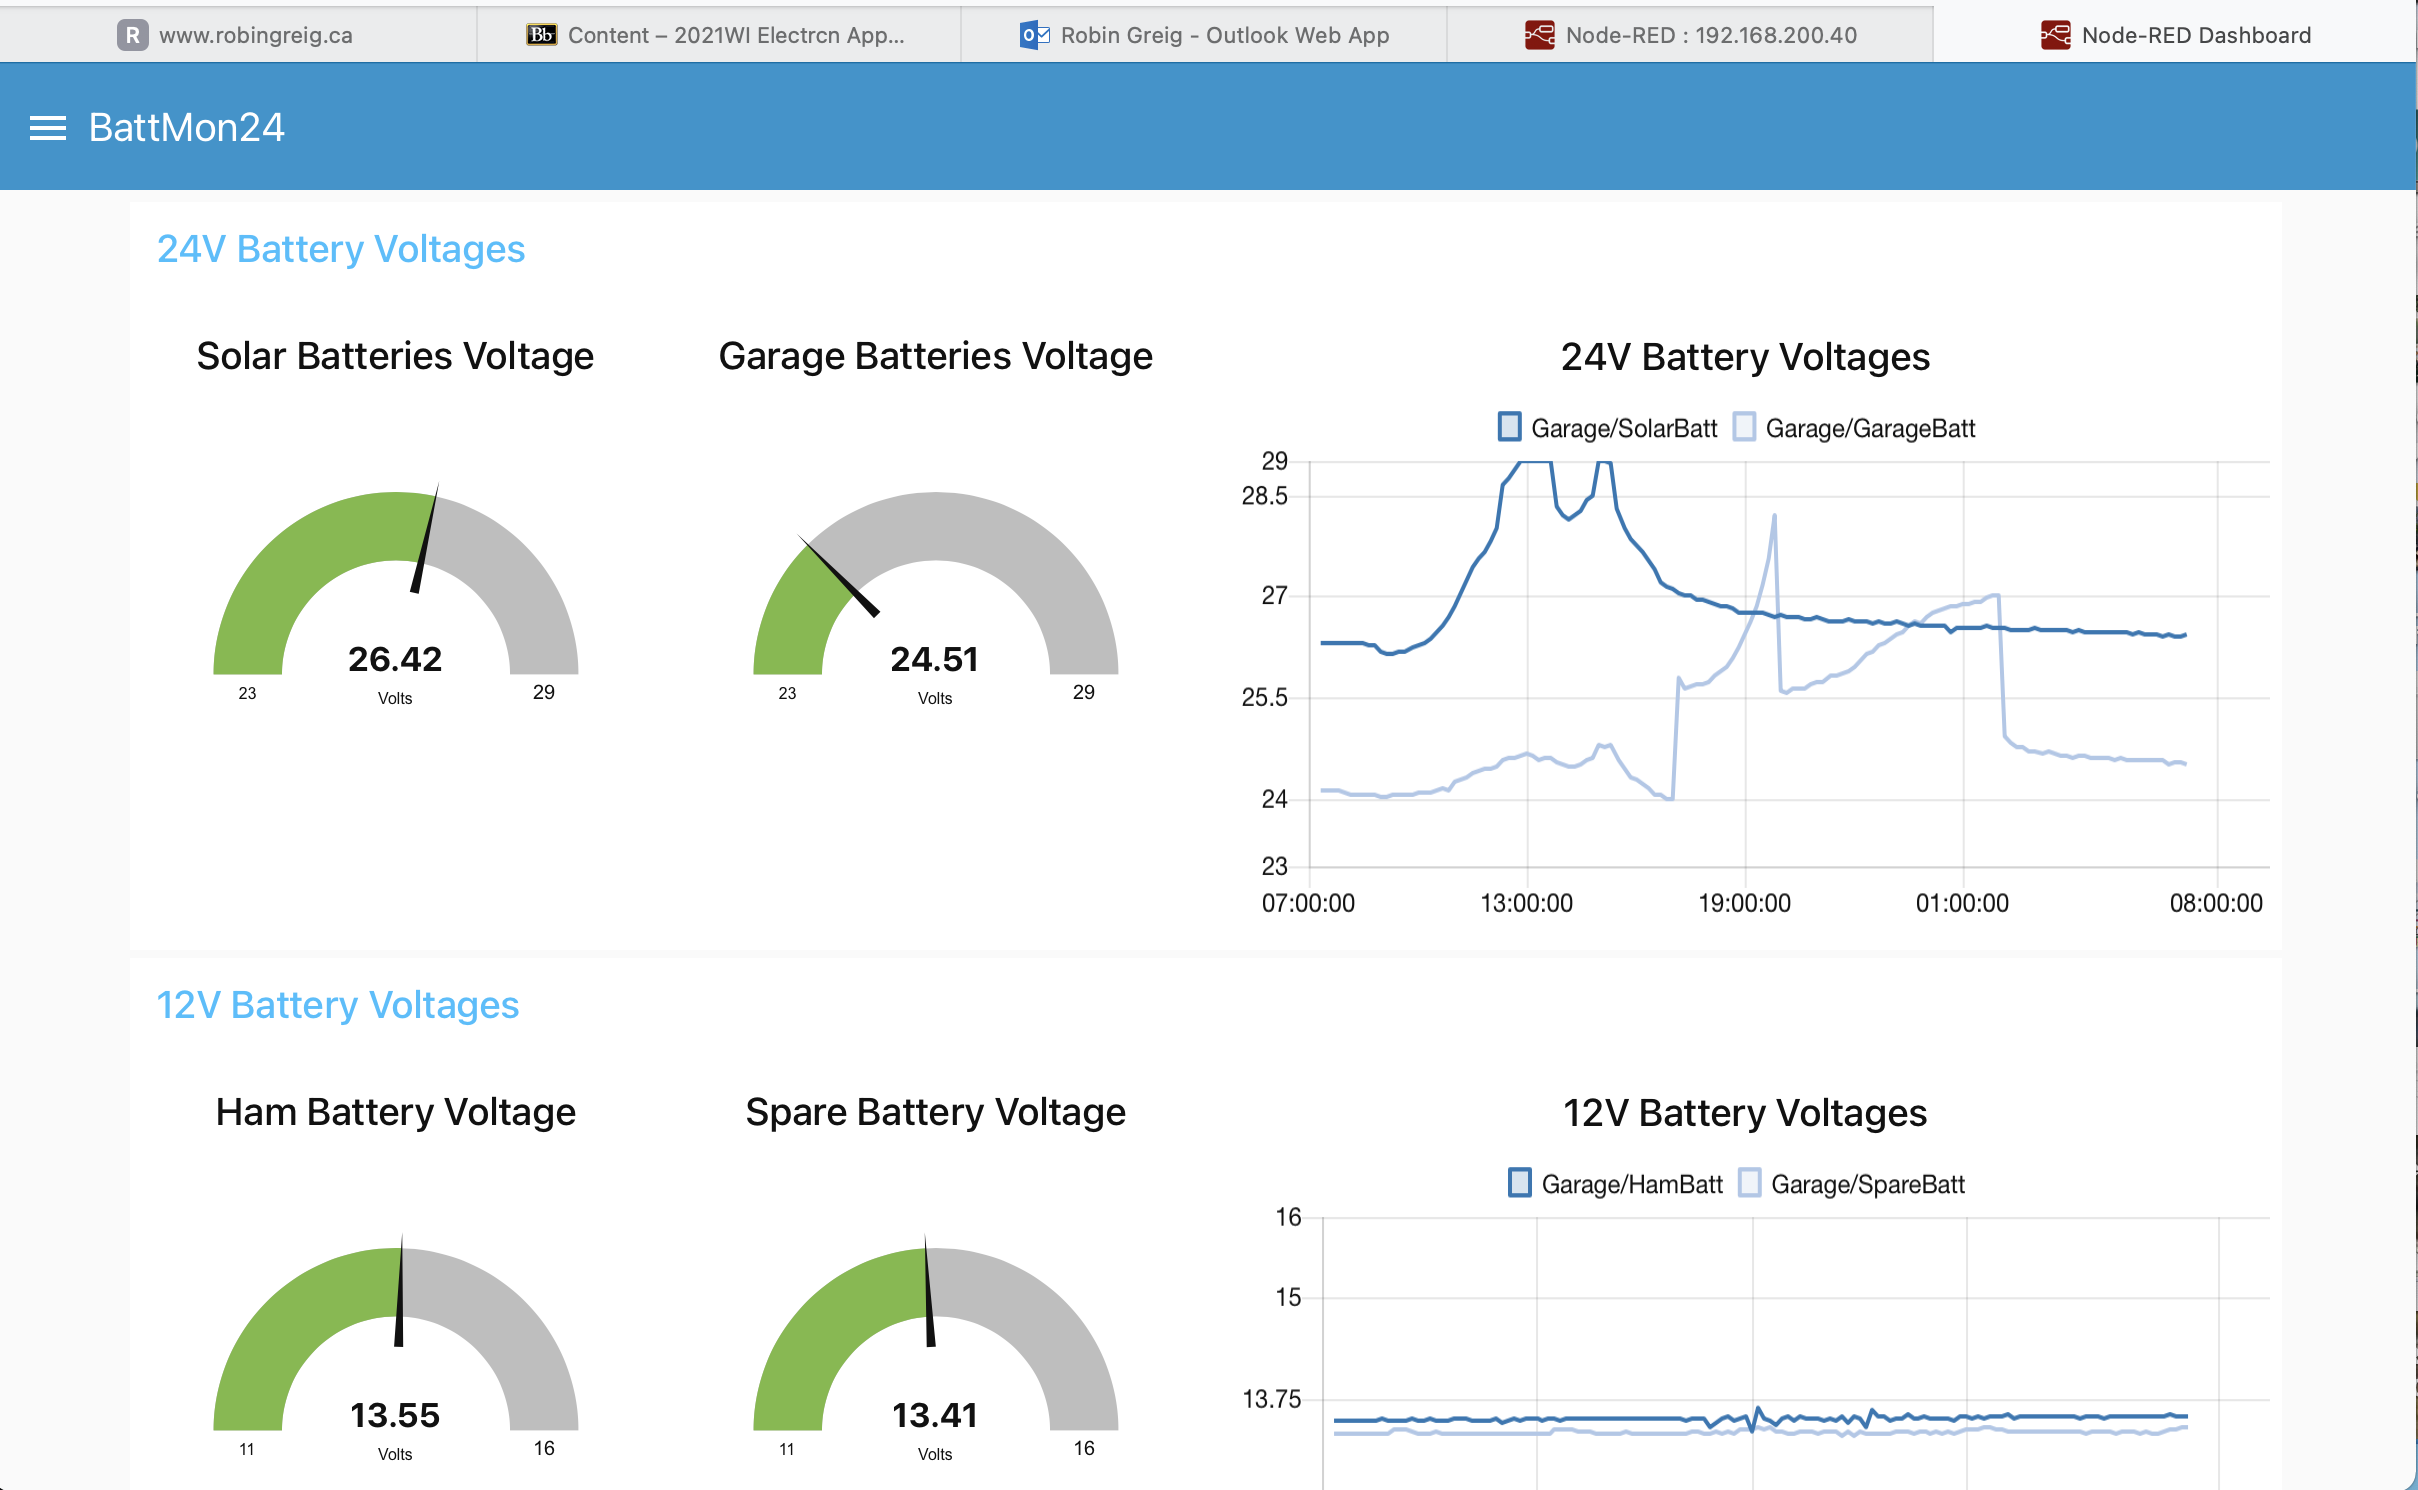
Back to our screen, click on the pencil beside "Add new ui_group" to bring up this screen:

And let's change the name from "Default" to "My First Group" to see the effect on the webpage once we're done:

Now press the "Add" button and you should return to this screen. We've set it up so that the tab in the upper left corner of our webpage should read "Home" and the group that our switch is in should read "My First Group". Let's change the name of the switch to be more descriptive "GPIO24" because that is the GPIO pin we'll be activating. We won't change the Payload options because we want the output to go True or high when we activate the button and Low or false when we deactivate the button:
Now press the "Done" button and you should return to this screen and notice that the red triangle is gone from the switch node since you've configured it:
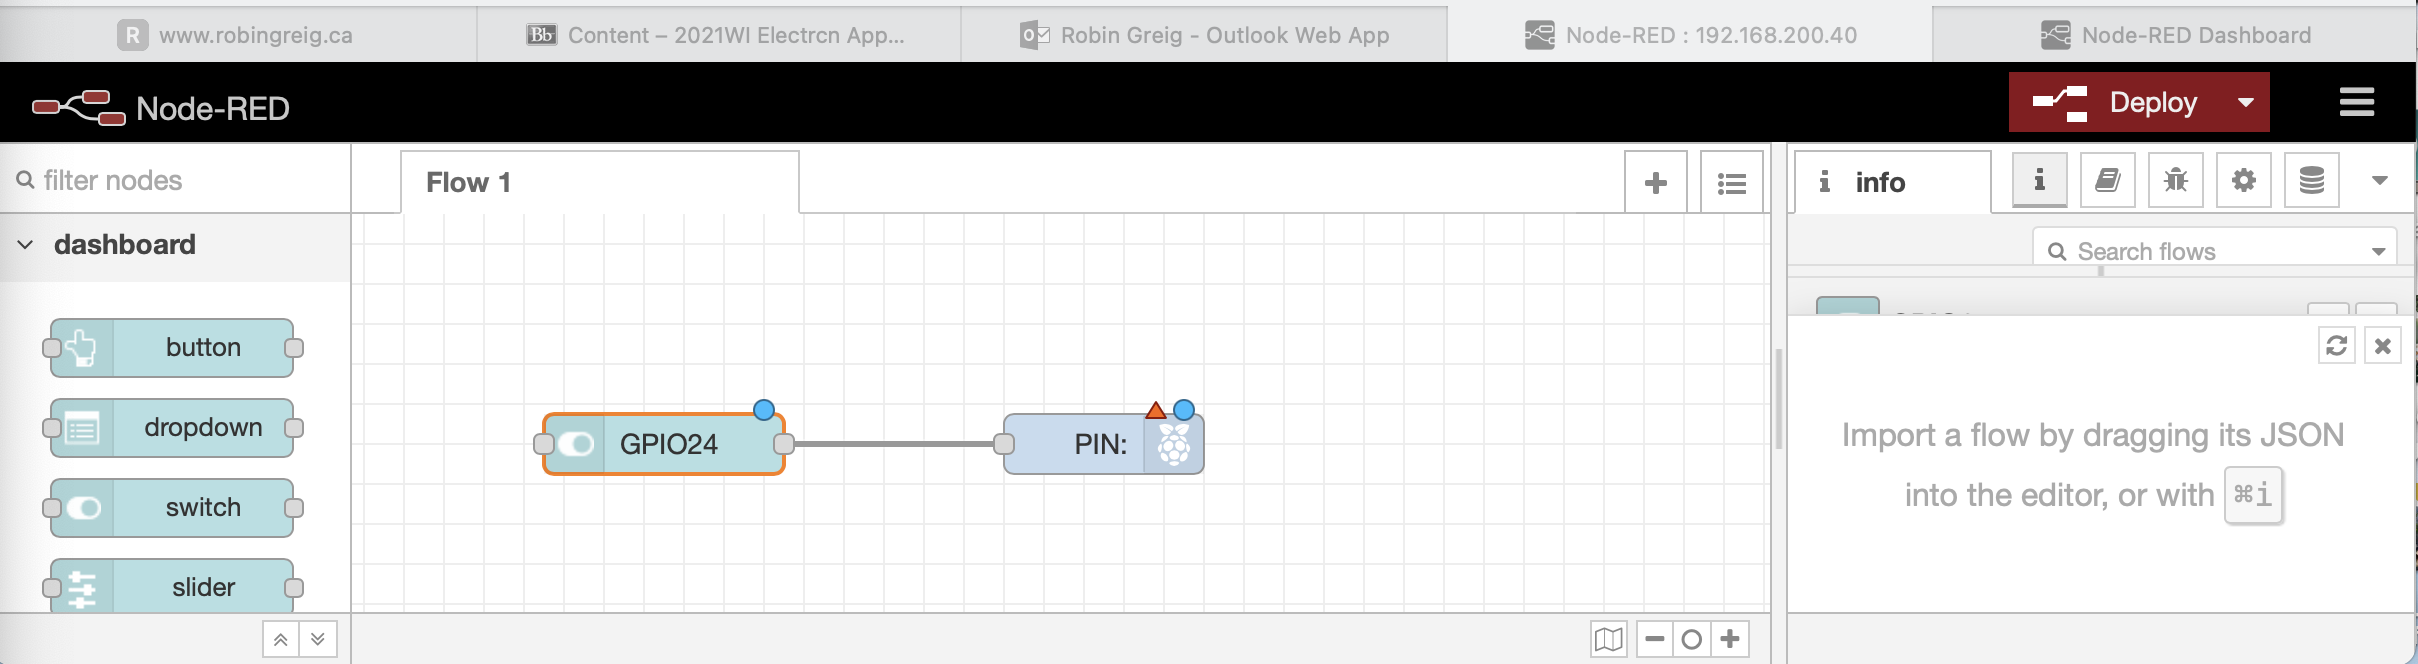
Now double-click on the rpi-gpio-out node and you should see this screen:
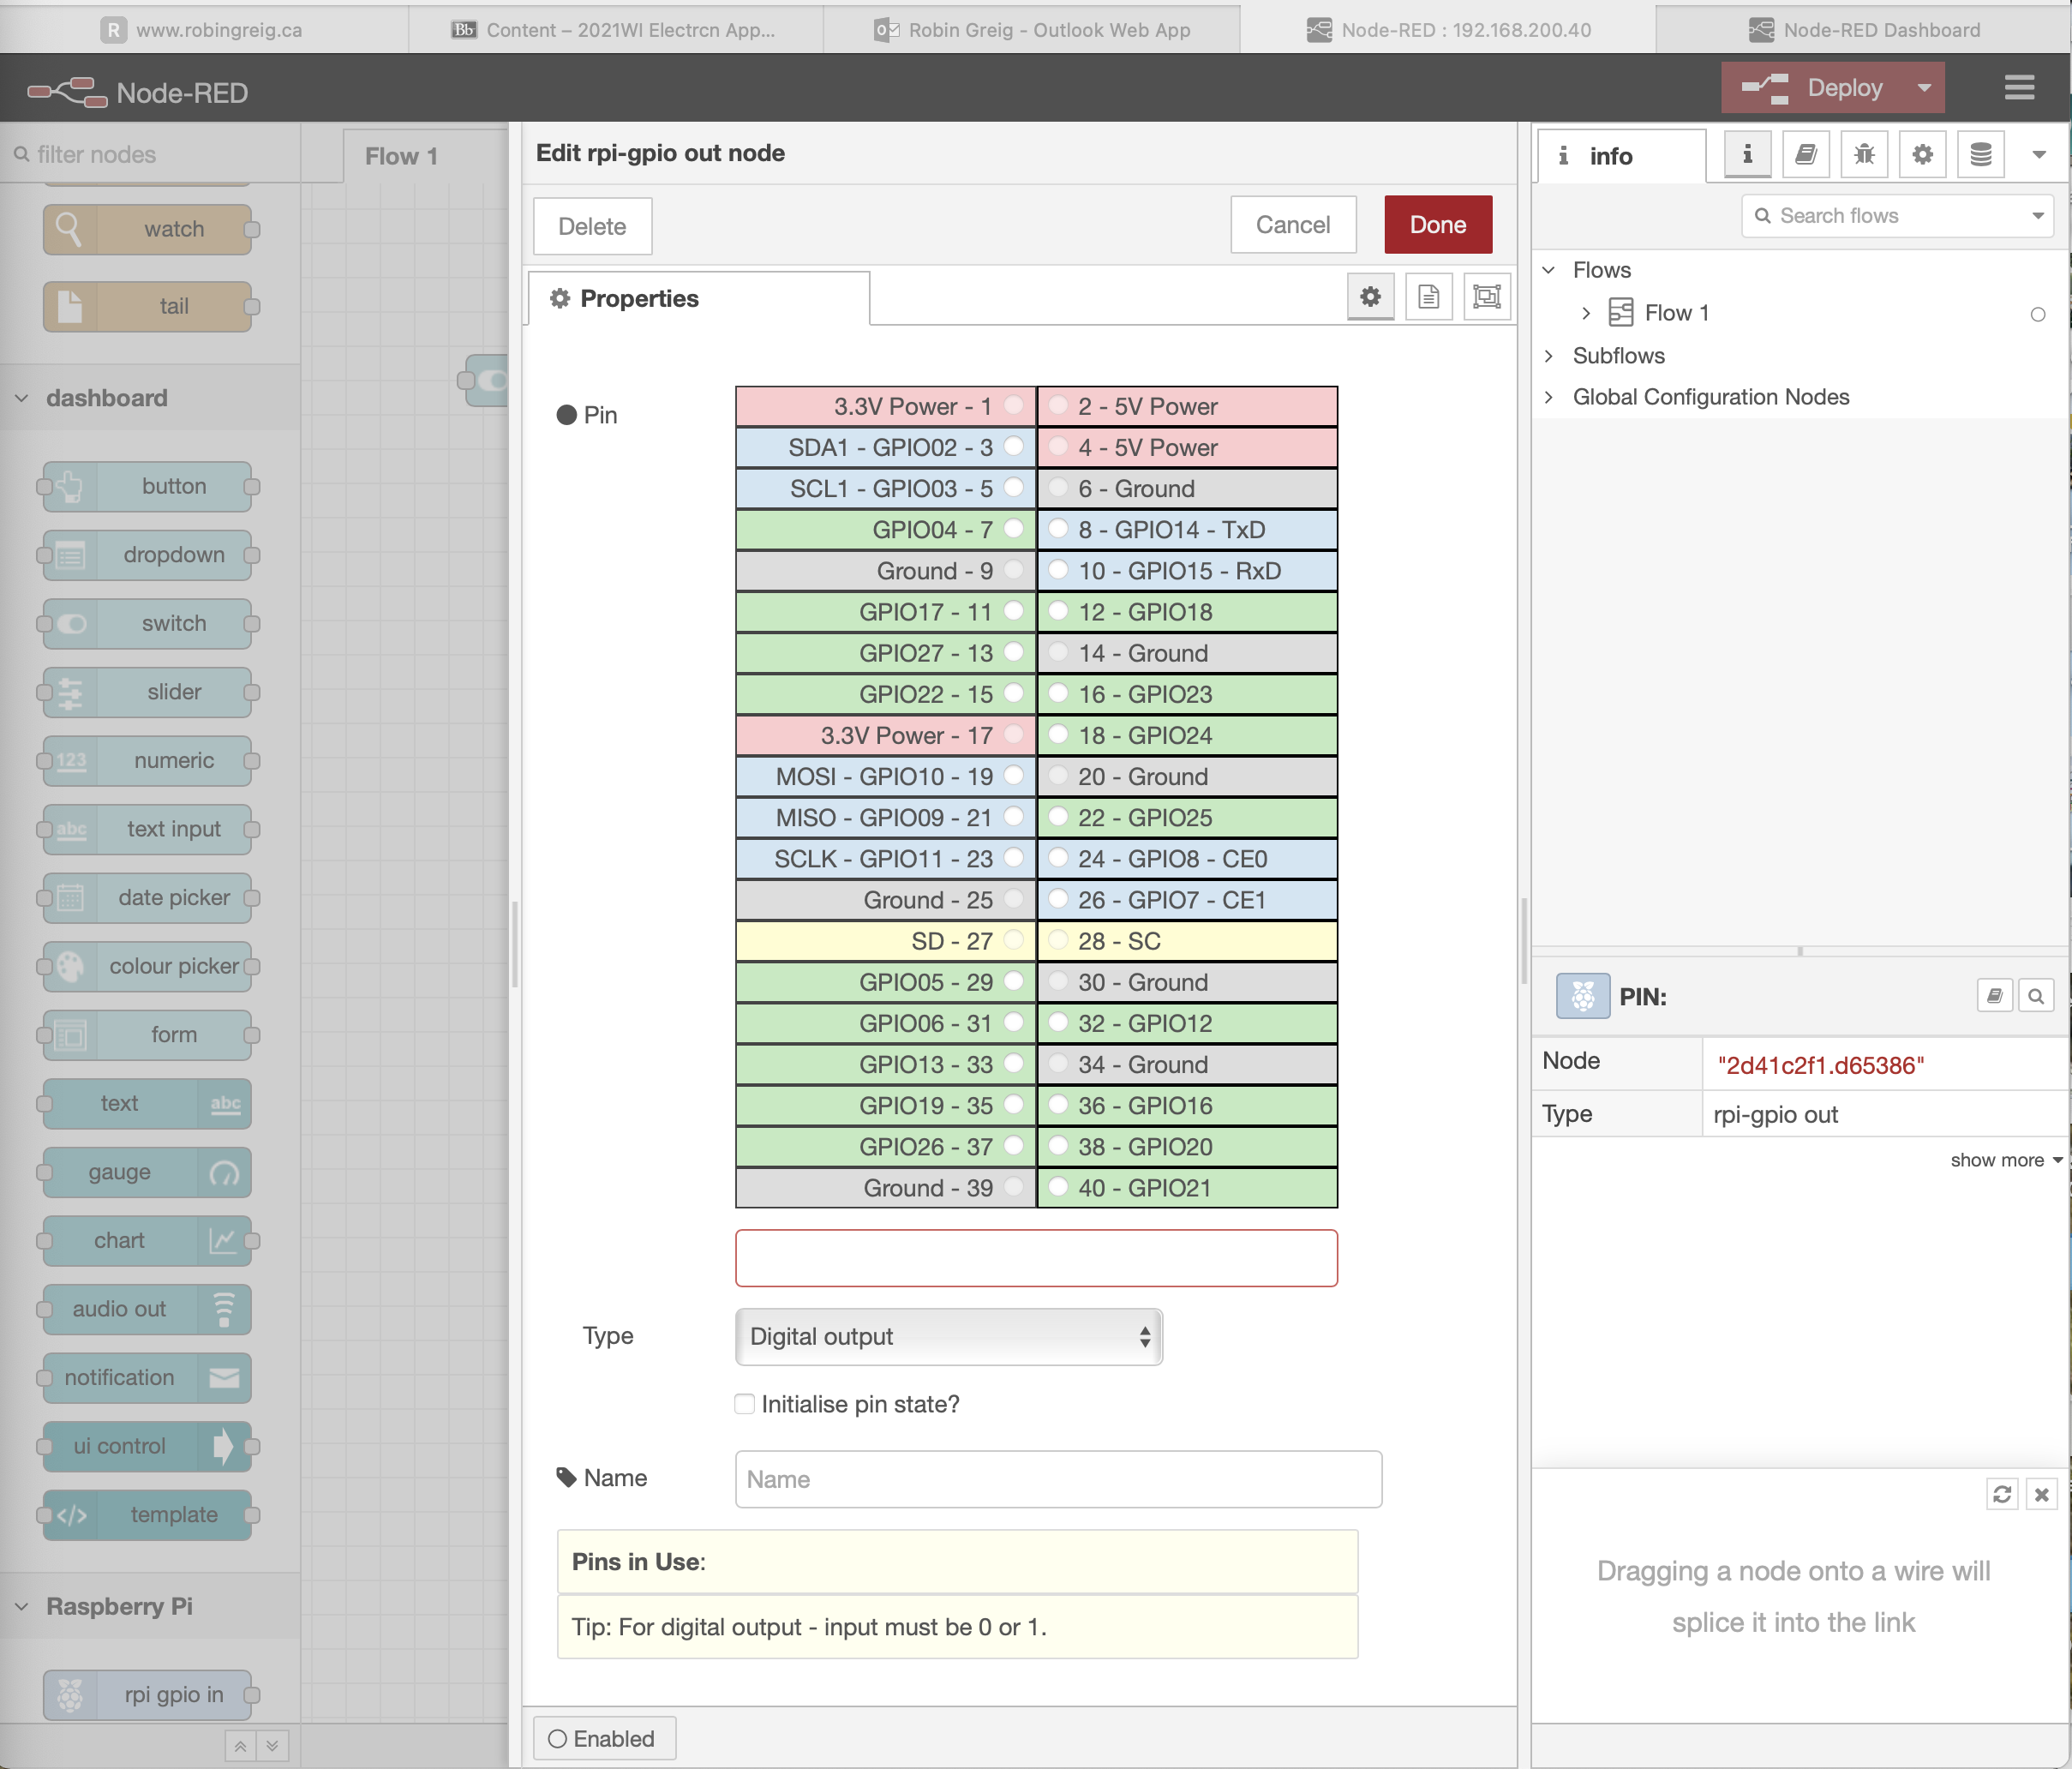
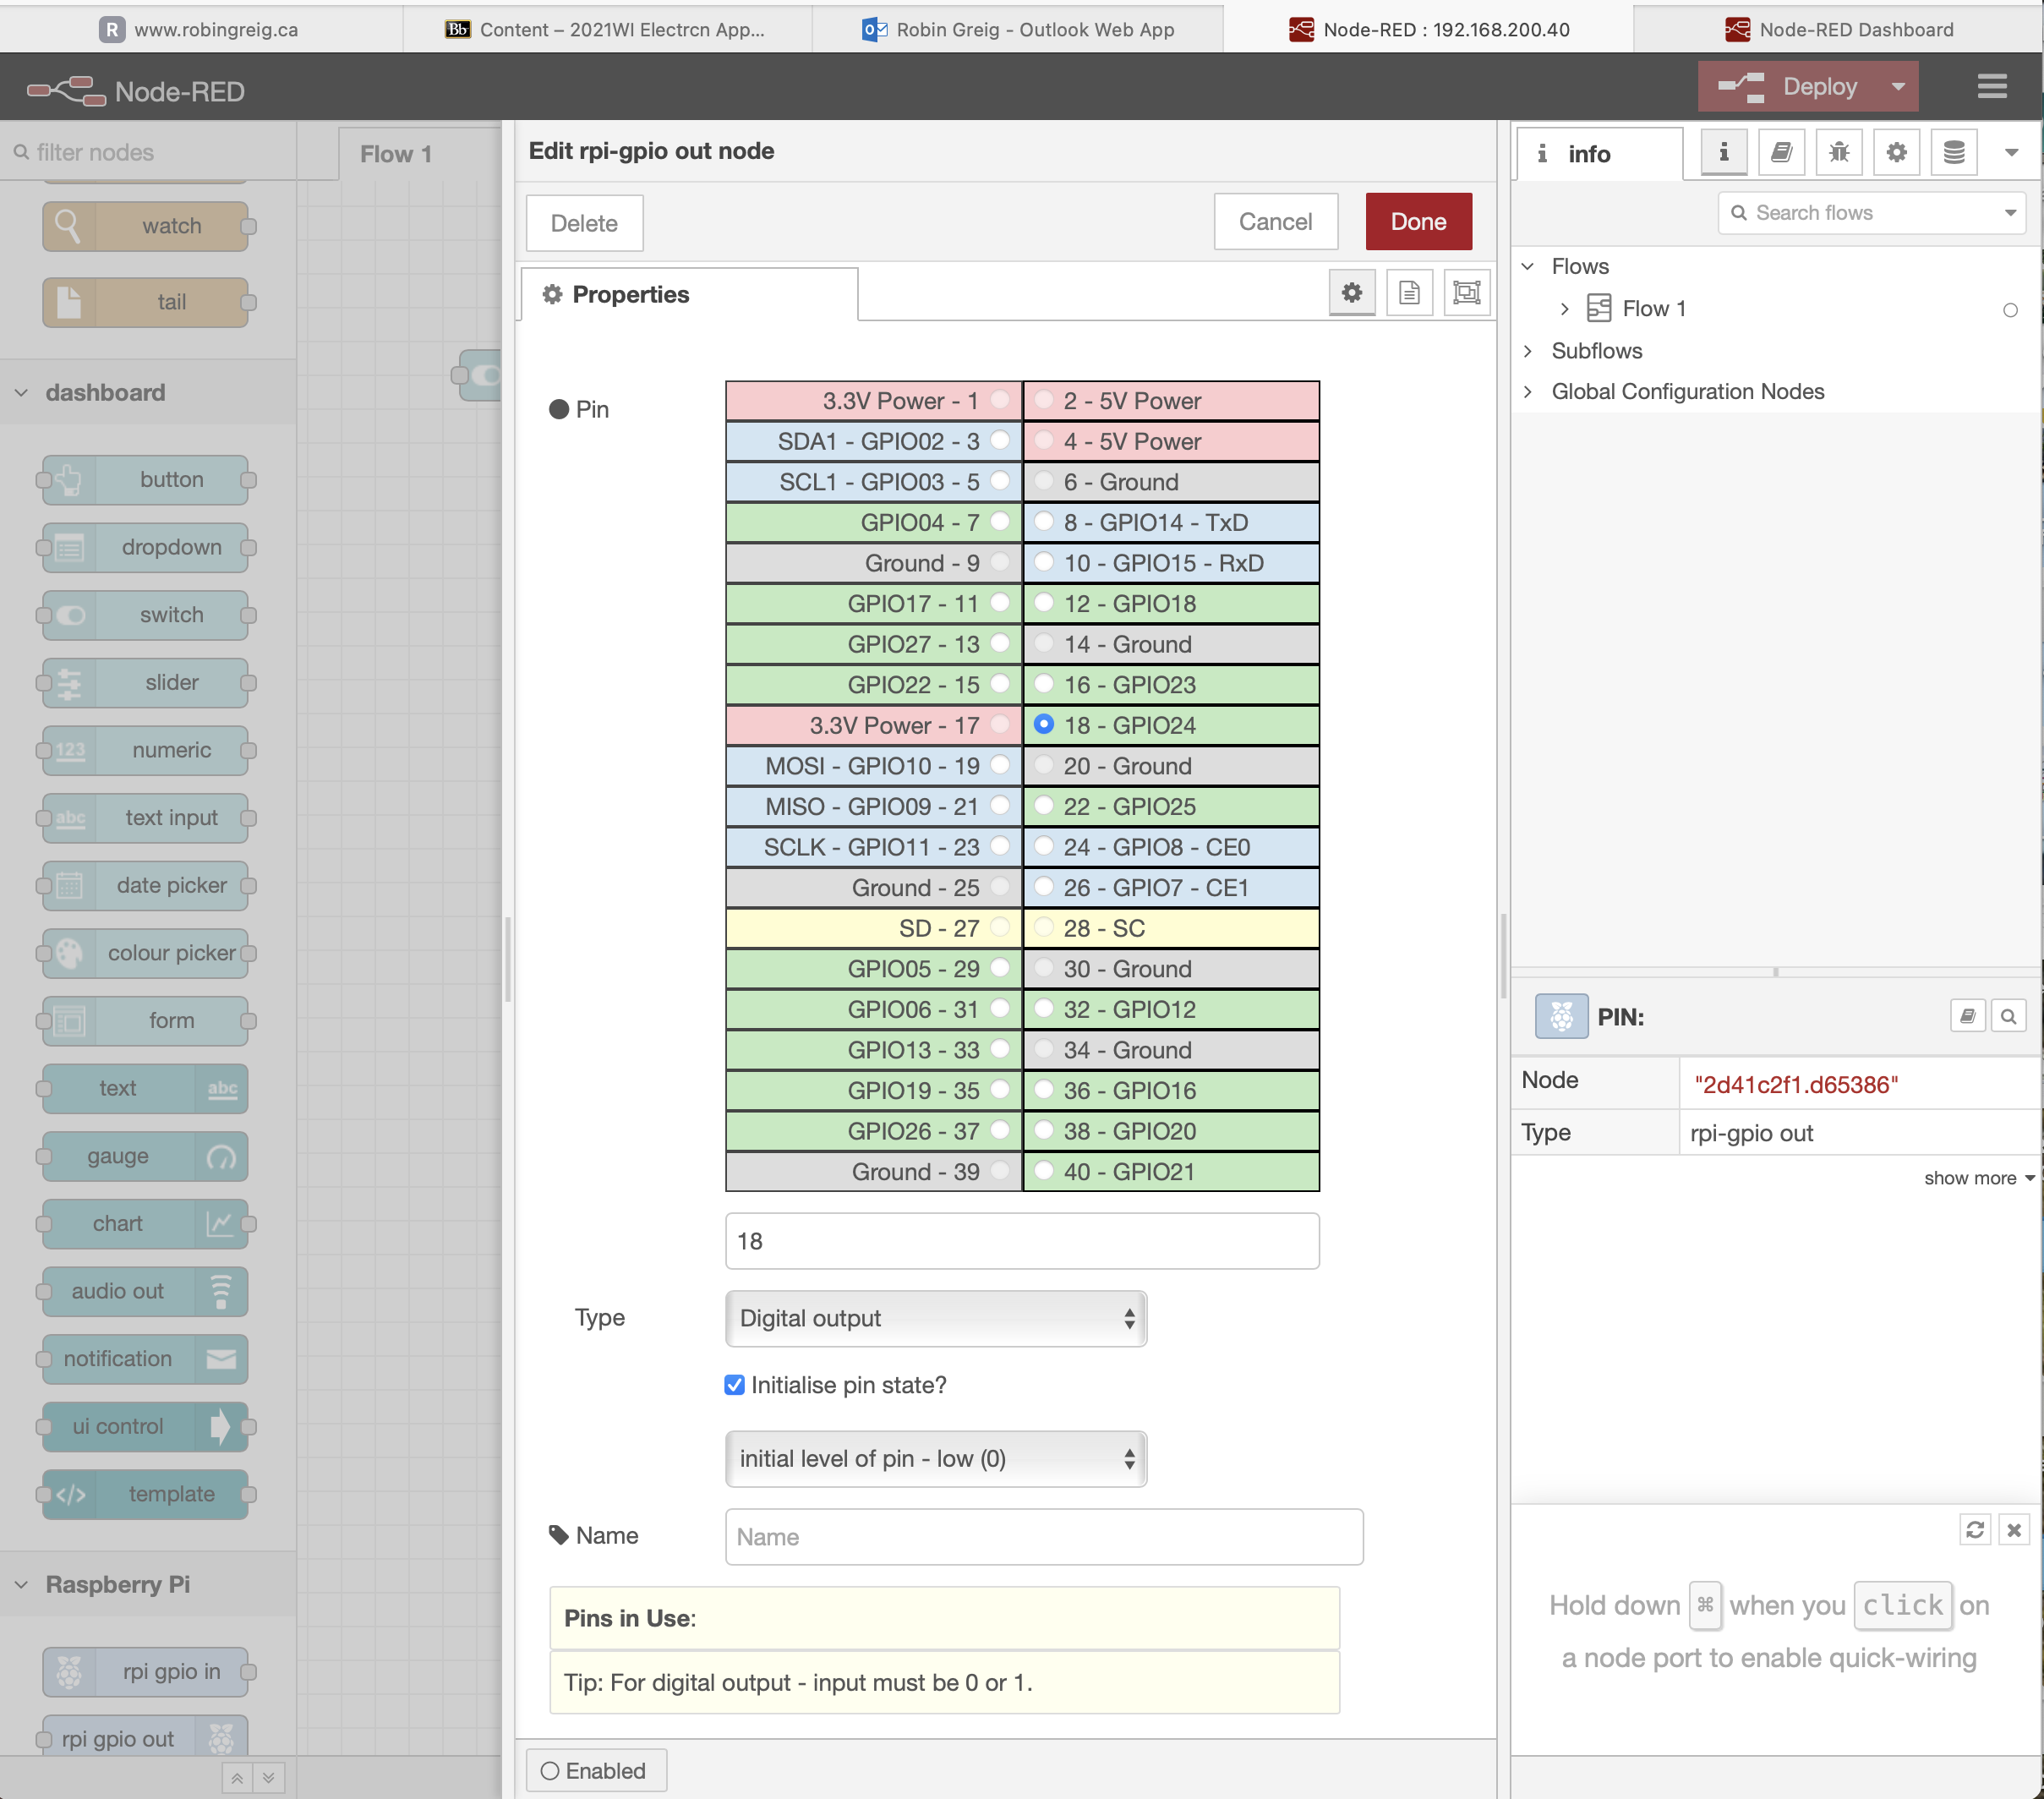
Click on the GPIO24 button (right side, 9 down) and also select the "Initialize pin state" check box toward the bottom of the screen. We want the pin to start out with a level of low (when the software is deployed, or the Pi reboots) so that our output is low and our lamp or whatever device we have connected is off:
Now press "Done" and you should return to the original palette and both red triangles should be gone:
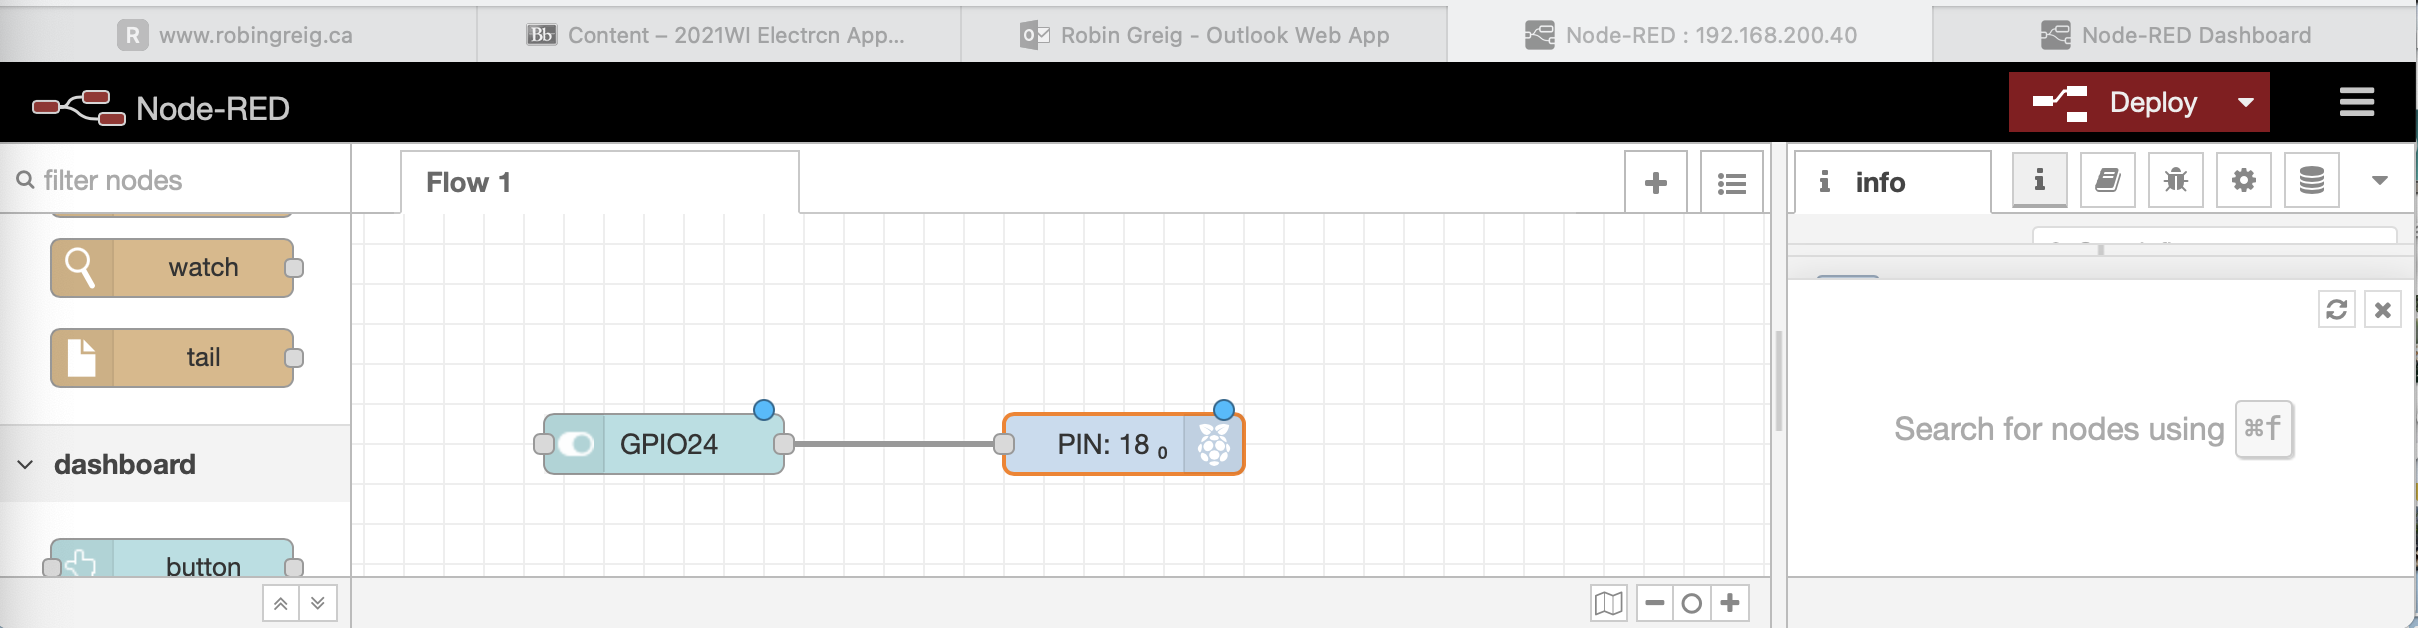
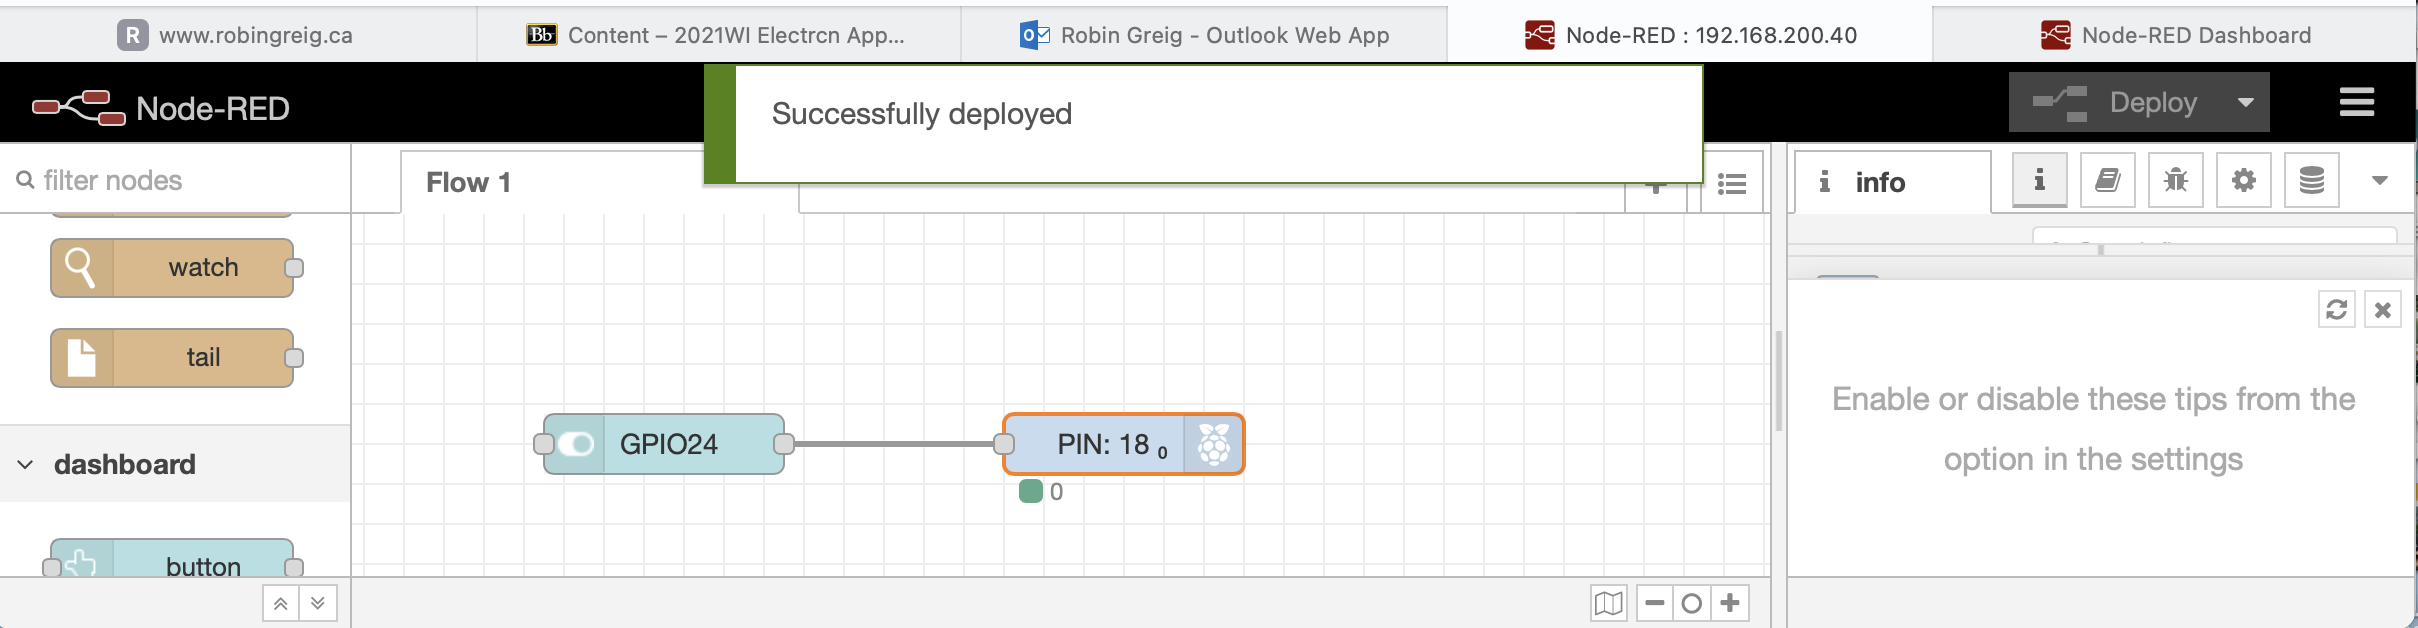
Now press the "Deploy button" and you should see the "Successfully deployed" banner at the top of the screen. You should also notice that the blue circles are gone from both of your nodes:
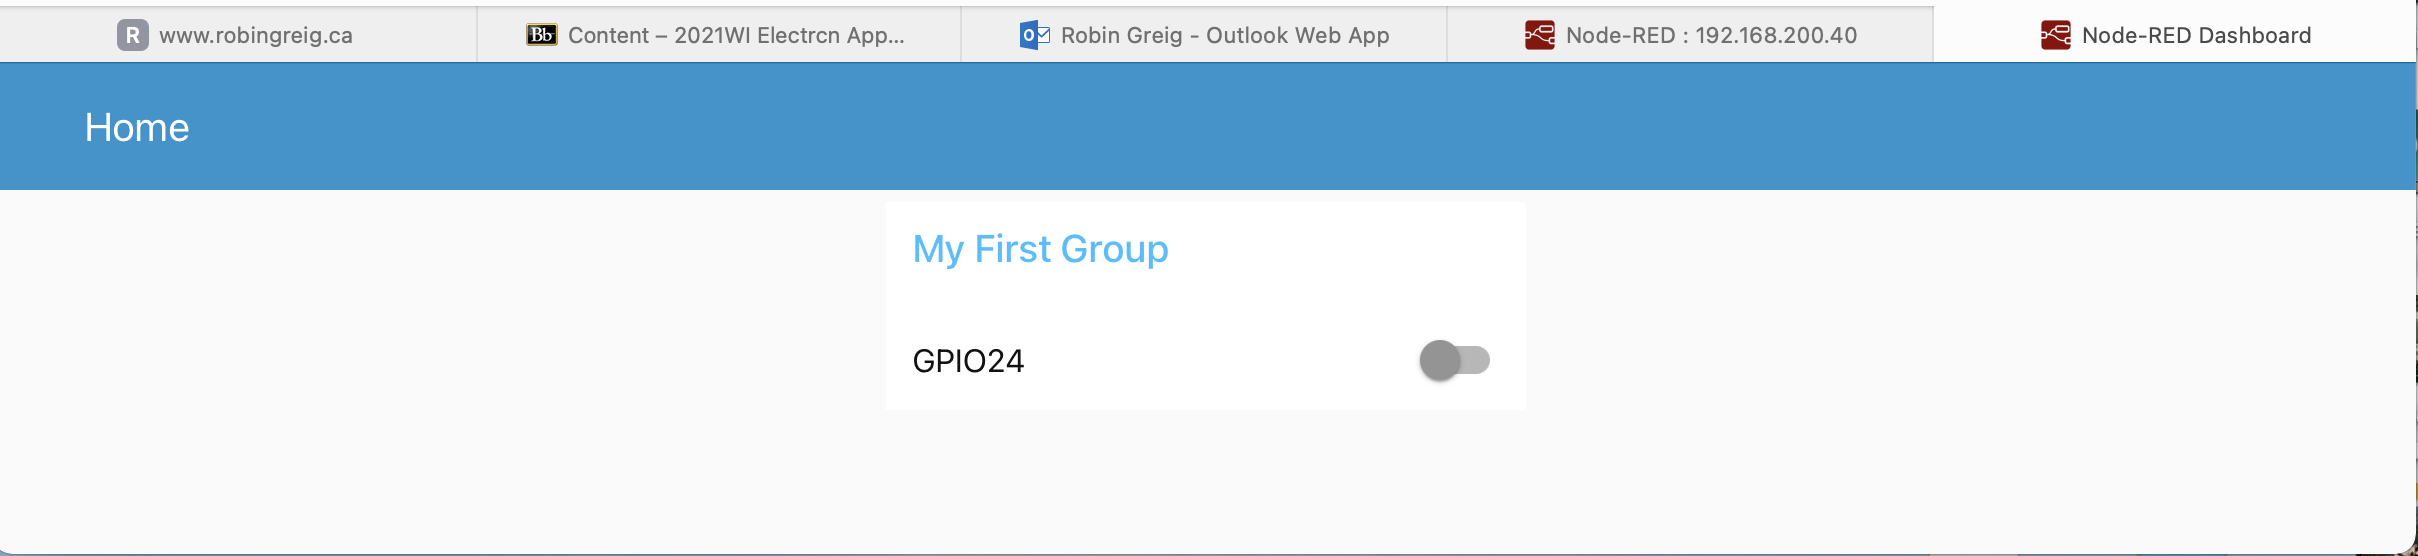
Now when you point your browser to "localhost:1880/ui" or "your-pi-address:1880/ui" you should see the switch. Your Tab is labeled "Home" and your group is labeled "My First Group". Hopefully this will help you to visualize how you could sort or layout your webpage:
Now you just need to hook up an LED (and 330 - 470 ohm resistor in series with it) to GPIO pin 24 and ground, and you should see the lamp turning on & off when you activate the swtich! I've run out of time and have to head off to work (sigh!) so I'll take some photos of my breadboard system and share some tips and tricks of the test gear I use in tomorrow's post!
Thanks for viewing!
Robin
Posted with STEMGeeks
Just discovered your fascinating series. Thank you! I will go back and read the back catalogue later but I do have a question for you. Are you into model railways as the Pi would be a perfect partner to run a full digitally controlled layout? I know there some people out there using them but there are no tutorials like yours sadly!
Ok..reading time! Thanks again and keep it up, I need interesting stuff to read as the main Hive feeds seems to be sadly lacking in stuff that interest me these days!
Best wishes :-)
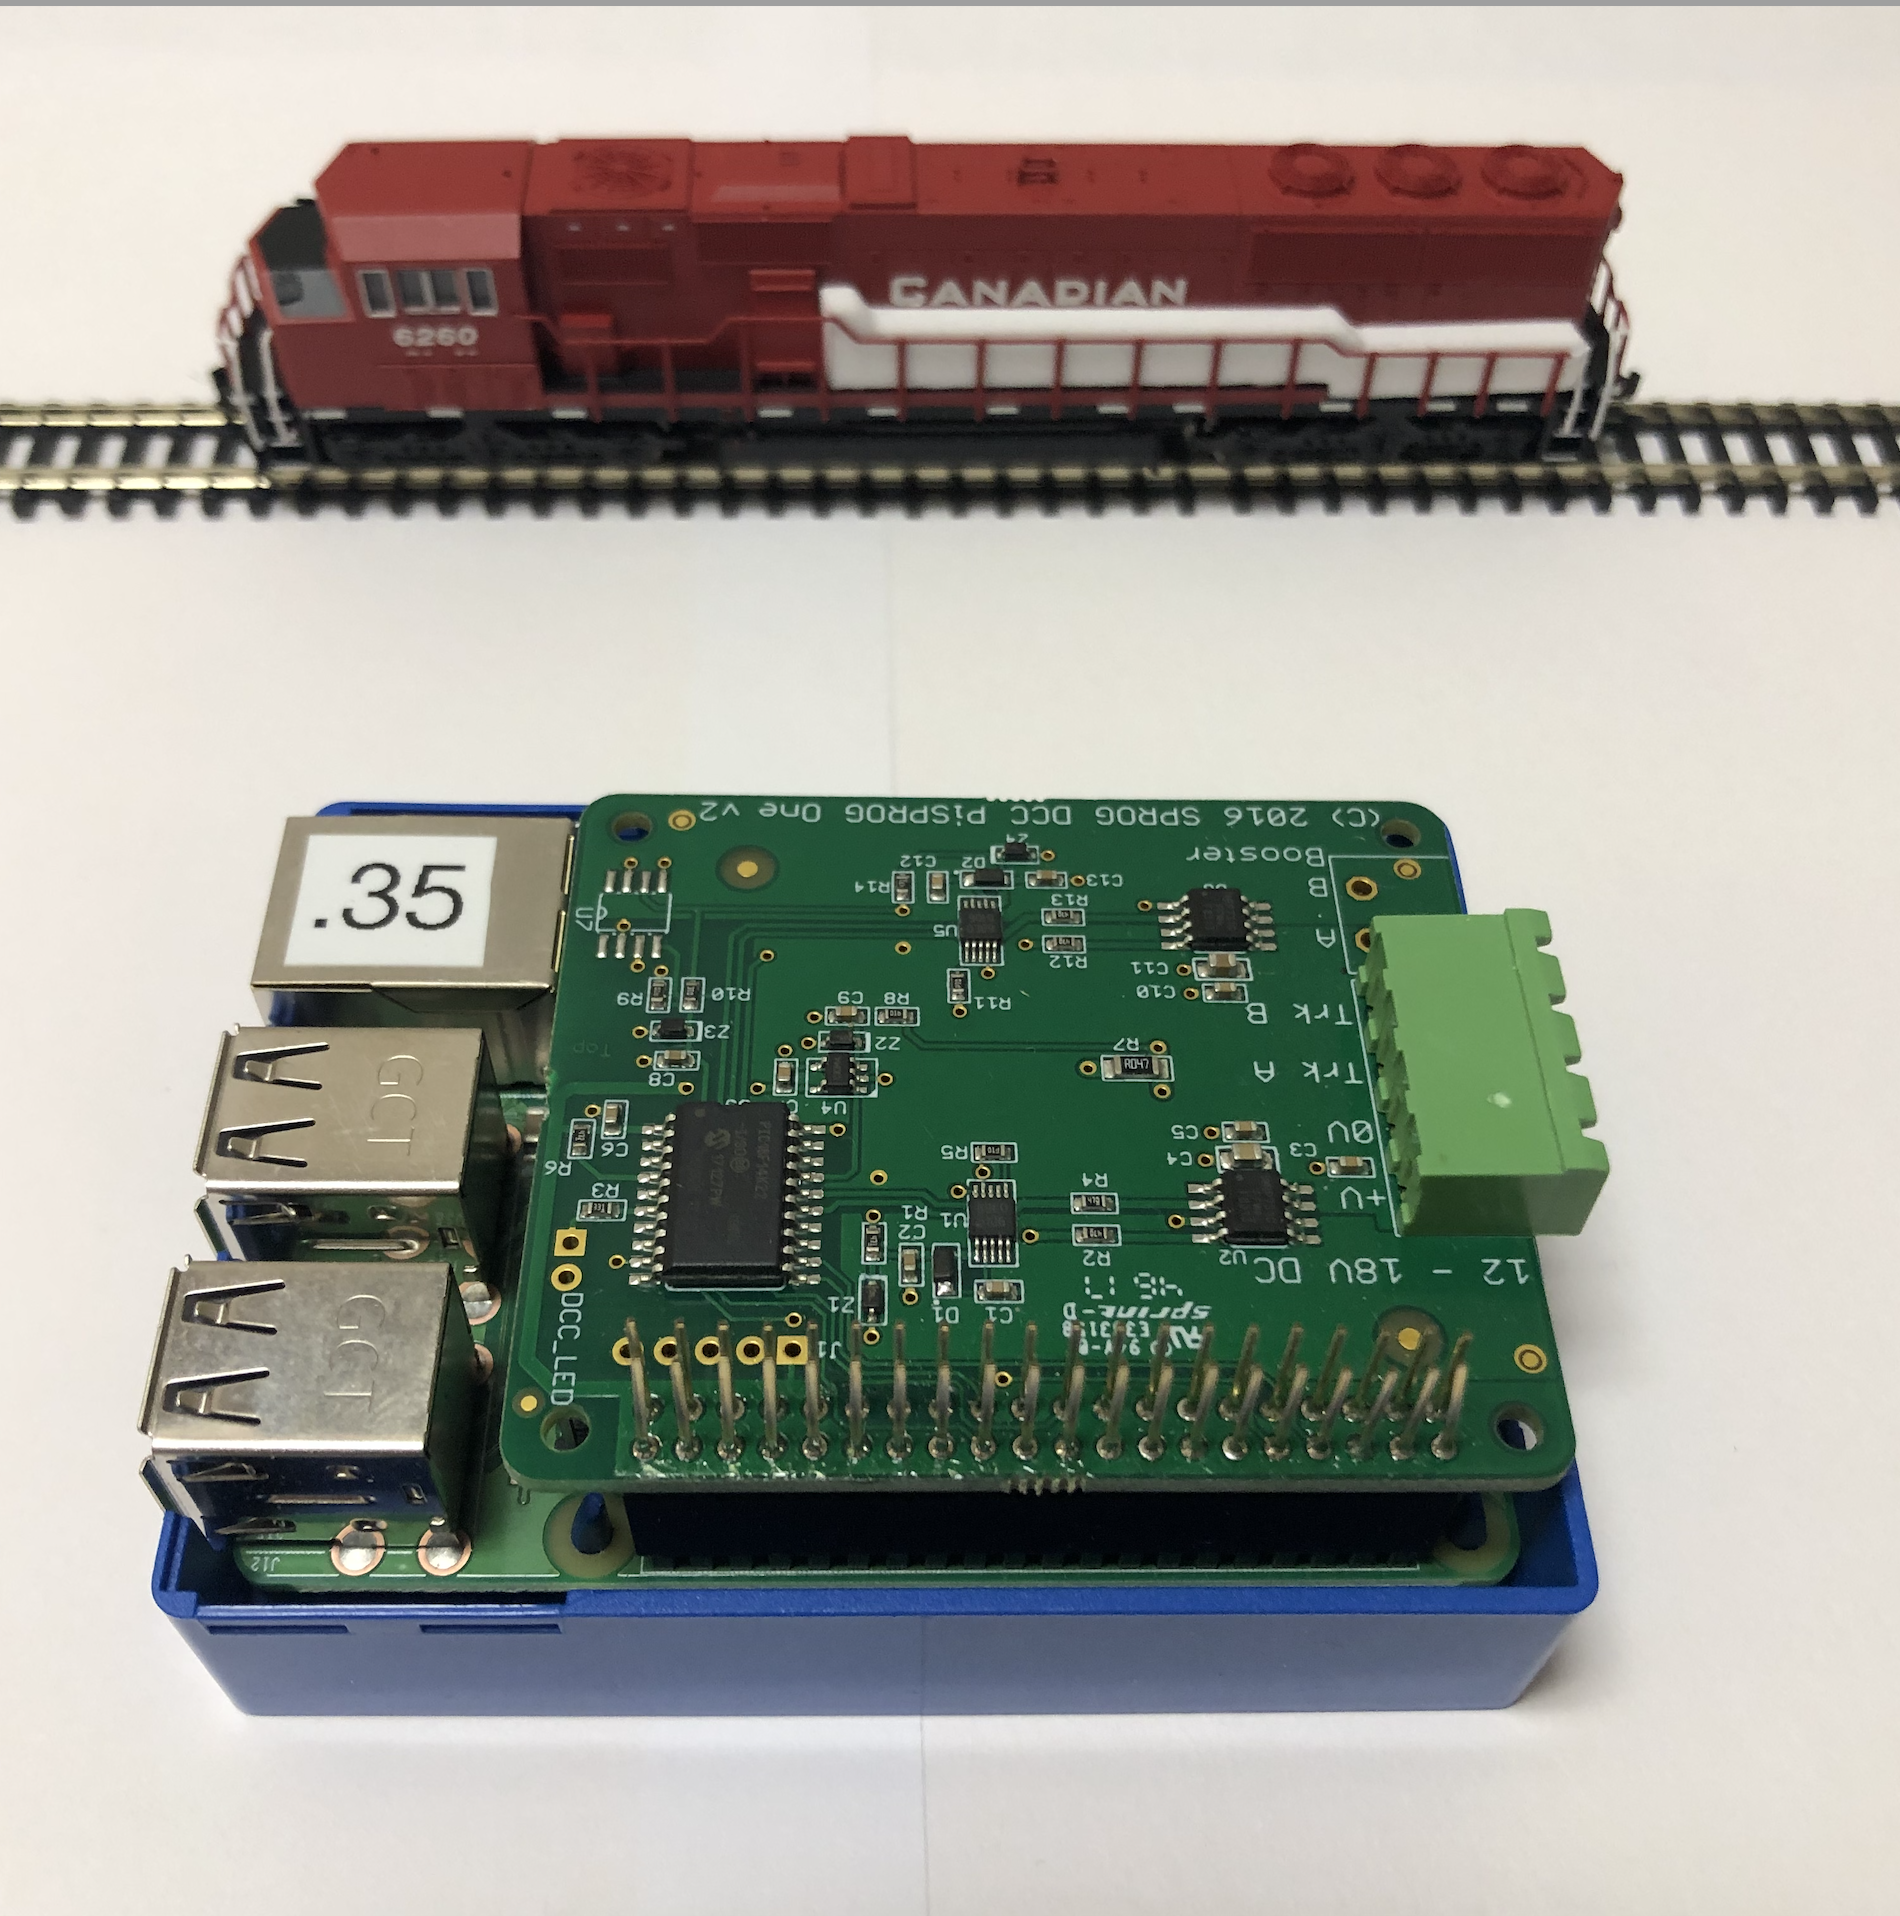
Hi @nathen007.stem and thanks for the kind words. I had a good chuckle when you asked about the model railway connection, because I had tinkered with the PiSPROG add on board that I purchased for my Raspberry Pi #35. My brother has graciously donated his N scale rolling stock to me and I had started to build up my model railroad with the PiSPROG individually controlling the engines via the Wi_Throttle app on my phone. And I believe you can integrate your switching and light controls through there as well. But then COVID came along and I shifted my focus to my Pi Home Automation project.....since I was spending so much time at home.....(grin). So I've not really spent any time with it but I do want to get back into it down the road!
You have just got your self a new stalker err follower!
I am just in the process of setting up a test track as I am getting back into the hobby and will be running DCC and upon reading up, there is so much functionality on the locos compared to the last time I ran a railway, 35+ years ago.
I also set-up a model railway community and then went around all the facebook groups to try and recruit people to the platform to no avail! Most model railway people seem to be rather stuck in their ways but I do read that they are fighting with DCC! Perhaps this will be a door into Hive in the future.
Thanks for the reply, and I will be watching closely for future articles! Have a great weekend.
Congratulations @robingreig! You have completed the following achievement on the Hive blockchain and have been rewarded with new badge(s) :
You can view your badges on your board and compare yourself to others in the Ranking
If you no longer want to receive notifications, reply to this comment with the word
STOPDo not miss the last post from @hivebuzz: