Electro-pneumatic Basics: Cementing Press (Time Dependent Control)
1. Introduction
In a previous blog, we discussed about dependent controls in pneumatic system. In this blog, we create a circuit that resonates the operation of a cementing press (time dependent control). The cementing press activates by pressing a button that controls the forward stroke. When the piston rod reached the full extended length, the component is pressed for 10 seconds. After time expires, the piston rod retracts automatically to initial position. It is specified that even the push button is still pressed, the rod retracts after 10 seconds. The process renews after one process cycle and the cylinder is fully retracted. In this blog, we show the time-dependent control in electro-pneumatic.
2. Circuit and Simulation
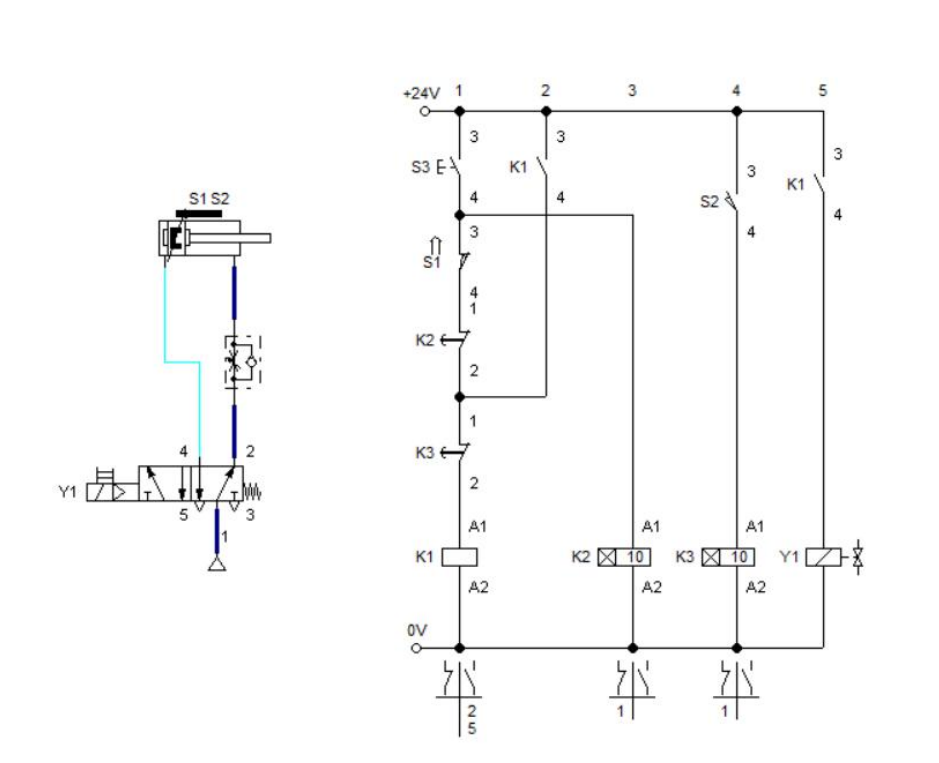
The pneumatic circuit built is composing of a double acting cylinder, a flow control valve, a piloted 5/2 way solenoid valve. A sensor is placed at the full retracted piston and other sensor in the full extension. An electronic timer relay (off-delay) is vital in isolating the process so that actuation happen only after cylinder returns to initial state. The circuit is shown in Figure 1.

Figure 1: Electro-pneumatic Circuit
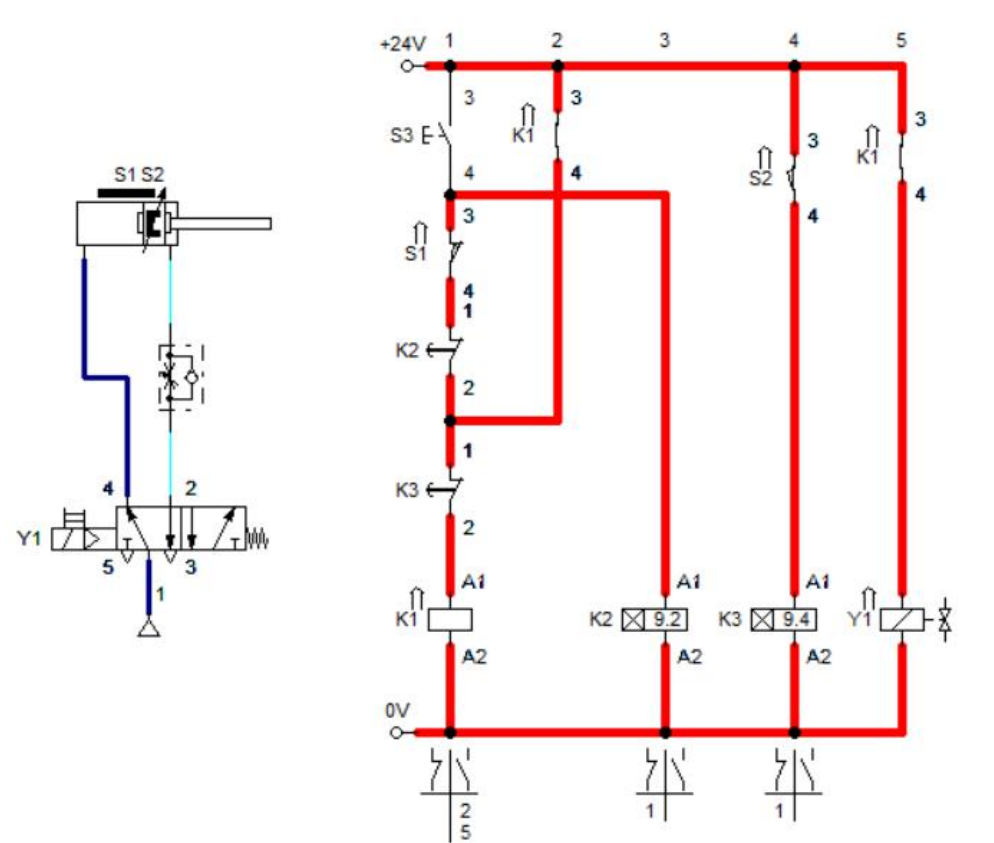
When pushbutton S3 is activated, electricity flows across the relay coil K1 to activate it. Once relay K1 is energized, all latched contacts K1 switched from open to closed or in reverse. Hence relay timer K2 is connected after S3, relay timer K2 activates when S3 is pressed. The relay timer K3 is activated when the cylinder is fully extended. Both K2 and K3 is set to 10 seconds and when activated, the shifting of timer contacts K2 and K3 happen after 10 seconds. The timer K2 is set to sustain the activation so that even when you pressed the S3 before the cylinder reaches full extension, it never go back to initial state.

Figure 2: S3 is pressed.
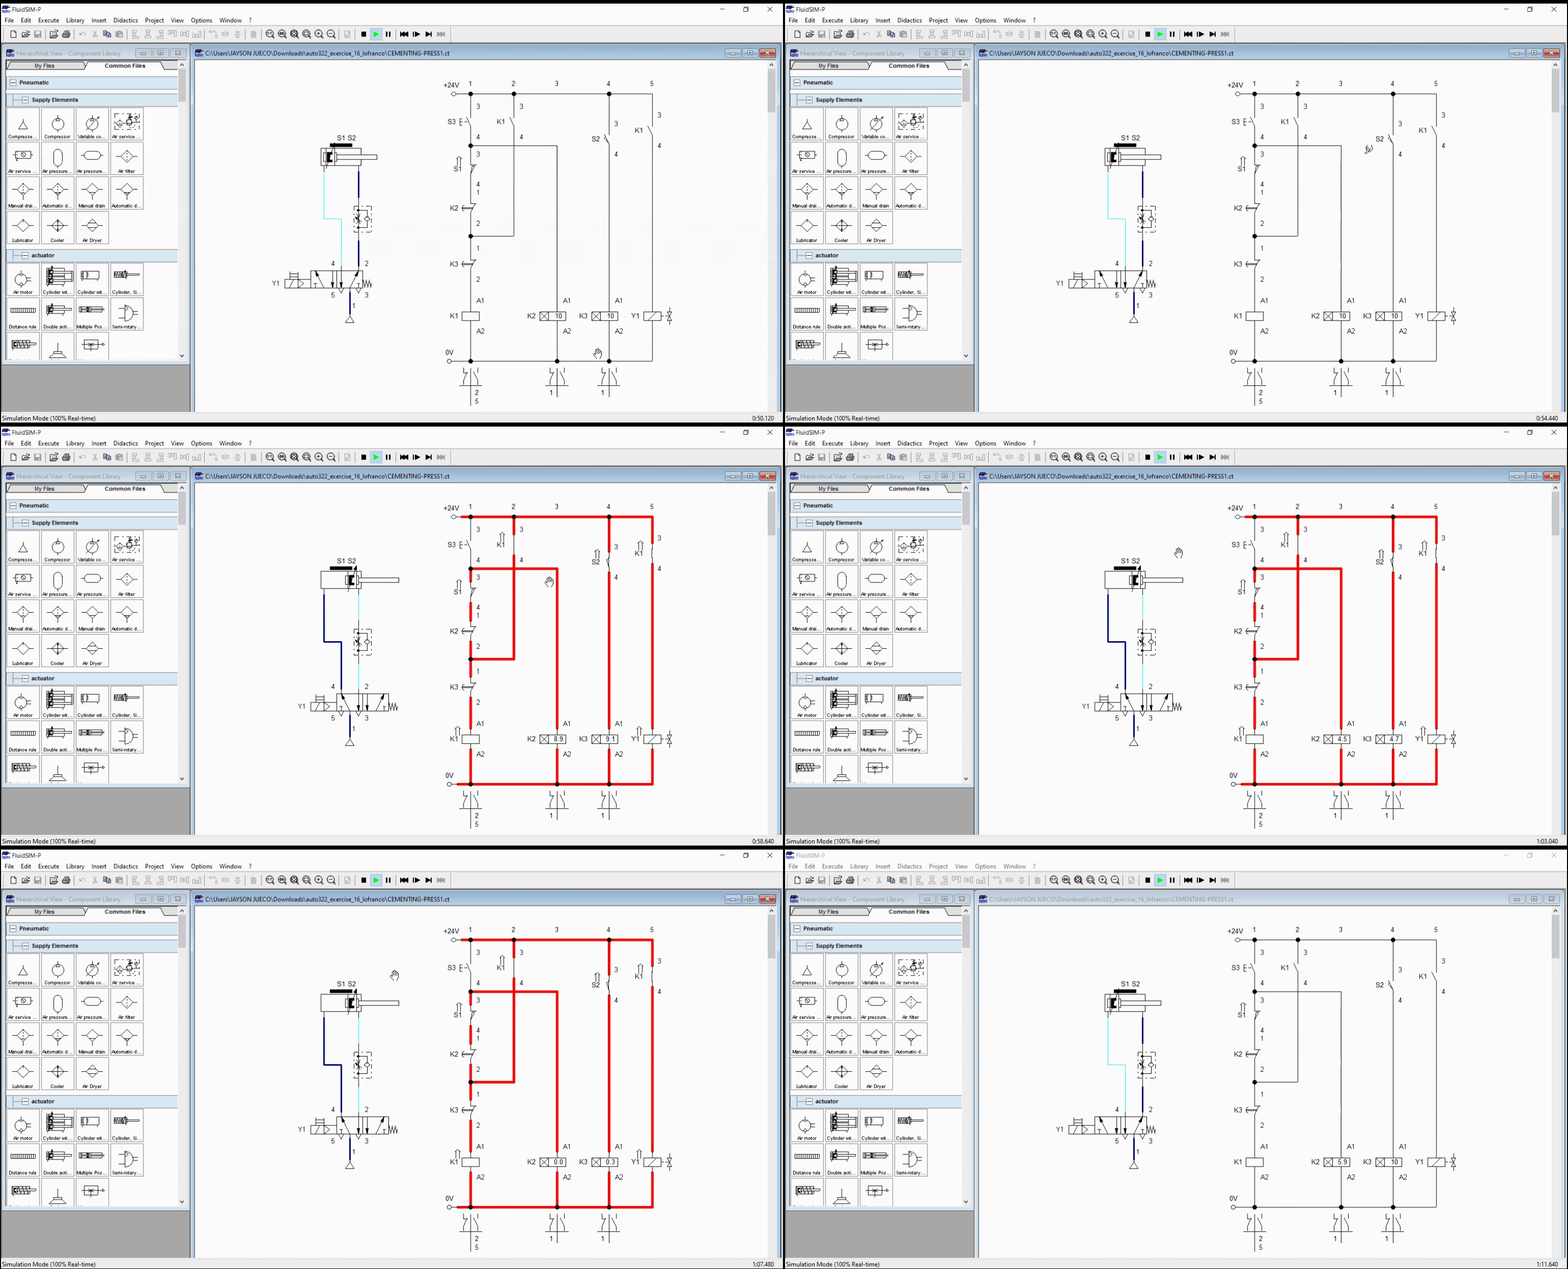
As relay coil K1 is activated, electricity flows to the solenoid Y1 which actuates the 5/2 way DCV in the pneumatic circuit. When actuated, 5/2 way DCV opens port 4 for the air pressure to flow through the cylinder. This caused the cylinder to extend. The sensor S1 is released as the cylinder extends. This is shown in Figure 2. The full simulation is shown in Figure 3.

Figure 3: Full Simulation
3. Conclusion
We created a time-dependent control in electro-pneumatic as shown in Figure 1. Sustaining activation by the use of timer was shown in this blog. The relay timer enables the process to complete before renewing the process. In this blog, we used the cementing press' circuit as an example of a time-dependent control implementation in electro-pneumatic.
4. References
[1] Pneumatic Basic Level. online access
[2] Pneumatic Advanced Level. online access
[3] Electro-pneumatic Basic Level. online access
(Note: All images and diagram in the text are drawn by the author (@juecoree) except those with separate citation.)
If your are Interested in pneumatic and electro-pneumatic system, you can read:
1. Pneumatic Basics: Direct Control
2. Pneumatic Basics: Indirect Control
3. Pneumatic Basics: AND and OR Logic
4. Pneumatic Basics: Memory Circuit and Speed Control
5. Pneumatic Basics: Dependent control
6. Pneumatic Basics: Multiple Actuators
7. Electro-pneumatic Basic: AND and OR Logic
8. Electro-pneumatic Basics: Interlocking, Latching and XOR logic
9. Electro-pneumatic Basics: Distribution of Workpiece
10. Electro-pneumatic Basic: Ejecting a workpiece
11. Electro-pneumatic Basics: Basic Automation
12. Electro-pneumatic Basics: Automation with Counter
12. Electro-pneumatic Basics: Automating with Timer
Posted with STEMGeeks