Node-Red Tabs on Raspberry Pi
Good Morning! In my previous post on using mqtt with Node-Red, @mytechtrail had asked how to add different tabs for the different flows that could be on separate Pi's. Additionally I'll share with you a public mqtt broker that you could use if you wanted to control your flows from anywhere without having to open a port in your firewall. I know enough about security to know that I don't have the skills to be opening ports while keeping the bad guys at bay! (grin)
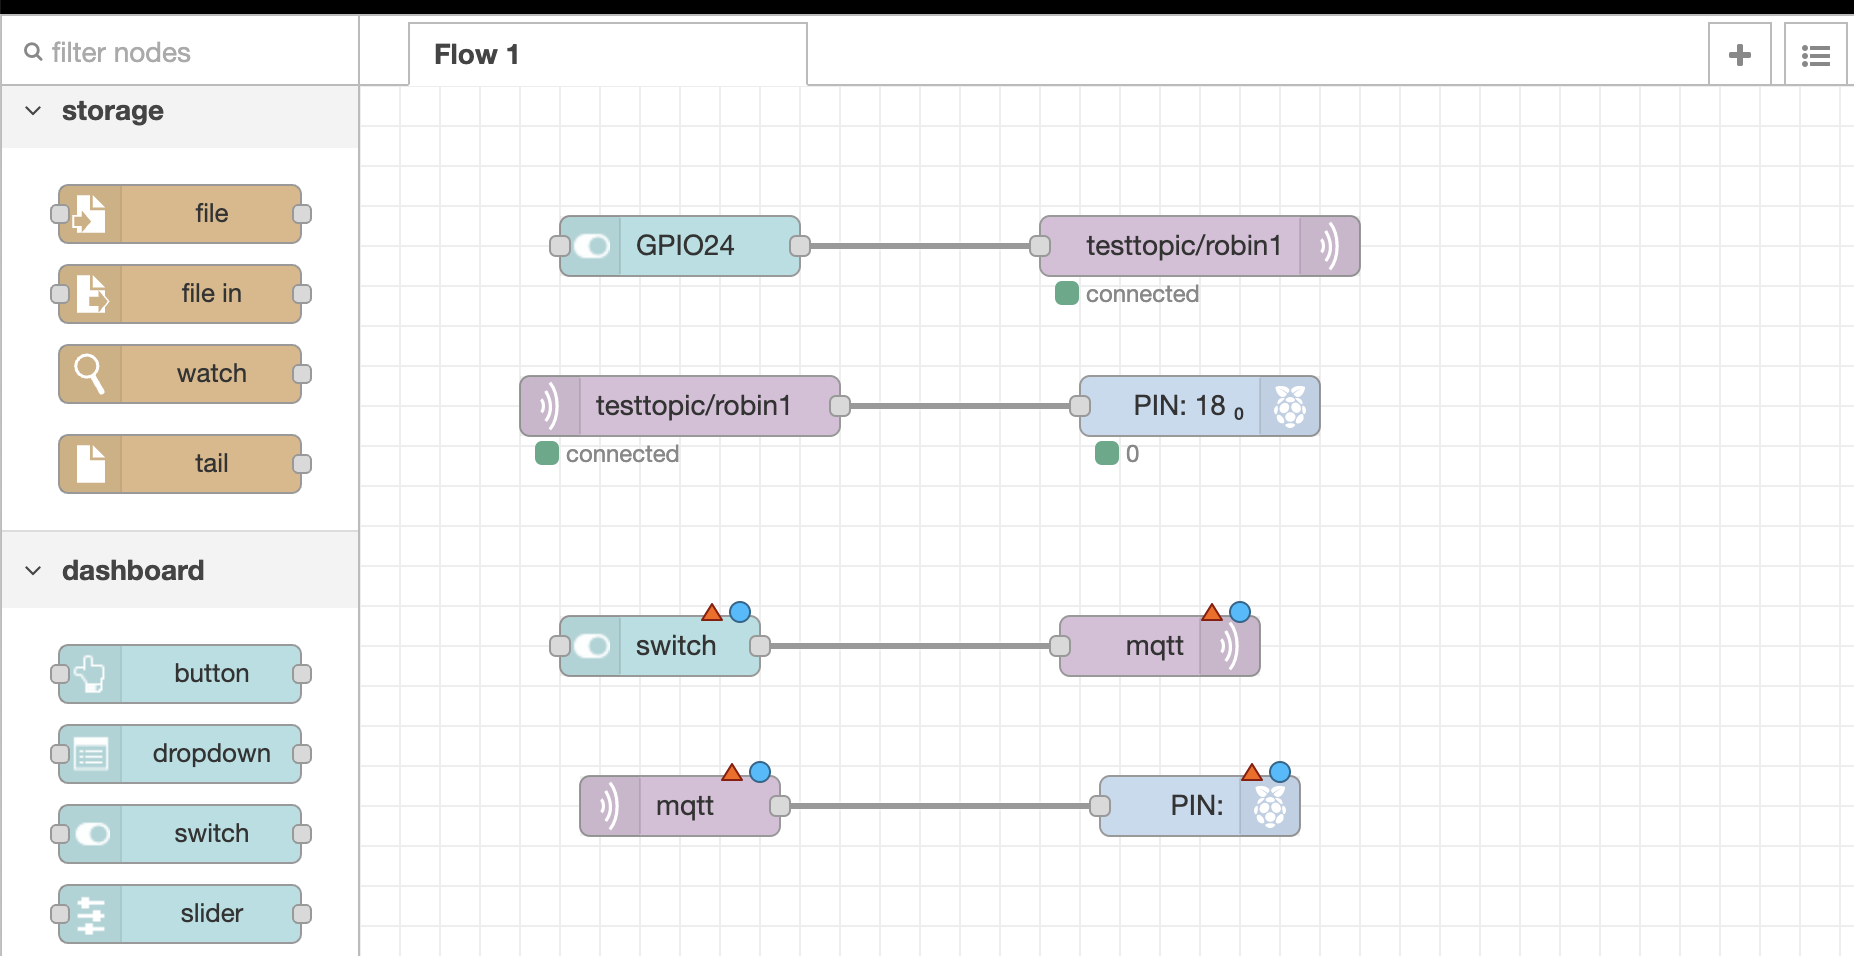
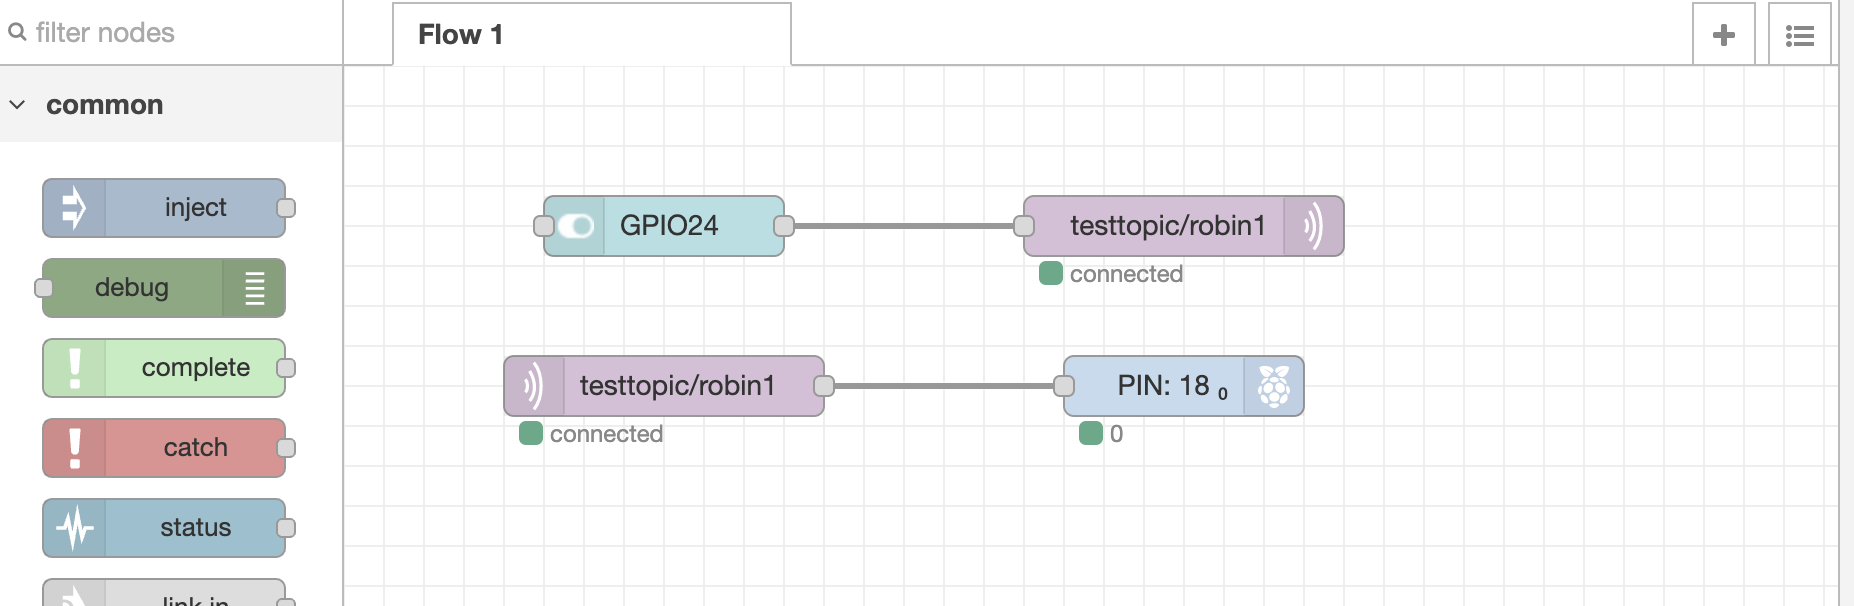 As mentioned previously, I originally had the switch (GPIO24) connected straight to the output (PIN18), however I'm now having the switch send a mqtt message to the public broker so generously provide by HiveMQ and if you have a few moments you want to read their awesome mqtt essentials series, that does a great job of explaining mqtt.

To add the hivemq broker double-click on the pink mqtt node and click on the down arrow on the Server box and select "Add new mqtt broker". Now click the pencil button to the right.
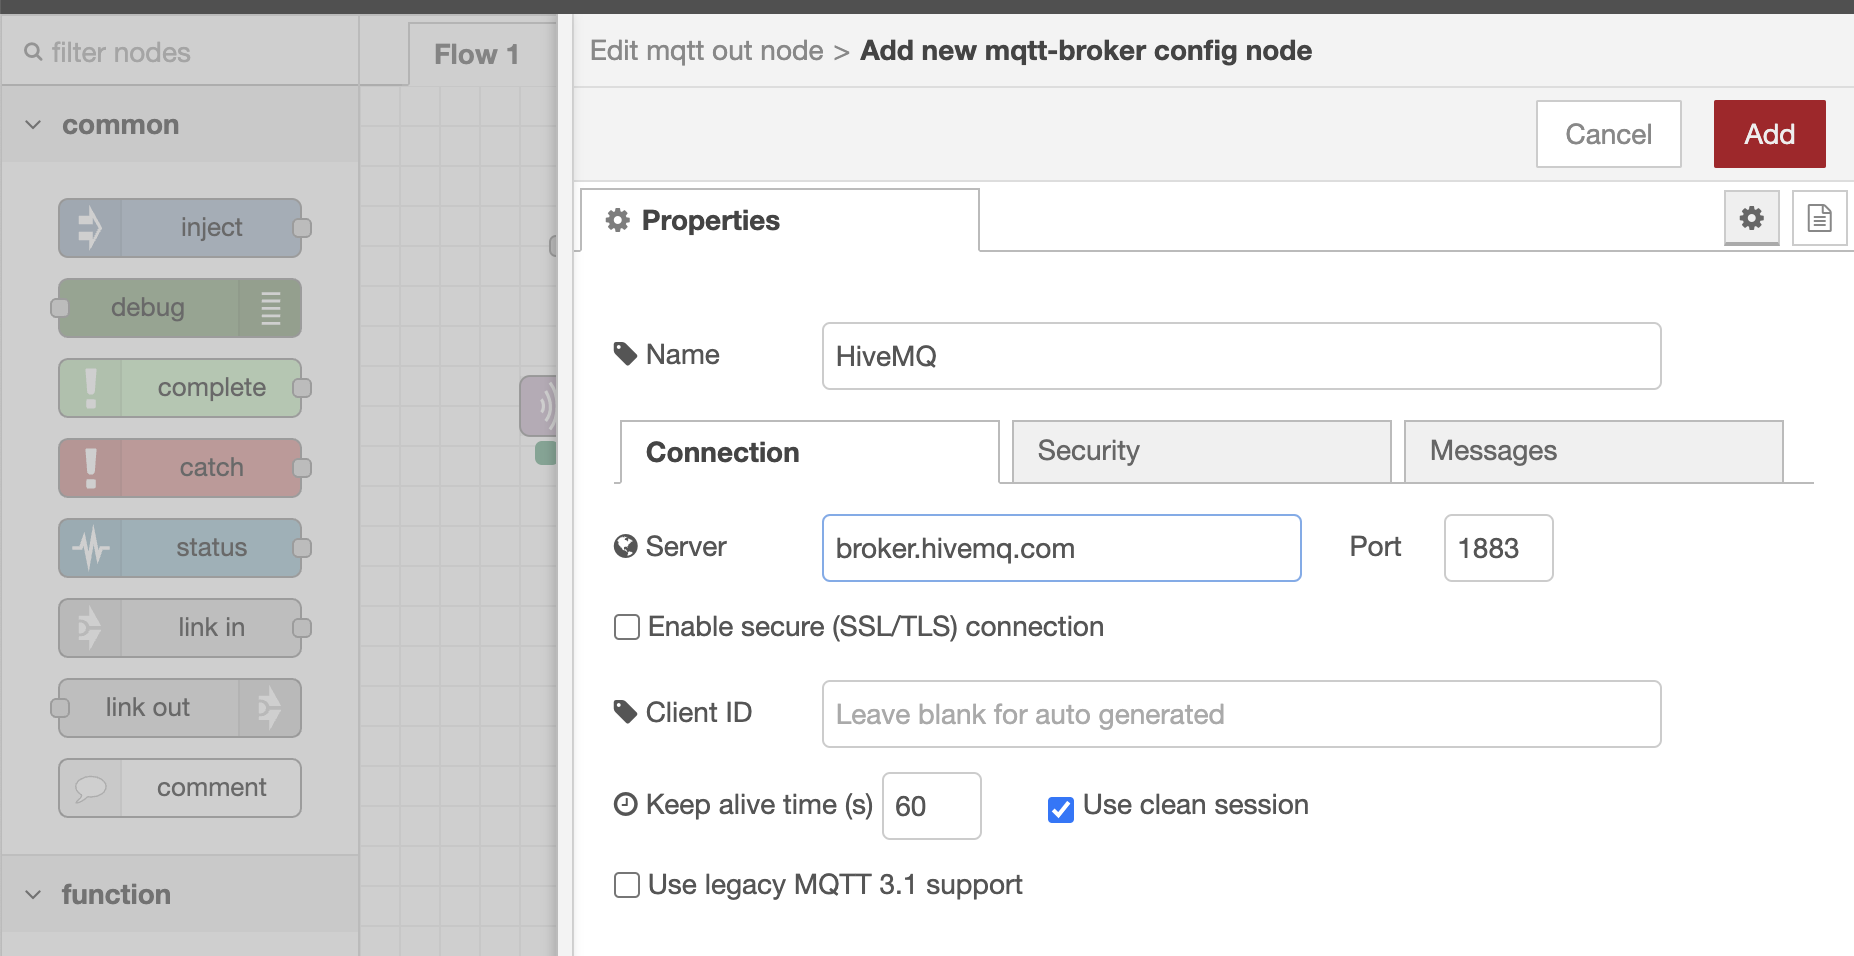 I labeled mine "HiveMQ" and the Server address is broker.hivemq.com and click "Add"
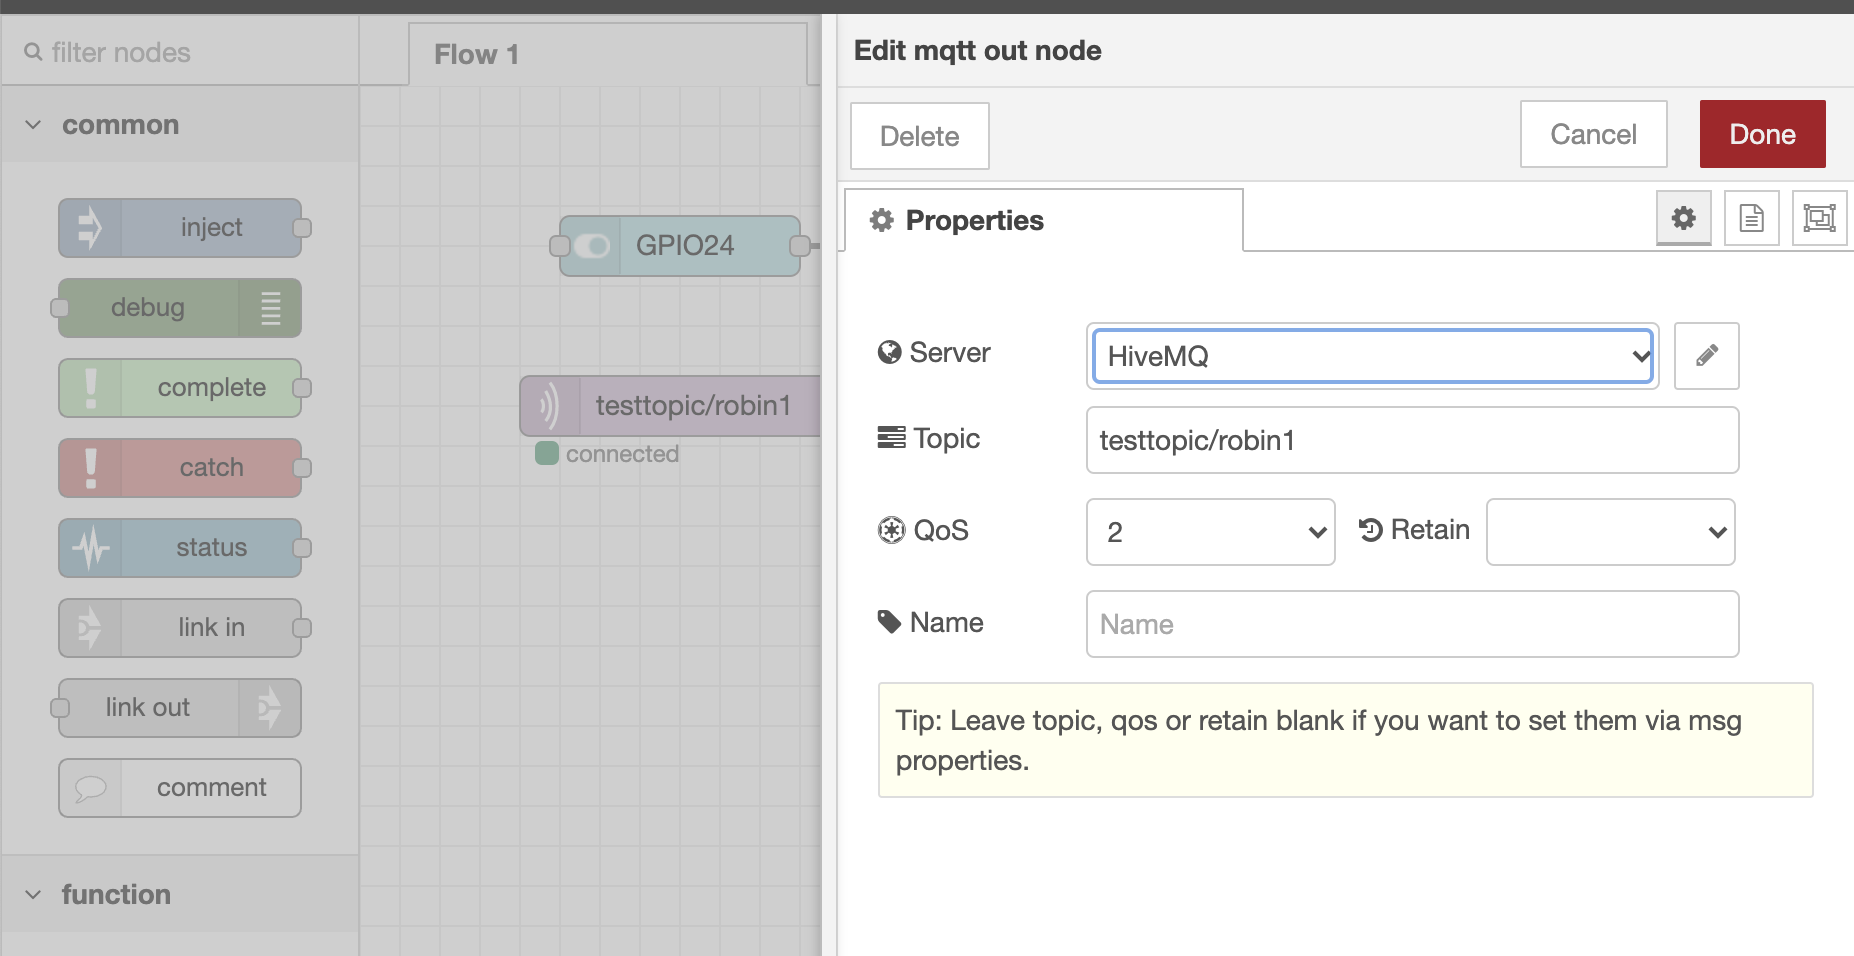 From what I understand, your topic should start with "testtopic/YourUniqueName". I've called mine "testtopic/robin1" and I've set QOS = 2 to assure delivery.
Don't forget to set the same broker and topic on the incoming mqtt node.
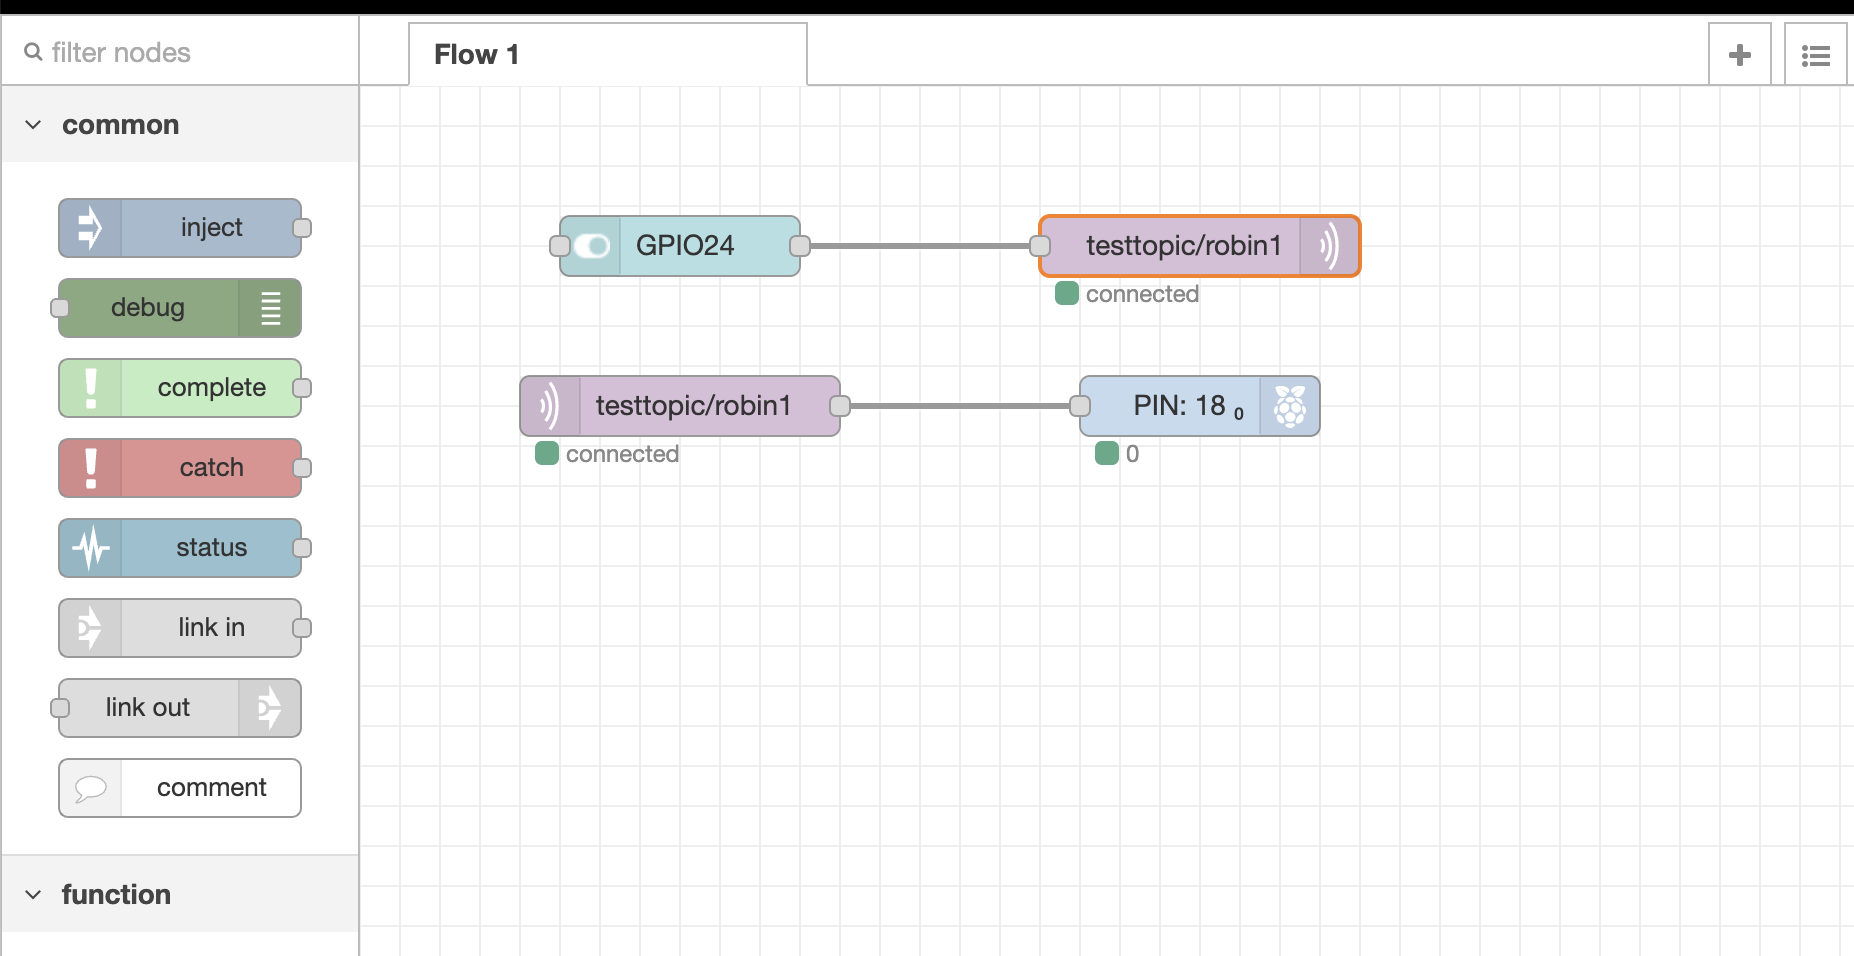
Deploy the changes and double check that your GPIO pin is going high & low as you move the switch on and off. You are now sending your mqtt message out to their public broker and you have subscribed to it and are receiving it back. If you want to manually test the message you can use their online browser client to publish messages to your topic and verify that you are receiving them.
 To setup a separate tab on the UI (User Interface = the webpage) lets add another switch > mqtt out & mqtt in > GPIO.
 Double clicking on the switch node brings up this screen and it defaults to the "Home" tab and "My First Group" group that we had setup earlier.
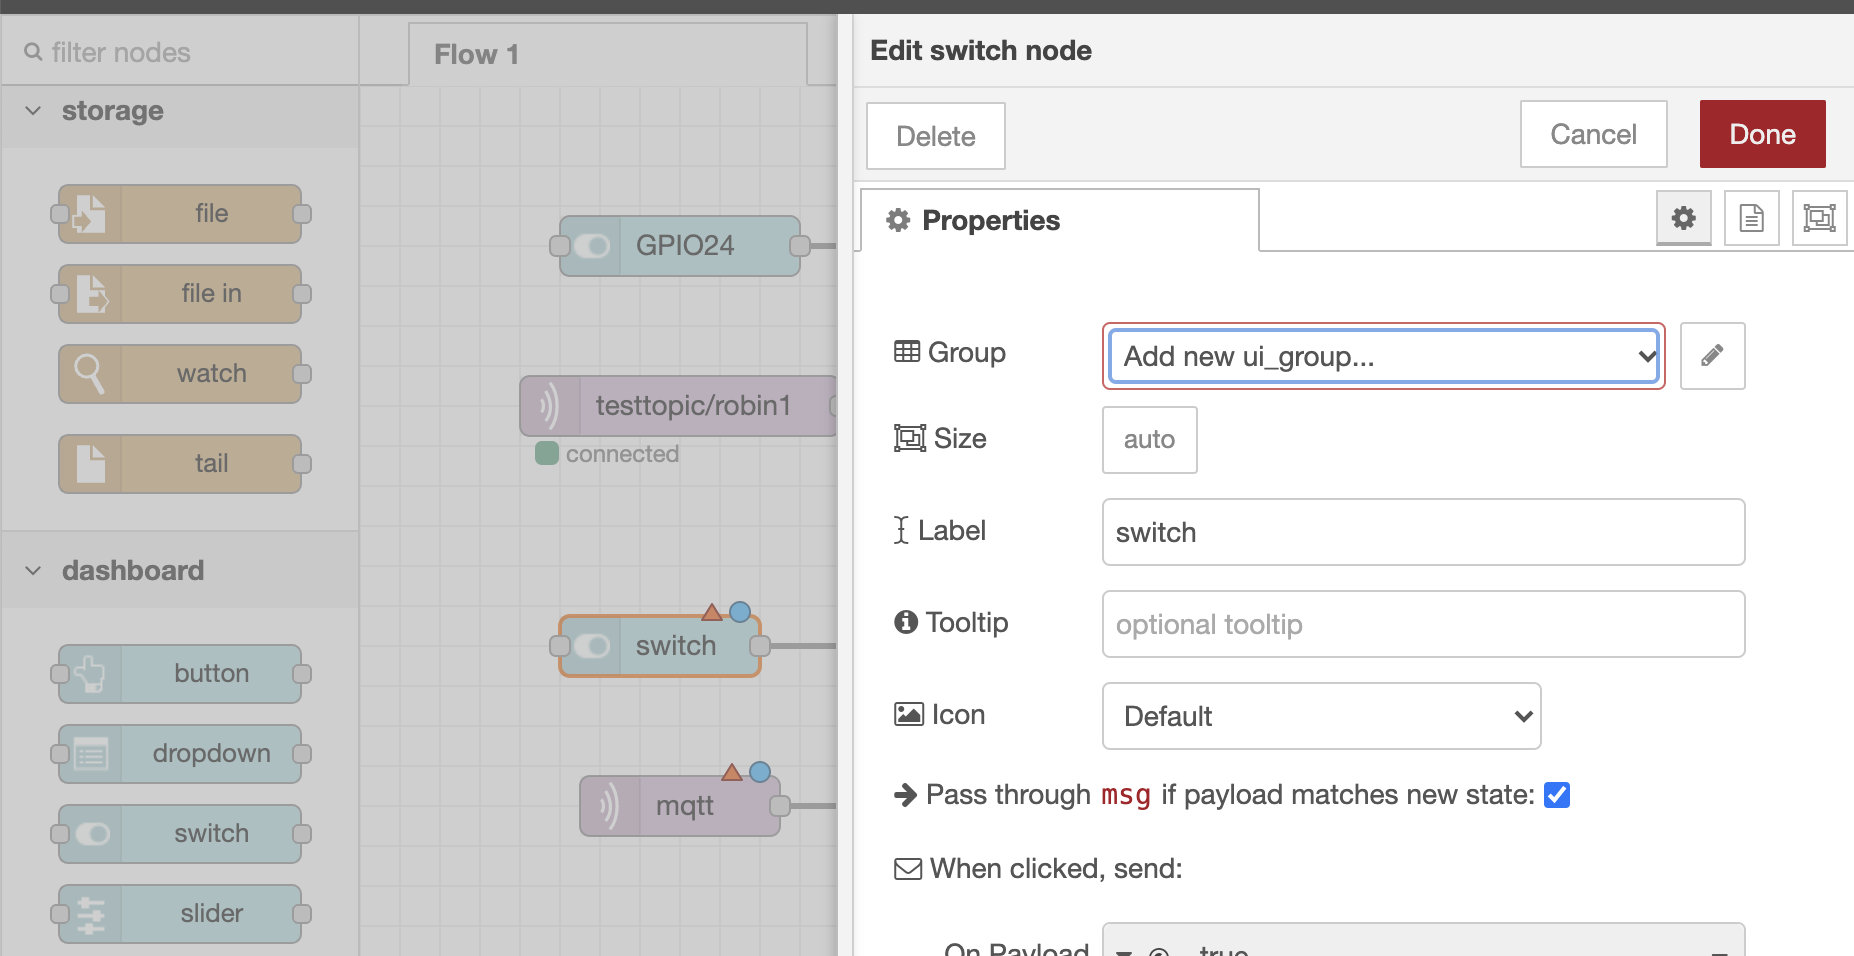 Go ahead and click on the dropdown arrow on the Group and select "Add new ui_group"
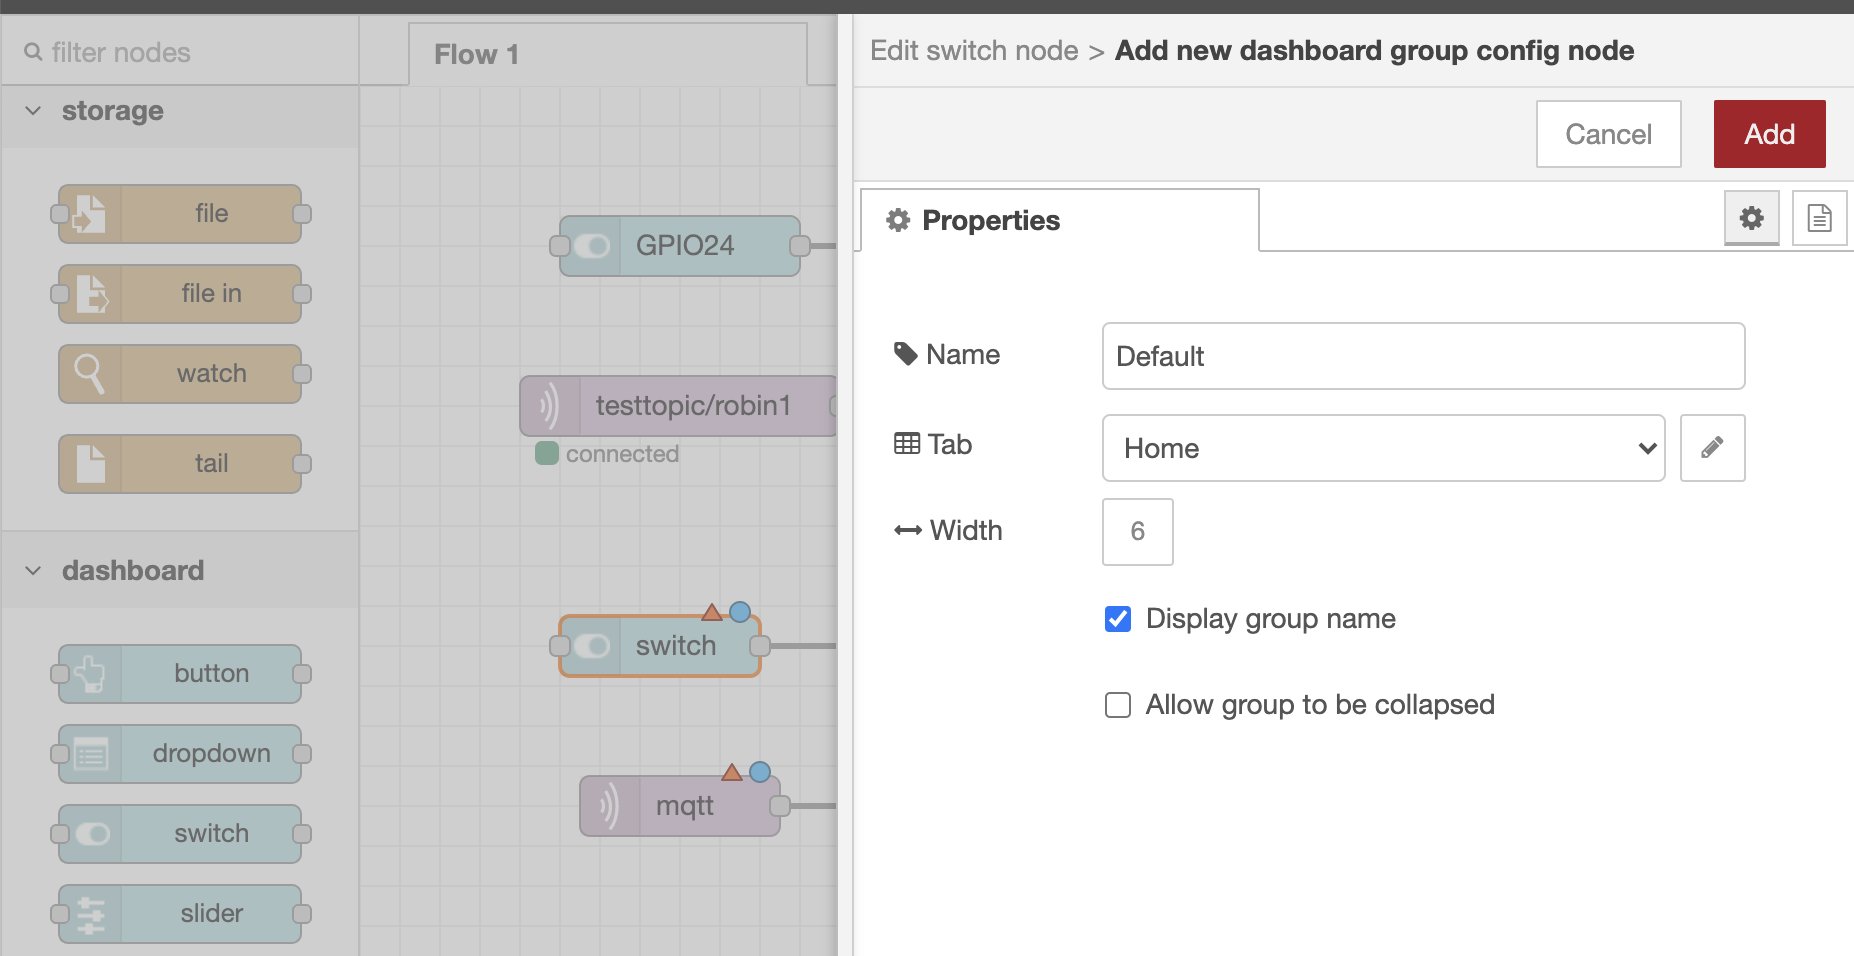 Click on the pencil to bring up this screen
 Click on the dropdown arrow on the Tab and select "Add new ui_tab"
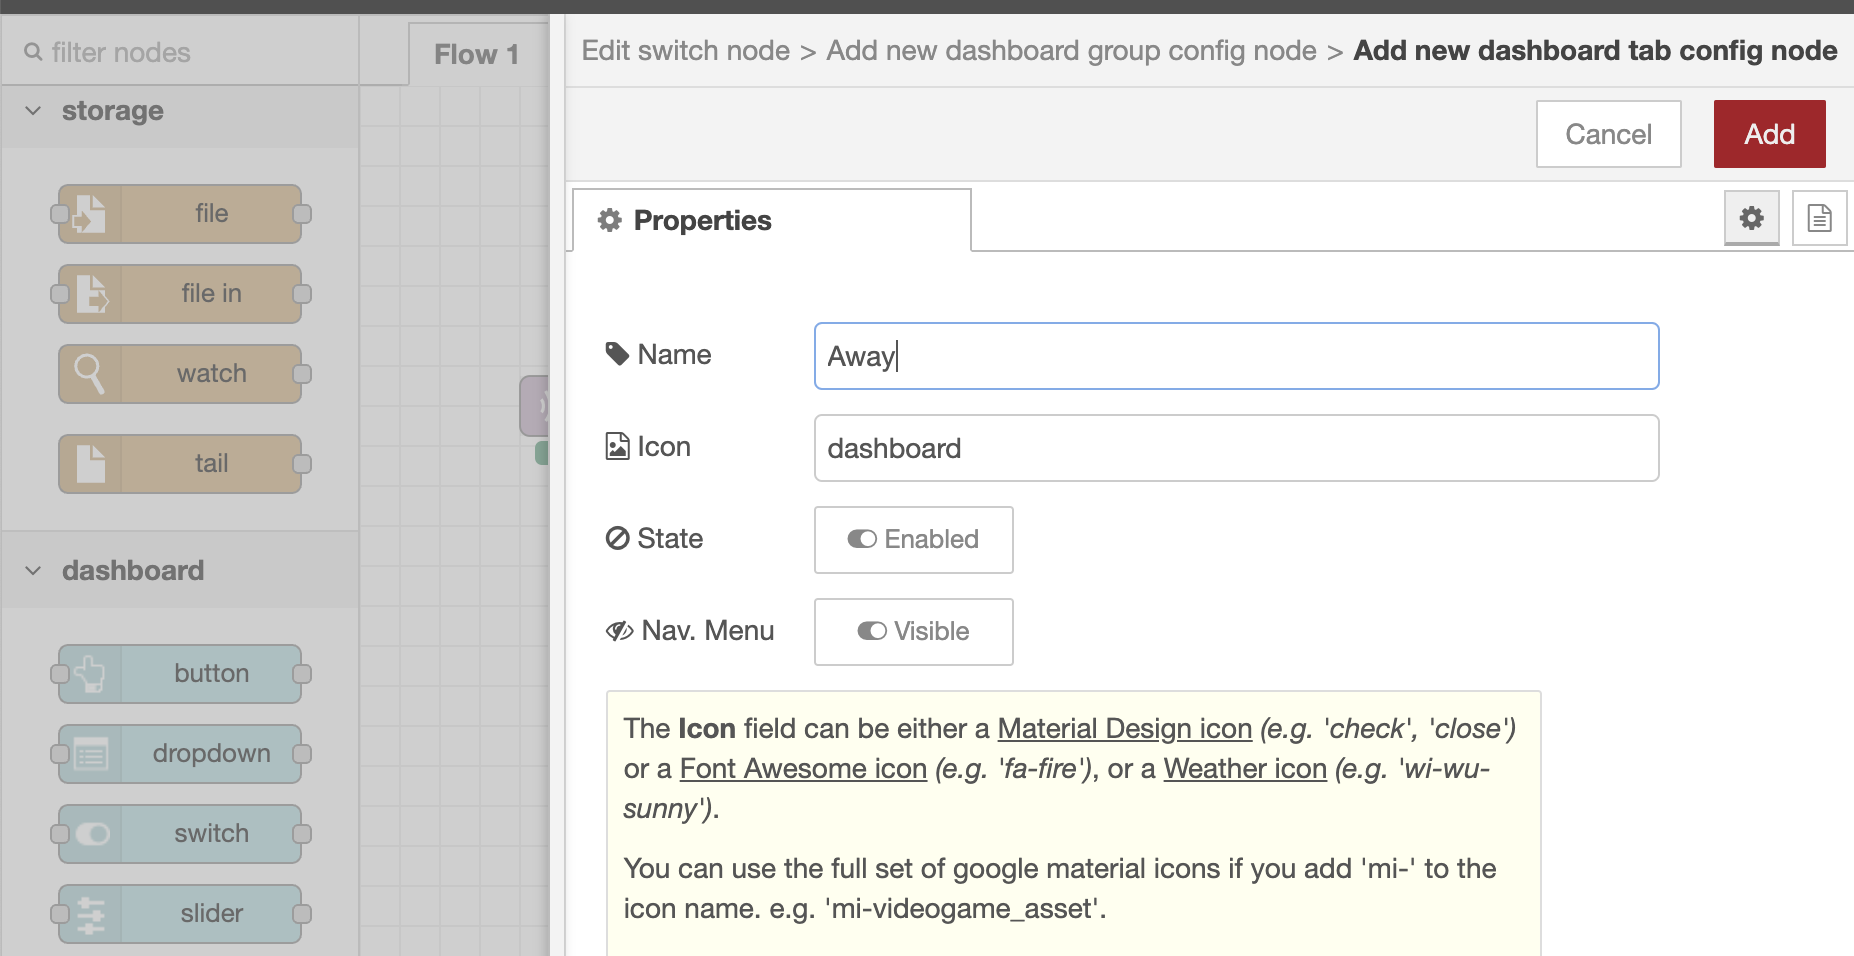
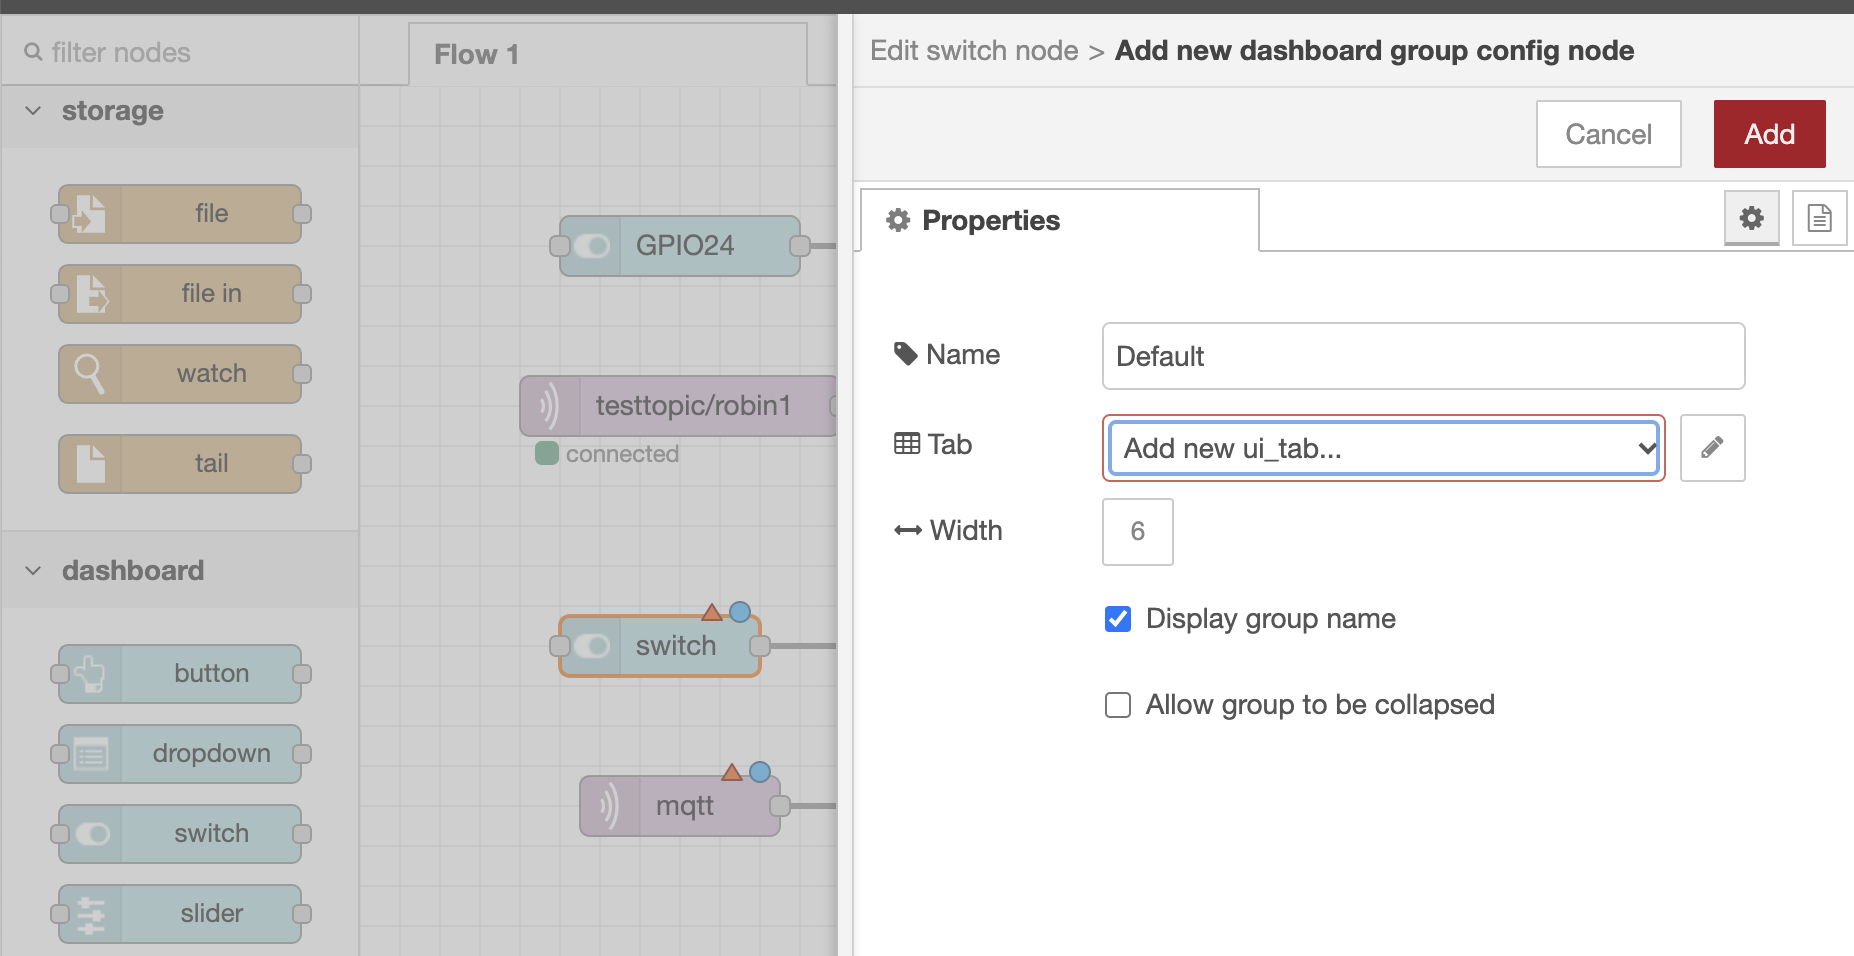
Click on the pencil and rename your new tab "Away" and click Add
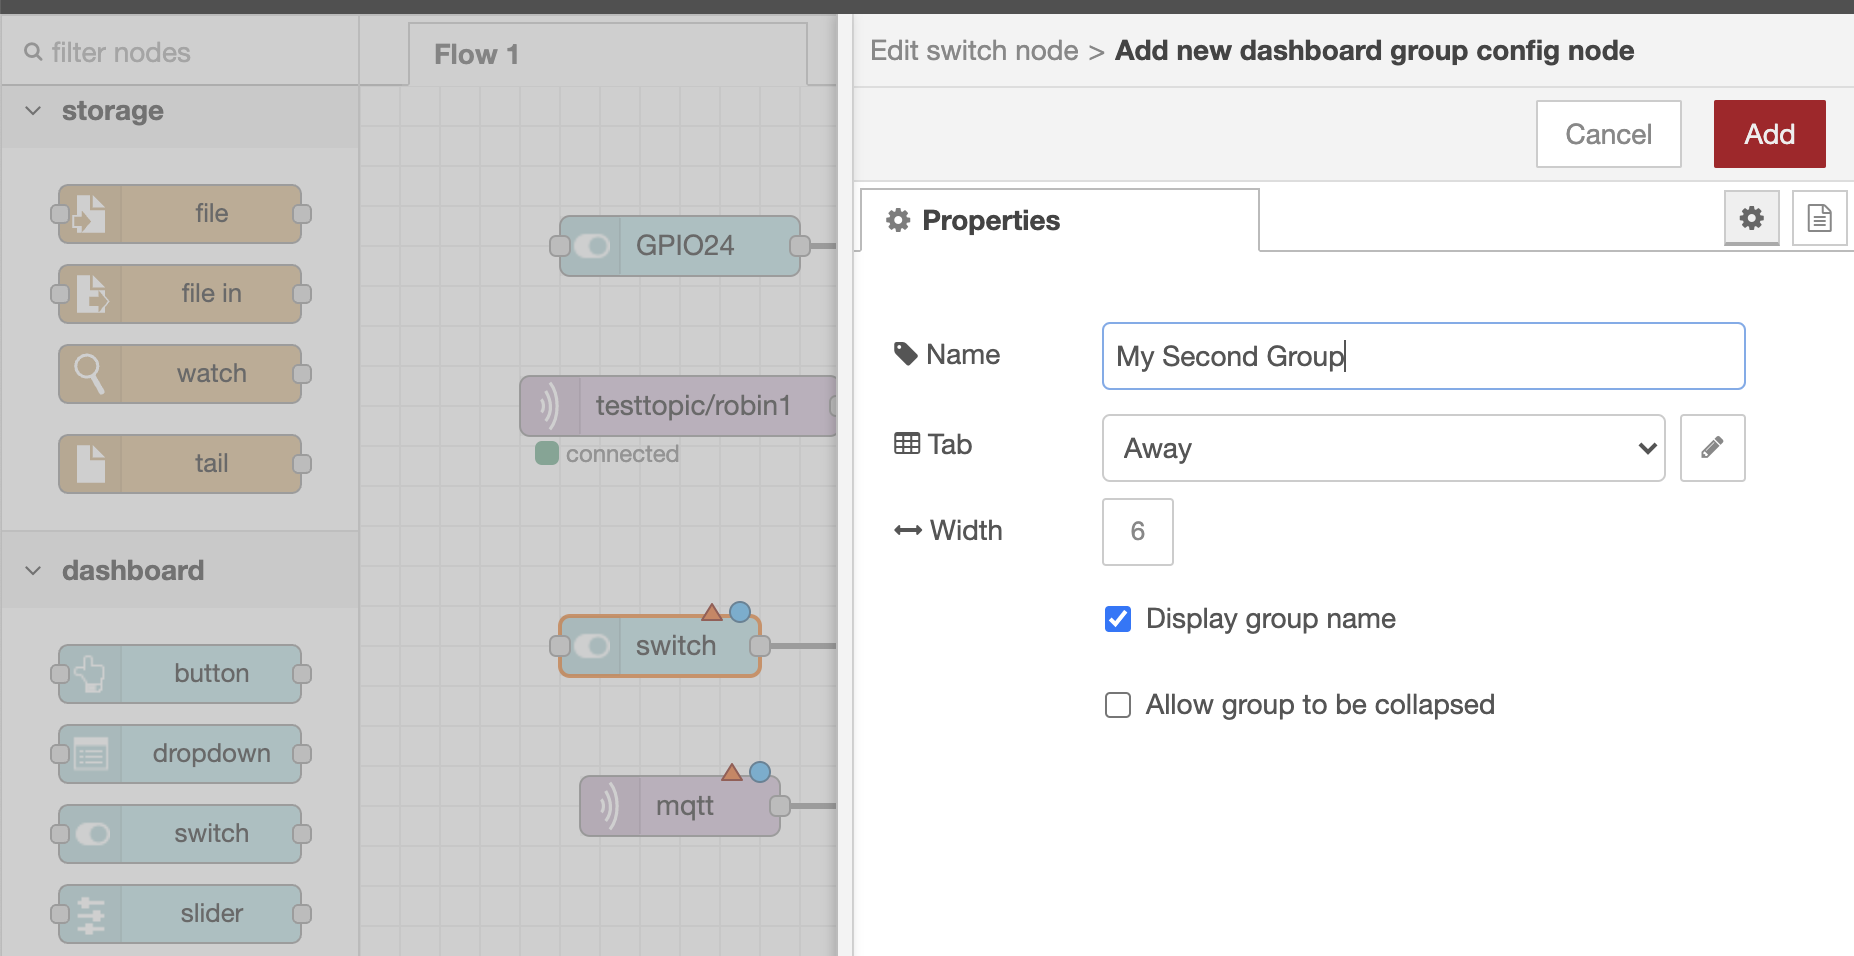
Rename the second group from "Default" to "My Second Group" and click Add

Now your switch node should have a Group of [Away] My Second Group and click Done
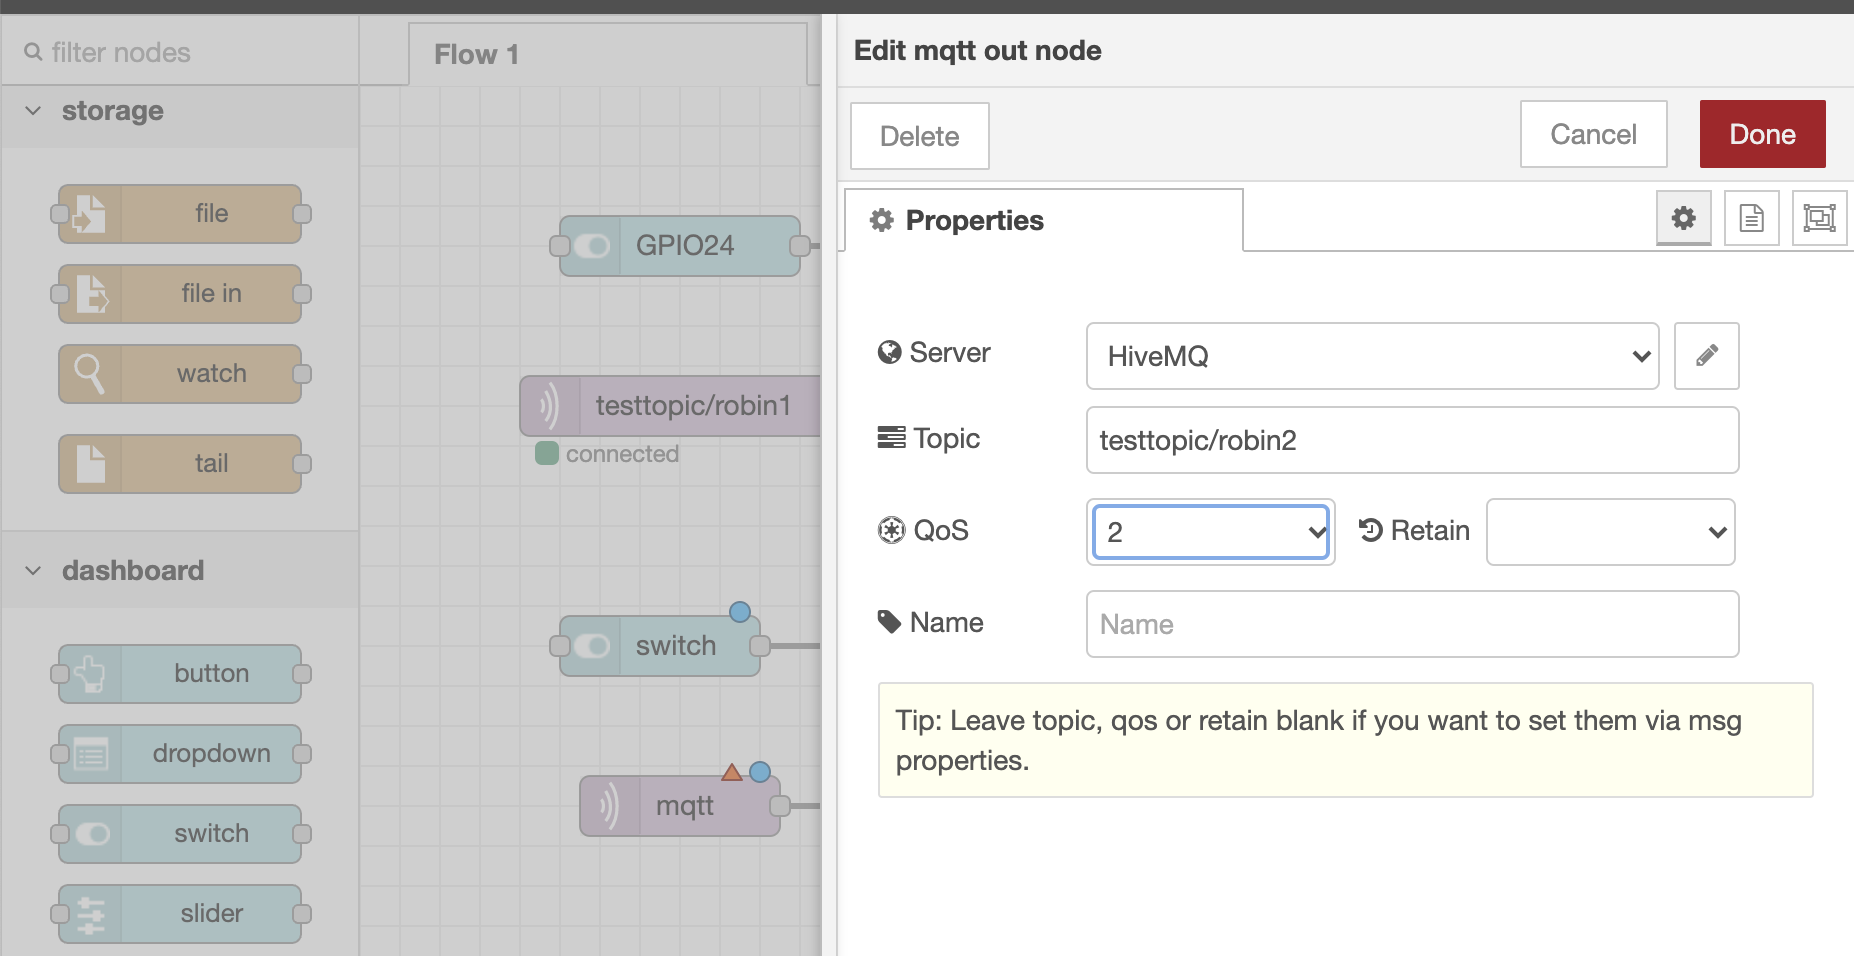
Click on the mqtt node and set the server to "HiveMQ", the topic to something new "testtopic/robin2" and the QOS to 2 for assured delivery, and click Done
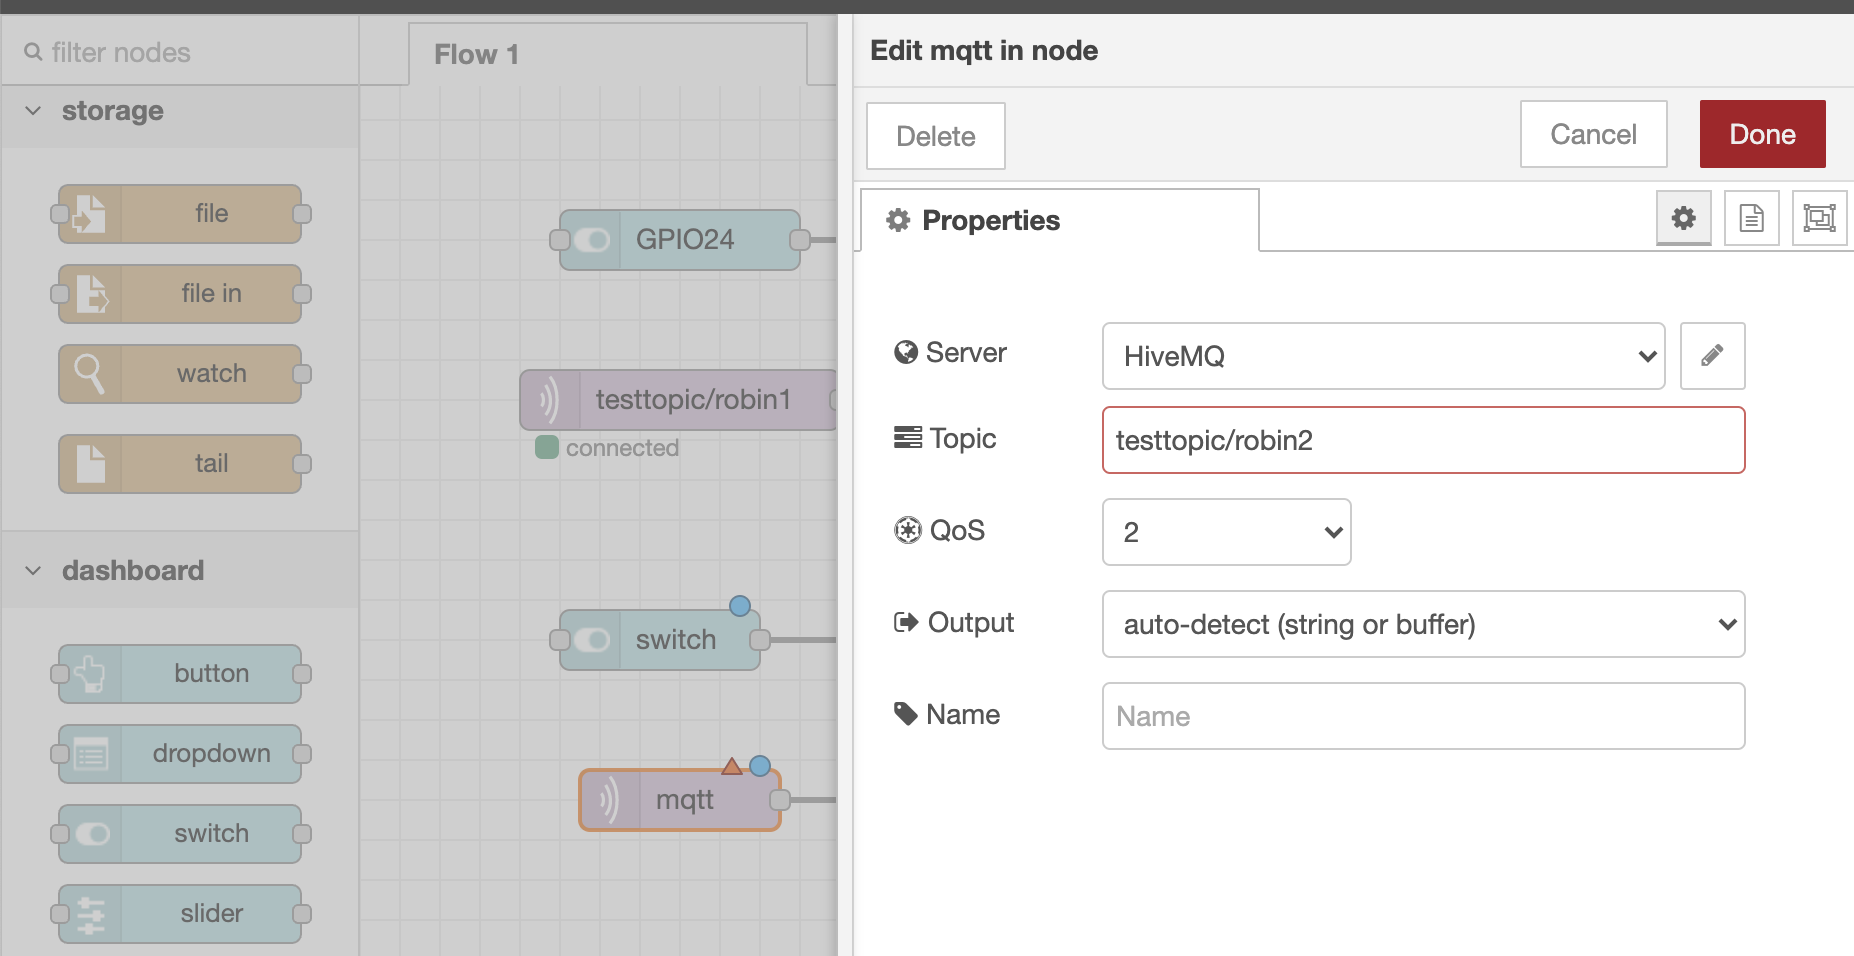
Do the same for the mqtt in node
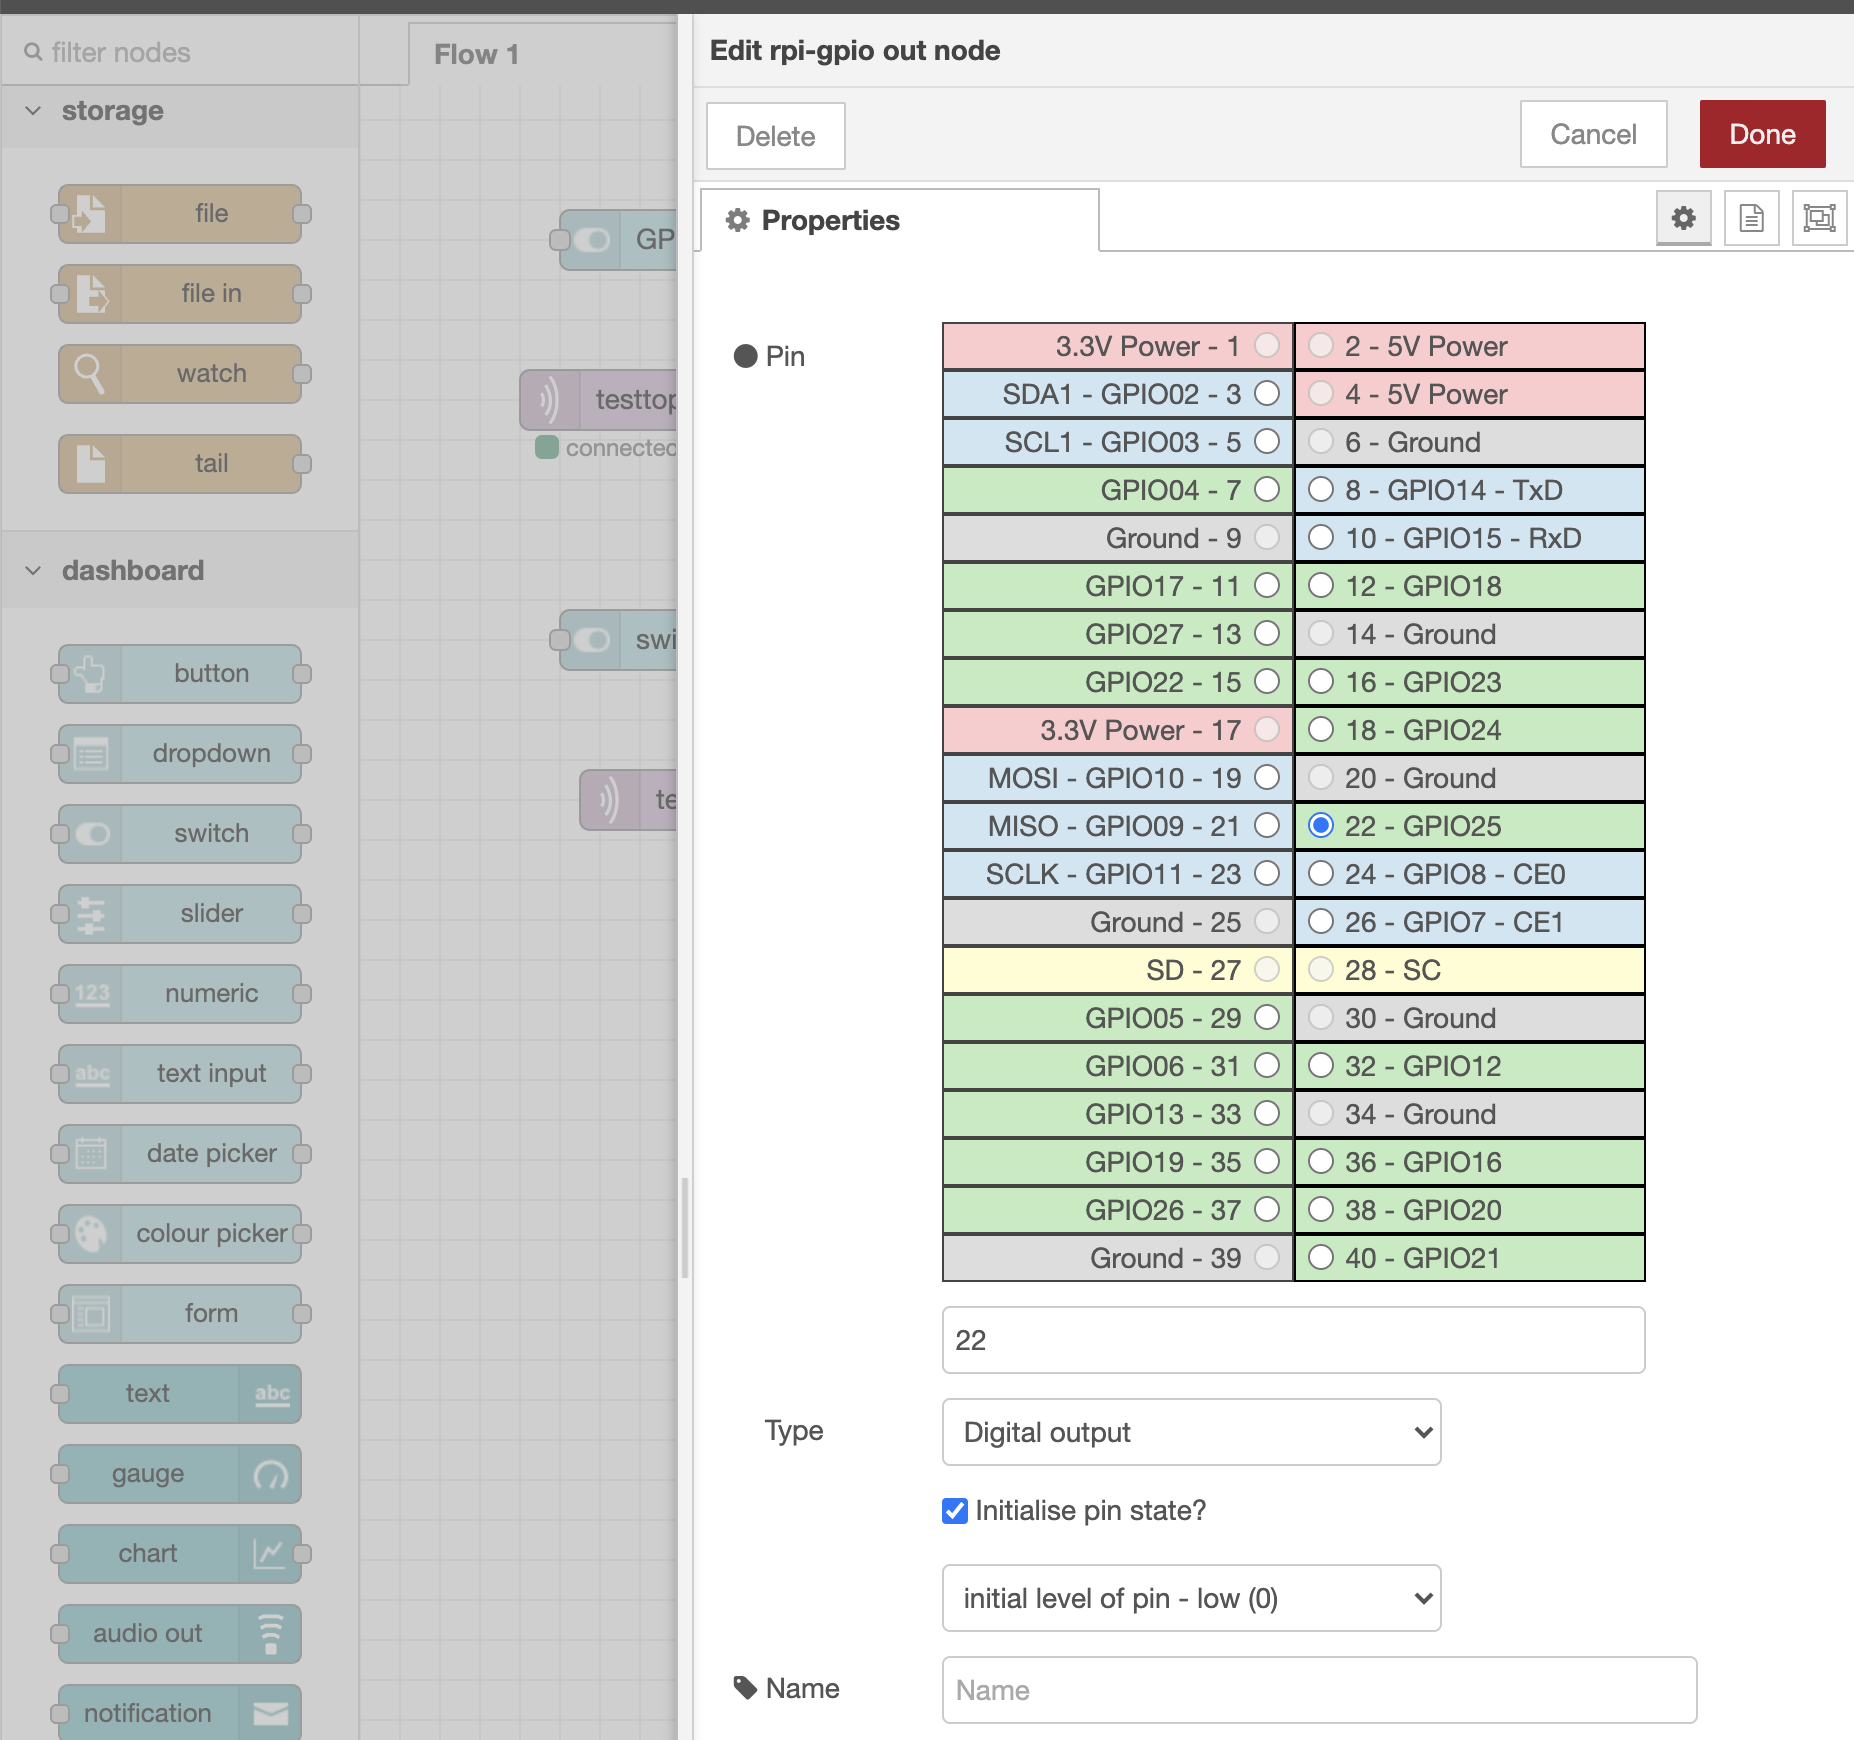
And set the GPIO pin to your desired number, and don't forget to select "Initialize pin state" if you want it to start in a Low or High state, and click Done
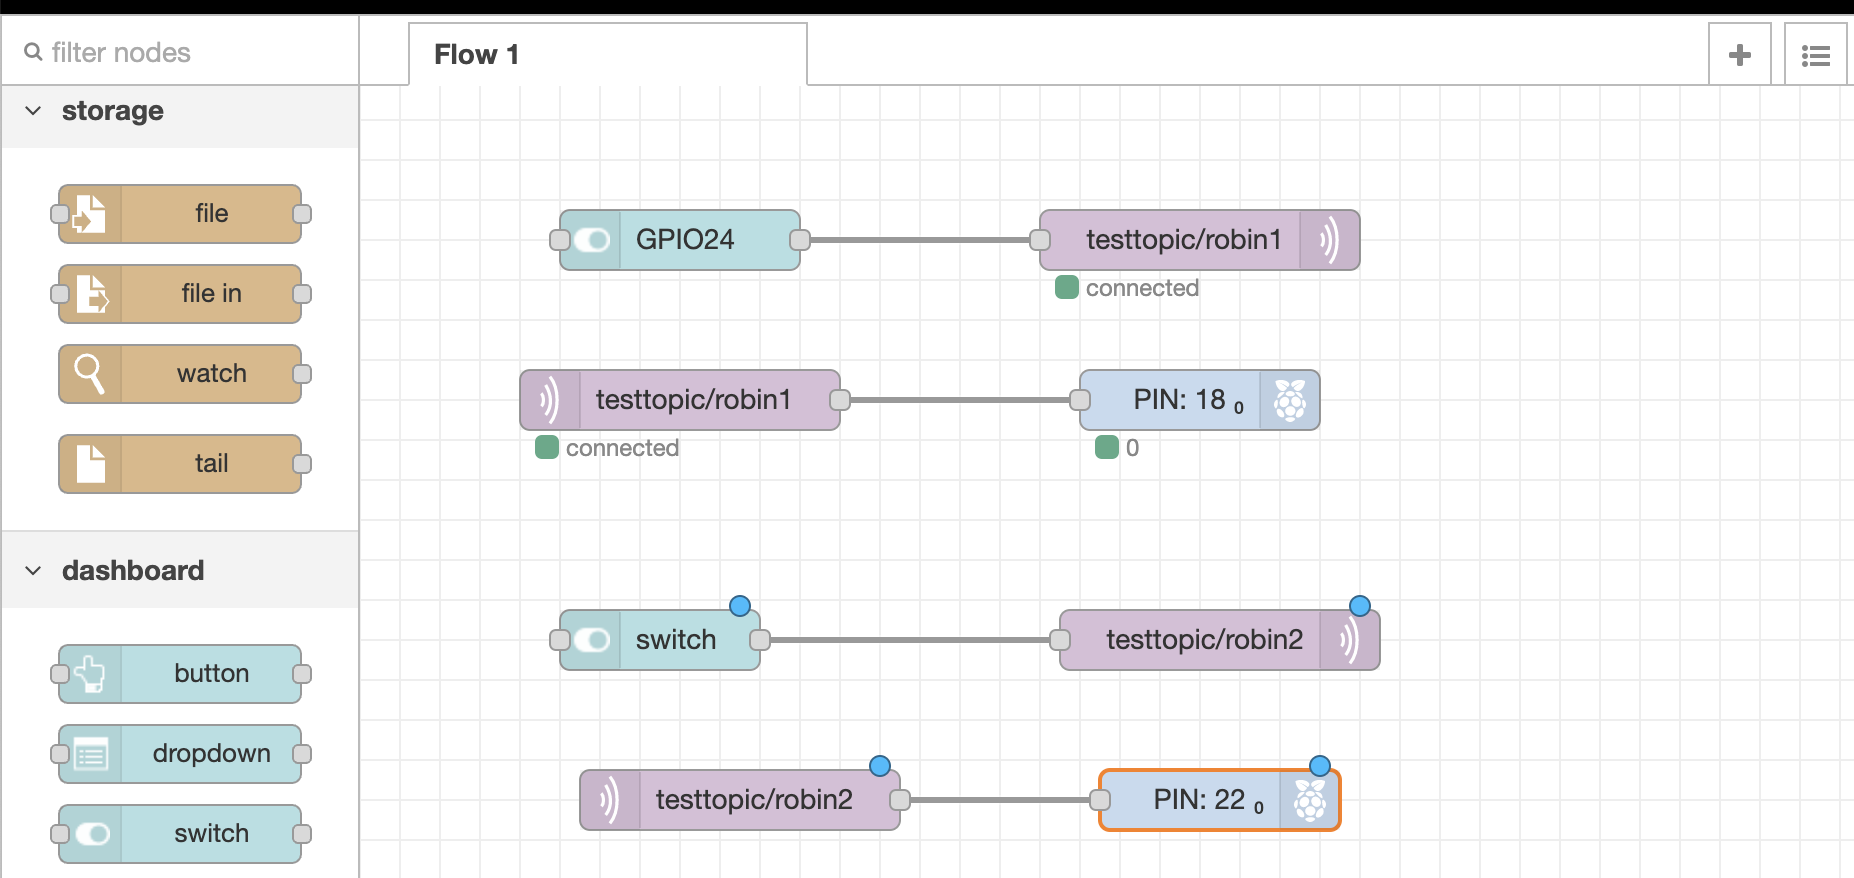
All the red triangles should be gone indicating that you configured all of the nodes and the blue circles will disappear once you've deployed the changes
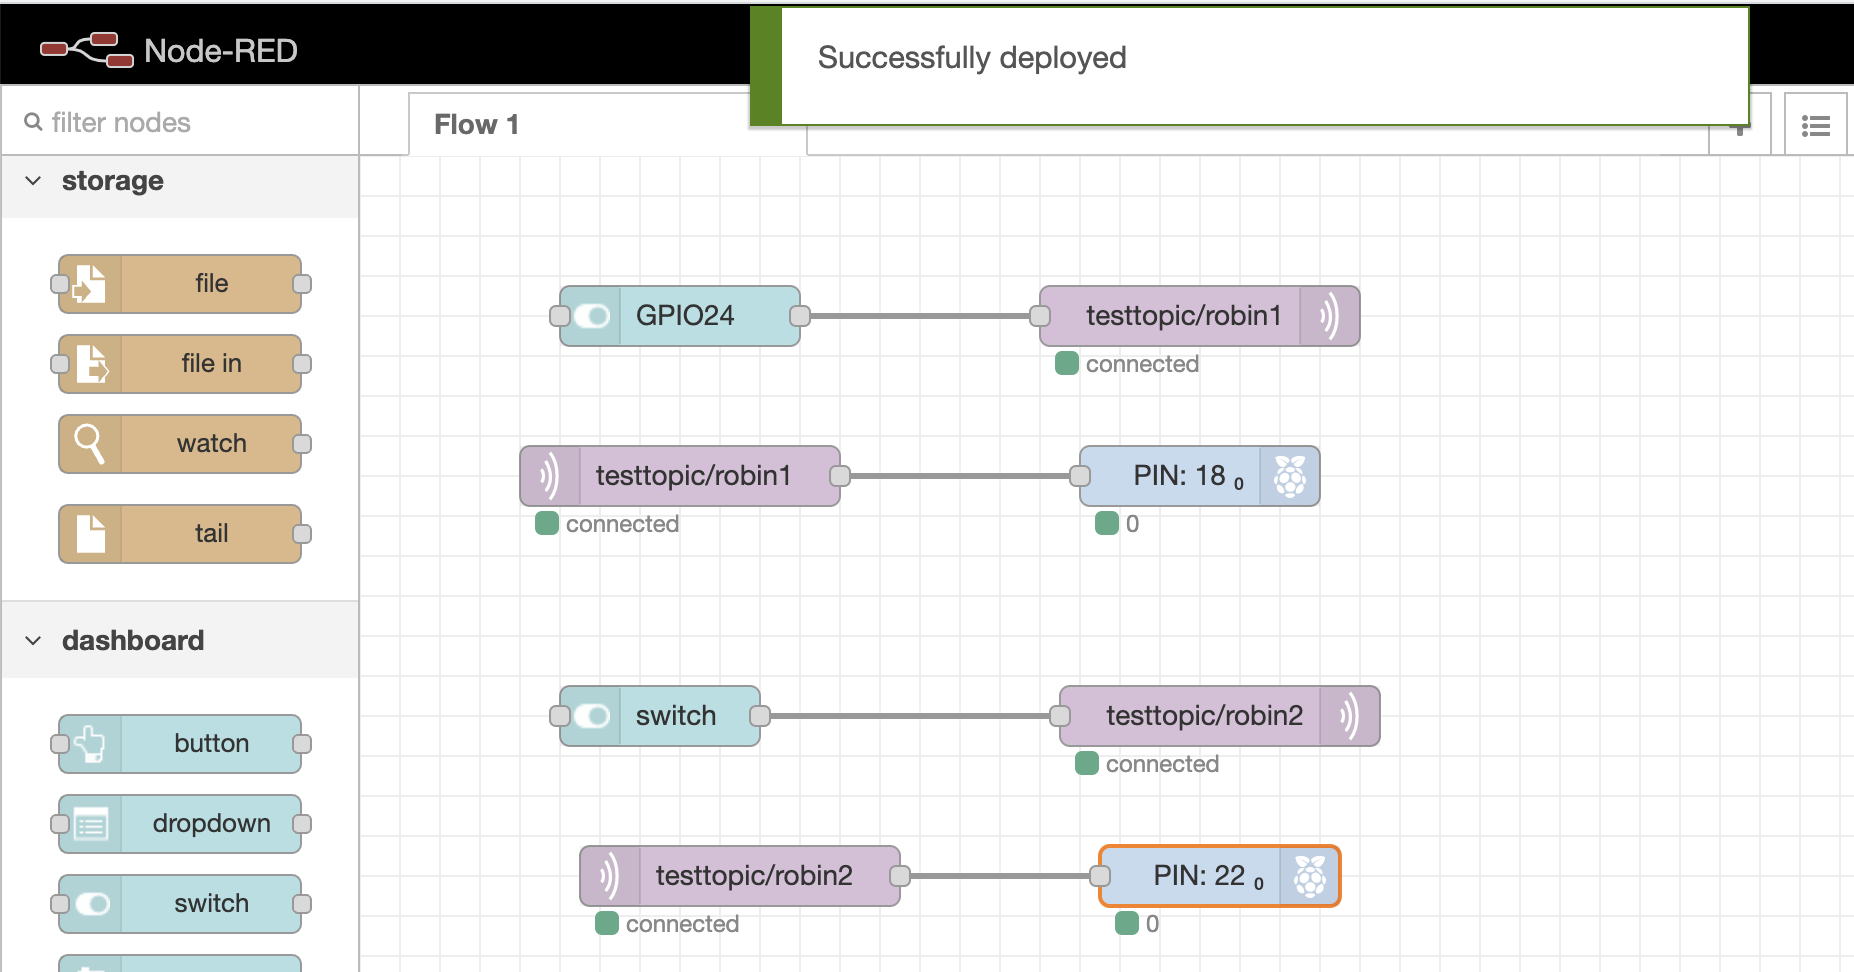
You did remember to deploy the changes right? (grin)
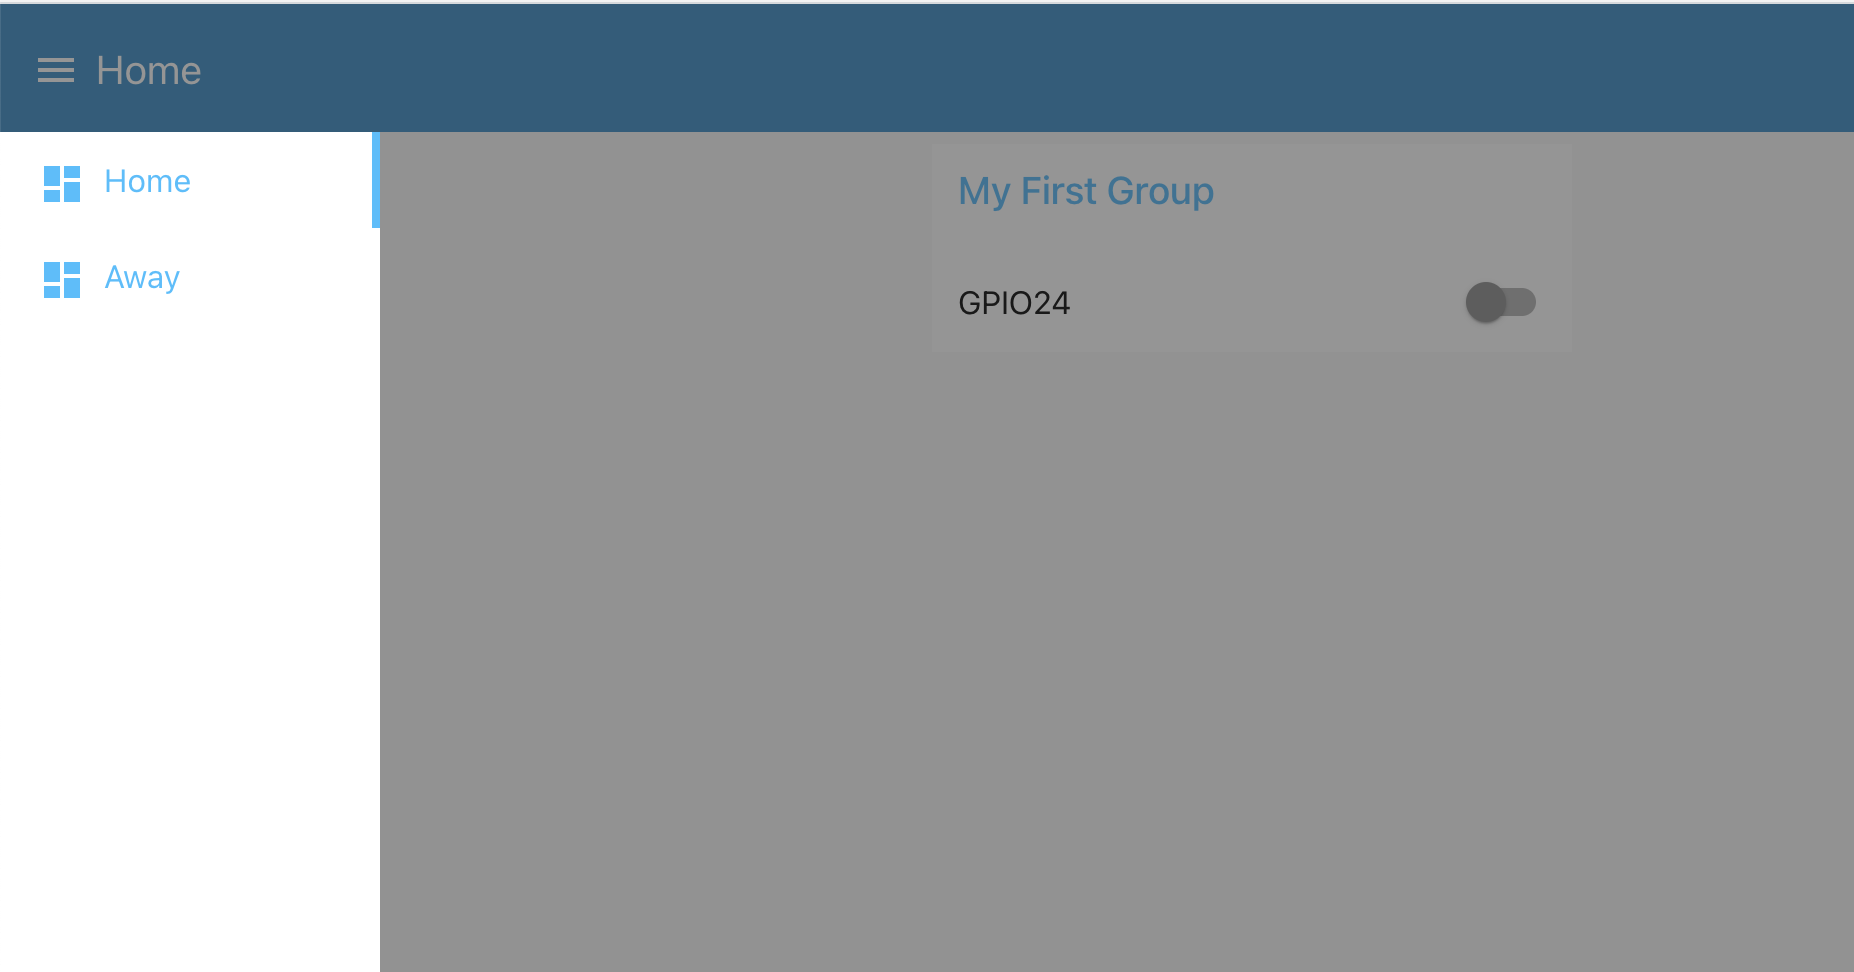
Now when you goto the UI "yourPiAddress:1880/ui" and click on the 3 bars beside the Home tab in the upper left corner you should see Home and Away (the new tab you've created)

Selecting "Home" brings up the GPIO24 switch in "My First Group"
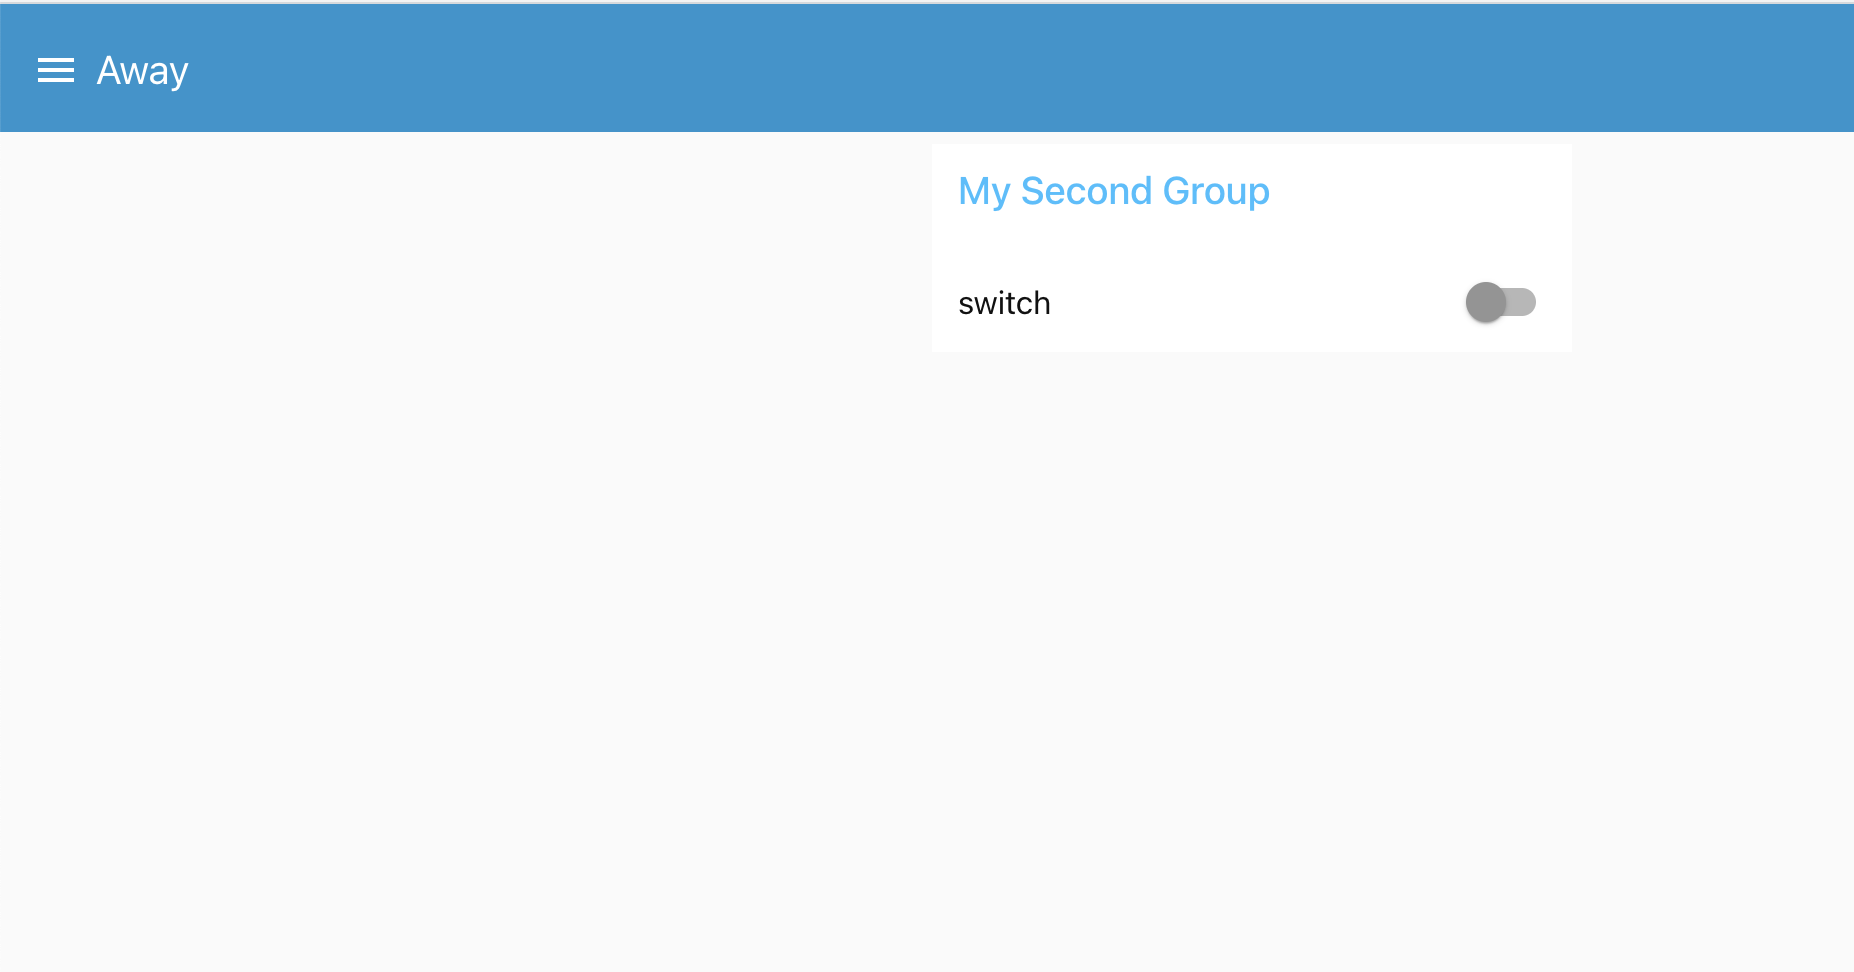
And selecting "Away" brings up the second switch in "My Second Group".
Hopefully this has shown you how you can add access to many of your different devices through Node-Red and because we are using mqtt we can control the outputs or receive input from Node-Red devices and the Pi ZeroW's running their python3 code.
Thanks for viewing!
Robin
Posted with STEMGeeks
Interesting the first time I tried the other switch block changed to the newly created tab and I had to redo its setup to get two separate ui tabs.
Yeah, it seems to default to editing the original tab/group info rather than adding a new one. I had that happen a couple of times also.
I've only used MQTT a few times and always felt like I'd really love it. I had no idea that there was a public MQTT broker available! I might need to build something, now, just to do it!
The HiveMQ broker is a great public broker and I'd also check out the Adafruit IO learn website for access to their free broker. Adafruit is one of my favorite companies to buy some very cook IoT tech from and they have great HowTo's to help you put it all together!
Congratulations @robingreig! You have completed the following achievement on the Hive blockchain and have been rewarded with new badge(s) :
You can view your badges on your board and compare yourself to others in the Ranking
If you no longer want to receive notifications, reply to this comment with the word
STOP