Android App Development | Beginner Course | Lecture#9 | Hive Learners
𝓖𝓻𝓮𝓮𝓽𝓲𝓷𝓰𝓼
Hello dear Hive Learners Community members, I hope you all are well. Today we will start our basic coding in JAVA. First, we learn the basic plus, minus, etc in JAVA then we use it in logic. Stick with me to develop a professional app,
GitHub Link
Use this GitHub project to clone into your directory. It will always get updated in the next lecture. So that you will never miss the latest code. Happy Coding!.
What Should I Learn
- How to connect design activity button in JAVA class
- how to write on click code
Assignment
- Connect a Button in JAVA
- Add on click listener
Procedure
First, you need to open the MainActivity.java file. Open this file structure and you will find the file there. app>java>com>example>hivelearners. The path may be different if your app name is not the same.
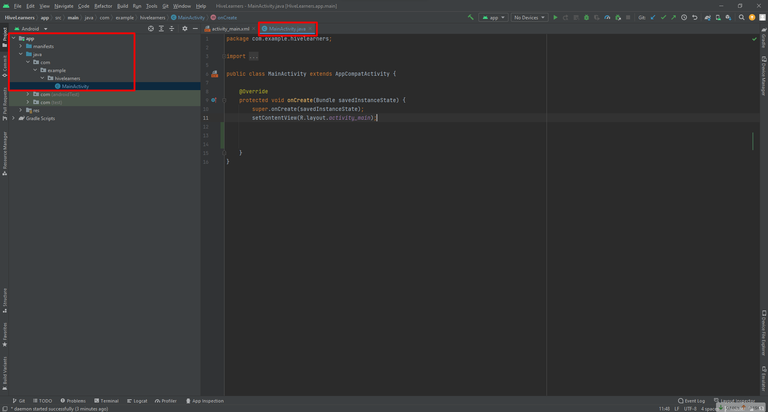
Then you need to write this code under this public class MainActivity extends AppCompatActivity { line.
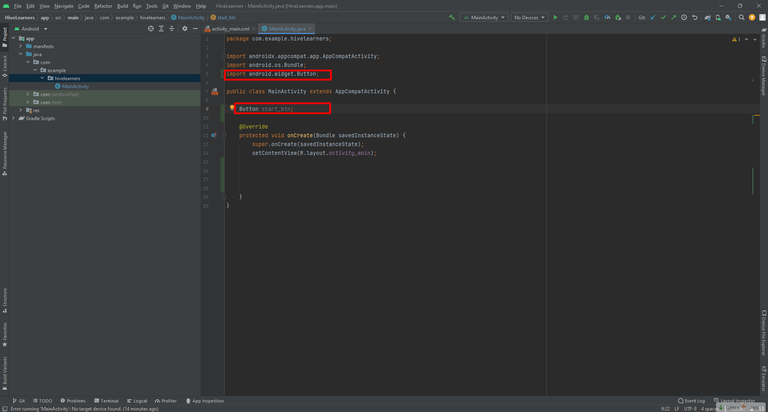
Write this code to declare the Button variable,
Button start_btn;
start_btn is the same name that we have used in the XML file with a button id. If you get any errors then use this line in the import
import android.widget.Button;
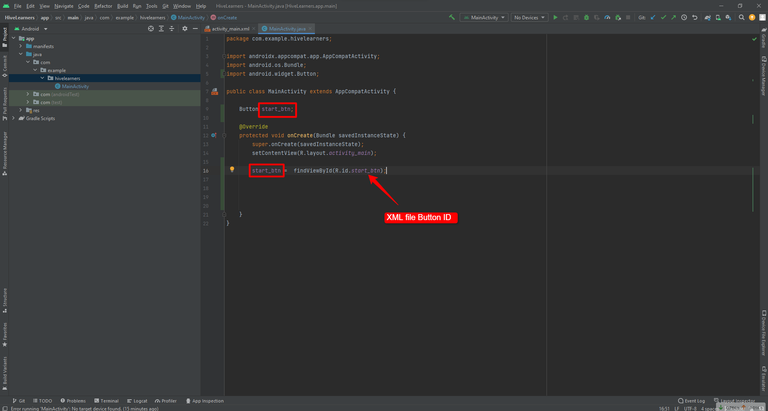
Now we need to add the reference of that button id that we have set in the XML file. The id of the XML file button and the variable name of this java activity is the same. You can change the variable name in the java activity and attach it to the XML button id by this reference line. Now need to write all the code under this line setContentView(R.layout.activity_main);
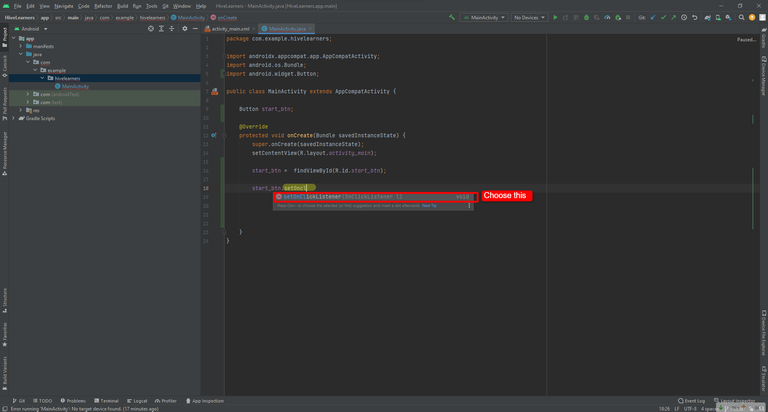
Now we can write the click button code. Write this code to act on click. where you write start_btn.setOncl you will get a hint for this choose that hint and it will write the code for you automatically.
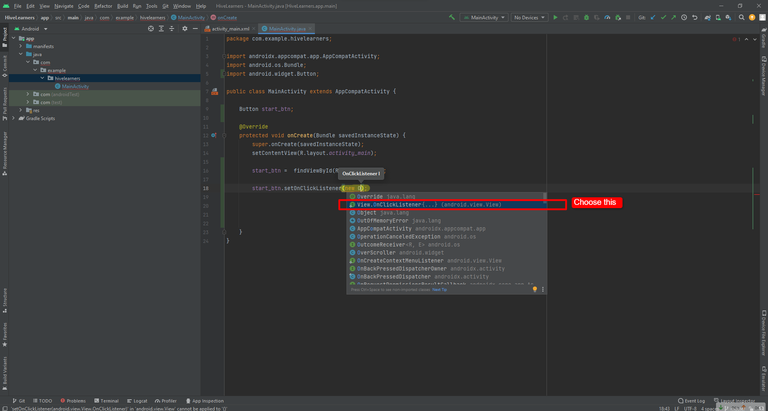
Now write new O In the small brackets and a hint appears again choose this hint to implement the listener of click. You can also write this code manually,
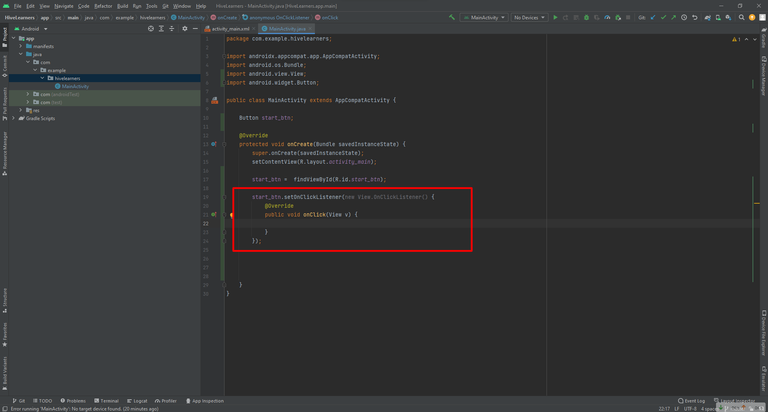
Here is the complete code of this listener
            @Override
            public void onClick(View v) {

            }
        });
We are ending this lecture here, Tomorrow we will install an emulator on our computer machine and run and display a message on our emulator screen. Take care and check the updated Github code and here is the full MainActivity.java code.
package com.example.hivelearners;

import androidx.appcompat.app.AppCompatActivity;
import android.os.Bundle;
import android.view.View;
import android.widget.Button;

public class MainActivity extends AppCompatActivity {

    Button start_btn;

    @Override
    protected void onCreate(Bundle savedInstanceState) {
        super.onCreate(savedInstanceState);
        setContentView(R.layout.activity_main);

        start_btn =  findViewById(R.id.start_btn);

        start_btn.setOnClickListener(new View.OnClickListener() {
            @Override
            public void onClick(View v) {

            }
        });


    }
}

Thank You

Thanks for the lesson to implement a buttom!
!1UP
Thank you for your nice words. 💕
You have received a 1UP from @gwajnberg!
@stem-curatorAnd they will bring !PIZZA 🍕
Learn more about our delegation service to earn daily rewards. Join the family on Discord.
Congratulations @faisalamin! You have completed the following achievement on the Hive blockchain and have been rewarded with new badge(s):
Your next target is to reach 1750 replies.
You can view your badges on your board and compare yourself to others in the Ranking
If you no longer want to receive notifications, reply to this comment with the word
STOPCheck out the last post from @hivebuzz: