My son and I rebuilt our LAN server with Lubuntu 20.x - WARNING: Fun ahead. :)
Tonight was a fun night of re-installing my server OS and installing Minecraft
I had a recent physical drive failure, and lost the OS of my local test server. Urgh.
I decided that it was time for a refresh anyway, since I was running Ubuntu 18. So it was off to read reviews of what is considered a decent OS for a low level mini-ITX form factor ADM motherboard.
After several reviews, I settled on lubuntu, the lightweight Ubuntu distro.
https://lubuntu.me/downloads/
I like the long-term releases, so I picked Lubuntu 20.04.
I run Ubuntu 20 as my main daily desktop. Yep, this was just going to be a base install for my server.
After downloading lubuntu-20.04.2-desktop-amd64, it was off to the races.

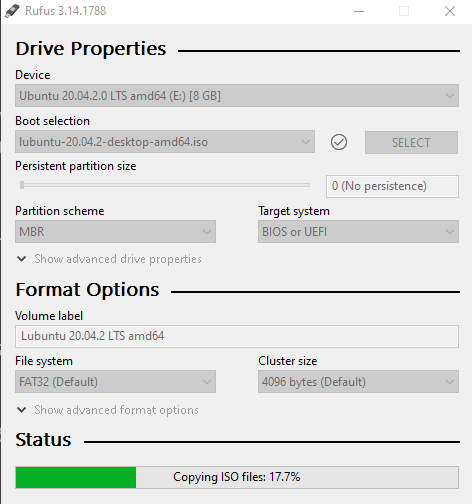
Rufus to the rescue...
If you've ever had to install an OS, it's so nice when you can download a .iso image and use Rufus (https://rufus.ie/) to 'burn' it onto a usb key.
Once that process was done (it only took a couple minutes), it was time to boot the server with the new OS install freshly burned onto a usb stick.
Having installed Ubuntu many times using different forks, etc. I knew the install process would be fairly straightforward. I don't need to re-invent the wheel since there are tons of great tutorials on how to install Ubuntu flavors. (I threw some links in the bottom of the post if you're interested)

A little cleaning goes a long way
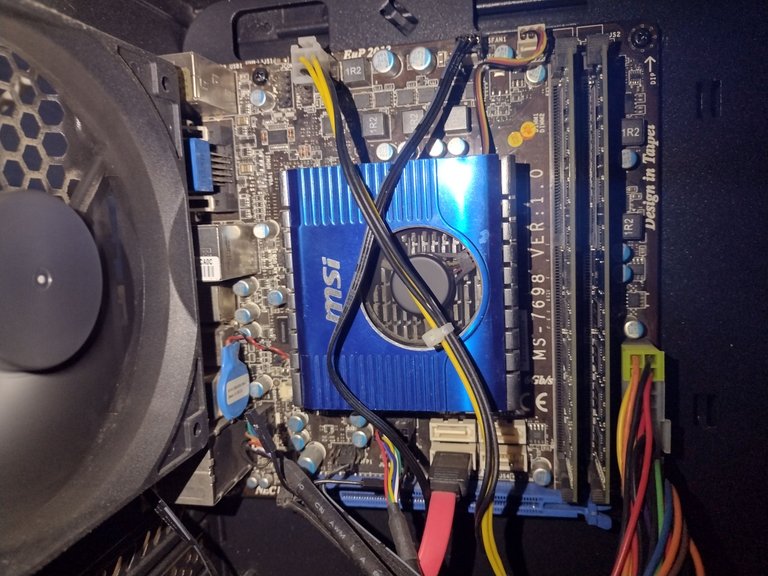
I recently bought some Endust spray for electronics. While the USB image was being burned, I cleaned the inside of the case.
MAN! It's been a while since I did this, but I didn't expect that much dust.
I also wiped off the outside of the case with some wipes. Good as new!

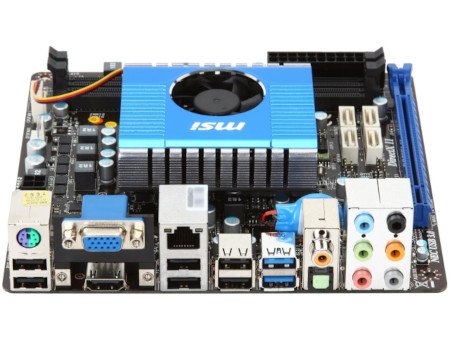
My trusty motherboard was ready to get her new OS.
AMD Hudson M1 E350IA-E45 for those interested.
Now that the motherboard was cleaned, dusted, and ready to go, I put the usb key with Lubuntu on the machine, booted it from the Lubuntu installation, and off we went.
Since the last drive was toast, I had a new 500G SSD on hand I was able to use to install the OS.
Like most Ubuntu installation, this was one guided and gave me plenty of choices. I took the defaults and installed Lubuntu. Tweaking comes after I get it installed.

A bit about passwords
I work in IT, and have for 2 decades. Here's some advice:
1) Use complex (non-guessable passwords).
Seriously. Use complex passwords. They're much less likely to get cracked, and will keep the device more secure. I recommend using passwords with camel-case (upper and lower letters) as well as numbers and symbols.
Most passwords require some complexity.
Ubuntu is also a little different because it's Linux kernel-based OS. There's 100% freedom to create a simple or complex password.
2) Use a password keeper such as LastPass or Bitwarden to store your passwords.
If you followed the first piece of advice, you created a complex password.
The tricky part is: how do you remember it?
The answer? You DON'T.
You use a password app to store complex passwords, and the only password you need to remember is the one to allow you to access your password app. (Take backups of your password file and store it securely. That's a whole 'nother post.)
I really wish people did this. It would make my job easier. I can't tell you the amount of time I have spent waiting on high-end support calls for some software company infra dudes to fumble around searching for access or password for a server.
It doesn't have to be that way. Save your passwords. (and backup your saves)
OK, done ranting. :D
We created a separate user for one of our server processes.
Because I want some server processes to run under limited account and not my own login, I created a new separate account to use with the Minecraft server I am installing for me and my son.
This new account (user aptly named minecraft) was set up and password assigned. Now when I launch minecraft after it's installed, it will be from this account.

Checked for and installed Java
The command to check for java is easy: # java - version.
The output showed we didn't have it installed, so it's time to get Java installed. (It's needed for Minecraft)
You can see from above Java wasn't installed. Installation was next using the command
sudo apt install default-jre

I also updated Java to the latest version and it's now openjdk version "16.0.1". :)
Now that Java is installed it's time to get Minecraft.
Downloading and installing the latest minecraft version.
I went to minecraft.net and downloaded the latest server.jar file. (Now it's obvious why I spent time getting Java set up.)
I renamed it from server.jar to minecraft_server.1.17.jar and placed it in it's own folder, /minecraft.
There's no real 'install' per se since it's a Java application. You just need to execute the .jar file to start the jvm.
Automating the startup
Since I know I want the Minecraft server to start when I start my Linux host, I created a start.sh script in bash and saved it in the /minecraft folder.
#!/bin/sh
while true
do
java -Xmx2048M -Xms2048M -jar minecraft_server.1.17.jar nogui
echo "restarting in 10"
sleep 10
done
This means that from now on, I can run the script to get the server running, and include all of my Java config I want to pass in when I start the Java process.
Next I made it executable via chmod +x start.sh,
I now have a startup script every time I want to launch this server. :)
Some Minecraft basics with a new server
The first time you execute the Minecraft .jar, the process outputs a eula.txt file. The process stops and you need to open and edit the file and set the eula=true in the file itself. Otherwise Minecraft won't start.
Pretty simple way to have a EULA agreement on a server than runs on command line IMO.
Use screen to launch the server and detach from it.
Linux has some great tools, and one of them is the screen command, which allows you to run commands in a terminal 'screen' then detach that screen from your current terminal window yet still continue running.
That means I won't have to worry about minecraft output from the start.sh script spewing all over my existing terminal.
After exectuting the script with ./start.sh, I was up and running!

OpenSSH to the rescue
After getting Minecraft running, now I need to get this server closed up, on my shelving, and configure ssh (secure shell) so that I can login to this server on the local network and manage it as needed without having an extra keyboard, mouse, and monitor.
The process for this is straightforward:
$ sudo apt install openssh-server
and to check the install:
$ systemctl status sshd (That's the output in the screenshot above)
Now, I just punch a hole in the firewall to allow ssh traffic into my server:
$ sudo ufw allow ssh
Since I want this to start every time the machine boots, I can enable that with:
$ sudo systemctl enable ssh
After doing some basic config, I'm now able to:
- login remotely with the minecraft user on the local network,
- detach the running minecraft process from the terminal,
- start, stop, restart the server easily.
Testing our server :)
After starting up minecraft, I launched my Minecraft Client to connect to our new server.
Wham! There it is:

Couple of odds 'n ends
After I have the minecraft server installed and up and running, it was time for some tweaking.
I reduced mem consumption down to 1024M from 2048 for the jvm since this box only has 4Gb mem total.
Changed Runlevel from 5 to 3. - Since a GUI is no longer needed on the server, I set the runlevel to 3 via:
ln -sf /lib/systemd/system/runlevel3.target /etc/systemd/system/default.targetNow when it boots, none of the gui processes will start, and I'll get better system resource utilization since I only need command line.Cranked down some user permissions and firewall rules.
I won't document these steps for now, but I did chmod a few files, set some of my ufw firewall rules, and set up some additional cron job to run a script that cleans up some logging daily, so that the server stays nice and optimized.

Onward and Upward!
Now that I have this machine hooked up, there's a lot more that I added to my To Do list. :)
I really enjoyed setting this up with Kai, (that's a photo of the both of us from last night) and he asked a lot of questions along the way.
Hopefully I can teach him to be a good admin and follow some simple practices to make his life easier with IT.
The best part of all this is now I will have a server I can use for my php\MySQL training I am working on, and a place for me to have fun playing Minecraft with my son on our own persistent LAN world. :)
Some useful links
If you're interested in setting up your own server, a little light reading is required, but it's nothing overwhelming. Here's some of the docs I used in setting this up:
https://lubuntu.me/downloads/
https://rufus.ie/
https://www.cyberciti.biz/faq/upgrade-update-ubuntu-using-terminal/
https://www.digitalocean.com/community/tutorials/how-to-install-java-with-apt-on-ubuntu-18-04
https://www.binarytides.com/linux-command-check-memory-usage/
https://linuxconfig.org/ubuntu-20-04-ssh-server
https://www.openssh.com/
https://likegeeks.com/linux-runlevels/
https://opensource.com/article/19/10/linux-server-security
https://askubuntu.com/questions/225471/how-to-install-minecraft-server
https://www.vultr.com/docs/how-to-install-a-minecraft-server-on-ubuntu-20-04
Final Thoughts
If I could give any piece of advice, it would be:
NEVER run any of the commands above without first reading the docs and man pages for a command and fully understand what you are doing.
Otherwise you can do harm to a server by running commands that are destructive. In my case, this is a test server that I don't use for anything permanent.
I enjoyed this process especially since Kai helped me every step of the way, and will make more of these posts whenever I need to do server maintenance or security updates. :)
Peace and love,
-Rob
P.S. Since I am trying to get back into doing regular posts, I also wanted to say that I am #alive, and part of the #aliveandthriving crew :)
Edited to add: After reading today's AliveChat, I am tagging this with #aliveandthriving. Nice job @flaxz and Alive tribe!
Thanks for sharing your server installation and time with your son, I use KeePass to store my passwords by the way, but great tip, and really nice to see you have already picked up the new tag too, we are just working out the details, plus we have some remodeling to do for the ebook as well, it's better to do one ebook and make it good and try to make it simple and easy as well, stay !ALIVE
100% agree. The more you can streamline it into one ebook, the easier it will be to promote. I just want to make sure we don't dilute it too much with too many items so that the main message of alive and thriving gets lost.
I actually have the idea quite clear on how to handle that, and I will update the mindmap quite soon too.
!ALIVE
You Are Alive and have been rewarded with 0.1 ALIVE tokens from the We Are Alive Tribe, and it's paid for by the earnings on @alive.chat, swing by our daily chat any time you want.

You Are Alive and have been rewarded with 0.1 ALIVE tokens from the We Are Alive Tribe, and it's paid for by the earnings on @alive.chat, swing by our daily chat any time you want.

I forgot to add that above, but here's a screenshot of me fishing on the server with Kai. :)
Wow. I must commend you by saying you have really done well. But i think the Lan can be commercialised so you can earn more money from that as well if you really wish to
Thanks for sharing your experience with installing the server and minecraft, Rob! Holy Cow! That's quite a process. You do some really cool bonding stuff with Kai! I am still toying with the idea of installing Linux in some form on my older laptop. I may be bugging you when I am ready to mess around with that. As far as password storage and generation goes, I have been using the paid version of Roboform for years. Love not having to think of passwords on my own. I remember the days when I used the same username and password (the name of my cat at the time) for every account. That's why I started using Roboform in the first place.
Thanks for your contribution to the STEMsocial community. Feel free to join us on discord to get to know the rest of us!
Please consider supporting our funding proposal, approving our witness (@stem.witness) or delegating to the @stemsocial account (for some ROI).
Please consider using the STEMsocial app app and including @stemsocial as a beneficiary to get a stronger support.
Excelent job.
Congratulations @robwillmann! You have completed the following achievement on the Hive blockchain and have been rewarded with new badge(s) :
Your next target is to reach 1250 replies.
You can view your badges on your board and compare yourself to others in the Ranking
If you no longer want to receive notifications, reply to this comment with the word
STOPCheck out the last post from @hivebuzz:
wow. 1000 replies. Here's to the next 250. :)