Step by step guide to setup a IPFS node
Nowadays IPFS node is important for running some blockchain applications and nodes. For example, SPKCC uses IPFS and it is important to have a local node running use the configuration if you SPKCC config files. I usually prefer running my nodes using pm2 instead of Docker. But both are good with their own advantages. In my case the nodes are pretty lightweight if I do it with pm2 and also version management is easier for me. So I prefer the non-docker method.
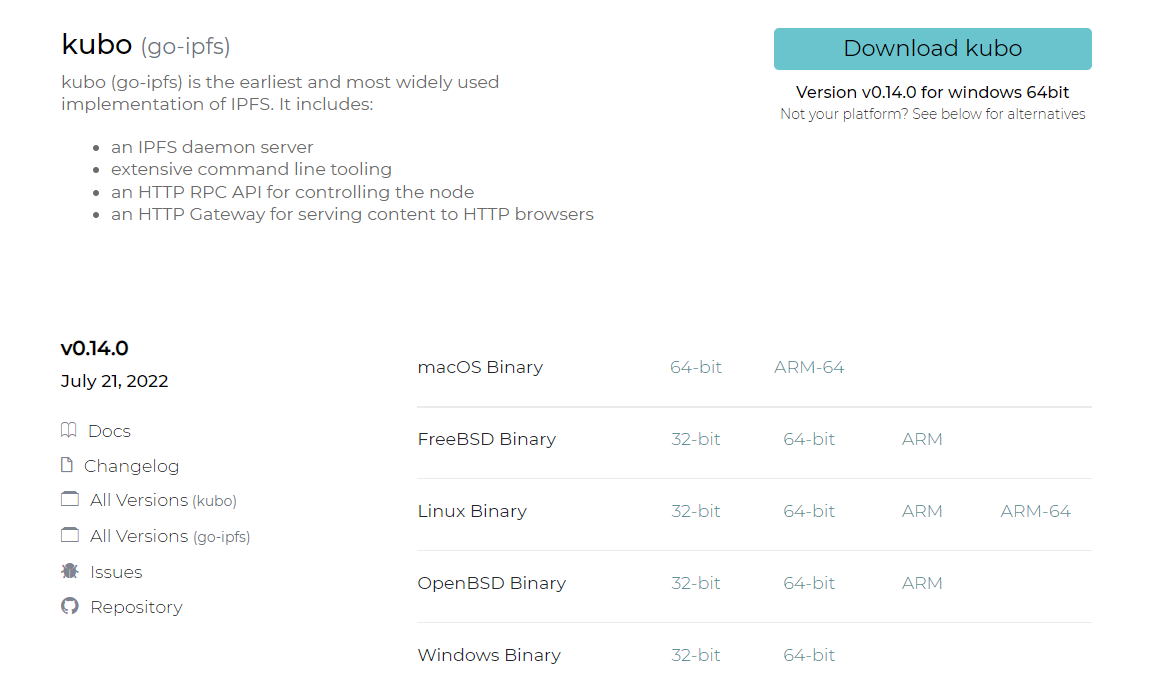
We are going to be installing kubo in this setup guide. The current version of kubo at the time of writing this article was v0.14.0 and before this version, it was called go-ipfs. I was using an older version on one of my servers and recently installed the new version on a different server. I wanted to write this step-by-step guide so that it is useful for me when I want to do it the next time. Of course, it is also helpful for people who are doing their first-time setup as well.
Step 1: Download and exact the setup file
There are two places to get the IPFS setup file.
The above gives us some details and links to other things if we want. We can download the tar file from there based on the version of our operating system.
Another alternative place is to check for the new releases of kubo from the GitHub releases page and pick the tar file from there. There will be multiple files available and good to pick the file based on our operating system.
https://github.com/ipfs/kubo/releases
Use the below command to download the setup file. I wanted these files to be inside a folder, so I created a new directory called ipfs and extracted the file there.
mkdir ipfs
wget https://github.com/ipfs/kubo/releases/download/v0.14.0/kubo_v0.14.0_linux-amd64.tar.gz
tar xvfz kubo_v0.14.0_linux-amd64.tar.gz
Step 2: Install IPFS
The next step is to navigate inside the folder and execute install.sh file.
cd kubo
sudo ./install.sh
After the installation is complete, the below output will be displayed in the logs.
Moved ./ipfs to /usr/local/bin
This doesn't mean that the IPFS node is running already.
Step 3: Initialize IPFS
The below command is for initializing IPFS.
ipfs init --profile server

The above command will initialize the IPFS node at ./root/.ipfs
Note: The server profile option is recommended for running in a data center. Using this profile will prevent IPFS from trying to discover local nodes, and reduce network traffic. Some hosting providers also have a policy against running IPFS, unless you use the server profile.
Step 4: Update the config file
The next step is the navigate to the initialized folder and update the config file.
cd ~\.ipfs
nano config
There are no big changes required if you would like to retain the default settings. If you would like to change some of the settings, updating the config file is important. There are two things that people usually change. The first is to update the maximum storage limit. By default, it is 10G and it can be changed to any value based on your need.
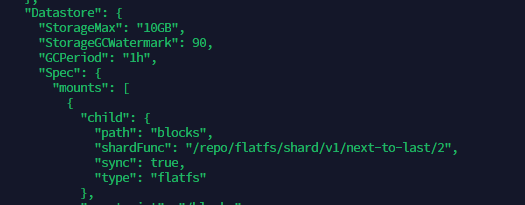
The second change is the port number. Again this is also not a mandatory step but I wanted to change it. In my case, I changed the port number of the API from default 5001 to 4002. You can change it to whatever you want.

Step 5: Start the Server
We have to run the server with the help of pm2. If you don't have pm2 installed, you have to first install nodejs and then install pm2. Assuming this should be a known step, I'm not going to cover that part in this tutorial. Use the below command to start the server:
pm2 start "ipfs daemon --enable-gc" --name ipfs --time
The above command will name the service as ipfs and also start the server with garbage collection enabled. If you want to restart the service if the memory consumption is high, you can include other criteria.
pm2 start "ipfs daemon --enable-gc" --name ipfs --time --max-memory-restart 3G
The above command will restart the node if the memory goes beyond 3G. You can customize it however you want.
After the service is started, you can view the logs with the below command:
pm2 logs ipfs
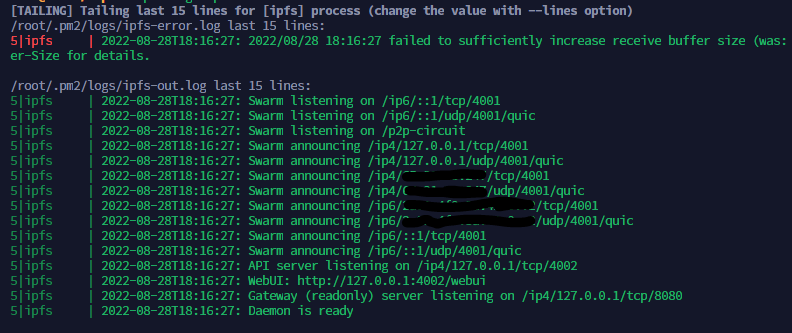
Based on the ports we changed, the API server is running in 4002.
The setup is complete and the IPFS can now be used in your apps. With this IPFS setup, my previous guide to set up the SPKCC node is now outdated. I will try to publish an updated guide including these steps.
Upgrading the node
The instructions are pretty much the same for upgrading the node as well.
If you like what I'm doing on Hive, you can vote me as a witness with the links below.
 |
 |
 |
 |
 |
 |
Posted with STEMGeeks
Congratulations @balaz! You have completed the following achievement on the Hive blockchain and have been rewarded with new badge(s):
Your next target is to reach 20 posts.
You can view your badges on your board and compare yourself to others in the Ranking
If you no longer want to receive notifications, reply to this comment with the word
STOPTo support your work, I also upvoted your post!
Check out the last post from @hivebuzz:
Support the HiveBuzz project. Vote for our proposal!
This post has been manually curated by @bhattg from Indiaunited community. Join us on our Discord Server.
Do you know that you can earn a passive income by delegating to @indiaunited. We share 100 % of the curation rewards with the delegators.
Here are some handy links for delegations: 100HP, 250HP, 500HP, 1000HP.
Read our latest announcement post to get more information.
Please contribute to the community by upvoting this comment and posts made by @indiaunited.
Good for SPKCC users! Your posts are very helpful into the hive world programming

!1UP
You have received a 1UP from @gwajnberg!
@bee-curator, @stem-curator, @neoxag-curator
And they will bring !PIZZA 🍕.
Learn more about our delegation service to earn daily rewards. Join the Cartel on Discord.
PIZZA Holders sent $PIZZA tips in this post's comments:
@curation-cartel(17/20) tipped @balaz (x1)
Please vote for pizza.witness!
Congratulations, @balaz Your Post Got 100% Boost.
@theguruasia Burnt 381.126 UPME & We Followed That Lead.
Contact Us : CORE / VAULT Token Discord Channel
Hi @Balaz, I find your posts very interesting especially for those of "steps by steps".
Just 2 questions:
I do have a hickup with the Docker/NGINX setup of the SPK ClaimChainNote, the API doesn't get adequately published since the last pull and build. Are you running this config + caddy for your note?