Tutorial: How to Setup a VPN on a Linux system Using VPNBOOK

The VPN is a technology for adding security and privacy to private networks as well as public networks. VPN can be used to bypass blocked websites in your area, and to hide on a network from intruders, and to hide browsing activity from local networks and Internet service providers.
For example, suppose you live in Indian Mumbai, but when you run a VPN you will actually look like you live in New York City ...
Step 1: Open the Firefox browser and go to the vpnbook.com site, and now click on OpenVpn:
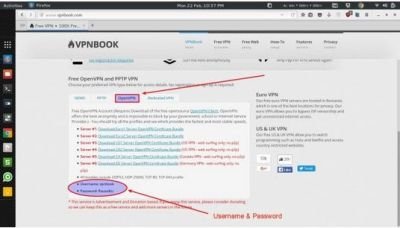
It is preferred to choose server # 1, and you can choose another server if you prefer ... The file will start downloading.
Keep the username and password in the image because we'll need them later ...
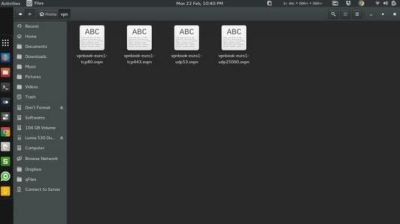
Step 2: Make a folder inside the Home Folder and rename it vpn, extract the file you downloaded into the vpn folder we created, your vpn folder will look like this:
Step 3: Open any of the existing files, I will choose vpnbook-euro1-tcp80.ovpn, click on the file and open it with any text editor, now copy the shaded lines in the image starting after the tag and up to the tag </ ca> :
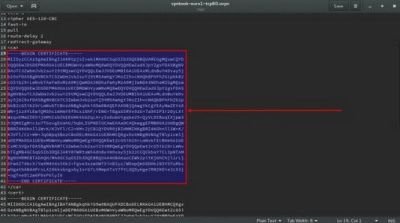
Create a new text file and paste the lines we have copied into it ...

Step 4: Save the new text file and rename it ca.crt in the vpn folder we created earlier ...
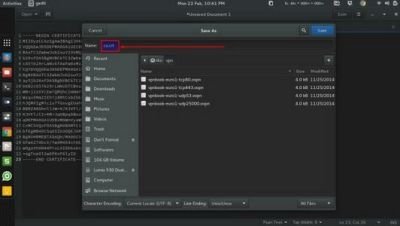
Also create a file named certificate.crt and paste into it those lines we copied earlier, and also create a file named key.key and paste into it the same lines, and save them in the vpn folder.
Step 5: Open the network settings, and add the VPN:
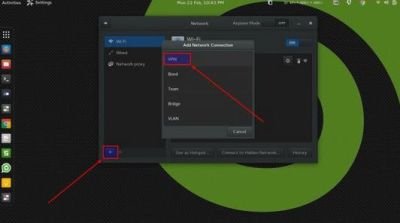
Open Another window, choose Import from file, and then choose the vpnbook-euro1-tcp80.ovpn file that we chose the previous time from the vpn folder we created ...
Step 6: A new window will appear, change the Type to Password with Certificates (TLS)
In the username box, type vpnbook, and use the password we noted in step 1, I should note that vpnbook constantly changes passwords, so verify that the password is correct ...
Then click on "User Certificate" and select "certificate.crt". For CA Certificate, choose "ca.crt". For Private Key, choose "key.key"
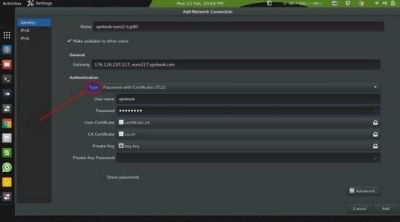
Press Add and close the window.
Step 7: We've finished setting up a VPN, it's time to turn it on!
Through the network icon, you will see a VPN option, press Connect.

- Note: You can visit whatismyipaddress.com to verify that the VPN works successfully.
Thank you for the contribution. It has been approved.
You can contact us on Discord.
[utopian-moderator]
Hey @steemtimes I am @utopian-io. I have just upvoted you!
Achievements
Suggestions
Get Noticed!
Community-Driven Witness!
I am the first and only Steem Community-Driven Witness. Participate on Discord. Lets GROW TOGETHER!
Up-vote this comment to grow my power and help Open Source contributions like this one. Want to chat? Join me on Discord https://discord.gg/Pc8HG9x