More Retro Game Development With Tic-80
Introduction
Welcome back to my second post on using Tic-80 for retro game development. If you missed the first post, head to the following link, which has a little more on the reasoning behind the articles, I’m writing and will give you a little extra background on getting started with Tic-80:
https://hive.blog/coding/@run.vince.run/retro-game-development-using-tic80
Not only is Tic-80 a great way to get started with retro game development, but it is also a great way to get started in programming. Tic-80 has the ability for developers to develop their games in different programming languages such as JavaScript or moonScript, but in this article and with a lot of the programming used in Tic-80 games, have used Lua to create their games. Although Lua is a fairly basic language, it still has a lot of functionality including loops, functions, if statements and for the more advanced programmers, can even incorporate Object Oriented Programming. Don’t worry, this article is still focused on getting started so there won’t be anything like that yet.
If you’ve used Tic-80 before, you’re probably a little annoyed. I keep calling the games we are making, programs as you probably know I should be referring to our programs as carts or cartridges. This is a tribute to the original cartridges used back in the 80’s for gaming consoles like Atari and NES. We’ll make sure we use the term cartridges or carts from now on.
It Seems To Good To Be True
I struggled with a lot of the concepts programming for Tic-80 when I first started as things seemed simply too easy to actually work, but as you might see in the rest of this article it actually is. In the following part of the article, we are going to use the default cartridge Tic-80 provides when you open the editor to get started. We’ll expand things further to make it our own and hopefully show you it actually is as easy as it seems.
1.Open Tic-80 to get things started. We will already have the default cartridge to get things started. Instead of getting into the cartridge straight away, we will first save it under a name we will remember and can use throughout this article. We’ll call the cartridge hellohive using the save command. You can see in the image below, when we save the cartridge it automatically adds the .tic file extension:

2. Move into the editor by typing “edit” in the console or pressing the ESC key. We saw in our last article, we have a nice “Hello World” application set up for us. We can basically remove everything we have in here as we are going to be replacing it with our own version of the cartridge. For now, we can keep the metadata in the top four lines of our cartridge, make sure you add in your own details for the title, author, desc, and make sure the script is also lua:
-- title:  Hello hive
-- author: Vince Sesto
-- desc:   Some nice fun with tic 80
-- script: lua
3. The first piece of code we are going to add is the TIC() function. This is a compulsory function used by the Tic-80 console and is called 60 times every second. So everything inside the TIC() function will run 60 times every second. Enter the code below, which includes two functions inside the TIC() function. The first is the cls() or Clear Screen function. Just as we can run this in our console to remove all the code from the screen, our cartridge can use it the same way. If there is no value inside the brackets, the screen will stay black, if you use any number between 1 to 16, it will use one of the corresponding colours to colour the screen. The second function is the print() function. Inside the print() function. This function will take what every word or string is placed in the inverted commas and print it to screen. The corresponding numbers after the “HELLO HIVE” is where in the x and y axis the words have been placed:
function TIC()
    cls()
    print("HELLO HIVE!",84,84)
end
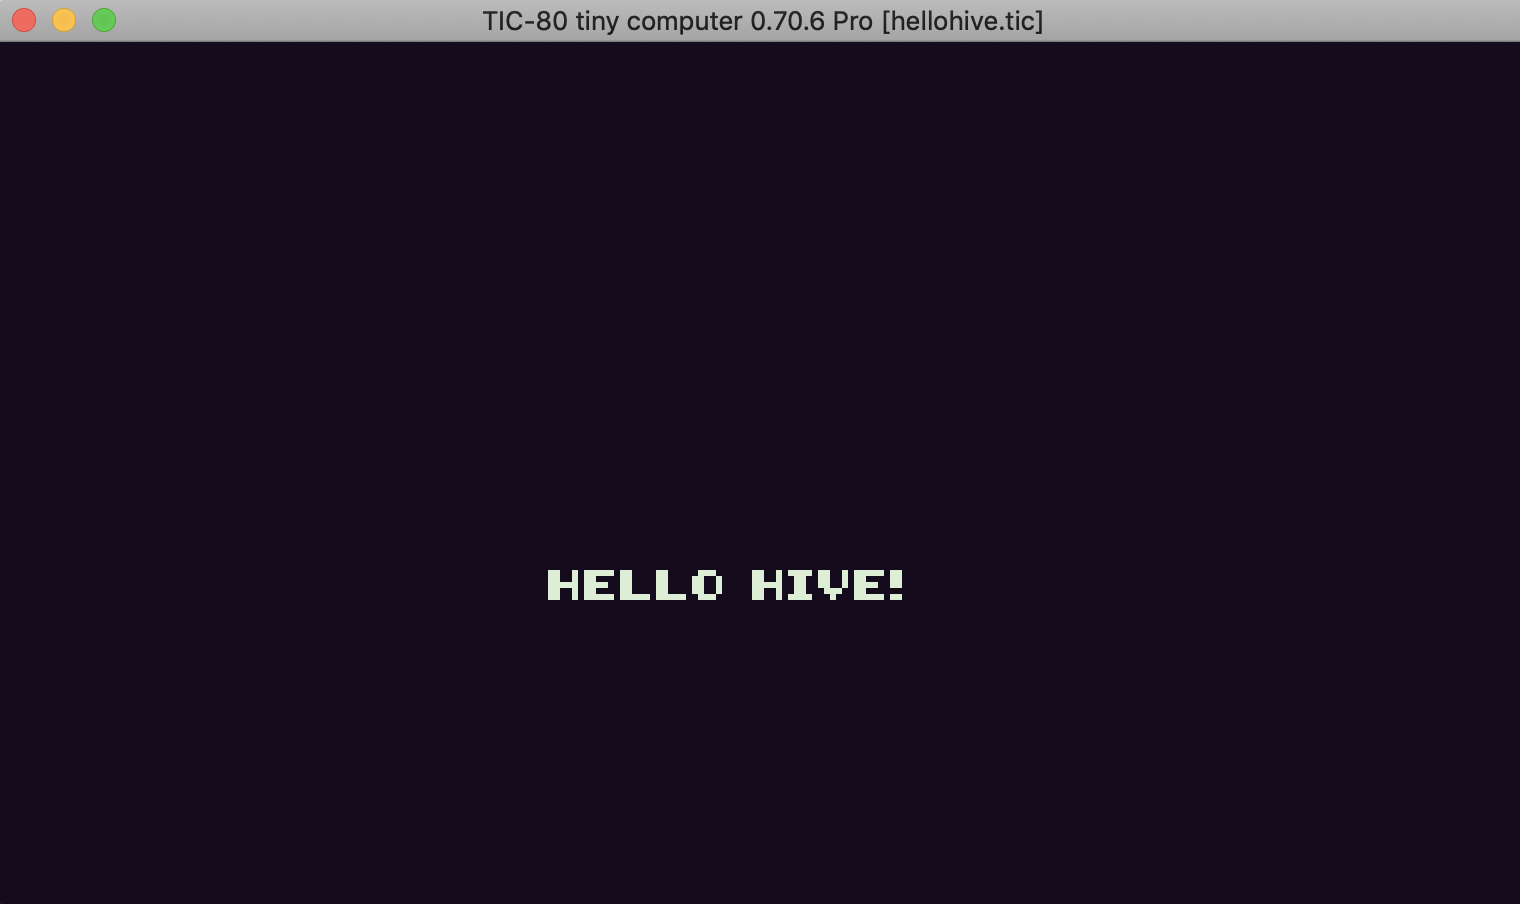
4. Press the ESC key to get out of the editor and if we run the cartridge now you should see something similar to the image below. A black screen with the words “HELLO HIVE!” in the middle of the screen. We could also leave the coordinates blank in the print() function which would place the text at the 0,0 coordinates which is the top left of the screen. The print function also can use values stored in variables if you needed to instead of typing the words you need:
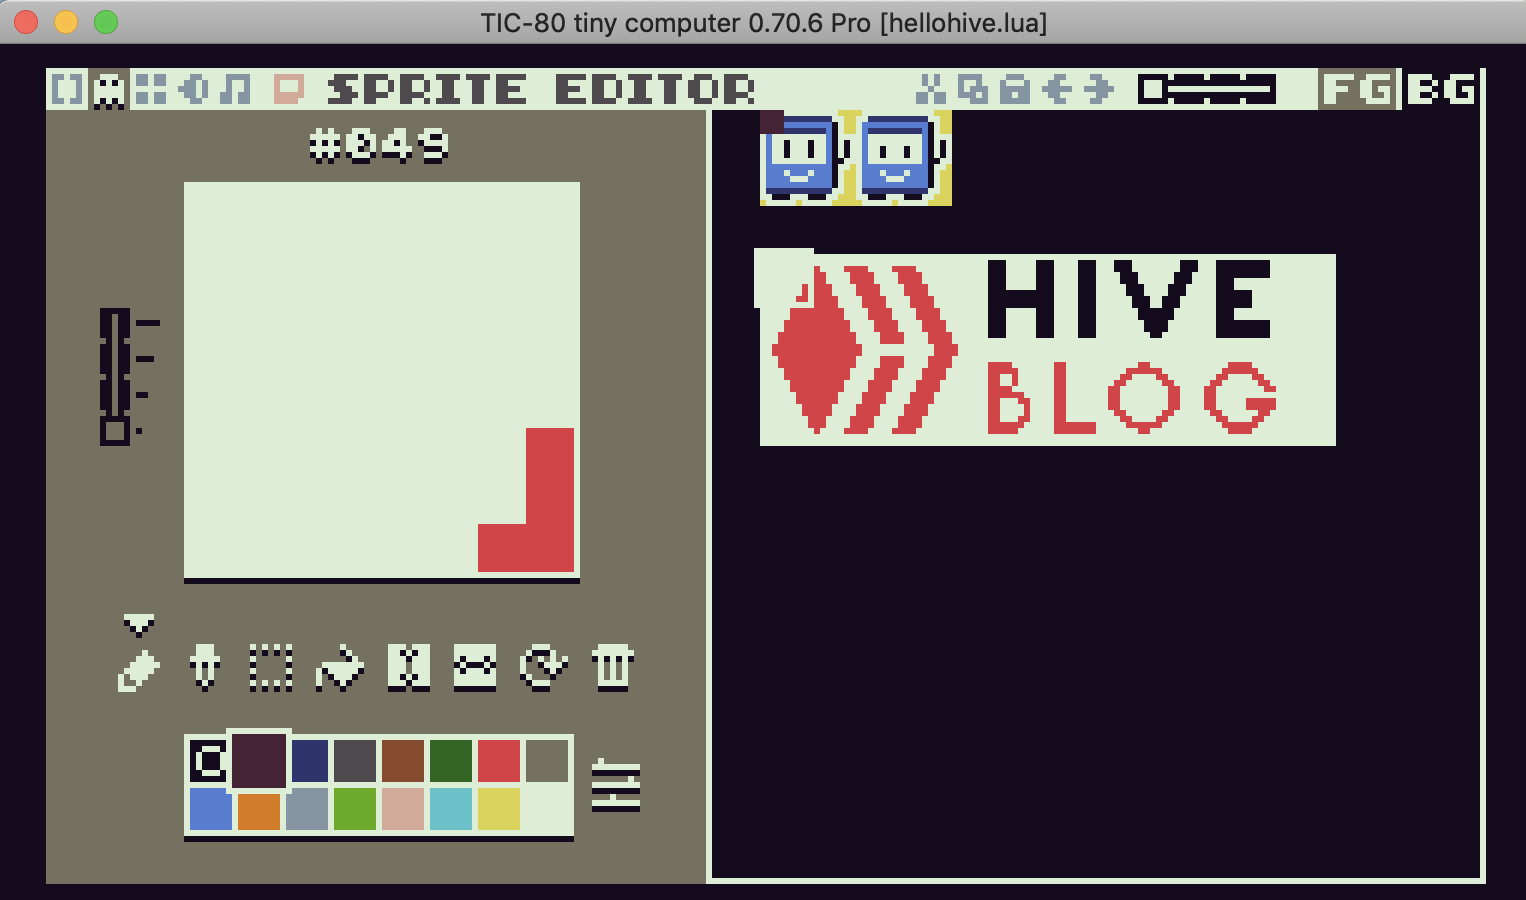
5. Get into the editor again and we’ll create our own sprite that is provided to the screen. Once you are in the editor, click on the sprite editor which looks like a Pacman ghost at the top left of the screen. There will already be the default images in place but I’ve create the Hive Blog logo on my screen. Take this time to get familiar creating pixel art on the sprite editor. The sprite editor allows you to draw images that consist of 16 colours. Fortunately, I have only used two on my logo, I have created. You can make your sprite as big or as small as you need it to be, just make sure you take note of the image number in the top left corner of our sprite, this is how we will then display it onto our screen. For our instance, the top left of our Hive Blog logo is #049:
6. To add a sprite to our cartridge, we need to use the spr() function. The function uses three compulsory attributes, similar to the print function. You need to include the identification number of the sprite, the x axis value and the y axis value. Out example uses number 49 as the sprite id. But, as our sprite goes on for more than one position in the sprite editor, we need to use other parameters in the function. We can add in the extra lines below. First we set variables for the x and y axis the spr() function then uses. The spr() function then uses the -1 to set the colour scale to the default value, the scale to the default value of 1, then the flip and rotate respectively also to their default of 0. The last two values of the function are the width and height you need to use from the sprite editor. In our case, it stretches for a width of 12 and a height of 4:
x=65
y=40

function TIC()
    cls()
    spr(49, x, y, -1, 1, 0, 0, 12, 4)
    print("HELLO HIVE!",84,84)
end
7. Currently the Hive Blog logo we have on our page is currently sitting lifeless on the screen. We can use the arrow keys to move our logo around the screen. If we knew a way for our cartridge to recognise when the arrow keys are pressed, we would be able to place this in the TIC() function so it will be able to move the sprite around. Well it’s actually really easy to do this with Tic-80. We can use the btn() function to recognise if buttons 0 to 3(the arrow keys have been pressed), and we do this by placing this function into an if statement. You can see from the code below, we place an if statement in the TIC() function for each of the arrow keys, and if one of the arrow keys have been pressed, the image will be moved in the direction required.
x=65
y=40

function TIC()

 if btn(0) then y=y-1 end
 if btn(1) then y=y+1 end
 if btn(2) then x=x-1 end
 if btn(3) then x=x+1 end

    cls()
    spr(49, x, y, -1, 1, 0, 0, 12, 4)
    print("HELLO HIVE!",84,84)
end
We’ve zoomed through a lot of work here and hopefully you’ve been able to follow along. Let me know if you have any questions and hopefully in the coming days we’ll make another change to our cartridge where it will move around on its own.