Pythonic Tutorial Part 1-6

Introduction
In this series I will guide through the several functionalities of the graphical programming tool for Python — Pythonic.
Intended as an easy to use open source programming framework for crypto trading bots, it’s well tested basic functionality can be applied to various other applications as well.
If your application requires smart logging capabilities, a reliable scheduling system, connectivity options and a scalable multiprocessing concept, then Pythonic is the right choice.
1.Installation
Pythonic is based on Python 3 and is available over Pythons standard package manager Pip. Regardless of the operating system, you can install Pythonic with the following steps:
Download and install Python 3 (recommended ≥ 3.5)
Run
pip install PythonicThe command will automatically collect all decencies of Pythonic. This process could take a while. If the installation was successful, you should see a message like this on the screen:

Pip installation successful (Pythonic v0.16)
Open a terminal and simply type
PythonicYou should now recognize that a new windows has opened:
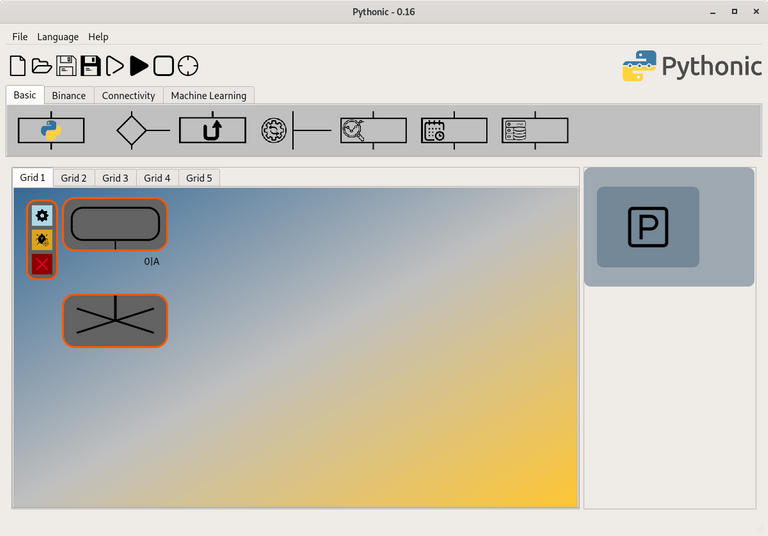
Pythonic 0.16 on Gnome 3
2. Concept
The programming area consist of 5 grids which can be populated with elements. The unit of 5 grids together is called a workflow. You can populate a grid with various elements by drag and drop them from the element bar to one of the placeholders (the ,,X”-elements at the end of the execution tree). You can choose elements from the fields Basic, Binance, Connectivity and Machine Learning.

Basic Elements
Each element is a atomic program which is executed in its own process.
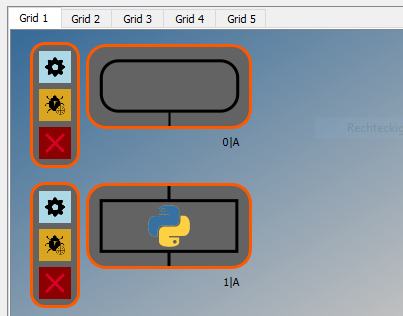
Two elements inside Grid 1
The execution flow is processed always from top to bottom and from left to right. (Of course there is a jump-to element available)
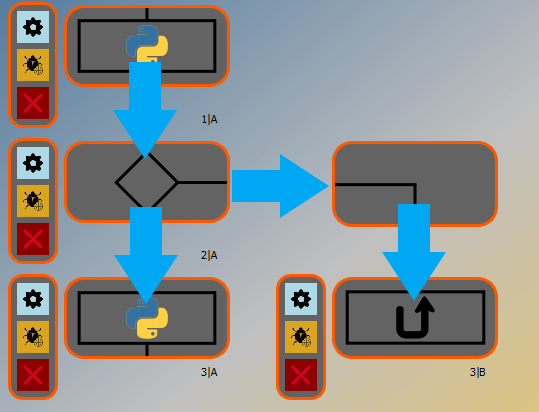
Execution flow
Each element has an input and an output. When an element is triggered, the output of the former element is passed as the input to the current element. After execution, the result is passed as the output to a subsequent element.
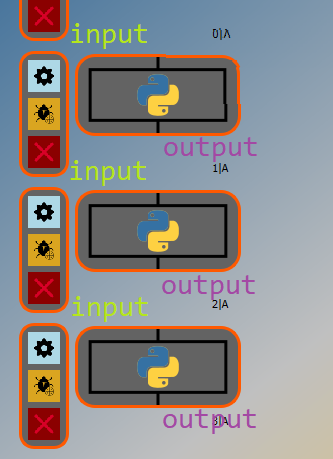
Input / Output parameter
The input and output can be of any Python type. Some elements expect a certain input type to work properly.
If you forgot to place an element to your execution flow, you can drag and drop an already setup element to the parking place (only the last element of a execution tree can be dropped).

Parking space
From the parking place, the element can be placed somewhere else in one of the grids — the configuration isn’t lost!
3. Toolbar

File IO
From left to right:
- New workflow
- Open workflow
- Save workflow
- Save workflow as ..

Execution control
From left to right:
- Start debug: Start the execution on all grids with a delay between the elements (adjustable under File-> Settings, default: 500ms)
- Run: Start normal execution on all grids (without delay)
- Stop execution on all grids (becomes effective on the transition between elements)
- Kill running timers and child processes: As the name suggests, kill immediately all background processes such as timers etc…
Also each element has its own toolbar:

Element toolbar
From top to bottom:
- Open element configuration
- Enable debug output: After the element was processed successfully, open a new window which shows the output of the element and pause the execution till you click on the “Ok” button.
- Delete the element (caution: configuration is then lost!)
4. Logging
Pythonic has an easy to use logging feature: You can configure each element to create a log message when it is processed.
Option for logging
The related log files are saved inside the users home directory under the following path scheme:
~/Pythonic_<Year>/<Month>/log_<Date>.txt
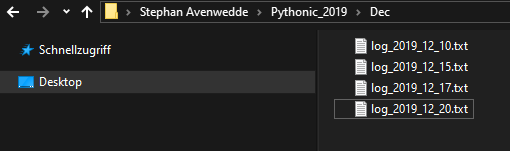
Log files inside users home directory
This scheme makes an easy recovery of log files possible, provides traceability and ensures that log files are not overwritten. When you start Pythonic, a new log file for the current day is created (if not already present). This happens also during the transition of two days.
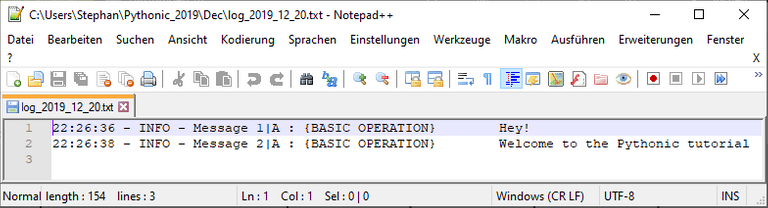
Log file created by Pythonic
The implementation of how to create a log message within a Basic Operation element can be seen in 6. Basic Operation.
5. Basic Scheduler
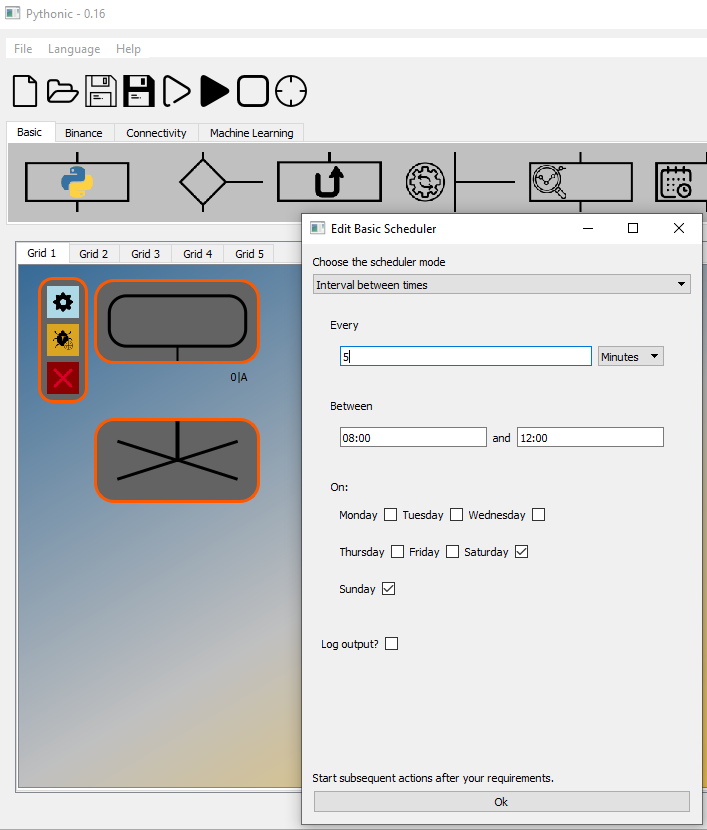
Basic Scheduler
The Basic Scheduler is always the first element in each grid. The output of this element is always the Python type None. In the default settings, it does simply trigger the subsequent element without repetition.
If you need this element later in the execution tree, you can find it under Basic tab of the element bar:

Basic Scheduler
This element lets you define when and how often subsequent elements are triggered.
When the frame color after the initial execution stays yellow, a background timer is still active which will trigger according to the configuration.
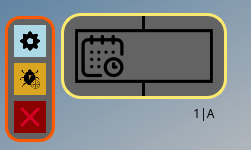
Active Basic Scheduler
6. Basic Operation
The Basic Operation element lets you execute arbitrary Python code.
You can import every Python library which is currently installed in your system.
The following predefined variables are available:
- input…………..Access the input of the previously element
- output…………Data which is passed to the subsequent element
- log_txt…………User defined log message when Log output es enabled
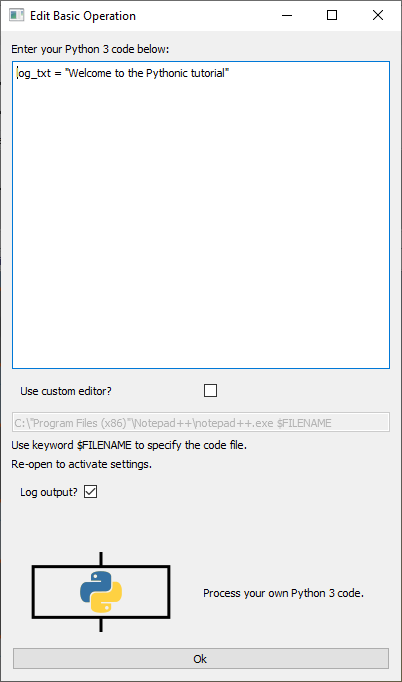
Basic Operation log message
Due to the fact that the standard code input lacks features like syntax highlighting and auto-completion, you can also setup your favorite editor by activating the checkbox ”Use custom editor?”.
Windows
- Visual Studio Code
<Path-to-VS-Code-installation-directory>\code.exe $FILENAME - Notepad++
<Path-to-Notepad++-directory>\notepad++.exe $FILENAME
Example:
D:\"Program Files (x86)”\”Microsoft VS Code”\code.exe $FILENAME
Linux
- Vim (GNOME-Terminal >= 3.27.1 required)
gnome-terminal — wait -e “vim $FILENAME” - Visual Studio Code
code -w $FILENAME
Congratulations @avenwedde! You have completed the following achievement on the Steem blockchain and have been rewarded with new badge(s) :
You can view your badges on your Steem Board and compare to others on the Steem Ranking
If you no longer want to receive notifications, reply to this comment with the word
STOPTo support your work, I also upvoted your post!
Vote for @Steemitboard as a witness to get one more award and increased upvotes!
Are you on Medium?
Yes, also
Hi, thanks for the post! I have included a link and a short description in my daily Science and technology digest, and you'll receive a 10% share of that post's rewards.
Nice to see it written on PyQt5 and it looks pretty straight forward. This remind me of the Junyper Notebooks. Great took to have around the n00bs that are learning coding.