Atari ST Programming: Getting Started with STOS BASIC
Now we have our development environment set up let's write some STOS BASIC code.
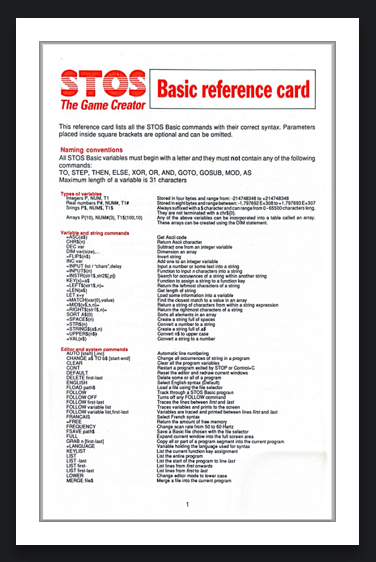
To help us out and save lots of googling, download the STOS manual here and I have uploaded a crunched PDF of the reference card that came in my boxed copy on my Retro Game Coders site.
STOS BASIC Basics: Expanding on Hello World
The first thing everyone must do (it's the law) with a new language, or an old one in this case, is "Hello World". As that only takes one command in STOS, let's do a little more than that to demonstrate some features of the language and orient ourselves to coding in the environment.
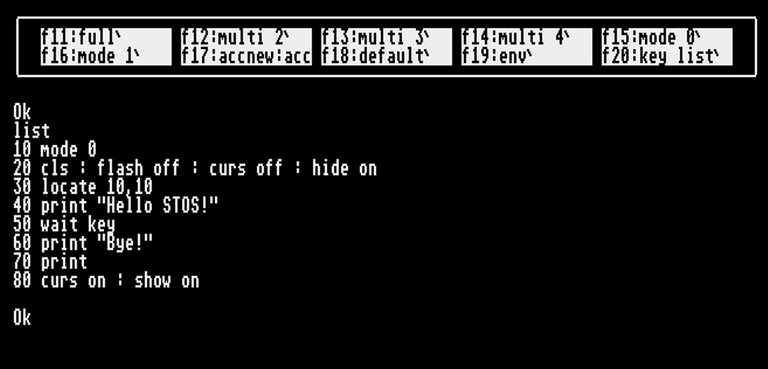
mode 0
cls : flash off : curs off : hide on
locate 10,10
print "Hello STOS!"
wait key
print "Bye!"
print
curs on : show on
Taking this line by line, first we set our resolution to low (320x200). Mode 1 would set us to Medium, but only if your emulator/machine is capable, on a mono monitor nothing would happen.
Next we turn off a bunch of annoying stuff such as the flashing cursor and the mouse pointer (of course we must remember to switch these things back on after our program is done!).
Now we can set our cursor position and output our text message.
wait key, as the name suggests, waits for the user to press a key before continuing. At that point we say goodbye and turn the cursors back on.
If you are entering your code into the STOS editor directly, remember you need line numbers:
If you are using the Visual Studio Code extension then you will need to tokenize with CTRL-SHIFT-B (not that we have any tokens required yet) then load your "build.asc" file using the fload "*.asc*" dialog box.
You can also use load "build.asc" after setting your dir$ to the correct directory of your virtual hard drive.
Then enter run and see your magic unfold!
Adding Color
If we tweak our code just a little (again, remember to add line numbers if coding directly in STOS), we can demonstrate color cycling using the shift command ...
mode 0
cls : flash off : curs off : hide on
locate 10,10
print "Hello STOS!"
shift 50
wait key
shift off
print "Bye!"
print
curs on : show on
This performs on the whole color palette but we can also rotate colors of a single palette entry like so:
mode 0
cls : flash off : curs off : hide on
locate 10,10
ink 1 : C =colour(1)
print "Hello STOS!"
flash 1,"(100,10)(200,10)(300,10)(400,10)(500,10)(600,10)(700,10)"
wait key
flash off
colour 1,C
print "Bye!"
print
curs on : show on
Here we set our text to the palette entry 1, and store that colour (note the English spelling!) in our C variable for later recall.
While we wait for a key, the palette entry is cycled through levels of red, like a red alert on the Enterprise bridge.
After the keypress, we set the colour back to how it was before we started.
Speaking of Star Trek red alerts, let's make it look a bit more "alerty":
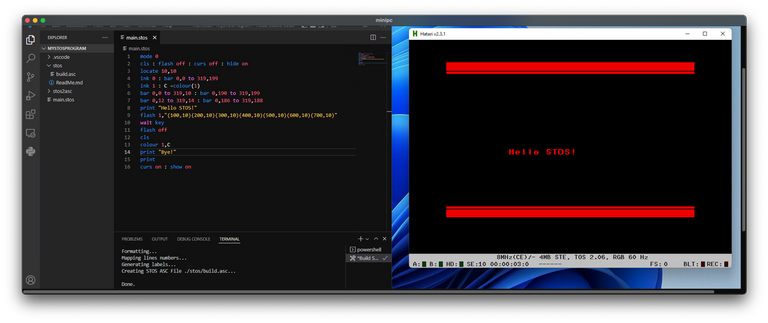
mode 0
cls : flash off : curs off : hide on
locate 10,10
ink 0 : bar 0,0 to 319,199
ink 1 : C =colour(1)
bar 0,0 to 319,10 : bar 0,190 to 319,199
bar 0,12 to 319,14 : bar 0,186 to 319,188
print "Hello STOS!"
flash 1,"(100,10)(200,10)(300,10)(400,10)(500,10)(600,10)(700,10)"
wait key
flash off
cls
colour 1,C
print "Bye!"
print
curs on : show on
Here we are using the built in graphic command bar to add stripes to the screen, and as we are using the same colour for everything it flashes along with the text.
STOS Productivity Tips
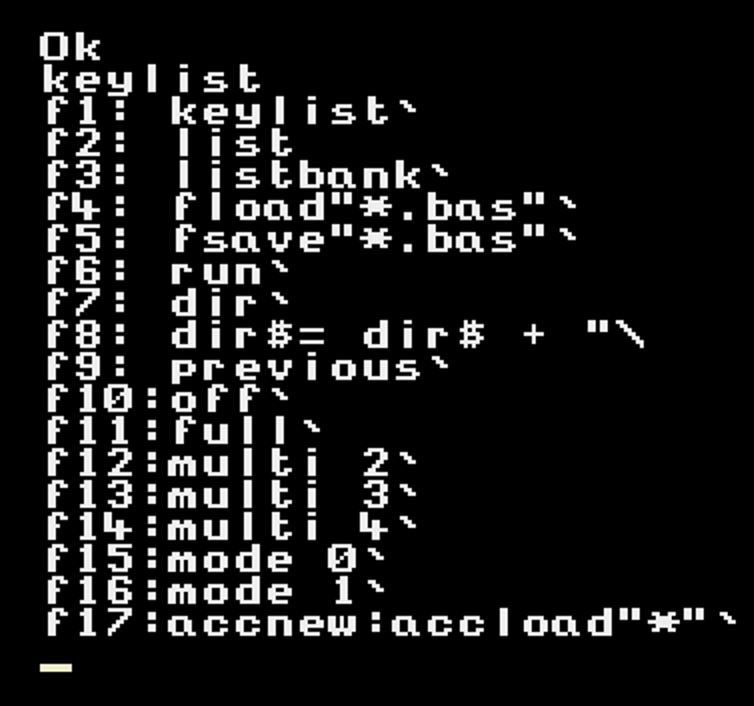
If at this point you are tired of constantly typing in the load command, you can set STOS keyboard shortcuts using the helpful key array, for example I set my F2 key to the load command this way:

(Using chr$($22) provides the " character without upsetting STOS, there might be a better way to escape the quote but I don't know of one)
To get the current list of shortcuts, enter keylist:
Next Up
That is enough of the basics, next time let's get some graphics up in this thing!