Programming the Amiga with AMOS BASIC: Maps & Scrolling
Up until now, our AMOS BASIC programming has relied on loading quite large full-screen images as our backgrounds. That is not memory efficient, plus creating maps and levels this way would be quite cumbersome.
The go-to solution is to create a tiled map. We will look at loading and drawing Icons, and how we can display and even scroll our maps, to offer massive game worlds at a fraction of the memory requirement.
Previous AMOS Basic Tutorials in this series:
Tile Based Maps
While the Amiga back in the day boasted a lot of memory for the time (most at least had 512kb, although at launch 256kb was standard), unless you are going to only have a couple of screens (title screen, high score screen, one or two backgrounds), loading IFF images, even compressed, will take up a bunch of room.
Instead, what most games implement is a system of maps or levels created out of tiles selected from a tile set.
Check out this famous set of tiles, recognise them?
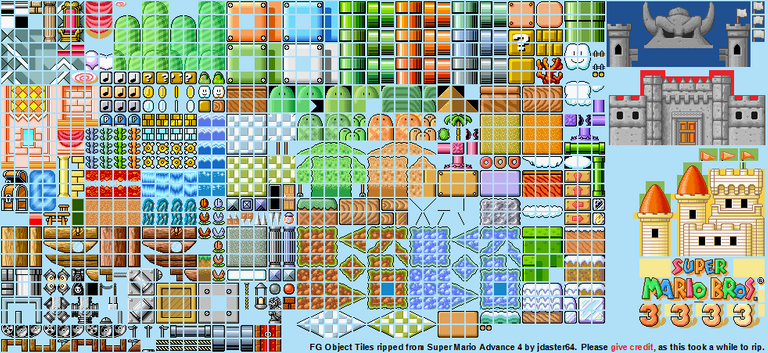
Super Mario tiles ripped by Jdaster64
This is how an NES game can be absolutely amazing fun and only take up 8kb!
AMOS Icons versus Blocks
In AMOS, our tiles are made out of Icons.
Unlike Bobs and Sprites, an Icon is not expected to move or have transparency. It's simply pasted onto the screen as almost like a paint package brush.
Of course, given the name, one of the use-cases is for clickable icon buttons, but we will use it to build up a graphical environment for our game players!
AMOS also has a feature called Blocks. They are similar to Icons except are created and destroyed in memory by programmatically grabbing an area of screen.
We will use Icons so that we can work in the object editor ahead of time.
Creating Amiga Tile Sets in AMOS with Icons
AMOS provides us with an Object Editor. While so far we used it to create bobs and sprites, in this case we will create icons.

Use the basic graphics tools to create some simple tiles. You could also load in an IFF picture and grab parts of that image to create your tiles too.
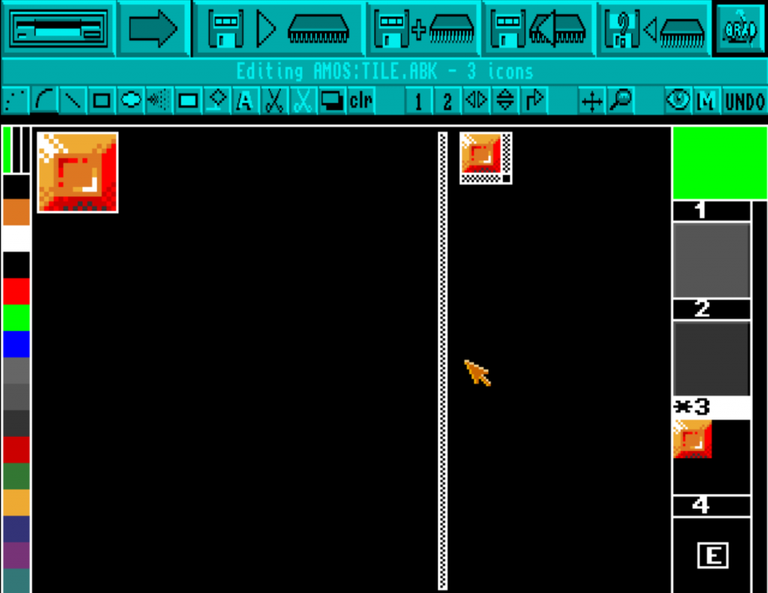
When you save your .ABK it will ask if your objects are bobs or icons, tell it we need icons.

Loading Icons with AMOS
Now to load the tile data we just saved.
For simplicity, ensure your AMOS Basic file is saved in the same location as your .ABK file, then use:
Load "TILE.ABK"
Once we have it in memory, we can also pull the colours out of the file:
Get Icon Palette
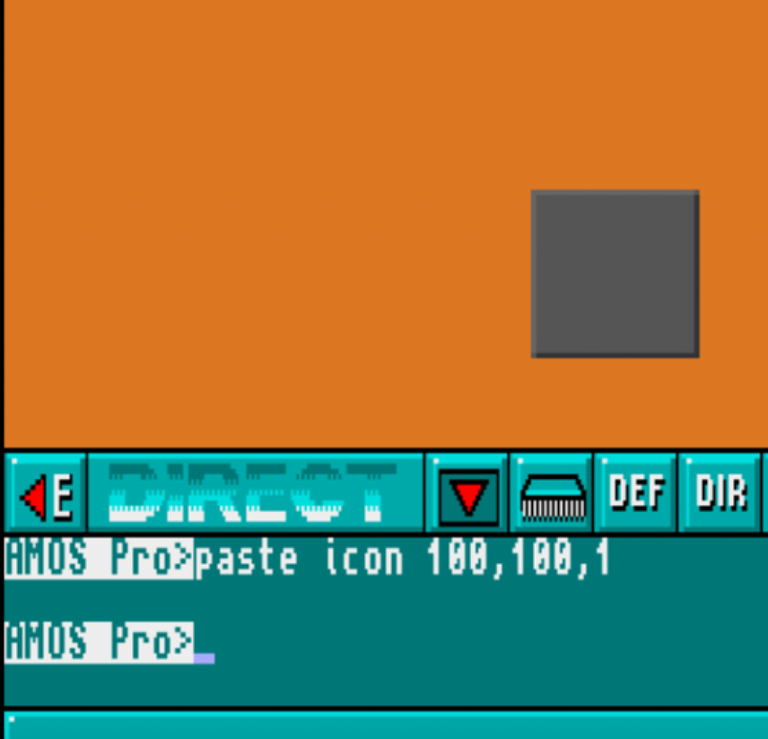
Now we can draw our icons on screen. The icons in the file are numbered from 1.
Paste Icon X,Y,Icon_Number
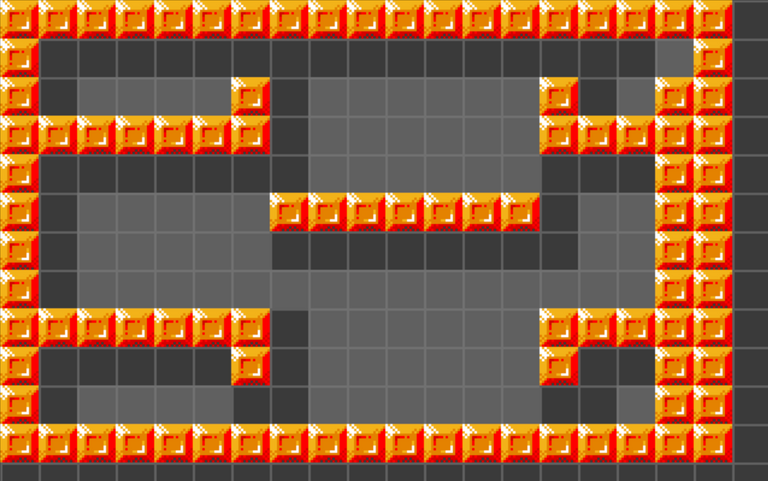
Creating and Displaying a Tile Map
Now we can paste our icons, creating a map is a simple case of expanding into a grid of icons.
As we saw in a previous tutorial, the way we commonly create a grid or table in AMOS Basic is to use an Array.
Think of our map array as being like a table of spreadsheet cells. Rather than using letters to indicate the column, however, arrays use numbers for both row and column.
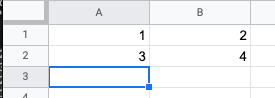
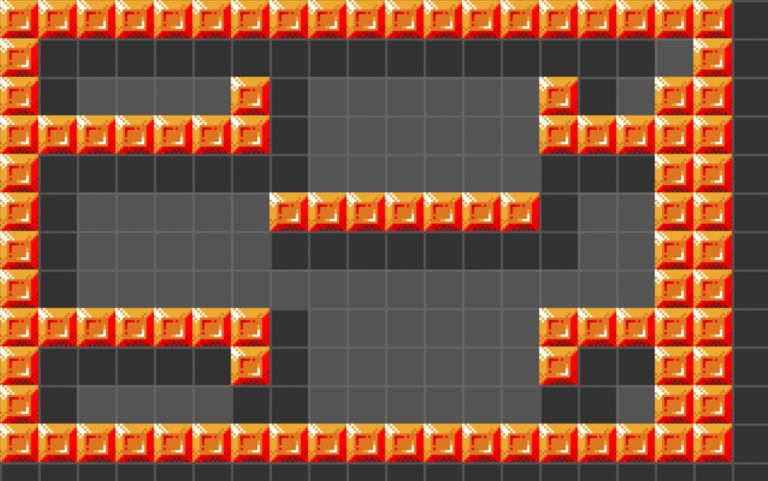
To make populating this array easier for ourselves, we will first create our map in text, using a String, and then fill the array from that.
Dim TILE_MAP(20,12)
ROWS$=ROWS$+"33333333333333333332"
ROWS$=ROWS$+"32222222222222222132"
ROWS$=ROWS$+"32111132111111321332"
ROWS$=ROWS$+"33333332111111333332"
ROWS$=ROWS$+"32222222111111222332"
ROWS$=ROWS$+"32111113333333211332"
ROWS$=ROWS$+"32111112222222211332"
ROWS$=ROWS$+"32111111111111111332"
ROWS$=ROWS$+"33333332111111333332"
ROWS$=ROWS$+"32222232111111322332"
ROWS$=ROWS$+"32111122111111221332"
ROWS$=ROWS$+"33333333333333333332"
ROWS$=ROWS$+"22222222222222222222"
Here we have told AMOS that we want to store 20 by 12 cells. We then create a text string containing the tile numbers that need to go into each cell.
Once we have that set up, we simply loop through the text string and insert the next entry into the appropriate array location.
I=0 ' Loop through the rows For Y=0 To 12' Loop through the columns
For X=0 To 19' Incremement the counter ' (AMOS weirdly counts from 1 with Mid$ ' BUT 0 will ALSO give the first char) Inc I ' Fill the map array with the values TILE_MAP(X,Y)=Val(Mid$(ROWS$,I,1)) ' Paste the graphic Paste Icon X*16,Y*16,TILE_MAP(X,Y)Next X
Next Y
Wait Key
Two functions help us here:
- Val() takes a string and converts it into the number it represents because "1" otherwise would be interpreted as text instead of a numeric value.
- Mid$() grabs the text at a given location within a string for you. We also provide a length of 1 to say that we want one character at the given location.
Strangely, while AMOS Arrays use 0 as the first slot, the Mid$ function seems to accept 0 but expects 1. I spent hours chasing down the cause of my maps being offset ... This kind of thing can really make debugging frustrating!
Full Map Code
' Set up our low res screen Screen Open 0,320,200,32,Lowres Flash Off : Curs Off : Hide On' Load our tileset into the databank
Load "TILE.ABK"' Get the palette from our tileset
Get Icon PaletteDim TILE_MAP(20,12)
ROWS$=ROWS$+"33333333333333333332"
ROWS$=ROWS$+"32222222222222222132"
ROWS$=ROWS$+"32111132111111321332"
ROWS$=ROWS$+"33333332111111333332"
ROWS$=ROWS$+"32222222111111222332"
ROWS$=ROWS$+"32111113333333211332"
ROWS$=ROWS$+"32111112222222211332"
ROWS$=ROWS$+"32111111111111111332"
ROWS$=ROWS$+"33333332111111333332"
ROWS$=ROWS$+"32222232111111322332"
ROWS$=ROWS$+"32111122111111221332"
ROWS$=ROWS$+"33333333333333333332"
ROWS$=ROWS$+"22222222222222222222"I=0
' Loop through the rows
For Y=0 To 12' Loop through the columns
For X=0 To 19' Incremement the counter ' (AMOS weirdly counts from 1 with Mid$ ' BUT 0 will ALSO give the first char) Inc I ' Fill the map array with the values TILE_MAP(X,Y)=Val(Mid$(ROWS$,I,1)) ' Paste the graphic Paste Icon X*16,Y*16,TILE_MAP(X,Y)Next X
Next Y
Wait Key
Tiled Map Scrolling in AMOS
If we can create a static map or level, why not then scroll it?
The trick to scrolling a screen made up of tiles is to backfill the next set of tiles you have scrolled. You can scroll horizontally, vertically, or both using this technique.
Previously we used a screen offset but we can also use a powerful screen copy feature of AMOS that allows us to copy a portion of a screen and paste it wherever we want:
Screen Copy 0,1,0,352,200 To 0,0,0
As you can see, we grab the part of the screen that is one pixel over to the right, and paste it at the top left of the screen, giving the impression of the screen moving.
This will leave a mess at the far right of the screen so we put the far right of our screen off of the visible area
Screen Open 0,353,200,32,Lowres
Rather than 320 pixels wide, we have made it 353 pixels wide. Really that is overkill, but it serves to illustrate the idea :)
When the screen has moved a whole 32 pixel tile distance, we paste a fresh column from the map on the right and start over until a key is pressed.
See the full scroller in action
Full AMOS Icon Scroller Code
' Set up our low res screen Screen Open 0,353,200,32,Lowres Screen Display 0,135,40,320,200 Flash Off : Curs Off : Hide On' Load our tileset into the databank
Load "TILE.ABK"' Get the palette from our tileset
Get Icon Palette' Load space invader
Load "INVADER.ABK"' Screen background from orange to black
Colour 1,$0' Sprite colour
Colour 17,$A00' Initial blank background ready to overwrite
' Loop through the rows in 32pixel increments
For Y=0 To 168 Step 32' Loop through the columns
For X=0 To 352 Step 32' Paste the graphic Paste Icon X,Y,1Next X
Next Y
' Set up the map
Dim TILE_MAP(70,5)
ROW1$="1211121122221211112111122221121111121222212222212111112222211122111111"
ROW2$="1211121121111211112111121121121111121211212111112111111211121122111111"
ROW3$="1222221122111211112111121121121121121211212111112111111211121122111111"
ROW4$="1211121121111211112111121121121121121211212111112111111211121111111111"
ROW5$="1211121122221222212222122221112212211222212111112222212122211122111111"' Set up the initial map in memory
For THIS_COL=0 To 69' Doing the same command multiple times is
' faster than a loop, it's called unrolling
TILE_MAP(THIS_COL,0)=Val(Mid$(ROW1$,THIS_COL,1))
TILE_MAP(THIS_COL,1)=Val(Mid$(ROW2$,THIS_COL,1))
TILE_MAP(THIS_COL,2)=Val(Mid$(ROW3$,THIS_COL,1))
TILE_MAP(THIS_COL,3)=Val(Mid$(ROW4$,THIS_COL,1))
TILE_MAP(THIS_COL,4)=Val(Mid$(ROW5$,THIS_COL,1))
TILE_MAP(THIS_COL,5)=1Next THIS_COL
' Loop until a key is pressed
While Inkey$=""Inc THIS_COLUMN
If THIS_COLUMN=70 Then THIS_COLUMN=0' Replace missing blocks
For Y=0 To 5
Paste Icon 320,Y*32,TILE_MAP(THIS_COLUMN,Y)
Next Y' Scroll the screen over the original
For I=0 To 31' Copy and paste the screen to ' give the impression of movement Screen Copy 0,1,0,352,200 To 0,0,0 ' Place our space invader Sprite 1,X Hard(SPX),Y Hard(SPY),1 ' Bounce math! If SPX>=288 Then SPX_DIR=-2 If SPX<=0 Then SPX_DIR=2 If SPY>=168 Then SPY_DIR=-2 If SPY<=0 Then SPY_DIR=2 SPX=SPX+SPX_DIR SPY=SPY+SPY_DIRNext I
Wend
Posted from my blog with SteemPress : https://makerhacks.com/amos-maps-and-scrolling/
That was a good read. Didn’t know there was were such limitations.