Node-Red, the Swiss army knife for Internet Of Things ?
Hey everyone,
I told you in a previous article about a project that has been on my mind for several years, today we're going to look at how we're going to talk with this garden. And if I'm already using a microcontroller to water the plants, I'm also going to take advantage of it to monitor a whole bunch of other variables like temperature, humidity and luminosity.
Why should we communicate with the garden?
First of all, it's an exercise for me, designing a system that fits into the category of connected objects (IOT) which is a recurring theme in electronic projects at the moment. But it's also a way to have a better idea and to quantify why a crop is doing well or poorly depending on different parameters, and to learn more about the needs of plants.

So on one side I have a microcontroller with many sensors and actuators (mainly pumps and lamps) and on the other side a phone (or a computer). Between the two, I need a graphical interface (easily modifiable) on which I can see the measurements made and activate the actuators.
I searched for a while for dashboard services for connected objects, but nothing suited me in terms of functionality/price ratio. Then I came across Node-RED, a graphical development tool based on JavaScript and having many modules (called nodes) allowing to realize all the functionalities I wanted, moreover it gives me a reason to learn a new programming language, in short the perfect solution! (You can also use Node-RED without typing a line of code)
 Architecture of my complete system
How to install Node-RED:
We are going to enter the very technical part now, if you have any question, do not hesitate to ask it in comments :)
I chose to run Node-RED on a Raspberry Pi Zero W (which has a Wi-Fi module) which allows it to run continuously without consuming much electricity. To install Node-RED on a Raspberry Pi, we use this command :
bash <(curl -sL https://raw.githubusercontent.com/node-red/linux-installers/master/deb/update-nodejs-and-nodered)
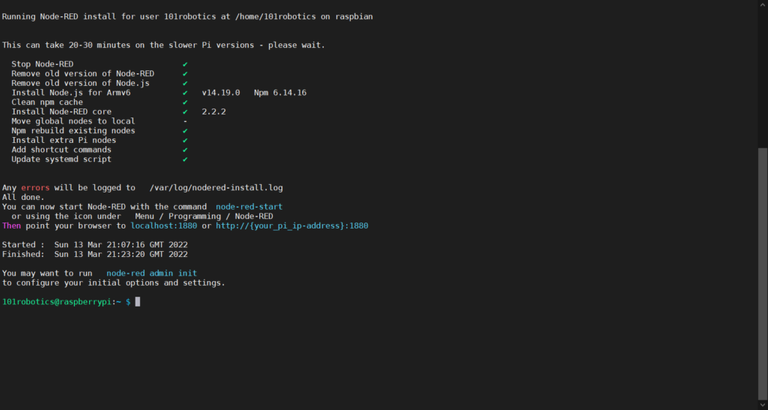 Screenshot of the end of the installation of Node-RED
For the communication between the Raspberry and the microcontroller, I chose the MQTT protocol which is very used on the Internet of Things and that I never had the opportunity to test until now. MQTT works by separating the information in 2, on one side the topic and on the other the message (content). This allows to easily segment the information (it can be compared to folders as it is possible to create a tree with topics : /sensors/humidity for example).
Node-RED has by default a node for MQTT communication, but that requires an external broker (server), to overcome this problem, I installed another node to integrate a broker directly into Node-RED.
To install it, go to the .node_red/ folder that was created when Node-Red was installed, then type this command :
npm install node-red-contrib-aedes
We can take this opportunity to install the node that will allow us to create the graphical interface:
npm install node-red-dashboard
I also installed a node to communicate with Telegram, which seems to me to be the simplest and most secure solution to communicate with Node-Red outside the local network (not necessarily wanting to expose ports to the internet):
npm install node-red-contrib-telegrambot
To create an account for your bot, you will have to use another bot that will guide you along, and give you important information to communicate with your bot, it is called Bot Father.
For more security, you can also follow the guide provided by Node-RED.
If you want more information on each of these nodes, you can consult their dedicated pages by clicking on the following links:
First steps with Node-RED:
Now that everything is installed, we will restart Node-RED to take advantage of all our new nodes:
node-red-restart
Then we will connect to Node-RED from our PC using the local IP address of the Raspberry Pi which should be 192.168.1.XX where XX is a number assigned by your box. You can find it on the portal of your box (accessible at 192.168.1.1 or 192.168.1.255) or from the Raspberry Pi by typing ifconfig using a screen and keyboard connected to the RPi. Once you have it, go to your web browser and type the address of your Raspberry Pi followed by ":1880" :
192.168.1.XX:1880
This address will allow you to access the Node-RED editor from any device connected to the same network as your Raspberry (so avoid public networks). Once the page is loaded, it should look like this (it will first ask you to identify yourself if you had previously configured a password):
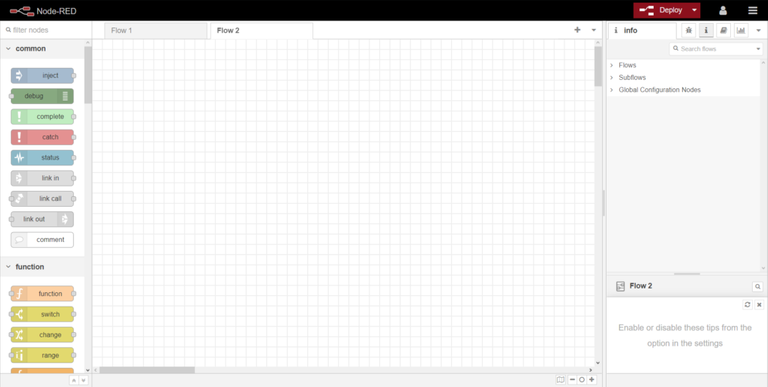 Screenshot of the Node-RED editor
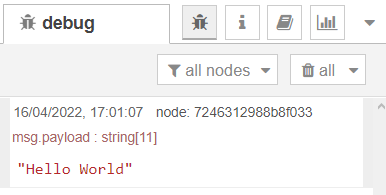
Node-RED is a graphical editor, using nodes that we will have to link and configure. For our first program (called flow), we will simply send the message "Hello World" in the debugger (a window used to get messages to find errors more easily).
We will place an Inject node whose "content" field is a sentence (String) that contains Hello World. Then we simply link it to a debug node, which should look like this:
 Example of flow for Hello World
If you didn't get this, you can import directly this example in your flow by copying this text in the window accessible by clicking on the three lines at the top right of the window, then on Import.
[
 {
 "id": "693ad42b36a34b03",
 "type": "tab",
 "label": "Hello",
 "disabled": false,
 "info": "",
 "env": []
 },
 {
 "id": "47902d4a884764bf",
 "type": "inject",
 "z": "693ad42b36a34b03",
 "name": "",
 "props": [
 {
 "p": "payload"
 },
 {
 "p": "topic",
 "vt": "str"
 }
 ],
 "repeat": "",
 "crontab": "",
 "once": false,
 "onceDelay": 0.1,
 "topic": "",
 "payload": "Hello World",
 "payloadType": "str",
 "x": 150,
 "y": 140,
 "wires": [
 [
 "7246312988b8f033"
 ]
 ]
 },
 {
 "id": "7246312988b8f033",
 "type": "debug",
 "z": "693ad42b36a34b03",
 "name": "",
 "active": true,
 "tosidebar": true,
 "console": false,
 "tostatus": false,
 "complete": "false",
 "statusVal": "",
 "statusType": "auto",
 "x": 330,
 "y": 140,
 "wires": []
 }
]
Once your program is ready, click on deploy, then on the small blue square in front of the module containing your sentence. This should trigger its display in the Debug tab on the right of the window.
Now that we have the basics, we will try to control a led on the microcontroller from our phone through MQTT and Telegram or the graphic interface accessible from the network.
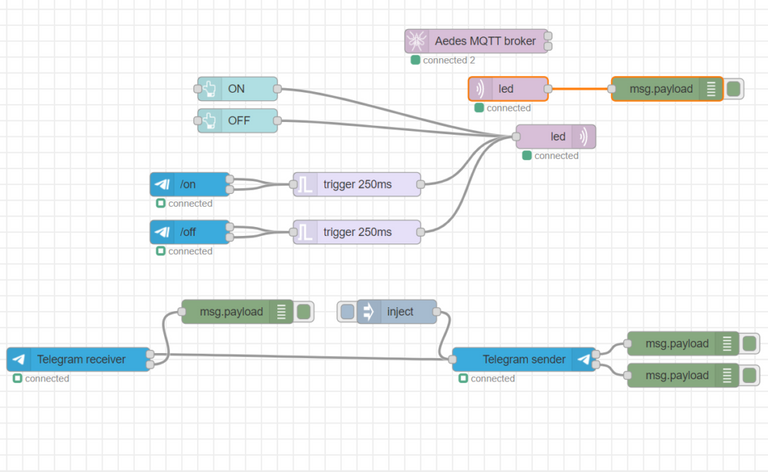
This program is going to be a bit complicated at first, but I'll separate the different functions so that we can learn about how each function communicates. You can find the complete program here. Just be careful to create your Telegram robot before and to choose it well in each block concerning Telegram.
We start at the top, the Aedes MQTT broker block is just used to integrate the MQTT server, it contains the MQTT port and the server connection information.

Then these two blocks are used to display in the Debugger what is happening on the MQTT topic led.
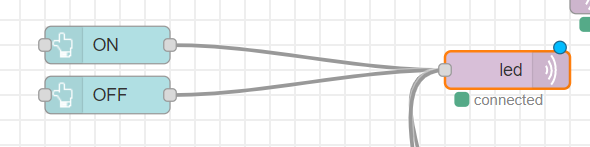
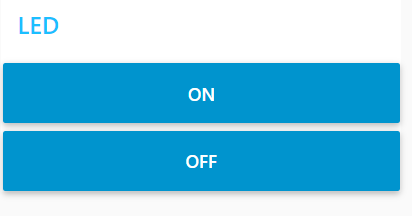
Here you can send MQTT commands to the topic led from 2 buttons on the GUI that look like this:
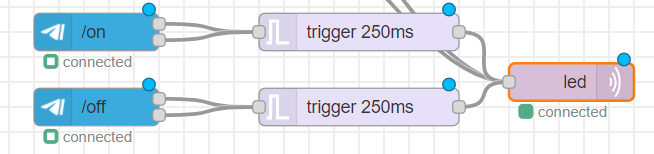
And connected to the same MQTT node we have the Telegram command detection events (/on and /off) that will trigger the sending of a message on the led topic, which will then be interpreted by the microcontroller.

Finally, we have these nodes that are only used to display the Telegram messages received and to send back everything that the user has sent us. In these blocks, you will have to fill in the information provided by Bot Father when creating your Telegram bot.
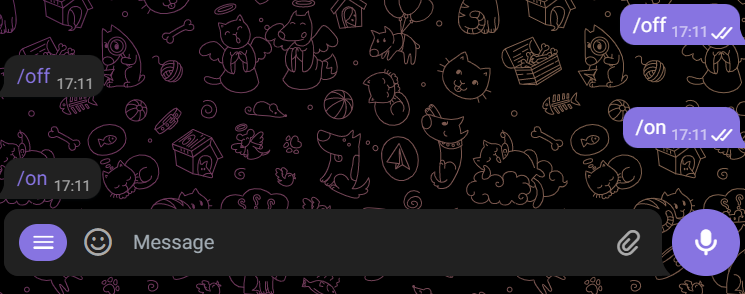
Once deployed, we can send commands to the robot to see what it answers.
We now move on to the microcontroller:
On this side, I wanted to be able to connect easily to the Wi-Fi and to have enough inputs and outputs to communicate with everything that will be connected to it. My choice was the ESP32, which is very common for its integration of Wi-Fi and Bluetooth directly into the microcontroller.
I chose to program in Python, for that I use Thonny IDE under Windows, this software allows to send easily a program to the microcontroller and displays all the print() functions that you will put in your program. Just make sure that the right COM port is selected in Run->Select Interpreter -> Port of WebREPL
We are always going to use internet in this project, so it's a good idea not to have to keep adding lines to connect to the Wi-Fi. Luckily for us, the ESP32 stores 2 programs in its memory, the main.py which is the main program and the boot.py which is the first program to be launched at the start of the ESP32, so we will place in the latter these few lines so that we don't need to put them in the main.py anymore (don't forget to enter the name of your Wi-Fi and its password):
import network
wlan = network.WLAN(network.STA_IF)
wlan.active(True)
if not wlan.isconnected():
 print('connecting to network...')
 wlan.connect('WIFI SSID', 'PASSWORD')
 while not wlan.isconnected():
 pass
print('network config:', wlan.ifconfig())
Then save the program by clicking on the diskette icon and then on MicroPython device :
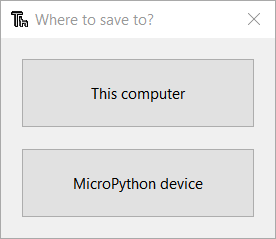 Click on MicroPython device
And replace the file boot.py :
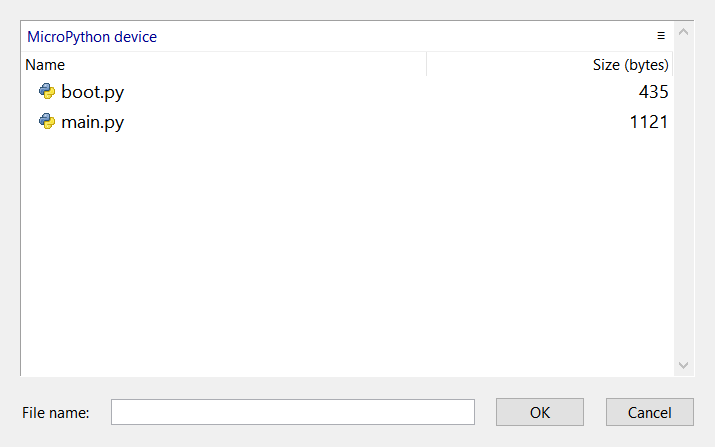 Screenshot of the ESP32 content
For our first MQTT program we will simply flash the LED on the board (pin 2 in my case), using this program :
from umqtt.simple import MQTTClient
from machine import Pin
import ubinascii
import machine
import micropython
import network
#Change the pin number according to your model
led = Pin(2, Pin.OUT)
# Serveur MQTT
SERVER = "192.168.1.00" #Change the IP according to your server
CLIENT_ID = ubinascii.hexlify(machine.unique_id())
TOPIC = b"led"
state = 0
def sub_cb(topic, msg):
 global state
 print((topic, msg))
 if msg == b"on":
 led.value(1)
 state = 1
 elif msg == b"off":
 led.value(0)
 state = 0
 else:
 print("Command unknown")
c = MQTTClient(CLIENT_ID, SERVER)
# Subscribed messages will be delivered to this callback
c.set_callback(sub_cb)
c.connect()
c.subscribe(TOPIC)
print("Connected to %s, subscribed to %s topic" % (SERVER, TOPIC))
try:
 while 1:
 c.wait_msg()
finally:
 c.disconnect()
And you should see a led light up on your card every time you press the ON button or send /on to your Telegram bot :
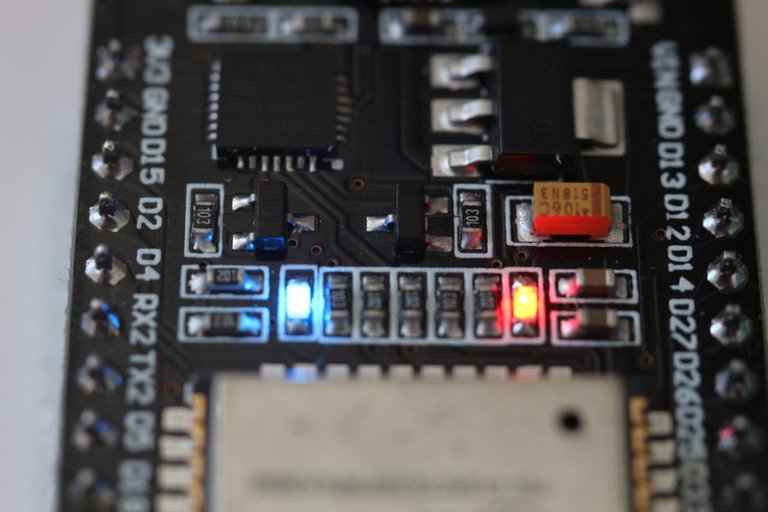 The red LED lights up when the card is powered, the blue one is the one we control
Conclusion:
So today we have seen how we will communicate with the connected part of the garden, as well as how Node-RED, Telegram bots and MQTT protocol works. In the next article, I will define the sensors and actuators I want to use and we will start designing the electronic board.
I hope you enjoyed this article and that it made you want to play a bit with Node-RED!
See you soon!
Sources to go further:
- Secure your editor | Node-RED
- Running on a Raspberry Pi | Node-RED
- Quick Reference ESP32 | Micropython
- MQTT Aedes | Node RED
- Dashboard | Node RED
- Telegram | Node Red
- UMQTT Simple for ESP32 | GitHub
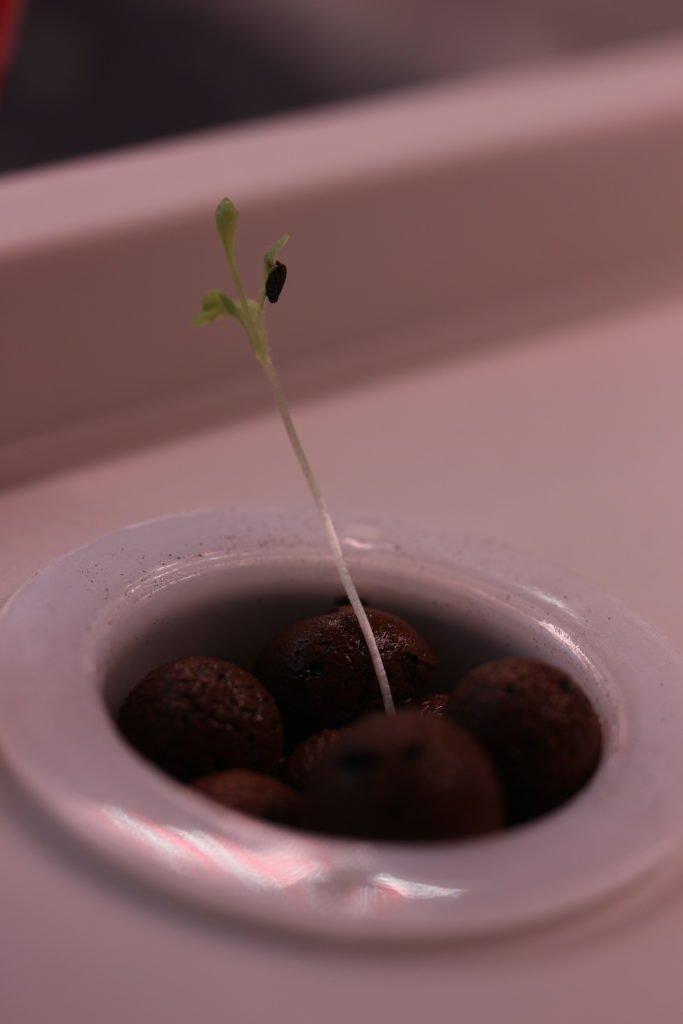
Garden update :
We transplanted the germinated seeds (lettuce) from the germination tray to the hydroponic system this week (maybe a bit too soon) and 5 out of 6 plants are doing great !
 Just after the transplantation
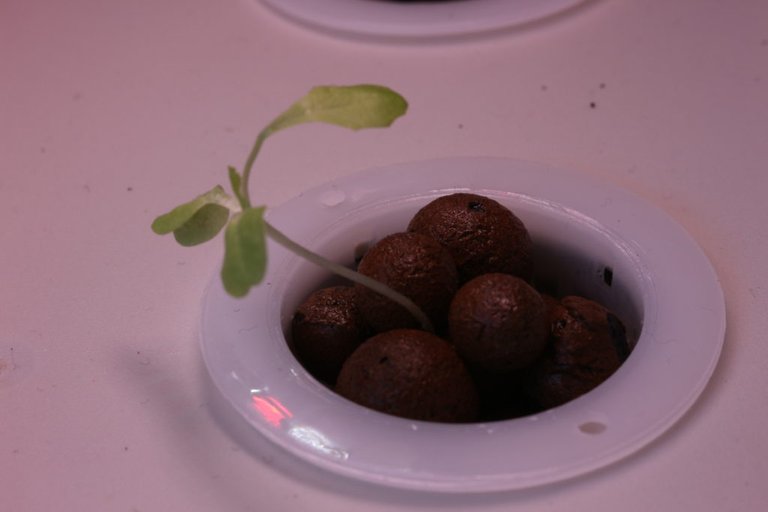 After 5 days in the hydroponic system
We also had our first strawberries arriving :
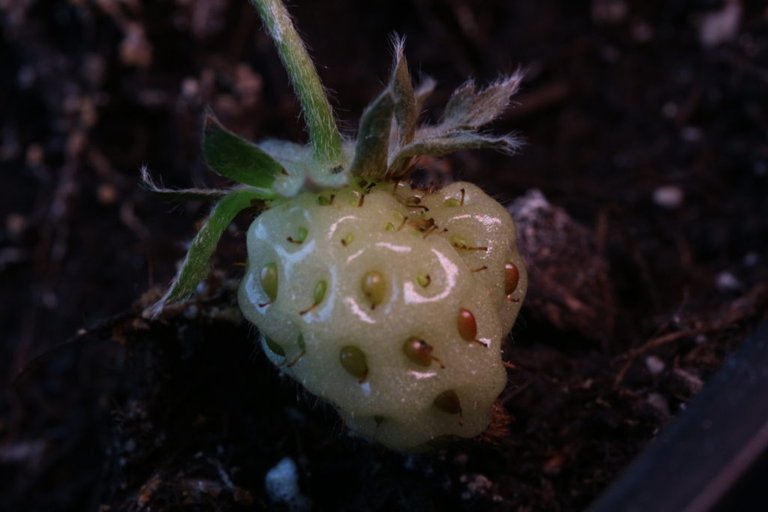 First strawberry appearing this week
Unfortunately we also had an infestation of aphids to deal with this week, we bought some black soap and sprayed a diluted solution over the infested plants, after some days it looks like it going in the right direction :)
Very interesting post, thank you for contributing to the community!
!1UP
Thank you :)
I love seeing this type content showing up in STEMGeeks, but please only post it once not multiple times in different languages.
Thank you for your comment!
It has been discussed on and off chain many times before... I will try posting both languages in the same post for the next articles ! I thought a lot about posting both languages in the same post for this topic but it was already too long (and a lot of work) so I preferred separating the languages instead of the content (plus it allows me to engage in 2 communities, StemSocial and LaRuche, without crossposting).
You have received a 1UP from @kwskicky!
@stem-curator, @vyb-curator, @pob-curator, @neoxag-curator, @pal-curatorAnd they will bring !PIZZA 🍕
Learn more about our delegation service to earn daily rewards. Join the family on Discord.
PIZZA Holders sent $PIZZA tips in this post's comments:
@curation-cartel(17/20) tipped @robotics101 (x1)
Please vote for pizza.witness!
Good to see that the bulk of the plants is doing great. The interface will provide ground for a lot of manipulations to see how different variables affect the growth of individual plants. Good work!
Yes, I will try to dial the parameters according to the plant's needs :) Thank you
I am glad to read from you again and to get some updates from the mini-garden. One important test will be to taste the products, to see how good they are. Soon soon I guess :)
As you are now a JS expert, will you join us to develop the future STEMsocial app? (You can now imagine me diabolically laughing.)
More seriously, this system of bots handling other bots seem a bit weird to me. Why can’t you just directly program the initial bot? I don’t understand the reason behind this layer of complexity.
Thank you, I'm glad to see you back on the chain :) I already had the chance to taste one strawberry yesterday !! First one of the year :)
I have just started, so I don't know if I could be very useful, but if at some point you need help finding bugs I can try ^^
Yes I can imagine your diabolical laugh very vividly :P
You just have to use this bot to create the ids of the account used by your bot, it's like asking for an API key on the Discord App but instead of a normal page, Telegram uses a chatbot.
Thank you for passing by :)
Yes, finally :)
I should take a picture of my 12 plants for you. They are however outdoor. If I think about it, you will get one tomorrow.
@bambukah and I will remember this, for sure.
ah OK now I got it. Thanks for clarifying and the nice comparison!
Cheers!
Thanks for your contribution to the STEMsocial community. Feel free to join us on discord to get to know the rest of us!
Please consider delegating to the @stemsocial account (85% of the curation rewards are returned).
You may also include @stemsocial as a beneficiary of the rewards of this post to get a stronger support.
Congratulations @robotics101!
You raised your level and are now a Minnow!
Support the HiveBuzz project. Vote for our proposal!
Dear @robotics101, we need your help!
The Hivebuzz proposal already got important support from the community. However, it lost its funding a few days ago and only needs a few more HP to get funded again.
May we ask you to support it so our team can continue its work this year?
You can do it on Peakd, ecency, Hive.blog or using HiveSigner.
https://peakd.com/me/proposals/199
Your support would be really helpful and you could make a difference.
Thank you!
Thank you . I just found from your article that I can use MQTT Aedes instead of MQTT mosquito. The Dashboard and Telegram nodes will also be helpful also.
May I know if there is hardware that is robust . Is ESP32+ relay good enough?
!LUV
@princekham(5/5) gave you LUV. tools | wallet | discord | community | <>< daily
HiveBuzz.me NFT for Peace