DIY Repairing of Extension Socket Gotten from a Waste Bin
Hello, good creators of the community. Today, I’ll be discussing how to repair an extension socket. But before proceeding with the tutorial on how to repair the extension socket, I got the extension socket I repaired from a waste bin. Early this morning, I went to throw out some waste into the waste bin from the apartment where I’m currently staying. I was opportune to see an extension that was dumped inside the waste bin.

When I saw the extension socket from my apartment waste bin, I took the extension socket. From the indication, the extension socket was no longer working and I think that was the reason it was dumped inside the waste bin.
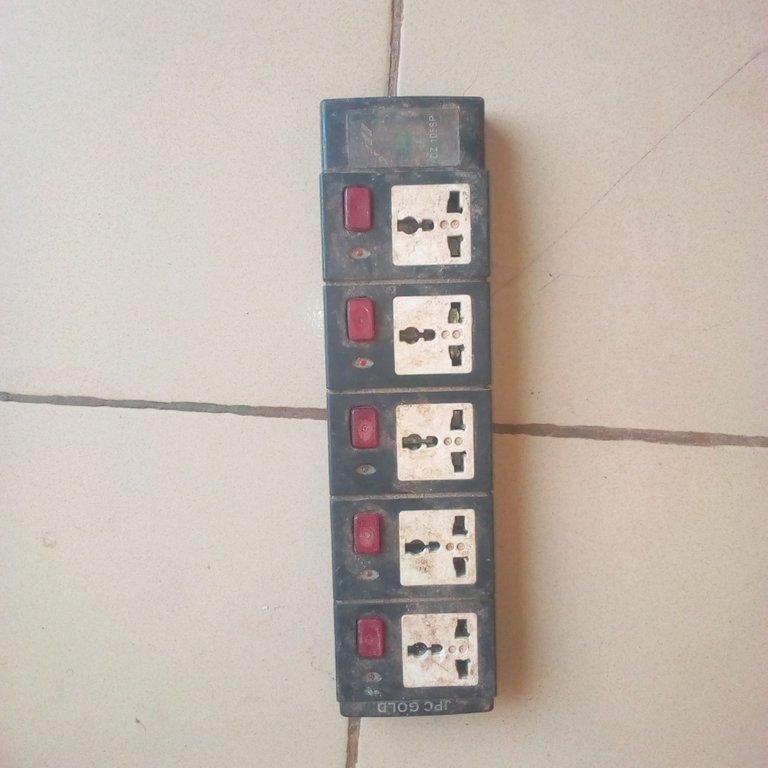
After collecting the extension socket from the waste bin, I took it inside my house and open it to check what the actual problem was. Though before opening the socket extension, there was no wire attached to the extension socket. This was already evidence that the socket extension will no longer be functioning well. This was how I went to the market to get the electrical materials used in repairing the extension socket.
The truth is that most extension sockets are very easy to spoil but can always be easily repaired. This is why I’ll be providing you with the materials and procedures used in repairing the extension socket. To enable you to repair some of the extension sockets you have forgotten they can actually work well again.
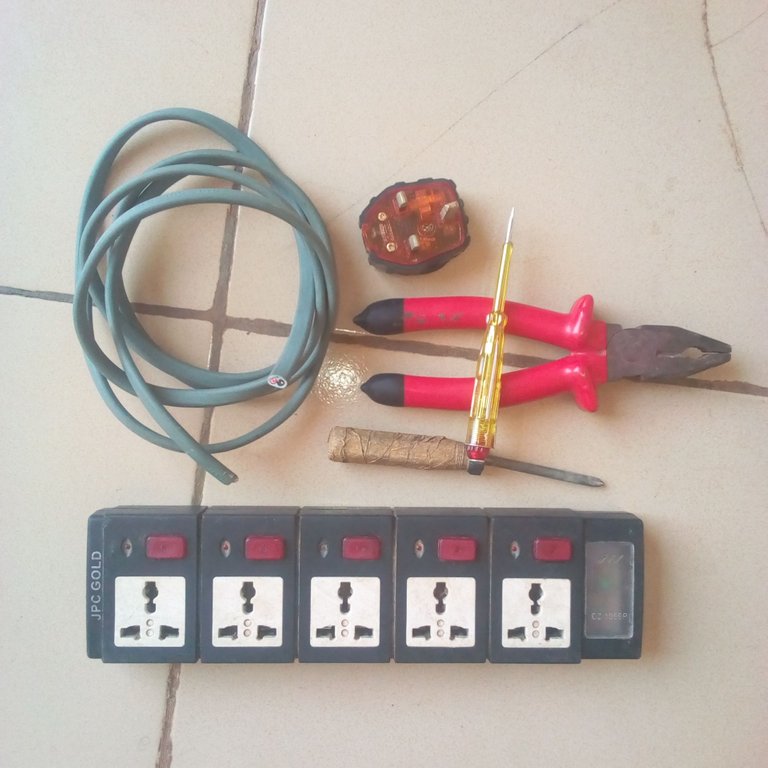
Materials used in repairing the extension socket will be highlighted below:
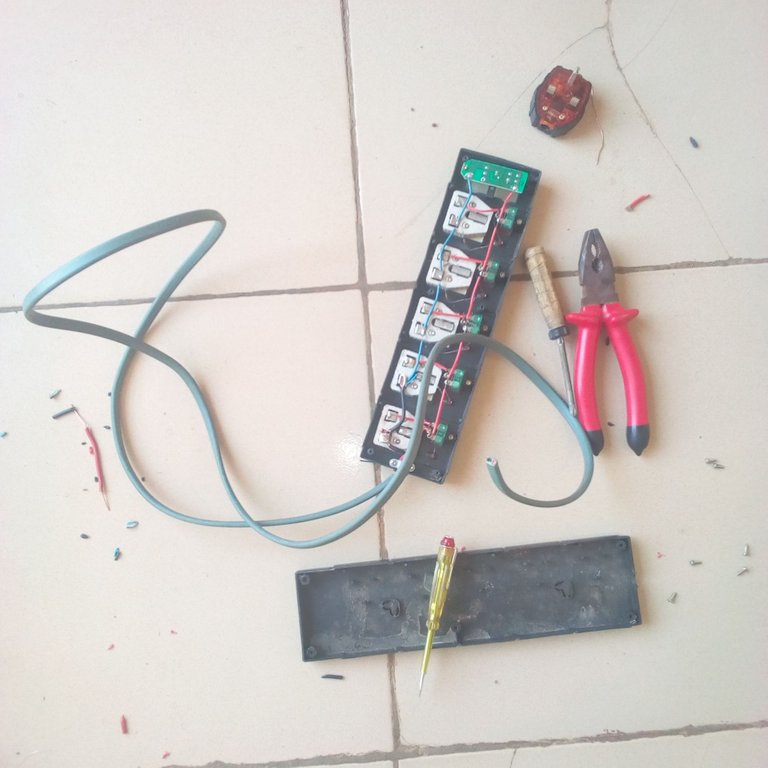
1.5mm Nigeria twin wire.
13A/250V fused socket plug head.
Light tester pen.
Screwdriver.
Plier.
Procedures used in repairing the extension socket will also be highlighted below in the steps:
Step 1
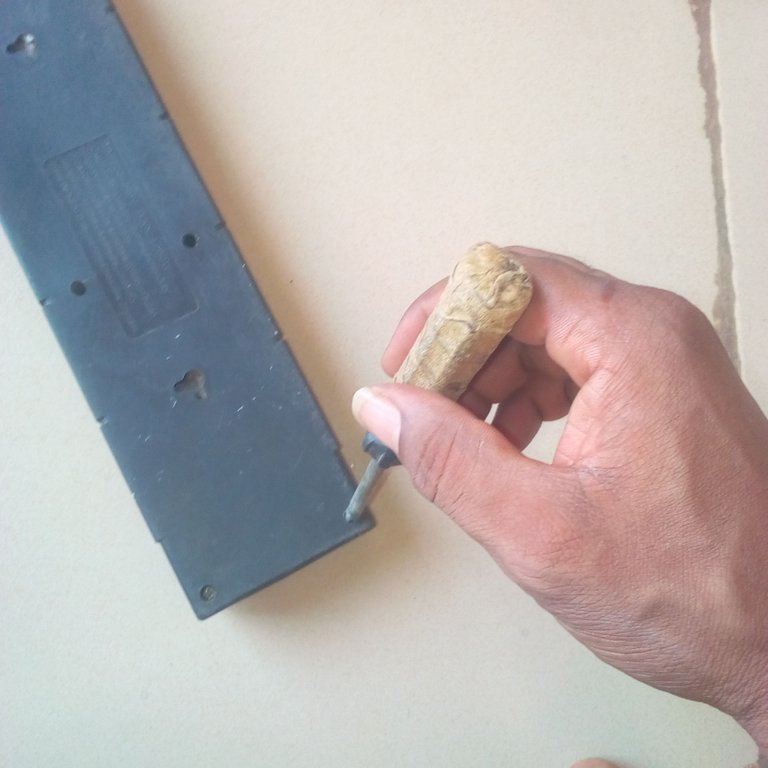
The first thing we have to do is to always clean any extension socket gotten from a waste bin. You can decide to just use any rag around to clean up the external part of the extension socket.
Step 2
After cleaning the extension socket, the next thing you’ll have to do is to use a screwdriver to open the cover of the extension socket.
Step 3
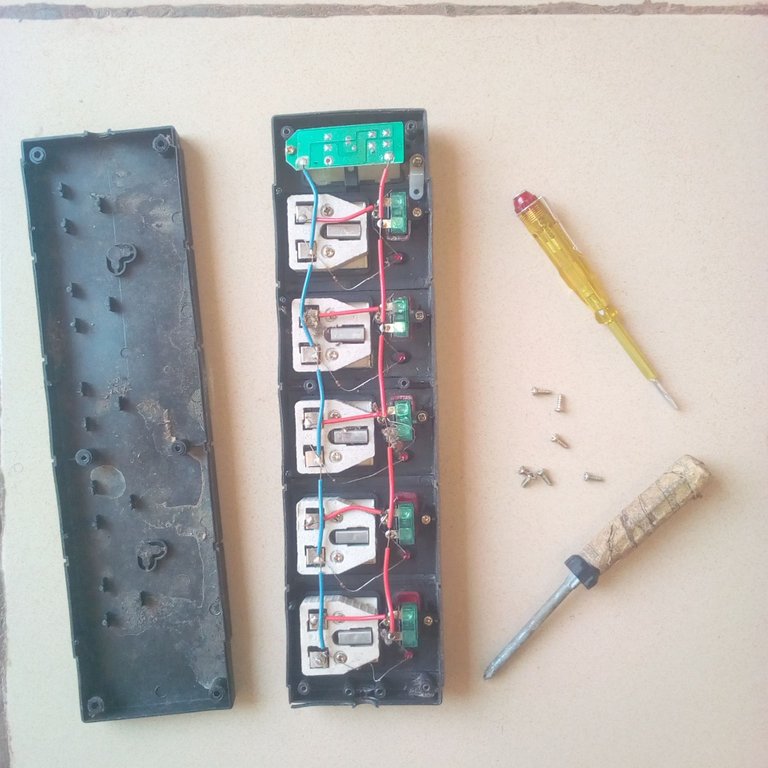
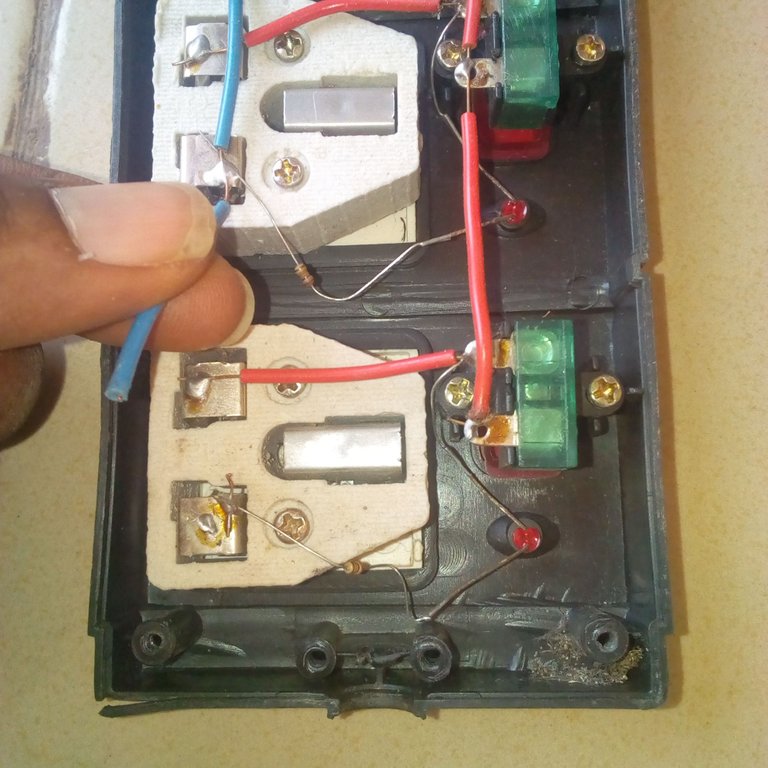
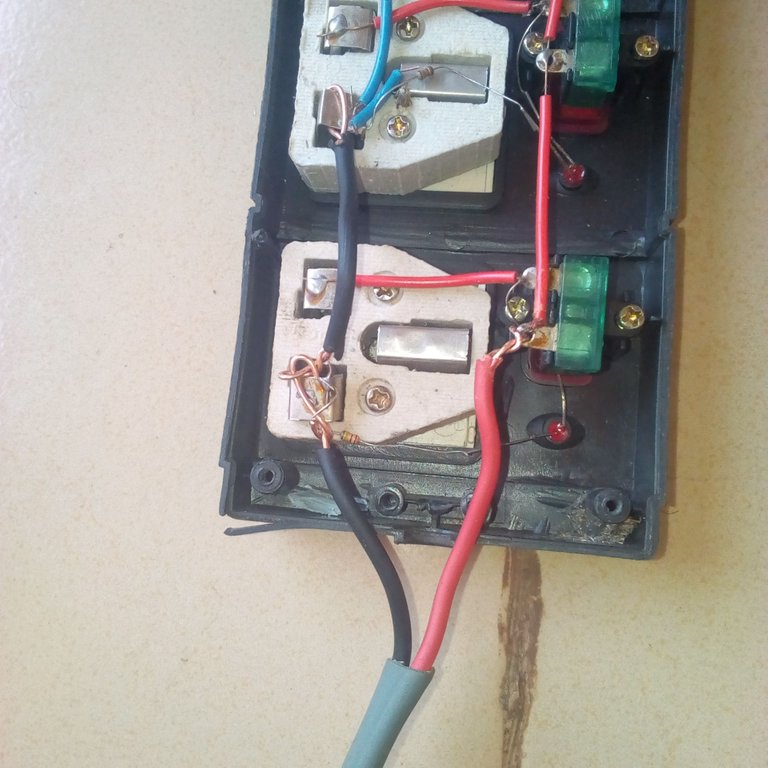
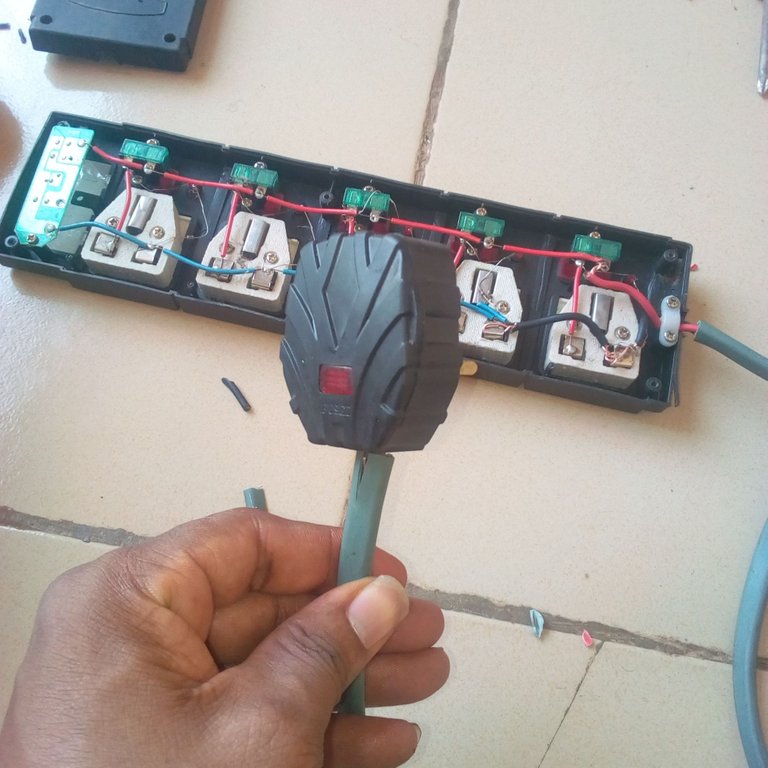
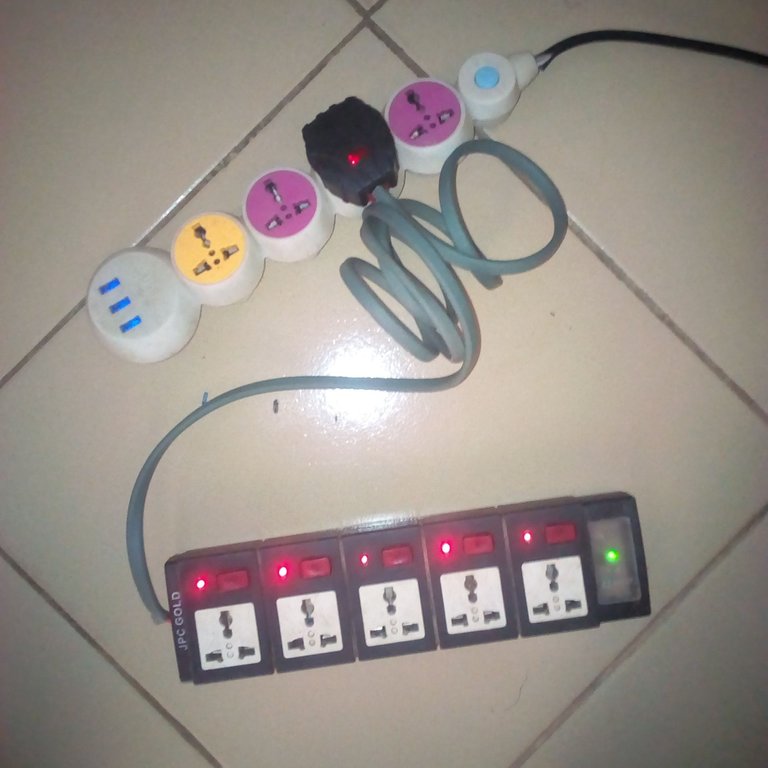
After that, you’ll have to trace the error in the extension socket. When I opened the back cover of the extension socket in repair, I observed that the two wires that are supposed to be supplying current into the extension socket were no longer intact. I also observed that the Neutral wire which helps the complete current flow inside the extension socket was cut by a damaged current flow spark.
Step 4
Note: Inside the extension socket, there are two colors of wires that supply current flow within the extension socket. The red color wire stands for Life (Positive +) while the blue color wire stands for Neutral (Negative -).
After dictating the errors from the extension socket, I have to first use the plier to cut some wire from the black twin wire I bought from the market. After cutting the black wire, I have to use the same plier to pill the mouth of the black wire and then fix the damaged blue Neutral wire of the extension socket. What I mean here is that I fixed all the wires that were damaged inside the extension socket.

Step 5
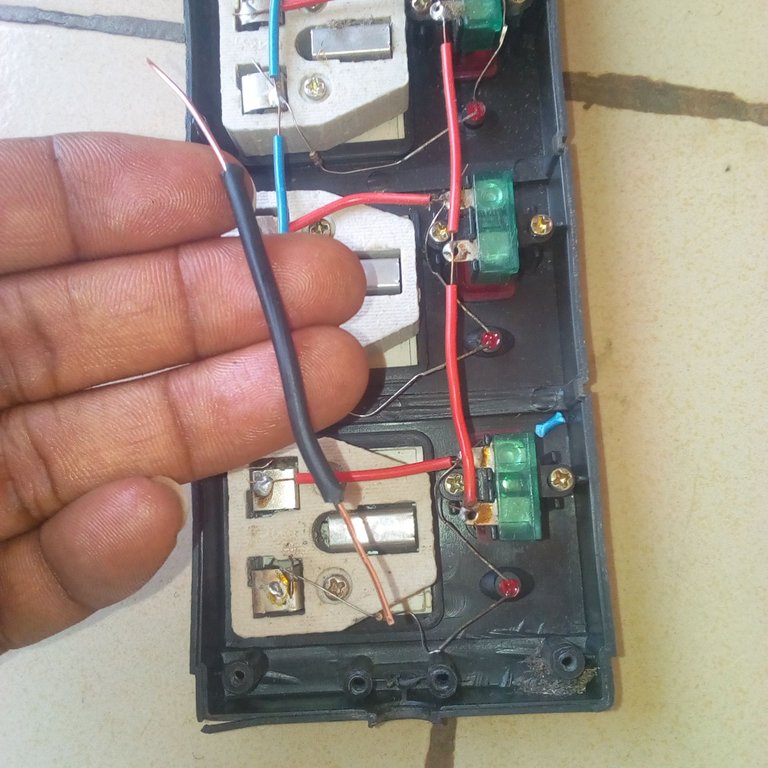
After I replaced the damaged wires into the extension socket, I now have to use my plier to pill the mouth of the 1.5mm Nigeria twin wire. After the pilling of both the red and black colored wire, I have to fix the black colored wire into the already existing blue colored wire from the extension which serves as the Neutral. After that, I also have to fix the red-colored 1.5mm Nigeria wire into the already existing red-colored wire from the extension socket on/off the power circuit.
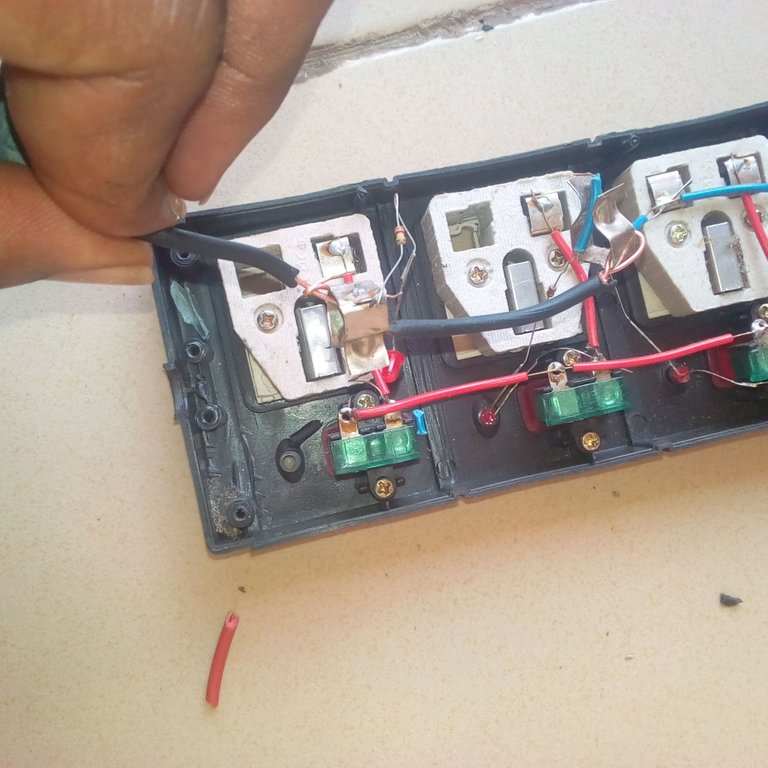

Step 6
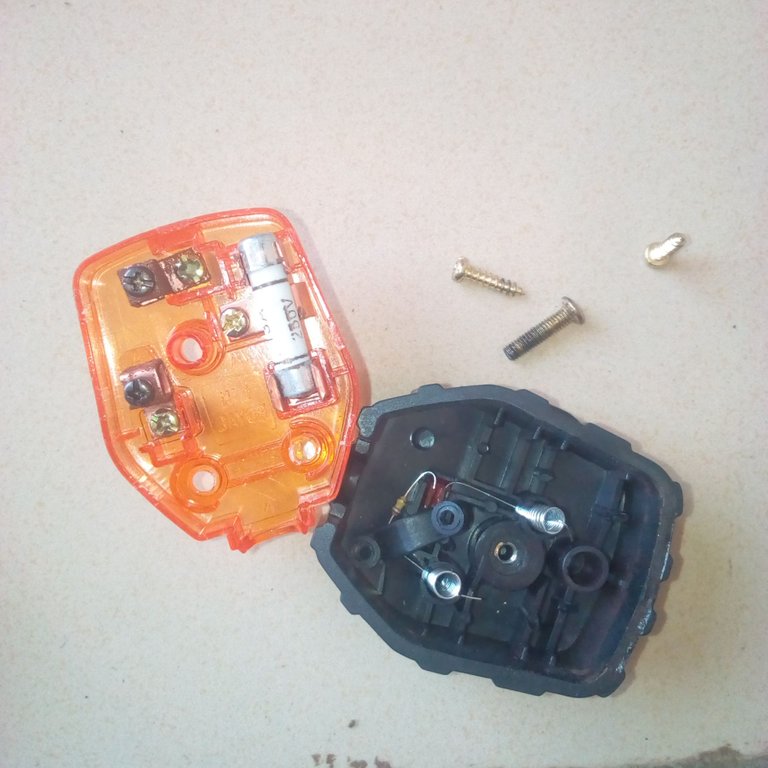
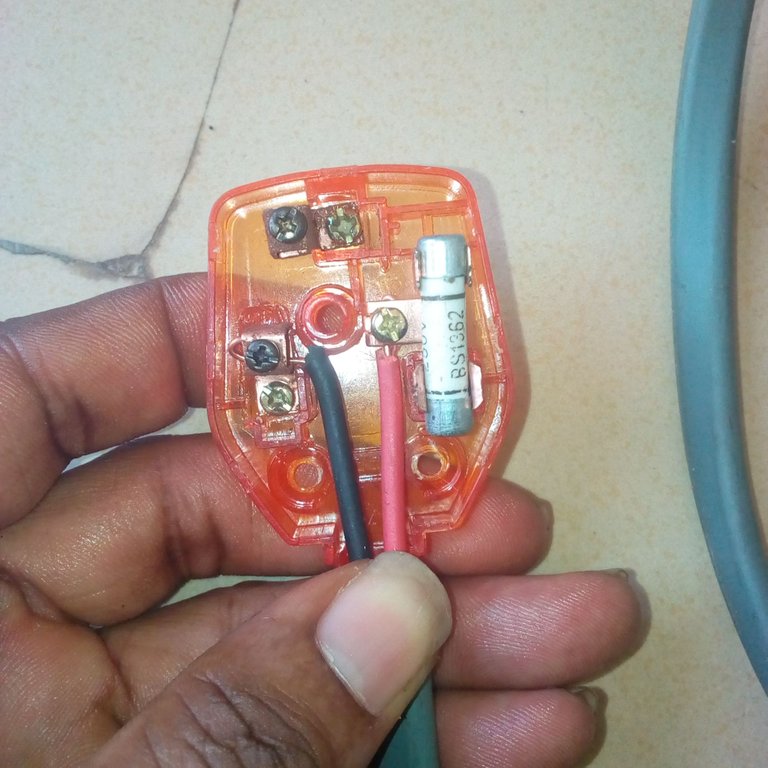
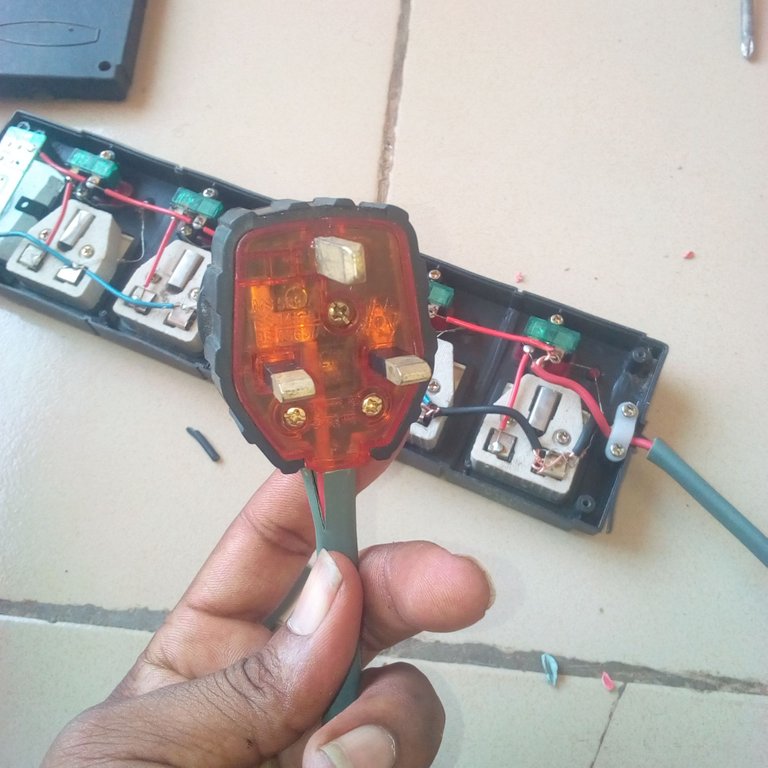
After fixing the 1.5mm Nigeria twin wire into the Neutral and on/off circuit inside the extension socket. I now have to use the screwdriver to open the 13A/250V fused head plug. When you open the head plug, to the right side, there’s a fuse attached to a nut. Then use the screwdriver to insert the red-colored wire closer to the fuse. After that, to the left side of the plug head, insert the black-colored wire.


Step 7
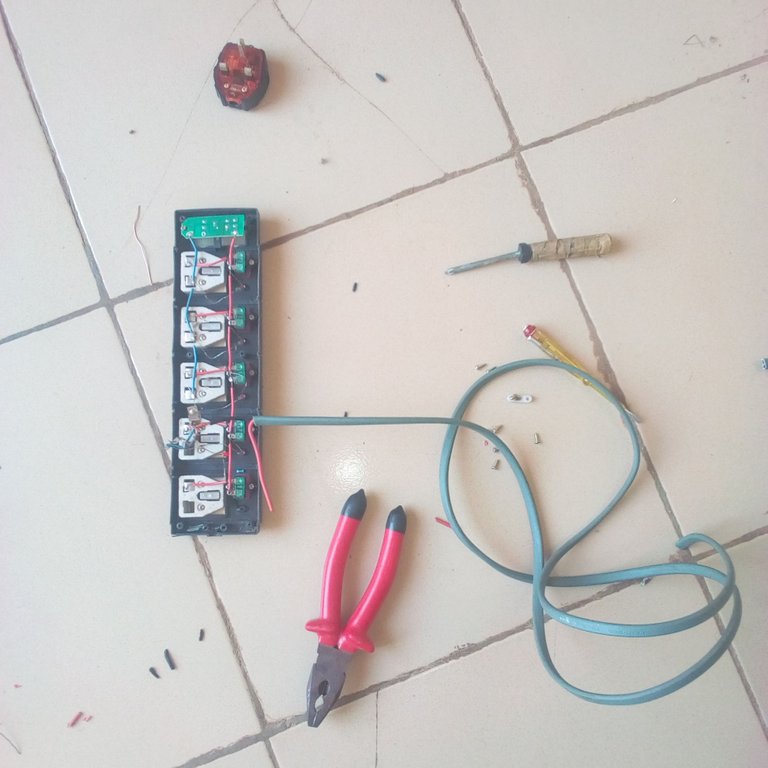
After you’re done with the plug head, you’ll need to close the plug head and then use the screwdriver to tight back the screws.
Step 8
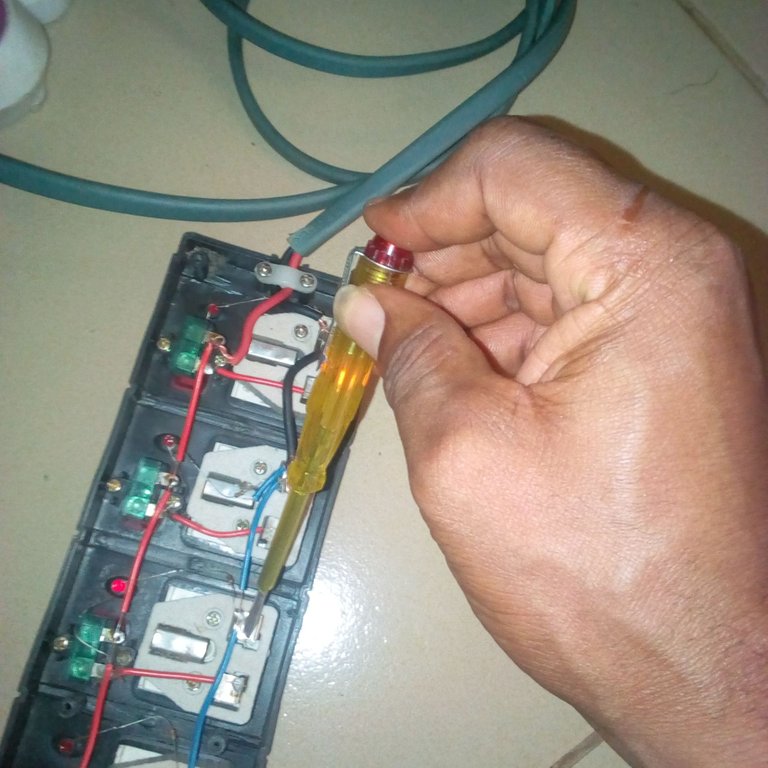
I think the extension socket is now working well by allowing current flow. Before you can be sure that the extension socket is now working, please plug it into any light and then use a light tester pen to test the current flow inside the extension socket.
Step 9
After checking and observing that the extension socket is back to life, you can now use the screwdriver to cover the back side of the extension socket.
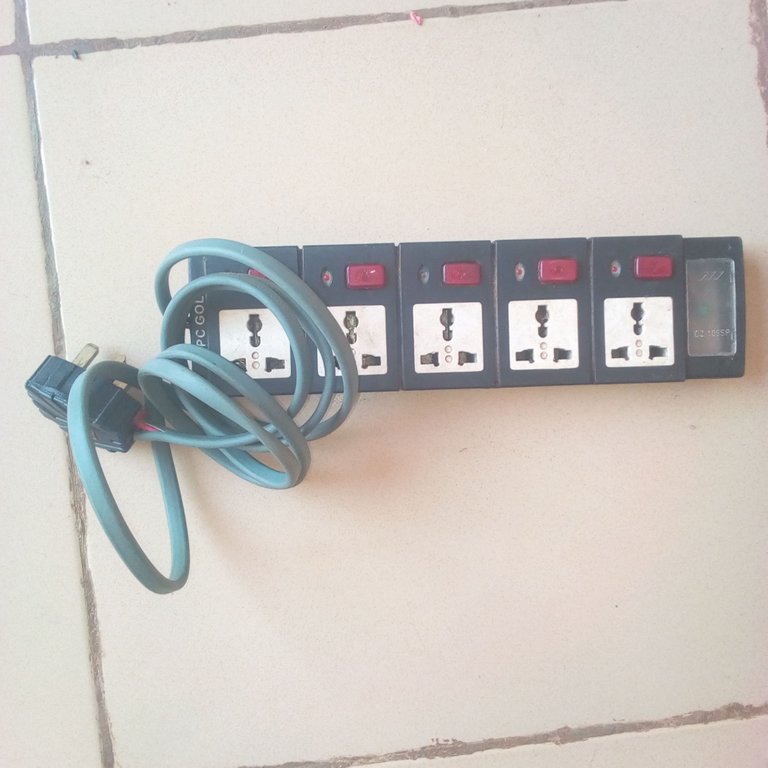
Thanks for being part of the extension socket repairing tutorial.
The first image was edited using Picsart.
Thank you for sharing this post in the DIYHUB Community!
Your content got selected by our fellow curator desro & you just received a little thank you upvote from us for your great work! Your post will be featured in one of our recurring compilations which are aiming to offer you a stage to widen your audience within the DIY scene of Hive. Stay creative & HIVE ON!
Please vote for our hive witness <3
This is not safe.
Great tutorial
!1UP
Thanks, dear for the support.
You have received a 1UP from @gwajnberg!
@stem-curator, @vyb-curator, @pob-curator
And they will bring !PIZZA 🍕.
Learn more about our delegation service to earn daily rewards. Join the Cartel on Discord.
I gifted $PIZZA slices here:
@curation-cartel(5/20) tipped @apunawu (x1)
Send $PIZZA tips in Discord via tip.cc!
Very useful! greetings my friend.
Thanks for the visit, dear friend.
Folks this is just dangerous, do not do this. I don't know what the etiquette about downvoting is, but this can potentially kill someone. 😳😞
There's no risk attached to it friend. You just need to follow the steps carefully.
No buddy, this is a death risk. The fact you don't think there's any risk makes it even more worrying. Thinking there is no risk here is the main reason noone should attempt to do this without having some level of electrical competency. And anyone with any electrical competency would immediately see the problems in what has been done.
That extension death trap needs to be thrown back in the bin it was found in immediately, after removing the botch up wiring which at least the person who put it in the bin originally had the sense to do. 😞
But the extension is already covered; besides, it's only meant for charging cell phones and fans, radios, and other minor appliances with low voltage output. In that regard, there'll be no bridge of current.
For your life, the lives of your family, and the lives of those who may be tempted to follow your example I will mention a few observations. I'm adding this as a main comment rather than buried in my reply to you.
These considerations are relevant to ANYONE who thinks they may follow this death guide. If you think this tutorial is good then stay very far away from doing any electrical work. Call an electrician. And if you want an extension block, go and buy one and save someone's life. Or go and study electrical engineering first and then make this repair.
I wish you all an extended safe life. 🙏