The 1989 Batmobile Lego Bulid - Part 1
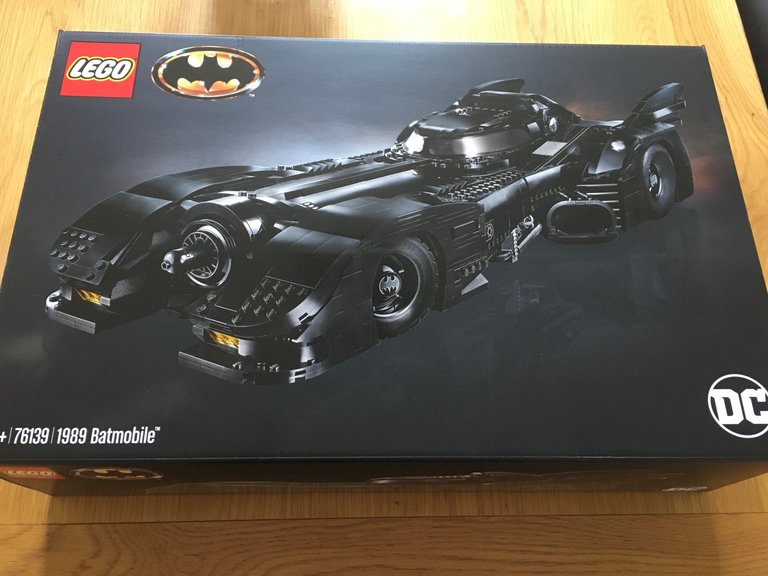
Ever since this kit appeared one day on my Facebook feed, I have been absolutely desperate to get it. I am a massive Batman fan and have been slowly collecting up Lego batman kits for a while. Justifying the price of £220 was hard though, but I finally convinced myself (and the wife) that it was a good idea.
This is also my first "large" lego build. With nearly 3500 pieces, it's going to take a long while to build. So far I've been blown away with some of the build techniques. There's nothing more satisfying than building a small module and watching it click into place perfectly at some random angle and onto some studs that you had no idea of why you put them there.
So let start....
Inside the Box
 |  |
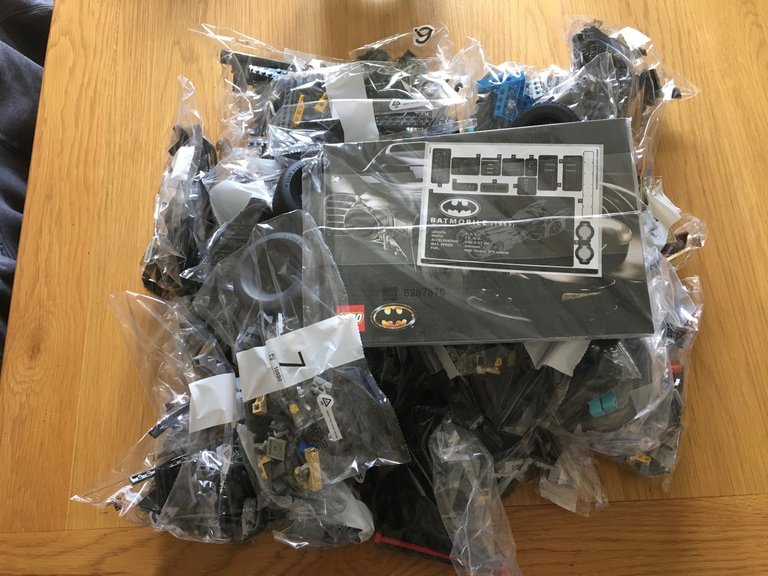 | 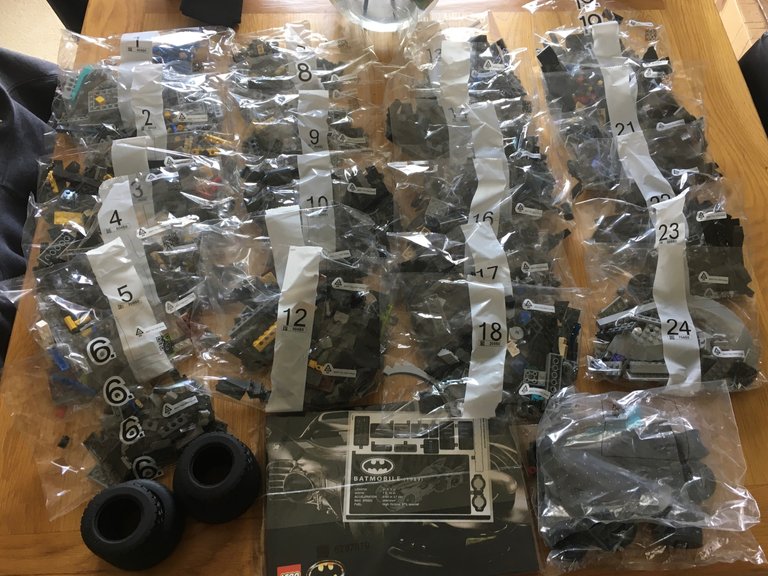 |
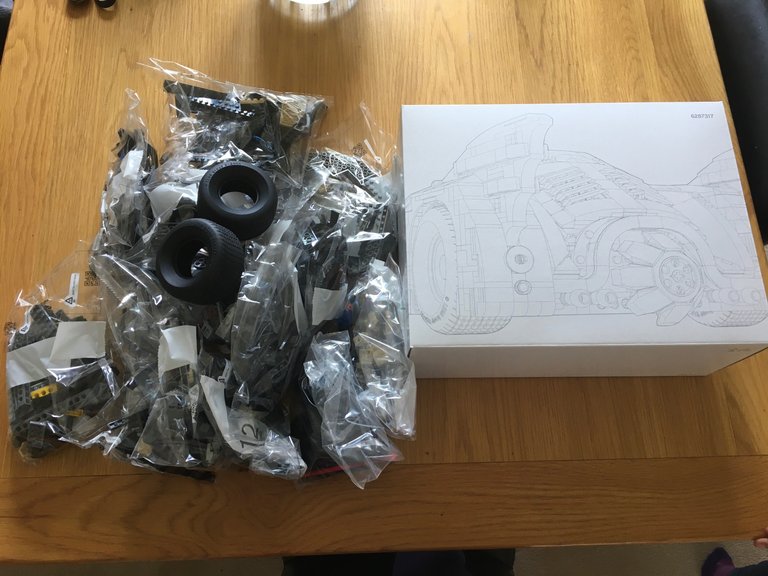
The box itself is pretty impressive. It's a cool matte black and the batmobile is a sort of embossed shiny image. Very tactile indeed. Inside you get a number of bags and a second box containing even more bags. There are 25 numbered bags in total, 2 more with larger and specialized parts, and 4 tires. There is also the shrinkwrapped manual and sticker package.
Minifigs
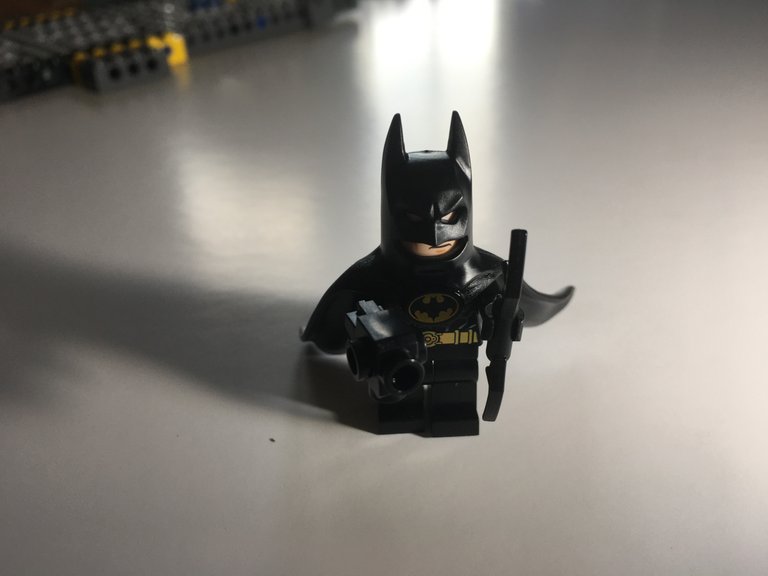 | 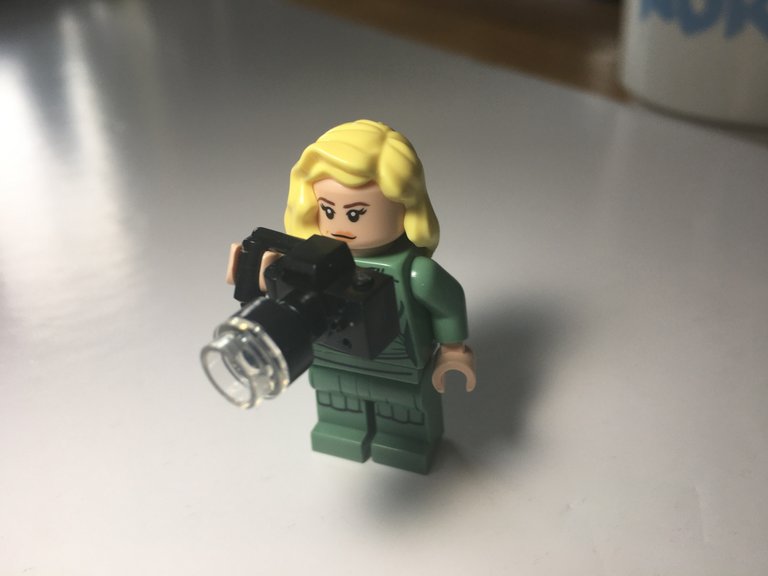 |
So far I have unpacked 2 of the 3 minifigs in this kit. The first one is, of course, batman. He is a bit different from other batman minifigs as he has a flexible rubber cape and cowl single headset instead of the usual cloth cape which the neck goes through. The other minifig is Vicki Vale, played by Kim Basinger in the 1989 movie. She has a cool little camera.
Manual
 | 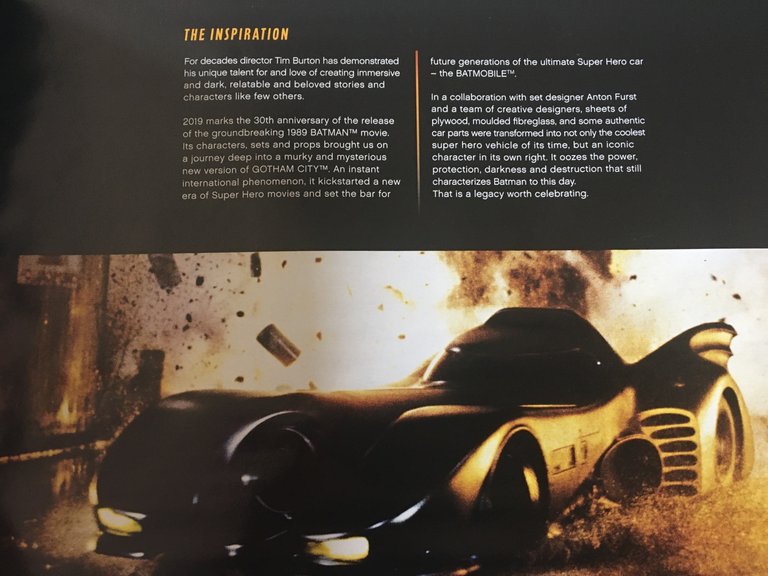 |
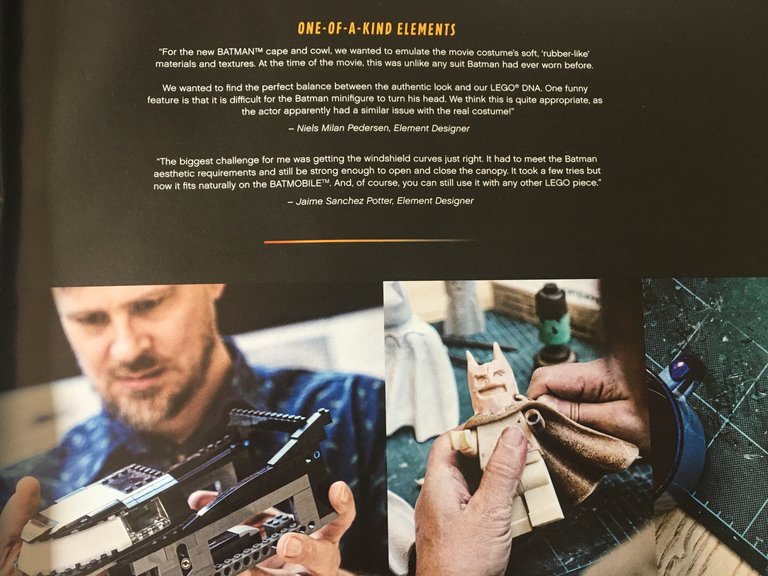 | 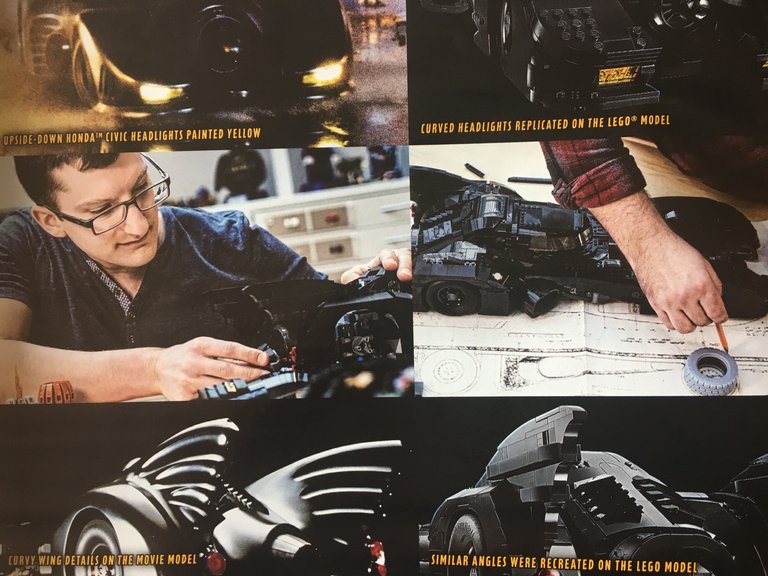 |
The manual is pretty awesome. Not only does it have the usual detailed lego build steps, but also has a lot of pages on the design and inspiration of the model. Some examples of those are above
Build
So here I will detail some of the build steps. The ones in this post get me to about halfway through the process.
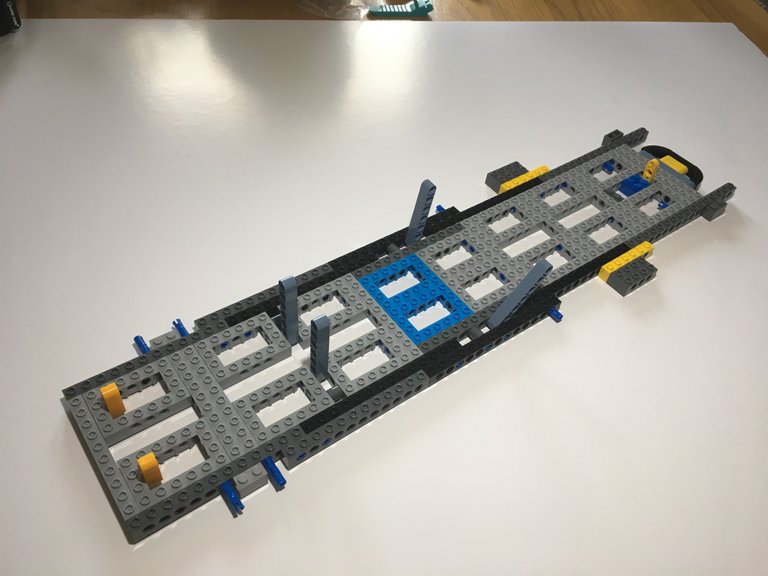
Firstly, the chassis, which is created from a number of Technik parts, mostly squares, and studs. Then a front axle and steering mechanism is added as well as the initial hints of the final black finish
 |  |
 |  |
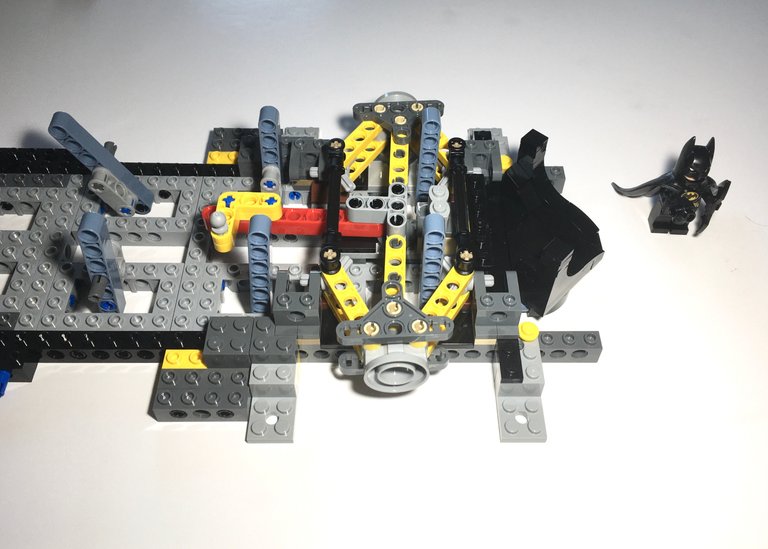
Next up is the completed steering column on the left and on the right, the full rack and pinion machine guns that will eventually be controlled by the twisting of the rear exhaust outlet. You can start to see some of the interior console details appearing near to the steering column.
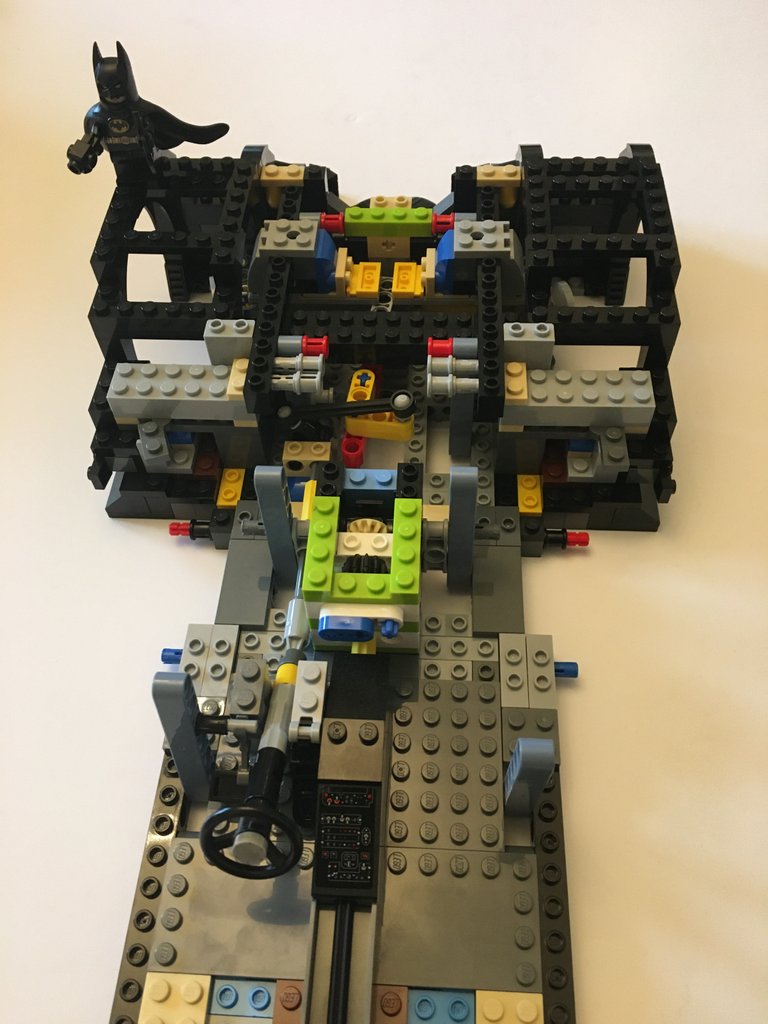 | 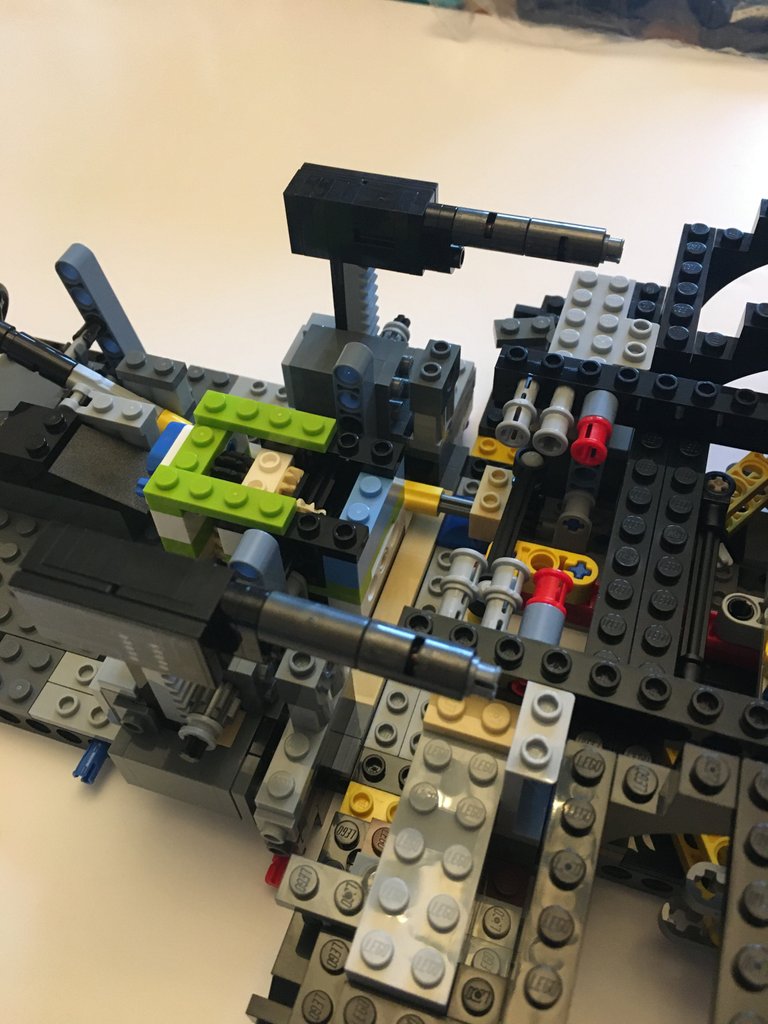 |
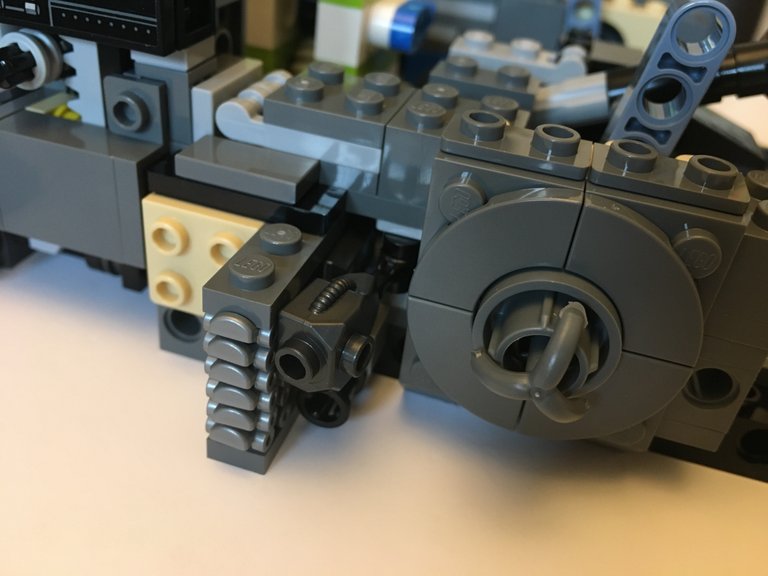
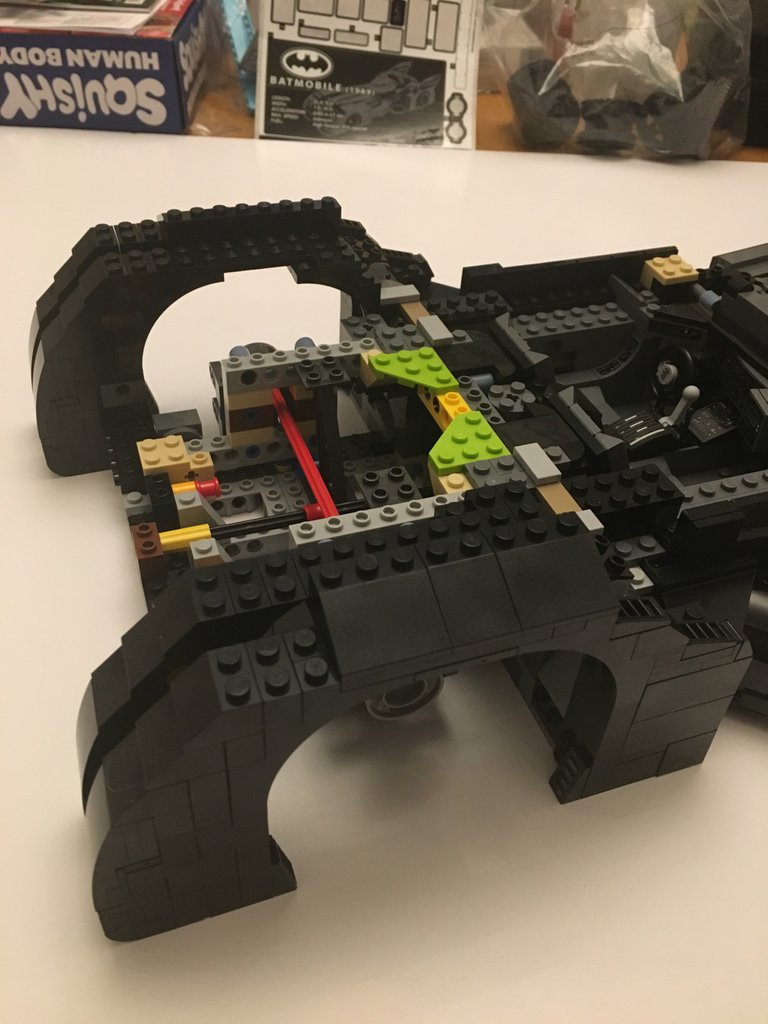
Some of the exterior details start to get added with some really clever pipework. I particularly like the use of 6 small lego cars as what appears to be some kind of cooling mechanism. There is a larger cooling mechanism in the form of the 6 fins with an air intake.
 | 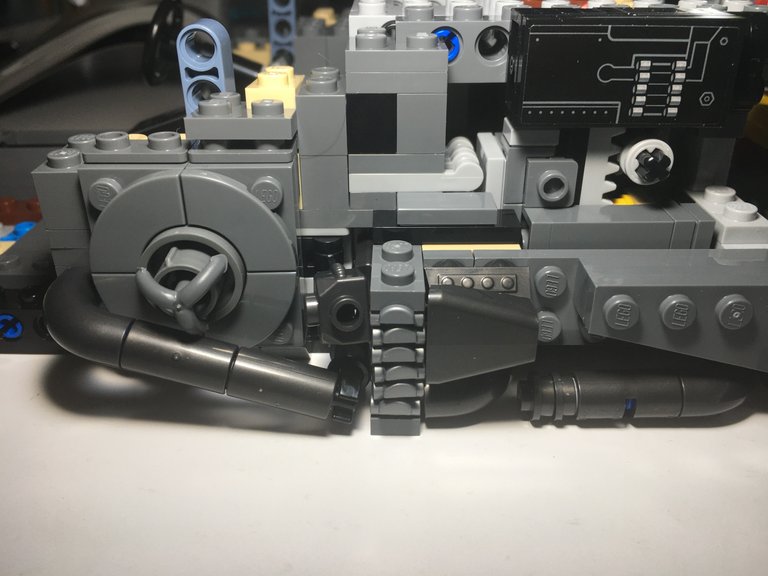 |
 |  |
Next, we start to build out the cockpit with a lot of flat plates in grey. There are some nice touches here, such as the pedals and control sticks. The irregular shape of the dashboard is also pretty neat.
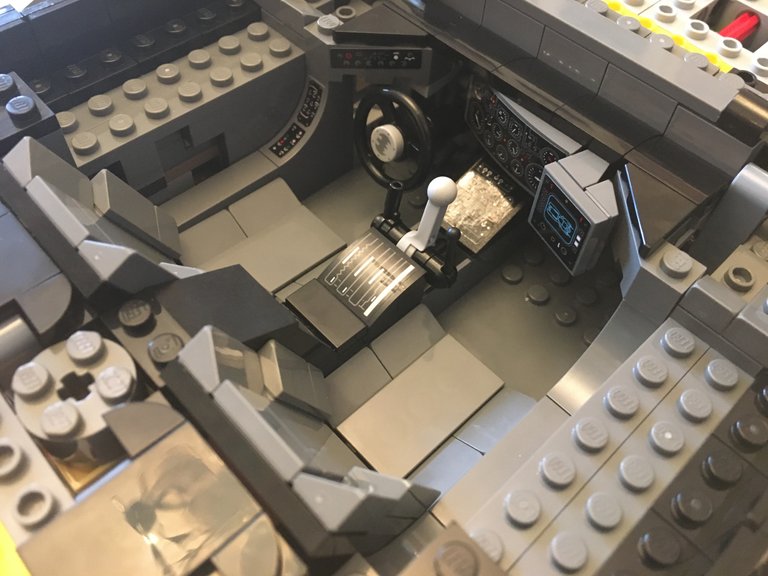 | 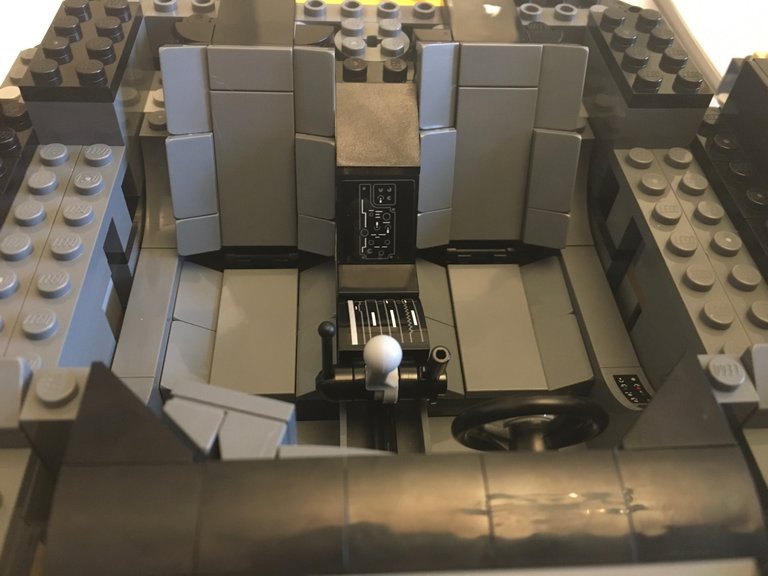 |
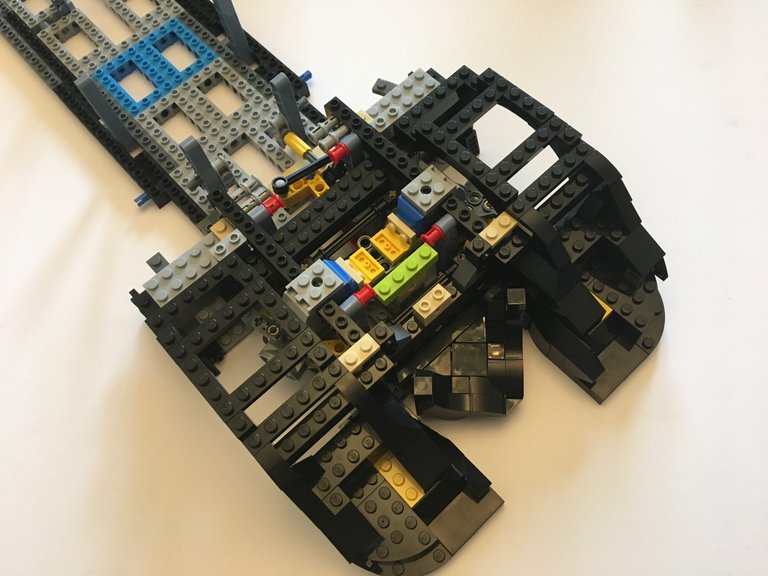
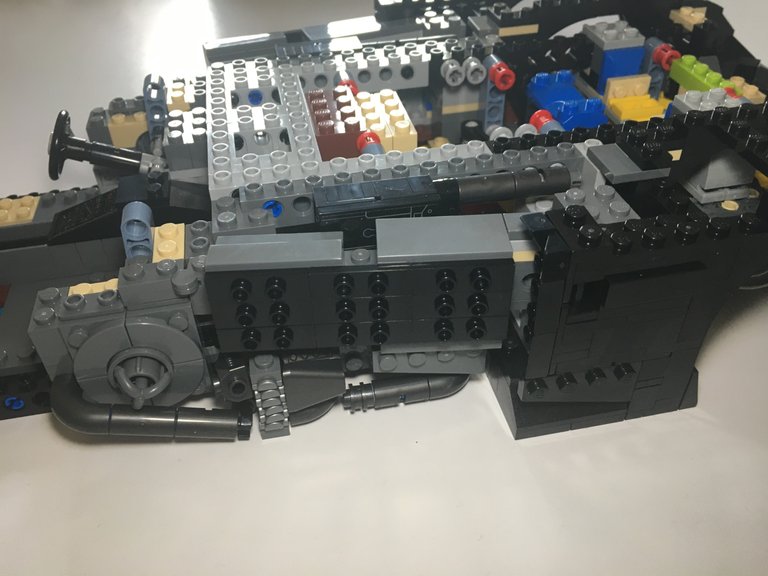
Here is a closer look at the rear wheel arches and axle. as well as starting to cover up some of the innards at the front with black plating. We are going to be using a lot of this stuff in this build.
 | 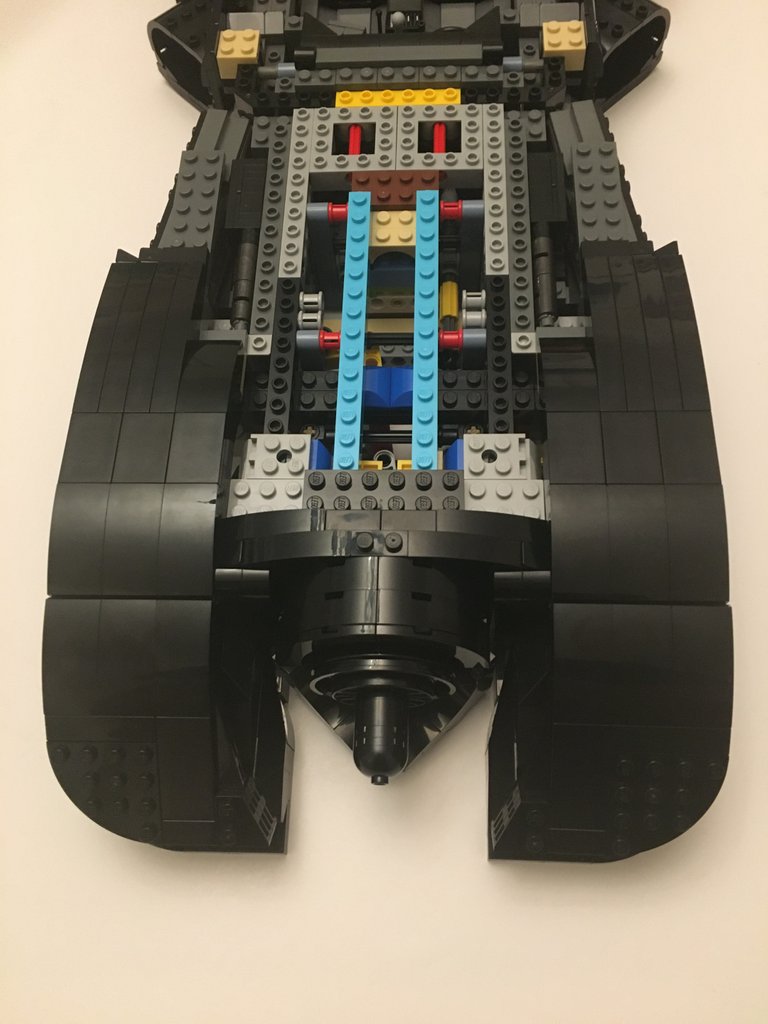 |
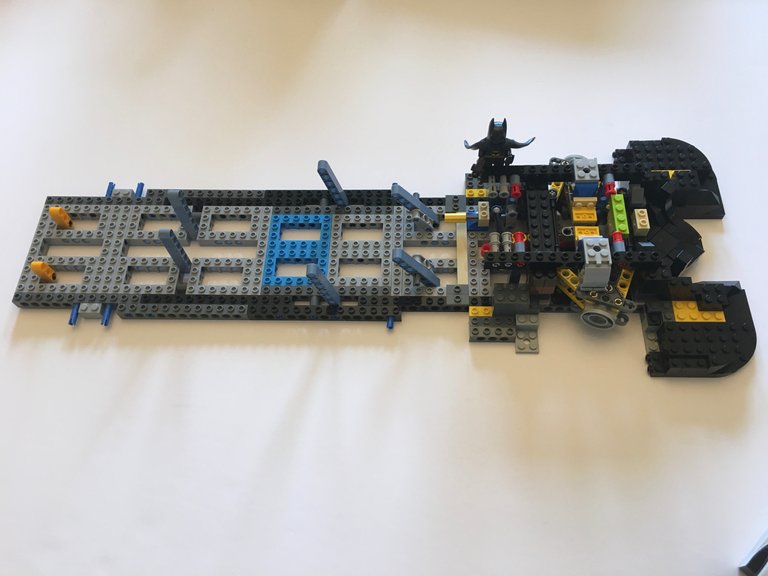
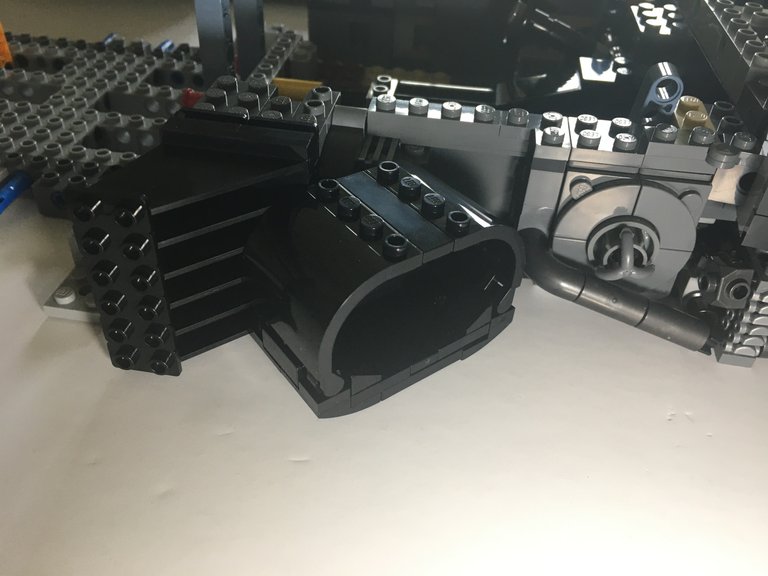
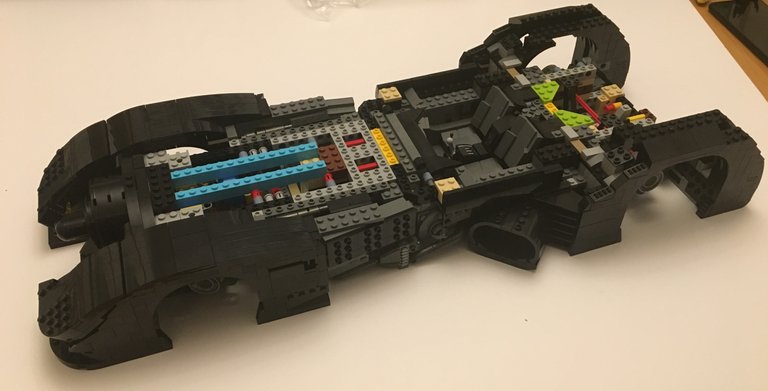
And finally for this post, the current state, with a lot of the underlying structural work done as well as some of the more decorative work at the front. The next jobs will be the engine cover, cockpit cover, and building out the rear of the model. That will probably be a couple of days away though.
Thanks for stopping by
Mark
This post was shared in the Curation Collective Discord community for curators, and upvoted and reblogged by the @c-squared community account after manual review.
@c-squared runs a community witness. Please consider using one of your witness votes on us here
Oh, this is HUGE !! 😄
Sure is. I should have said that the total length is 60cm. :)
Honestly, I´m jealous. This thing is absolutely amazing and I would love to assemble it.
That is looking good. And definitely large.
woah dude this is even cooler than I expected! I haven't ever bought an expensive modern set and had no idea the instructions would include a section on design inspiration with photos, so neat! The build is looking awesome
Thanks mate, can't wait to get it complete and try to take some studio level photos with it. Might go mad with the smoke machine :D