Home Automation with Home Assistant, Controlling my Front Room Lamp
Hey all
Following on from my previous post on my home automation setup, I thought I'd dive into a bit more detail on how my front room lamp has been automated. It's a pretty simple setup with the following logic
- Turn on 15 minutes before the sun sets
- Turn off 1 minute after the TV has been turned off, but only after 9:30 pm. This gives us a minute to get out of the lounge before it goes dark
Hardware
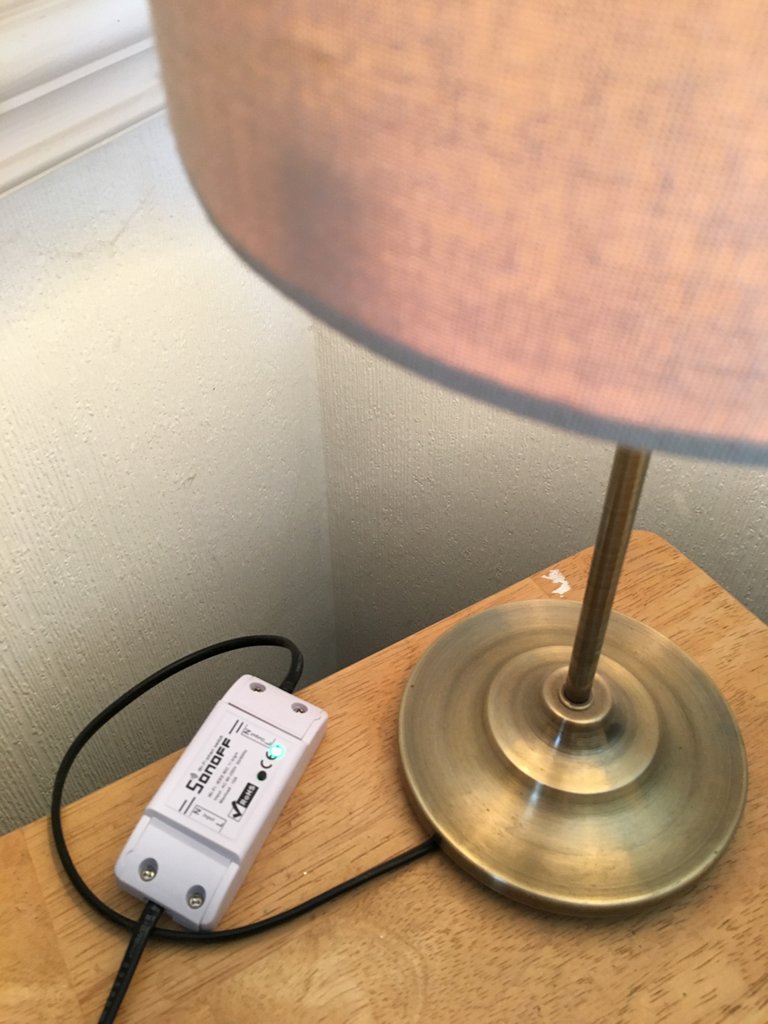
So obviously for this setup, you need a switch of some kind and I am using a Sonoff Basic switch which is flashed with Tasmota firmware. This is just a free firmware update for devices with the ESP8266 wifi microchip on them. It connects inline with a lamp as you can see in this picture on the right. Before you upload the firmware to it, you update the code with your wifi SSID and password and it connects up automatically and becomes discoverable on the network
You can access the switch directly as it runs its own small web server. Just hitting the IP address of the switch in a browser gets you into the device config page
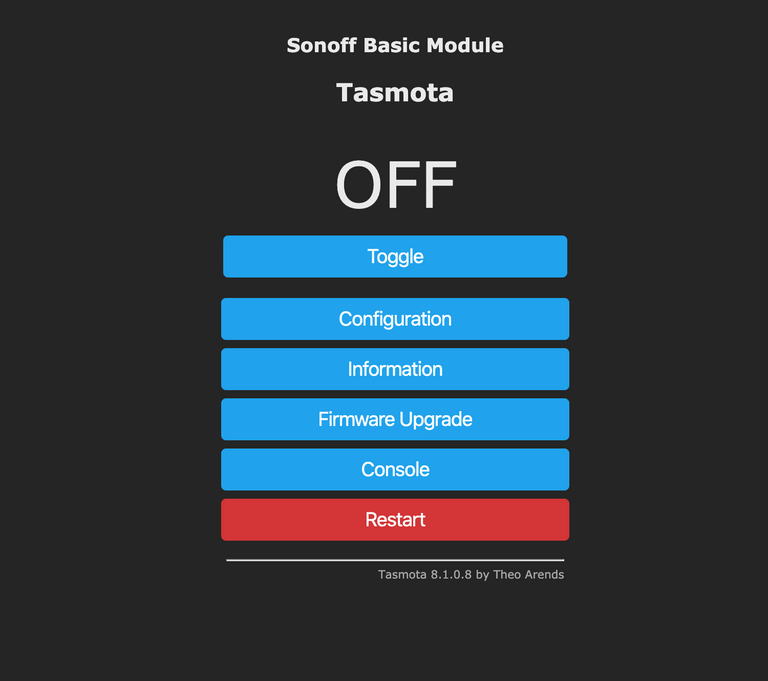
In this UI you can test the switch with the toggle button and update the configuration. The one thing that you really need to do on this UI is to configure the location of the MQTT broker. The MQTT broker is a lightweight bit of software that handles messages to and from the switch using a publish and subscribe mechanism. Think of it as a mechanism for seeing when the status of the switch has changed and reporting this to other systems as well as a way of broadcasting changes to the switch to turn it on and off.
The MQTT protocol provides a lightweight method of carrying out messaging using a publish/subscribe model. This makes it suitable for Internet of Things messaging such as with low power sensors or mobile devices such as phones, embedded computers or microcontrollers.
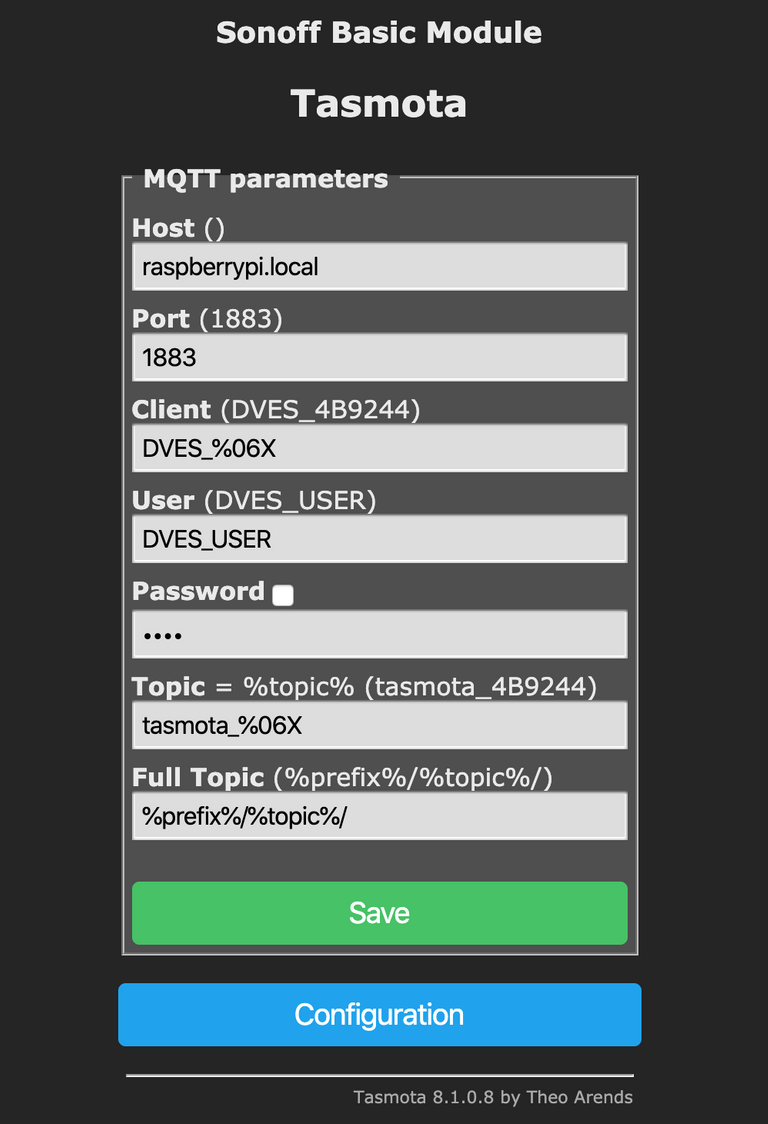
I use Mosquitto as my MQTT broker and that runs on my raspberry pi alongside my home assistant software. My Sonoff is configured as follows. The only thing that is non-default is the host() field
The only other hardware involved in this automation is my TV and that is an LG running WebOS.
Configuration
Configuration of the devices themselves is done in Home Assistant in the form of YAML files. You have a base yaml file called configuration.yaml that contains a lot of top-level config items and a number of imports that relate to other parts of the system. This just makes it easier to manage. For example, a basic config to manage mqtt devices and TV would look like this.
# Configure a default setup of Home Assistant (frontend, api, etc)
default_config:

# define where your mqtt broker is
mqtt:
  broker: 127.0.0.1

#ip address and name of the tv
webostv:
  host: 192.168.1.200
  name: Living Room TV


#include files
group: !include groups.yaml
automation: !include automations.yaml
script: !include scripts.yaml
scene: !include scenes.yaml
switch: !include switches.yaml
zone: !include zones.yaml
sensor: !include sensors.yaml
light: !include lights.yaml
The other important file for setting up the devices themselves, in this case, is the switches.yaml which looks like this and defines the MQTT details for the light switch.
- platform: mqtt
  name: "Front Room Lamp"
  # command_topic is where to send commands
  command_topic: "cmnd/tasmota_4B9244/POWER"
  # state_topic is where to get the state of the switch
  state_topic: "stat/tasmota_4B9244/POWER"
  qos: 1
  # commands to change state
  payload_on: "ON"
  payload_off: "OFF"
  # keep a record of state even if system is restarted
  retain: true
Automation
There are two methods I use for automation, one is in the YAML files directly in Home Assistant and one is with an automation workflow tool called Node Red. Node Red integrates directly with Home Assistant, can see all of the exposed devices, and has a number of plugins that you can add that work with Home Assistant. I'll step through the automations here
Turning the light on after sunset
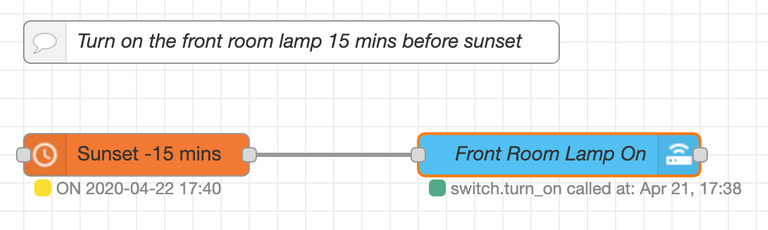
To the right here is a section of my Node Red automation that shows how you link up nodes to cause actions. The first node in this workflow is a Schedex node which is a cool scheduling node. It can fire off at specific times per day, on specific days, randomly, or based on environmental things such as sunset times. You can also see that yesterday, Front Room Light On was called at 17:38 UTC and today it will be called at 17:40 UTC.
Bringing up the node's properties gets you the following self-explanatory dialog box
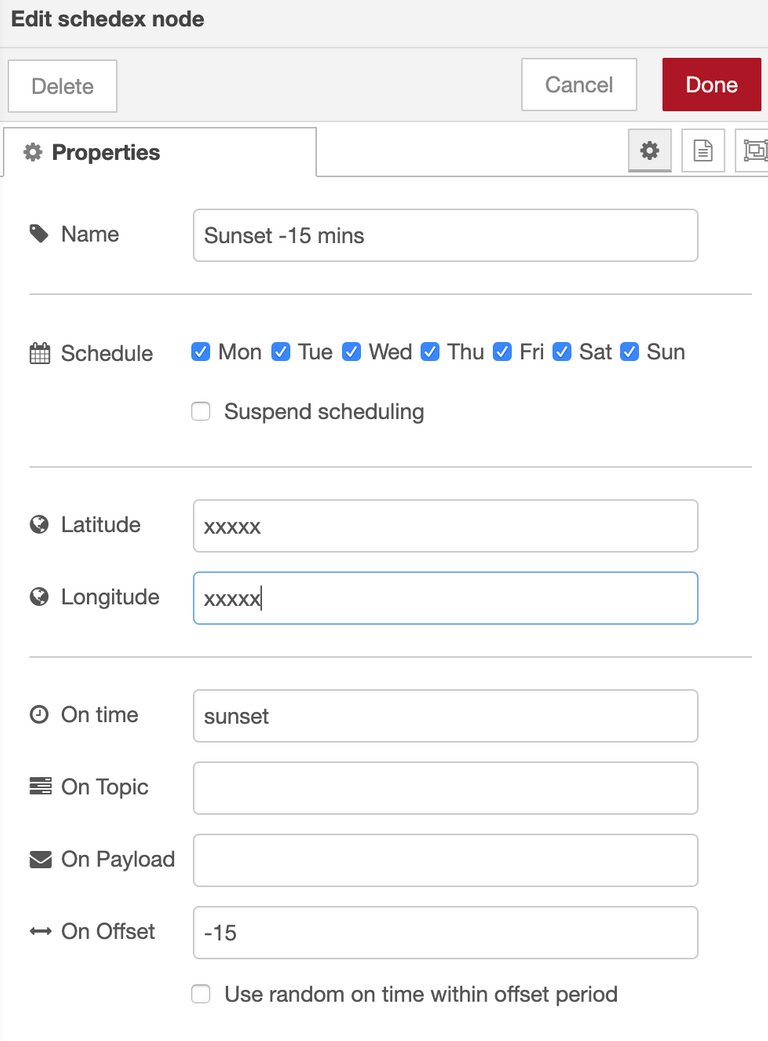
So at sunset -15 minutes (at my location), this fires a message to the next item in the workflow, which is 'Front Room Lamp On' service call node
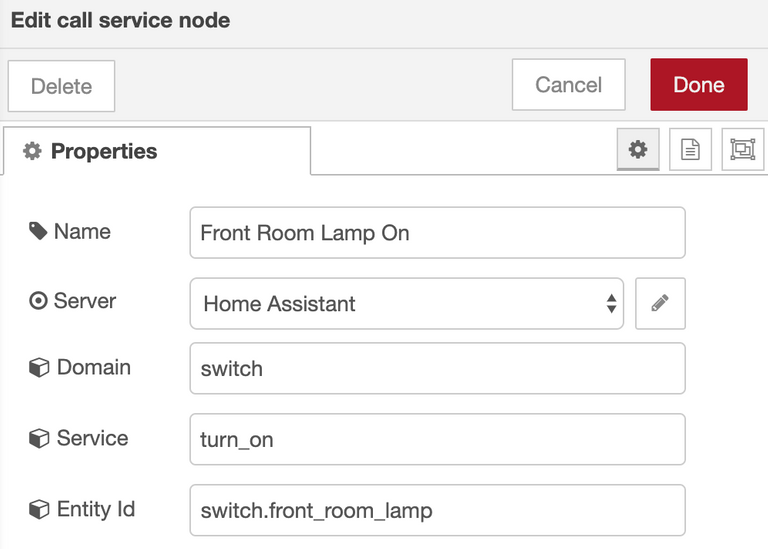
The entity, switch.front_room_lamp here relates to the YAML definition i previously set up in the MQTT config file , switches.yaml above. The service being turn_on will trigger the payload_on command and send the "ON" message to the switch itself.
Turning the light off with the TV
The last thing we tend to do before we go to bed is to turn the TV off so this is a great hook to signal when to shut things off that don't need to be on overnight. This automation is done in standard YAML as I haven't had a chance to migrate it to Node Red yet but is a good example of how powerful the language is on its own. This is a snippet from automations.yaml It's pretty self-explanatory; if the TV is turned from on to off for 1 minute and the condition that it is after 21:00 or before 06:00 (for those late nights), then perform the action switch.turn_off on switch.front_room_lamp
# turn the downstairs light off if you turn the tv off after 9pm
- alias: 'TV turned off in the evening'
  trigger:
    platform: state
    entity_id: media_player.living_room_tv
    # Optional
    from: "on"
    # Optional
    to: "off"
    # If given, will trigger when state has been the to state for X time.
    for: "00:01:00"
  condition:
    condition: or
    conditions:
      - condition: time
        after: '21:00'
      - condition: time
        before: '06:00'
  action:
    - service: switch.turn_off
      entity_id: switch.front_room_lamp
So with those two pretty simple automation configs, I haven't had to manually switch the front room lamp on or off in months!!
I think next time I write one of these I will go through my security camera setup and how that integrates with Home Assistant, alerting myself and my wife to any movement outside in different ways depending on our whereabouts and the time of day.
Hope you have found this interesting/informative
Thanks for reading
Mark
Very informative post, where did you purchase your Sonoff Basic switch and what resource did you use to flash the Tasmota firmware?
Sonoff basic I got from banggood in the UK, but they have them available worldwide think
I used a few guides but this one was quite good
as was this
Thanks for the links, I keep looking at the Sonoff and wondering if I truly have a use for them.