How to Set/Configure Static IP on Windows 11 (Video and Graphical Tutorial)
Greetings!
Welcome to another edition of my Windows 11 tutorial. Today's topic is how to enable, configure, or turn on STATIC IP on Windows 11. In my first attempt to change the IPv4 settings on my new Windows 11 machine I tried to do it in the old way, but I noticed that it seems to be not working so I checked the settings of the Windows 11 then I found out that Microsoft seems to change the way how IPv4 is managed in Windows 11. This is what I found out... Check the video tutorial below. And next to the video tutorial is the graphical tutorial that I based on the video tutorial.
Video Tutorial
Graphical Tutorial
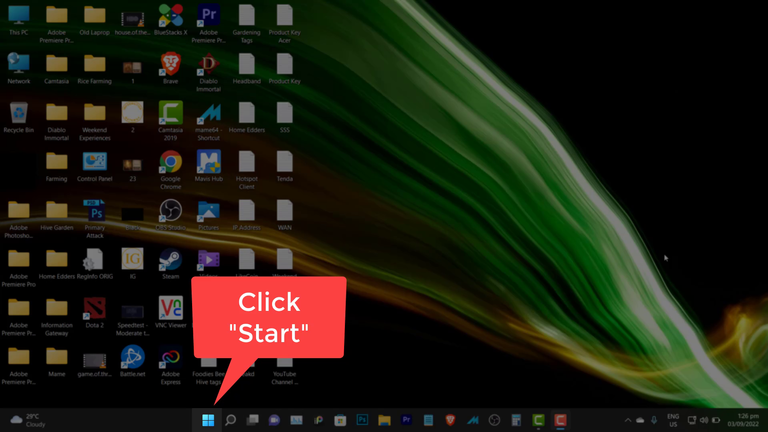
1. Click "Start"
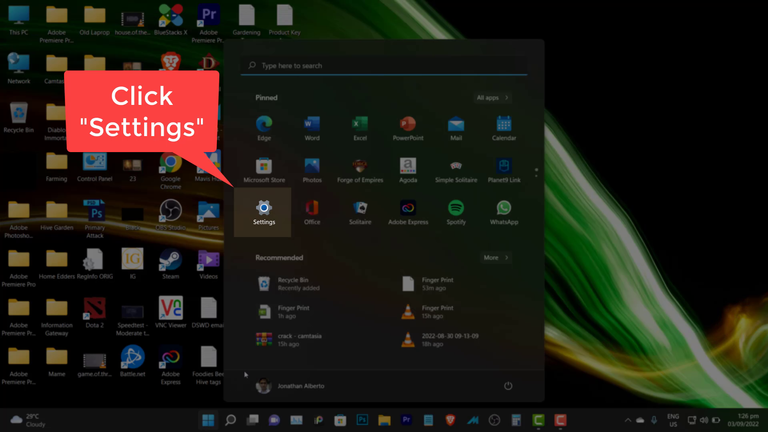
2. Click "Settings"
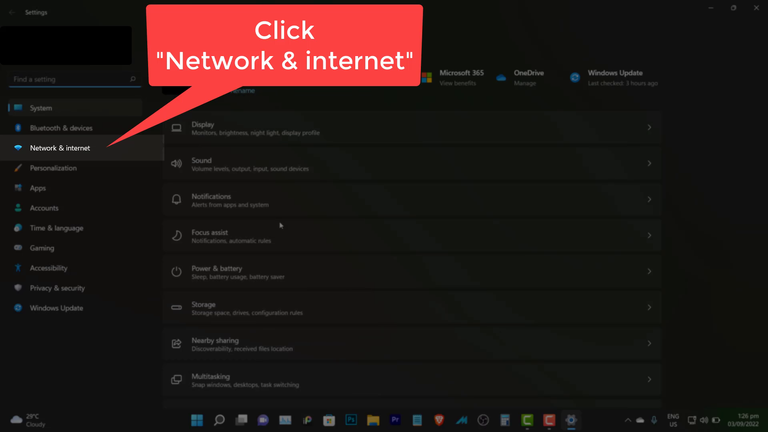
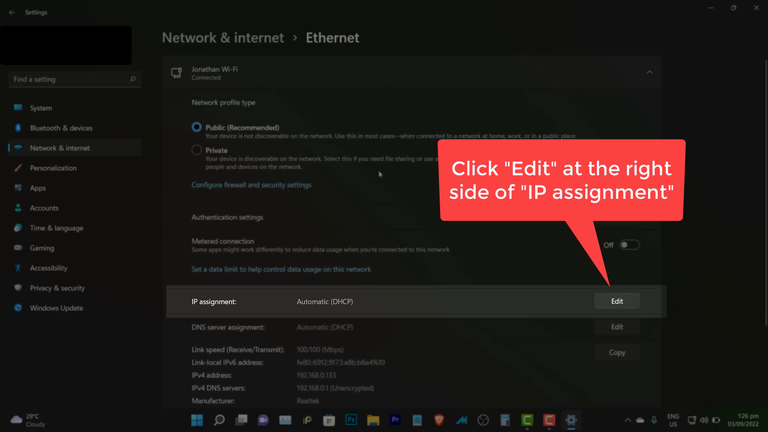
3. Click "Network & internet"
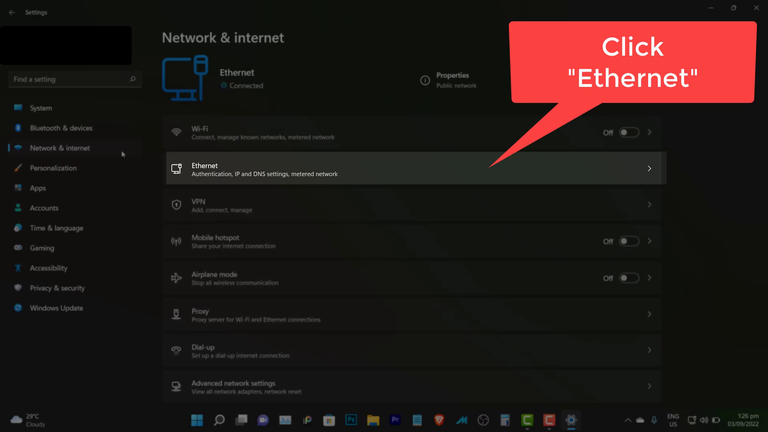
4. Click "Ethernet"
5. Click "Edit"
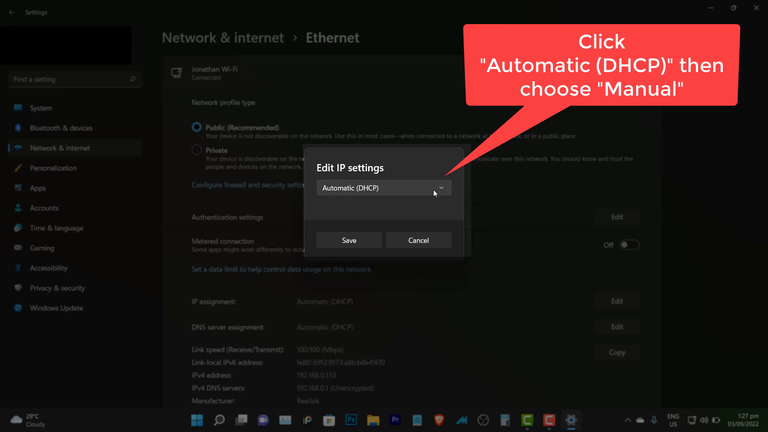
6. Click "Automatic (DHCP)" then choose "Manual"
7. Click "IPv4" to turn on

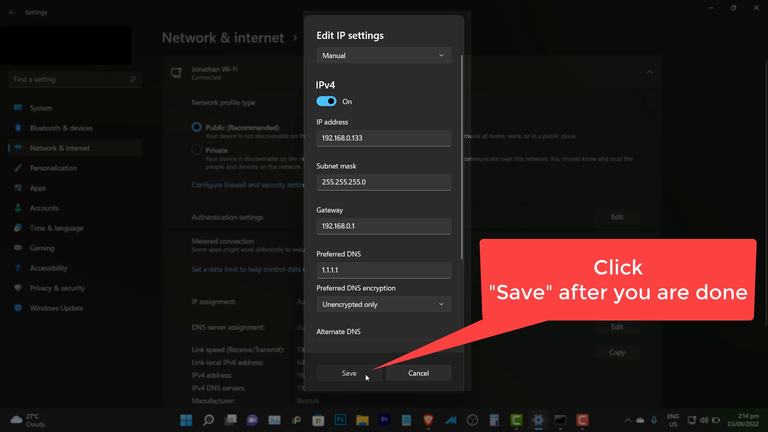
8. Type your "IP address", in my case it is 192.168.0.133
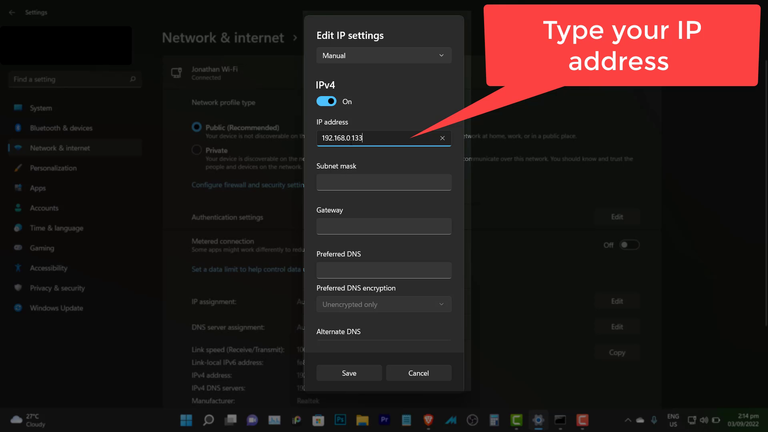
9. Type your "Subnet mask", in my case, it is 255.255.255.0

10. Type your "Gateway", in my case. it is 192.168.0.1

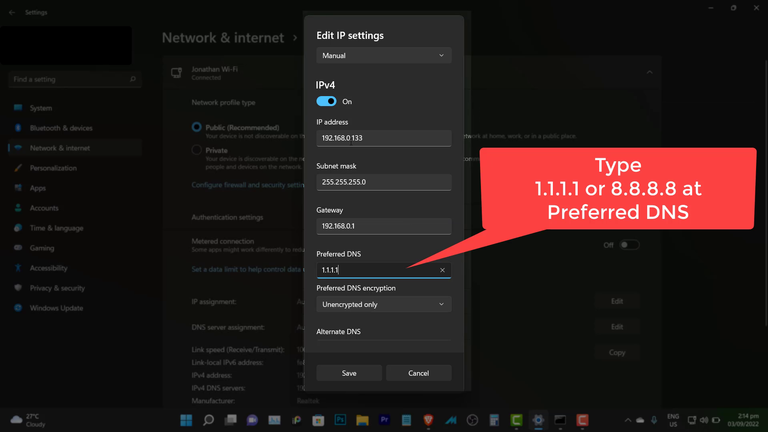
11. Type your "Preferred DNS", you can use Cloudflare or Google DNS, which is 1.1.1.1 and 8.8.8.8 respectively, in my case I use 1.1.1.1 which is faster than Google
12. Click "Save" to make your save your changes
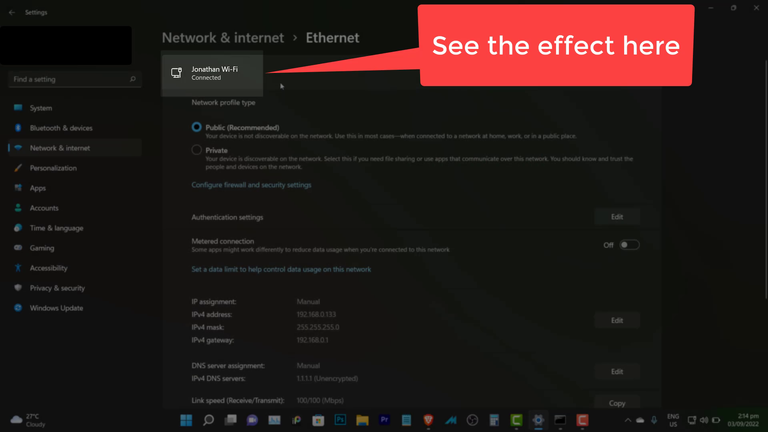
13. See the effect of your changes...
That is all for now guys, catch you up with the next one. Wishing you all safety, good health, and abundance.


tutorial
technology
informationtechnology
windows
windows11
staticip
hiveph
hivephilippines
philippines
0
0
0.000
Nice and very easy to follow tutorial.
I am just wondering, what are the reasons why we should be configuring our static IP? I've seen that being done a lot of times by persons I know. I think I might have done that once or twice too. It just didn't stick to me the reason that I did it. 😊
Thanks for sharing.
!1UP
In my case, I use Static IP to easily manage the devices in my network that is connected to a Router (via Wi-Fi or LAN cable).
Ohh see. Now I am getting the use cases for it.
I rarely manage my router so I don't usually mess with the Static IP.
Thanks for the feedback.
You're welcome and have a nice day ahead.
You have received a 1UP from @thecuriousfool!
@stem-curator
And they will bring !PIZZA 🍕.
Learn more about our delegation service to earn daily rewards. Join the Cartel on Discord.
Thank you @thecuriousfool @oneup-cartel
You are very much welcome. 😊
PIZZA Holders sent $PIZZA tips in this post's comments:
@curation-cartel(19/20) tipped @afterglow (x1)
Join us in Discord!
Thank you @curation-cartel @pizzabot