Saludos comunidad aquí su pana ElFinoNFT en esta ocasión le quiero compartir mi experiencia en minería de criptomonedas tengo más de 4 años minando he instalado rig de minería así que voy hacer una serie de tutoriales para minar comencemos por lo más básico que es armar un rig de minería.
Greetings community, here your friend ElFinoNFT, this time I want to share my experience in cryptocurrency mining, I have been mining for more than 4 years, I have installed a mining rig, so I am going to do a series of tutorials to mine, let's start with the most basic, which is to build a mining rig. mining.

Las mayoría de criptomonedas se minan con GPU que es el sistema de procesamiento que usan las tarjetas de video y digo la mayoría porque hay muchas monedas que podemos minar y se puede minar con CPU, Memoria Ram, Disco Duro, Asic, y GPU.
Most cryptocurrencies are mined with GPU which is the processing system used by video cards and I say the majority because there are many coins that we can mine and it can be mined with CPU, Ram Memory, Hard Drive, Asic, and GPU.

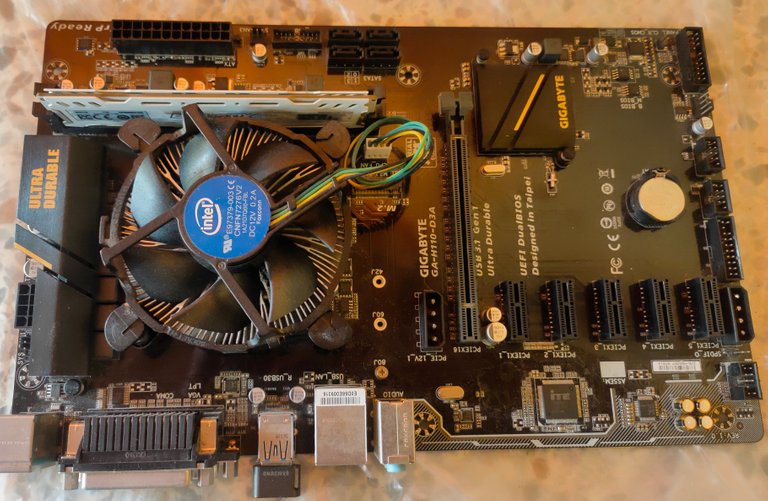
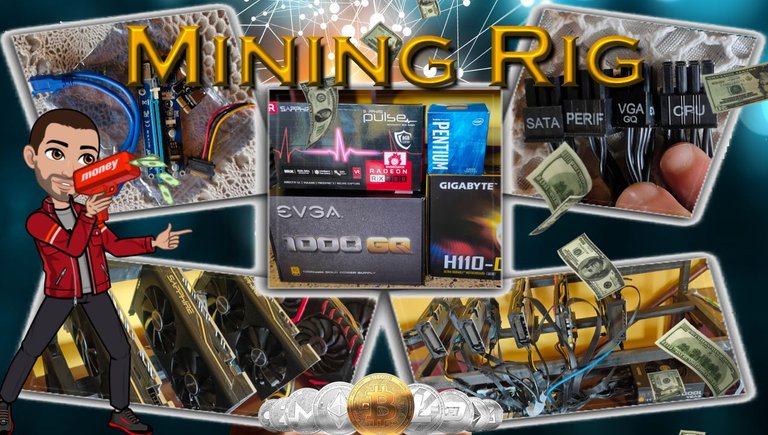
Para este caso en particular veremos cómo minar con GPU específicamente armar un Rig de Minería para eso solo vamos a necesitar una tarjeta madre, a partir de la tercera generación en adelante ya las tarjetas madre traen dos o más puertos PCI Express que son los que necesitamos para conectar las tarjetas de video, y claro también una memoria ram minimo 4gb y un procesador compatible con la tarjeta madre. El procesado y la memoria no tienen que ser tan potente porque utilizaremos el poder de las tarjetas de video. Prácticamente el procesador es solo para encender el equipo y levantar el Sistema Operativo.
For this particular case we will see how to mine with GPU specifically to build a Mining Rig for that we are only going to need a motherboard, from the third generation onwards and the motherboards have two or more PCI Express ports which are what we need to connect the video cards, and of course also a minimum 4gb ram memory and a processor compatible with the motherboard. Processing and memory don't have to be as powerful because we'll be using the power of the video cards. Practically the processor is only to turn on the equipment and start the Operating System.
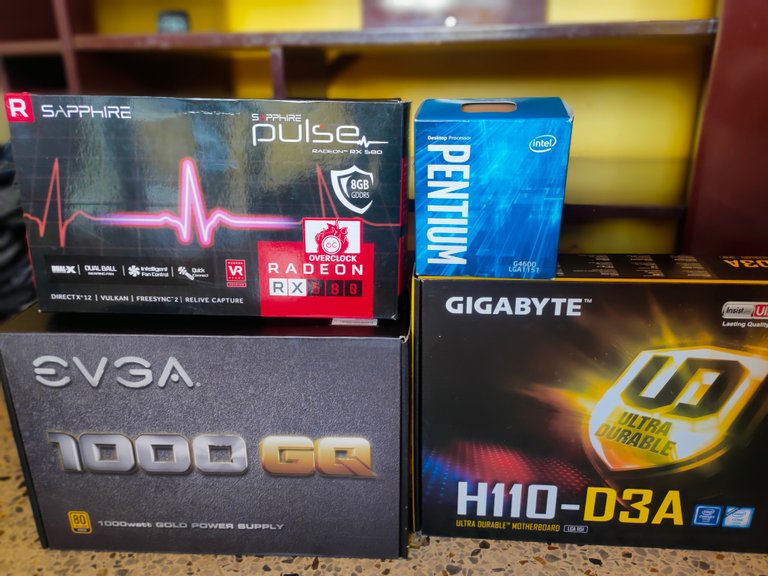
Importante también tener un buena Fuente de Poder Certificada creo que la fuente es primordial, aquí no hay que escatimar en precios realmente he tenido cliente que por ahorrarse unos dólares compran fuentes sin certificación o marcas raras que la verdad no funcionan para esto, a los pocos meses se dañan y lo peligroso de esto es que puede dañar otros componentes del equipo. Así que la fuente debe ser original y como mínimo certificación plata en adelante.
It is also important to have a good Certified Power Source I think that the source is essential, here we should not skimp on prices I have really had a client who, in order to save a few dollars, buy sources without certification or rare brands that do not really work for this, after a few months are damaged and the danger of this is that it can damage other components of the computer. So the source must be original and at least silver certified or later.

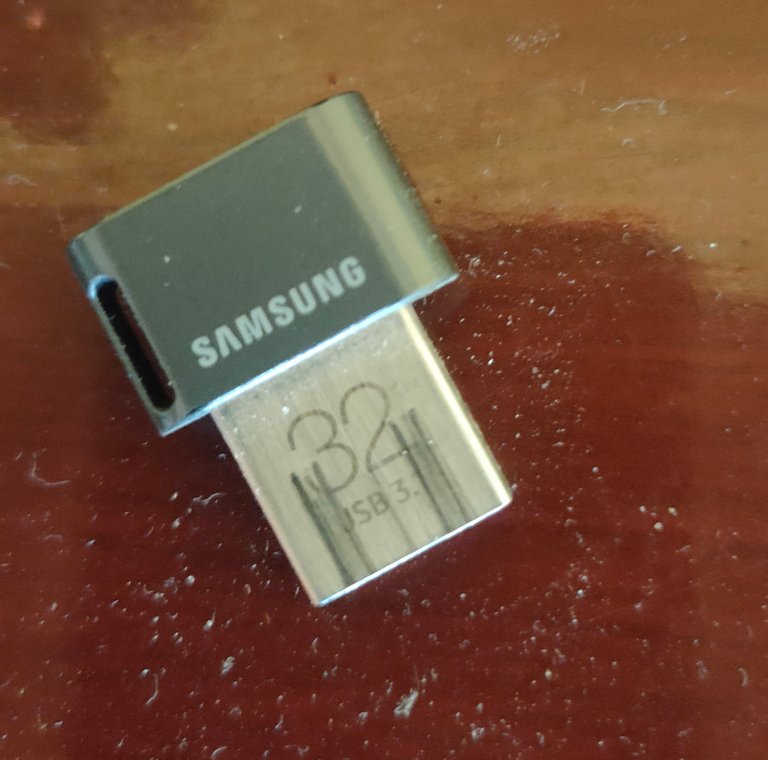
También necesitaremos un dispositivo de almacenamiento solo para colocar el Sistema Operativo no necesita de ser tan potente puede ser un disco duro pequeño o preferiblemente un Pendriver de minimo 8Gb y que sea 3.0 Sata, en lo particular prefirió el pendrive es mucho más económico y fácil de instalar.
We will also need a storage device just to place the Operating System it does not need to be so powerful it can be a small hard drive or preferably a Pendriver of at least 8Gb and that is 3.0 Sata, in particular he preferred the pendrive it is much cheaper and easier to use install.
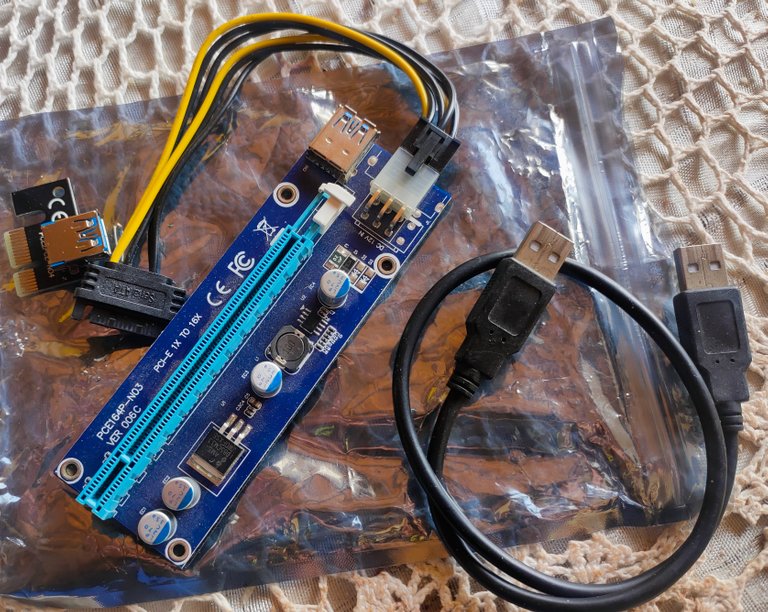
Por otro lado y para mayor comodidad es bueno tener una estructura de madera o de metal para colocar las tarjetas sobre todo si son varias. Y para eso también vamos a necesitar conectores Riser para las tarjetas de videos.
On the other hand, and for greater comfort, it is good to have a wooden or metal structure to place the cards, especially if there are several. And for that we are also going to need Riser connectors for the video cards.
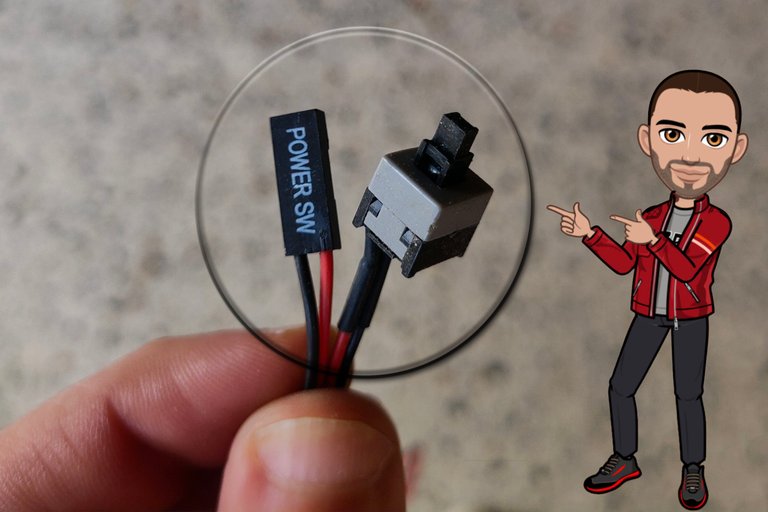
Hay tarjetas madres que tiene su botón de encendido integrado, pero si no tienes que tener un botón como este para encender el equipo.
There are motherboards that have their power button integrated, but if not, you have to have a button like this to turn on the computer.
Comencemos con el armado primero que todo armar la parte normal del computador que es la tarjeta madre el procesador y la memoria.
Let's start with the assembly first of all to assemble the normal part of the computer that is the motherboard, the processor and the memory.
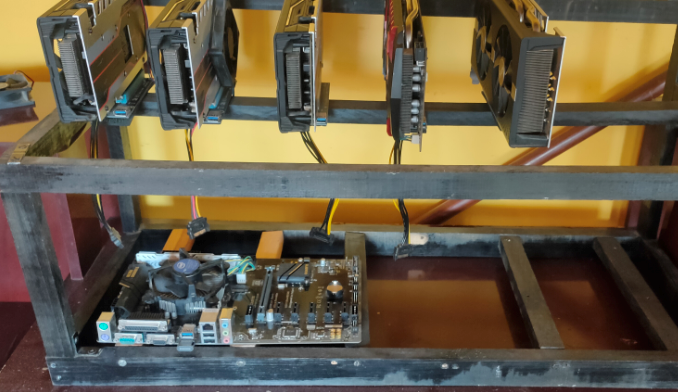
Posiciona las tarjetas de video con su riser en la estructura, en lo particular prefiero dejar unos 10 cm de espacio entre tarjetas eso hace que no se calienten tanto yo prefiero tener la temperatura en máximo 73° de echo si es menor mejor.
Position the video cards with their riser in the structure, in particular I prefer to leave about 10 cm of space between cards that makes them not get so hot I prefer to have the temperature at maximum 73 ° in fact if it is lower the better.

Colocar la placa ya armada en el lugar correspondiente dentro de la estructura.
Place the already assembled plate in the corresponding place inside the structure.
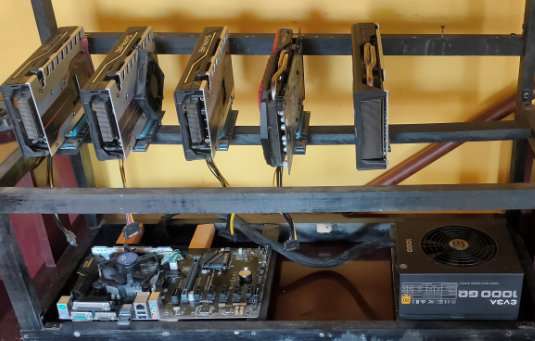
Colocar la Fuente y conectar los cables de alimentación de la Tarjeta Madre y del CPU.
Place the Power Supply and connect the power cables of the Mother Card and the CPU.
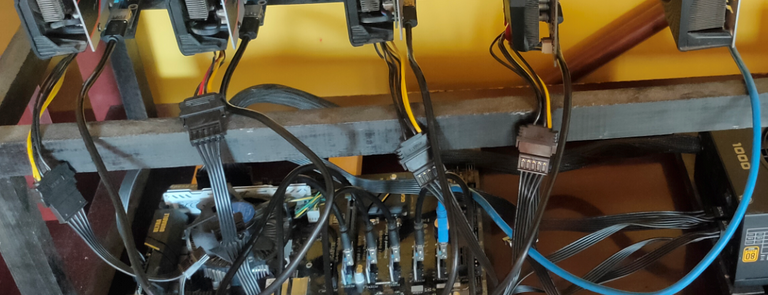
Normalmente se usan fuentes de poder modulares y tenemos todo este montón de cables.
Normally modular power supplies are used and we have all this bunch of cables.
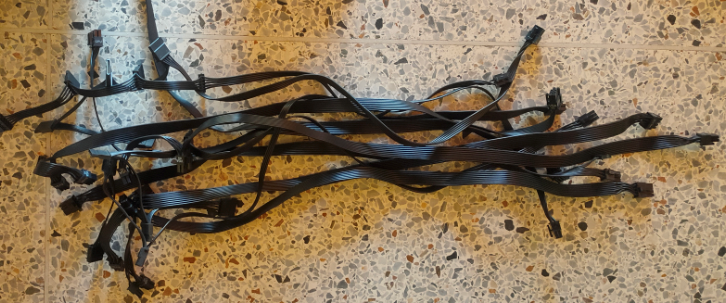
Lo bueno es que cada uno viene marcado por lo general son Sata para las conexiones de los riser, Periférico por si queremos colocar ventiladores adicionales, Vga para las tarjetas de video y Cpu que es el que conectamos en la placa.
The good thing is that each one is marked, usually they are Sata for the riser connections, Peripheral in case we want to place additional fans, Vga for the video cards and CPU, which is the one that we connect to the board.

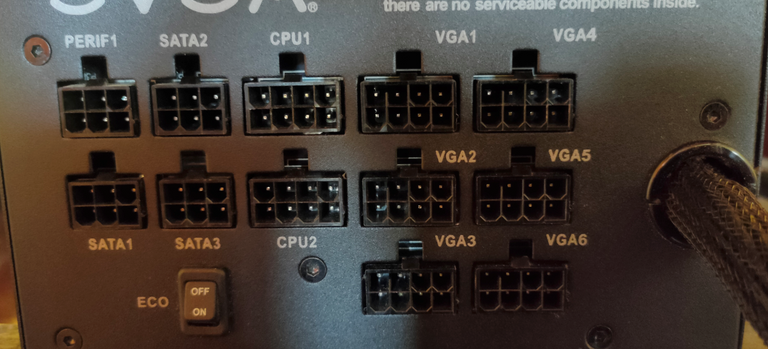
También en la fuente todos los puestos de los cables vienen marcados, cada uno en su lugar correspondiente.
Also in the source all the cable posts are marked, each one in its corresponding place.
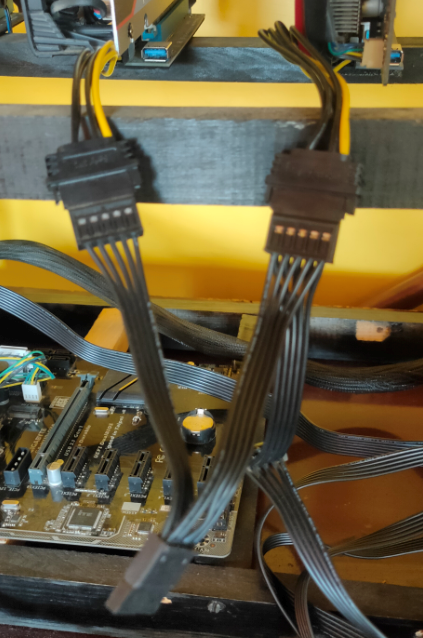
Continuamos conectando los cables Sata.
Continuamos conectando los cables Sata.
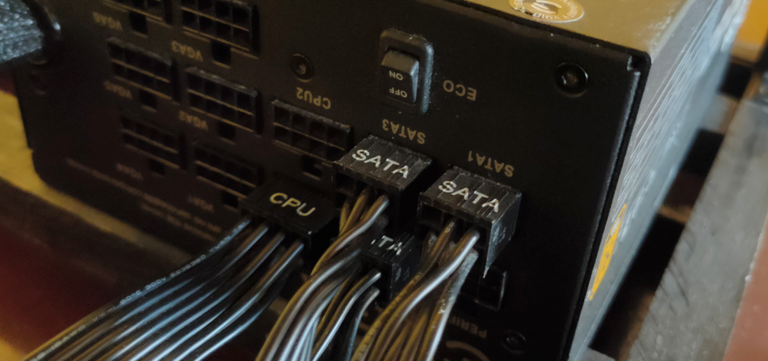
Ojo en esta conexión los cables Sata normalmente traen 4 conectores un solo cable pero recuera esos cables normalmente son para disco duros o periféricos que consumen a lo mucho unos 16W incluso mucho menos. Estos cables a lo mucho soportan 54W.
Be careful in this connection, Sata cables normally have 4 connectors in a single cable, but remember, these cables are usually for hard drives or peripherals that consume at most 16W, even much less. These cables at most support 54W.
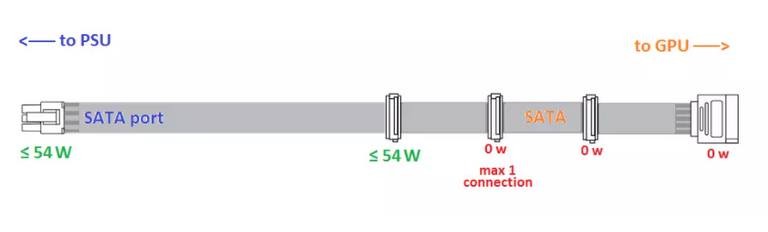
Fuente de la imagen /image source
Por eso en caso de un rig de minería no es recomendable conectar más de dos tarjetas a un solo cables por que el consumo de cada risir es de 20W a 25W cada una si conectamos 3 o más de seguro se va a quemar el cable y el puerto dañando así la fuente así que ojo ten cuidado con eso.
For this reason, in the case of a mining rig, it is not recommended to connect more than two cards to a single cable because the consumption of each risir is from 20W to 25W each, if we connect 3 or more, the cable and the cable will surely burn. port thus damaging the source so be careful with that.

De hecho si la tarjeta es de más de 8Gb solo debes conectar 1 por que las tarjetas de 12 en adelante consumen unos 40W así que solo se puede conectar 1 aun cable así queden sobrando los demás puertos.
In fact, if the card is more than 8Gb you only have to connect 1 because the cards of 12 onwards consume about 40W so only 1 can be connected even with a cable so the other ports are left over.
Si necesitas más puertos Sata puedes usar con un adaptador los cables periféricos a sata.
If you need more Sata ports you can use an adapter peripheral cables to sata.
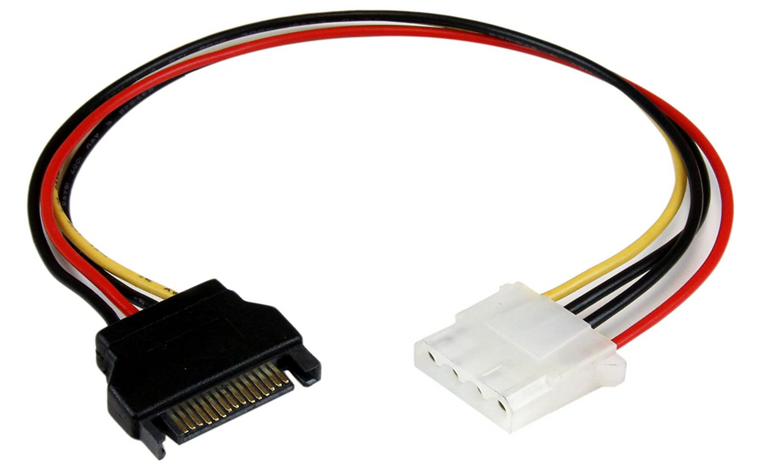
image www.amazon.com
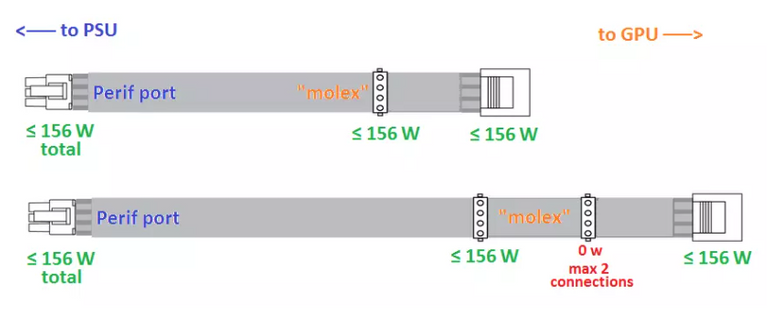
Ojo con el adaptador porque este cable normalmente tiene 156W y es mucho más de lo que necesitamos.
Be careful with the adapter because this cable normally has 156W and it is much more than we need.
Fuente de la imagen /image source
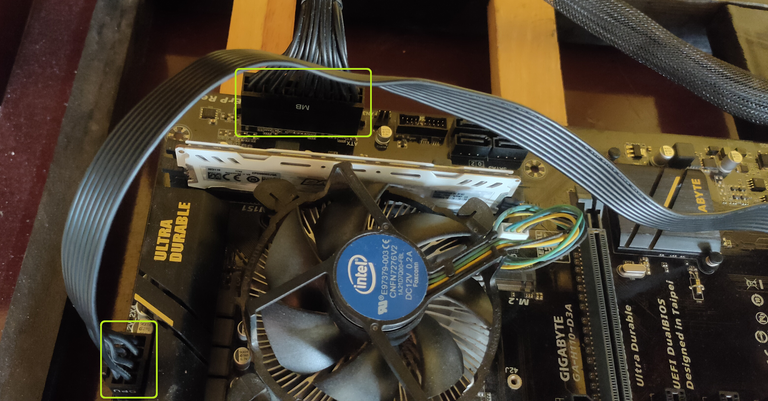
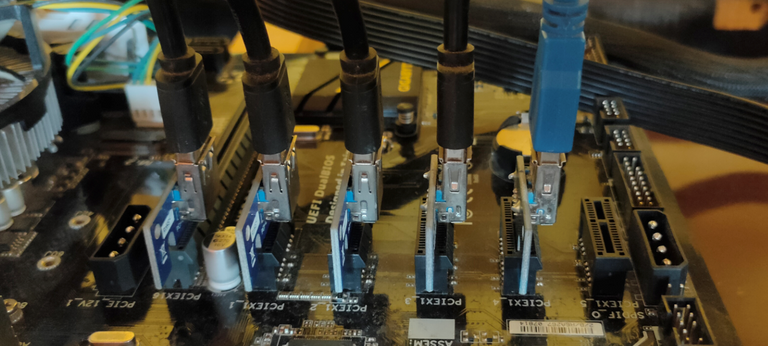
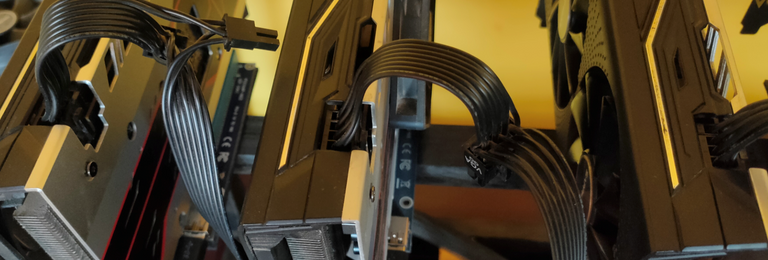
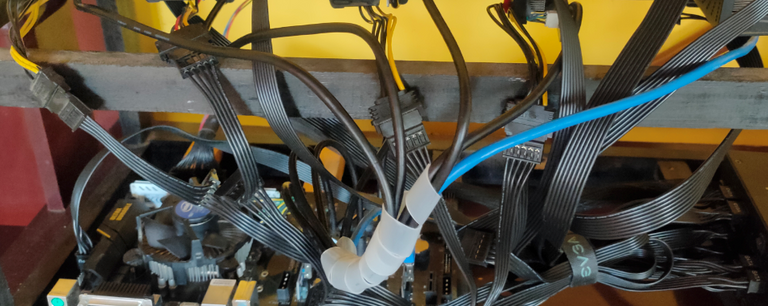
Una vez conectado todos los cables Sata a los riser. Procedemos a conectar los Pci Express a la tarjeta madre y con el cable usb a los riser correspondientes.
Once all the Sata cables are connected to the risers. We proceed to connect the Pci Express to the motherboard and with the usb cable to the corresponding riser.
Ahora pasamos a las tarjetas cada una de la tarjeta con un solo cable Vga
Now we turn to the cards each of the card with a single Vga cable
En casa de que la tarjeta tengo 2 puertos de alimentación para eso son estos cables que vienen ya unidos.
In the case of the card I have 2 power ports, that's why these cables are already attached.
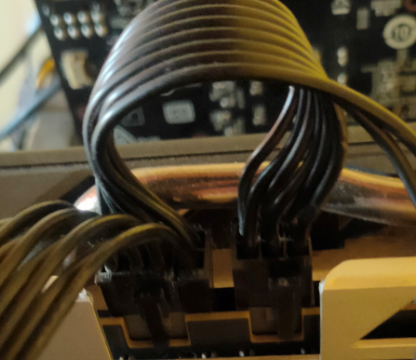
Cada cable VGA debe ir a una sola tarjeta te aunque la tarjeta solo tenga un puerto y el cable tenga 2 déjalo que sobre.
Each VGA cable should go to only one card, even if the card only has one port and the cable has 2, leave it to spare.
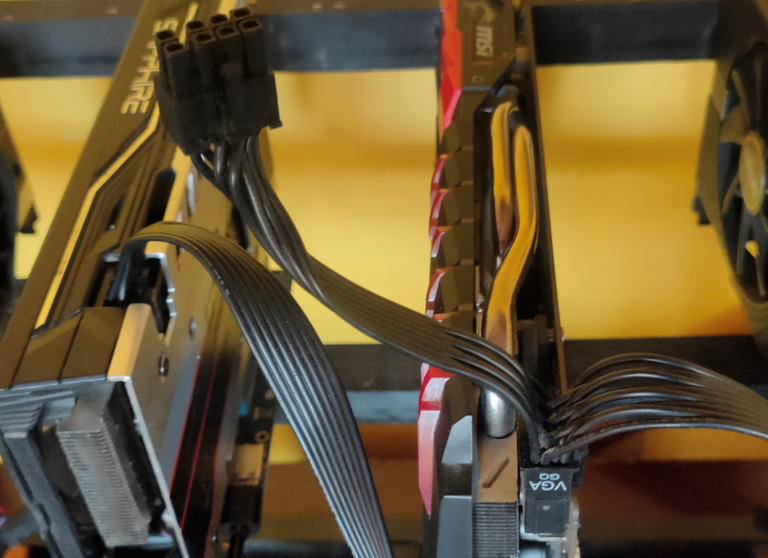
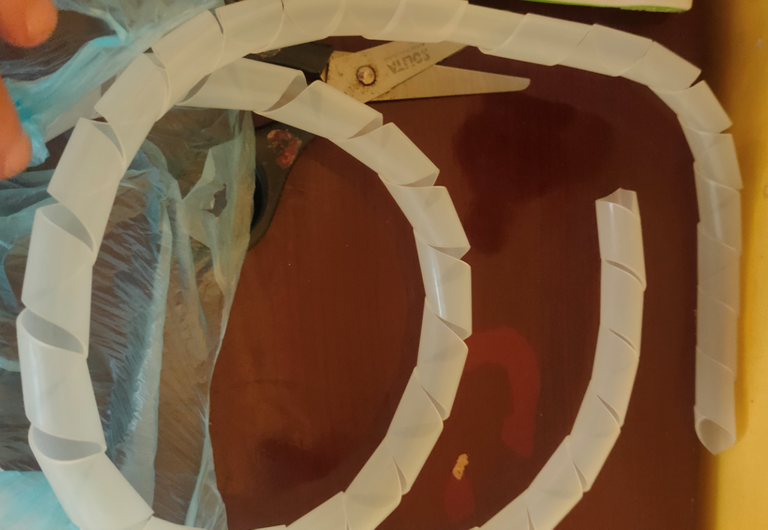
Listo ya tenemos nuestro rig armado para ordenar un poco los cables yo uso este organizador de cable.
Ready we already have our rig assembled to tidy up the cables a little I use this cable organizer.
Nota importante.
Como les dije la fuente de poder es lo primordial en este equipo. Y es lo primero que se daña comúnmente por una mala instalaciones. Sobre todo con lo de los cables sata que mencione anteriormente, y también con los VGA que he visto que conectan siempre más de 1 tarjeta eso no se hace.
Important note.
As I told you, the power source is paramount in this team. And it is the first thing that is commonly damaged by poor installations. Especially with the sata cables that I mentioned earlier, and also with the VGA ones that I have seen that always connect more than 1 card, that is not done.
También un error muy común que daña las fuentes es superar el consumo predeterminado que estas tiene es muy común porque si se fijan en esta fuente.
Also, a very common mistake that damages fonts is exceeding the default consumption that they have, it is very common because if you look at this font.
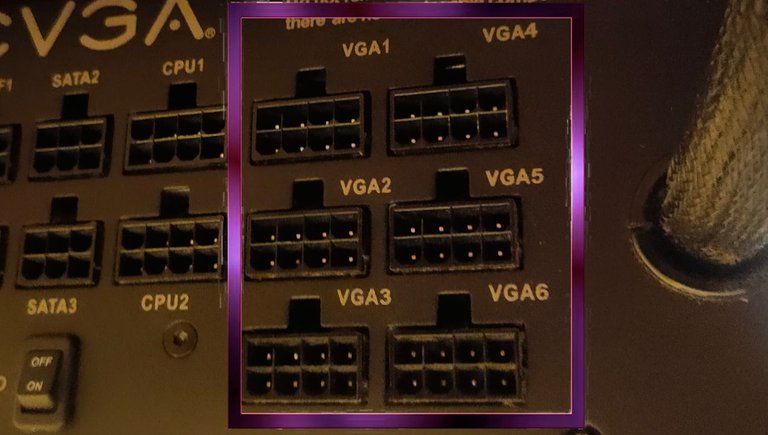
Hay 6 puertos de vega y su capacidad máxima es de 1000W, cada tarjeta consume entre 140W y 180W por lo menos las de 8gb es así. Pero además de las tarjetas esta la placa con su procesado y memoria que consume almenas unos 100W es por eso que yo a esta fuente le coloco máximo 5 tarjetas a pesar de que traiga 6 puertos porque con esas 5 tarjetas más la placa estoy en el límite de los 1000W que soporta. No se debe exceder la carga.
There are 6 vega ports and their maximum capacity is 1000W, each card consumes between 140W and 180W, at least the 8GB ones are like that. But in addition to the cards, there is the board with its processing and memory that consumes at least 100W, that is why I put a maximum of 5 cards in this source, even though it comes with 6 ports, because with those 5 cards plus the board, I am at the limit. of the 1000W that it supports. The load must not be exceeded.
Si necesitas conectar más tarjetas lo más recomendable es colocar una fuente adicional para eso es este aparato, para conectar dos fuentes simultáneamente.
If you need to connect more cards, it is best to place an additional source, that is what this device is for, to connect two sources simultaneously.
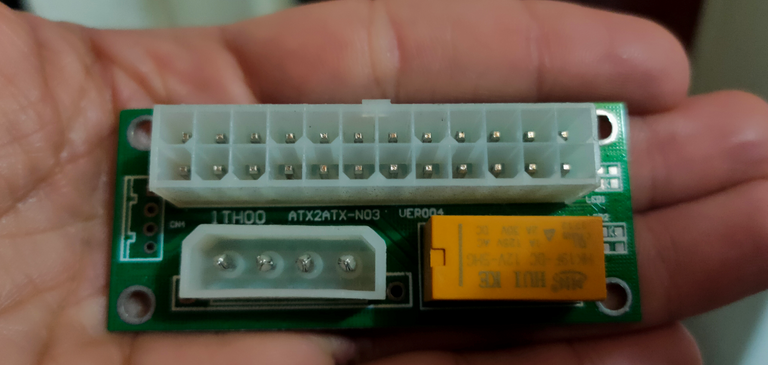
Por favor colocar la otra fuente con ese accesorio y no la pongas directo con un puente eso se hace solo de manera provisional pero no es recomendable puentear porque la fuente queda directa y te puede dañar las tarjetas o causar in incendió es muy peligroso.
Please place the other source with that accessory and do not put it directly with a jumper, that is done only provisionally but it is not recommended to jumper because the source is direct and it can damage the cards or cause a fire, it is very dangerous.
Ahora listo ya armamos nuestro rig solo falta el Sistema operativo que la verdad hay varios el más utilizado y más fácil de usar es SimpleMining.net o HiveOS. Ambos son automáticos y fáciles pero hablaremos de eso en otro post para no hacerlo tan largo espero que esta información te sea útil. Cualquier duda en los comentarios.
Now that's it, we've put together our rig, all that's missing is the operating system, which the truth is, there are several, the most widely used and easiest to use is SimpleMining.net or HiveOS. Both are automatic and easy, but we will talk about it in another post so as not to make it so long, I hope this information is useful to you. Any questions in the comments.
La mayor parte de las imafenes fueron tomadas de mi teléfono y editadas con Corel Photo Pait, espero te guste mi nuevo avatar lo veras muy seguido en mis publicaciones.
Most of the images were taken from my phone and edited with Corel Photo Pait, I hope you like my new avatar, you will see it very often in my publications.
My social networks
Hive: @elfino28
https://twitter.com/ElFinoNFT
https://www.instagram.com/ElFinoNFT
https://www.youtube.com/user/KBI93X
telegram https://t.me/ElFinoNFT


Congratulations @elfino28! You have completed the following achievement on the Hive blockchain and have been rewarded with new badge(s):
Your next target is to reach 800 upvotes.
You can view your badges on your board and compare yourself to others in the Ranking
If you no longer want to receive notifications, reply to this comment with the word
STOPTo support your work, I also upvoted your post!
Check out the last post from @hivebuzz:
https://twitter.com/ElFinoNFT/status/1521520403214184449
The rewards earned on this comment will go directly to the person sharing the post on Twitter as long as they are registered with @poshtoken. Sign up at https://hiveposh.com.
Excelente aporte me gustaría hacer lo mismo en mi casa, bueno quizás lo haga en algún momento pero se ve que hay que ir buscando varios componentes.
si poco a apoco se consiguen no es dificil gracias por el comentario !PIZZA
PIZZA Holders sent $PIZZA tips in this post's comments:
@elfino28(1/5) tipped @pleo1542 (x1)
You can now send $PIZZA tips in Discord via tip.cc!
Bienvenido amigo mío espero seguir viendo muchas de tus publicaciones ????