GETTING ACQUAINTED IN USING ARDUINO.
Recently, I joined an automation training class which promises to train us to the point of learning to build drones ourselves but before getting to that point, we would go through different practicals and topics in which this is once of them.
Yesterday we delt with putting on an LED with Arduino and was given some codes on how to do it on the Arduino software.
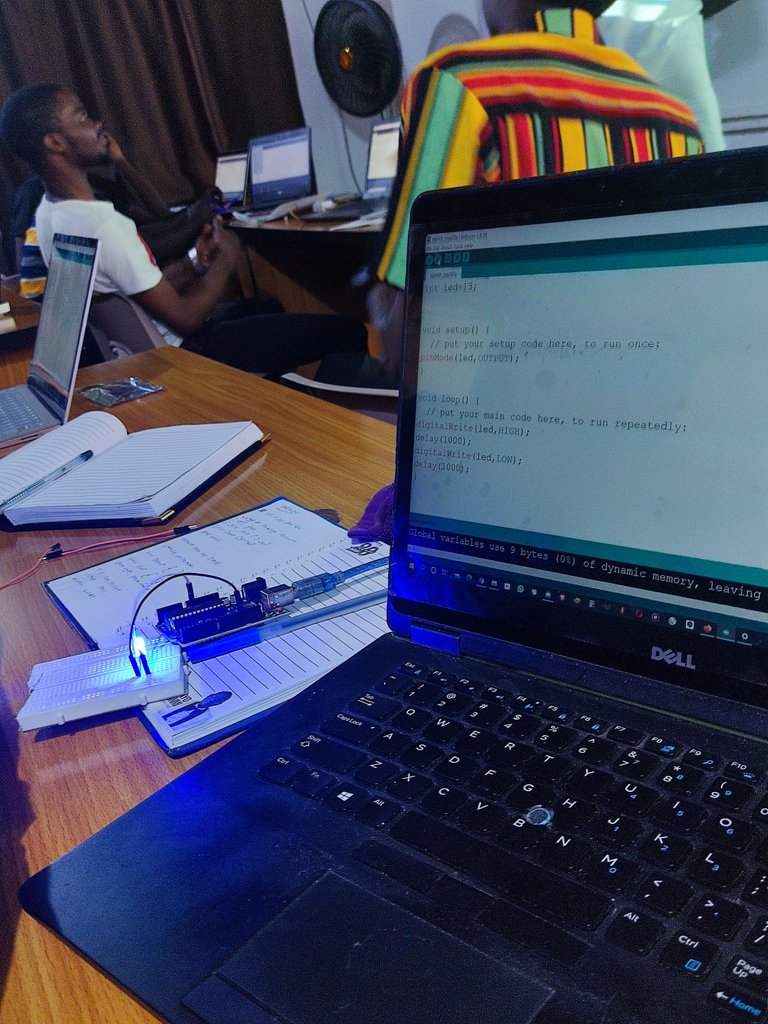
From the screen of my laptop above, the code written is
Int led=13;

void setup () {
// put your code here to run once;
pinMode (led, OUTPUT);
}

void loop () {
// put your main code here to run repeatedly;
digitalWrite (led, HIGH);
delay(1000);
digitalWrite (led, LOW);
delay(1000);
}
The code written above is to set the led to be coming on and off every second. That's the first practical we did as of yesterday.
An assignment was given to use that we should make a traffic light setting using a RED, YELLOW, GREEN led lights.
Presently, I don't have my own Arduino kit and it cost for a price of $50 in my country. So, I would be saving up towards getting that amount so I can do my assignments and also practice up everything.
Also luckily for me, before I get my own Arduino kit, I have a friend who I recently called the said he would borrow me his kit to practice. After I get them in hand, I would be able to make more practice and make better blogs on Arduino.
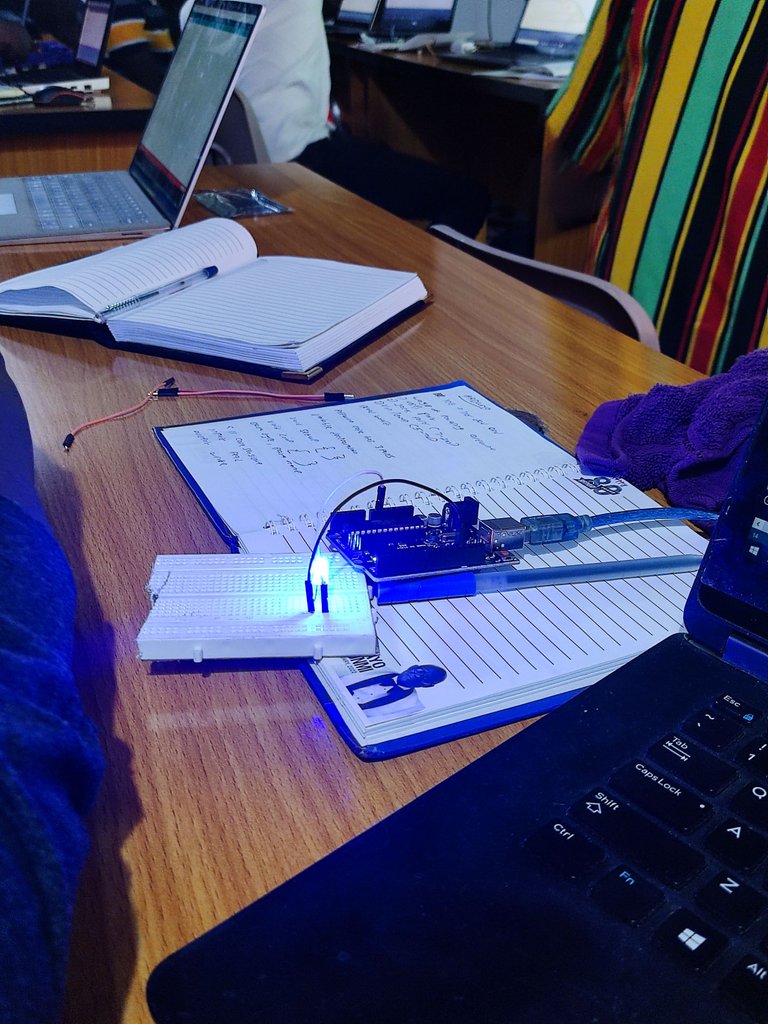
ARDUINO WITH LCD
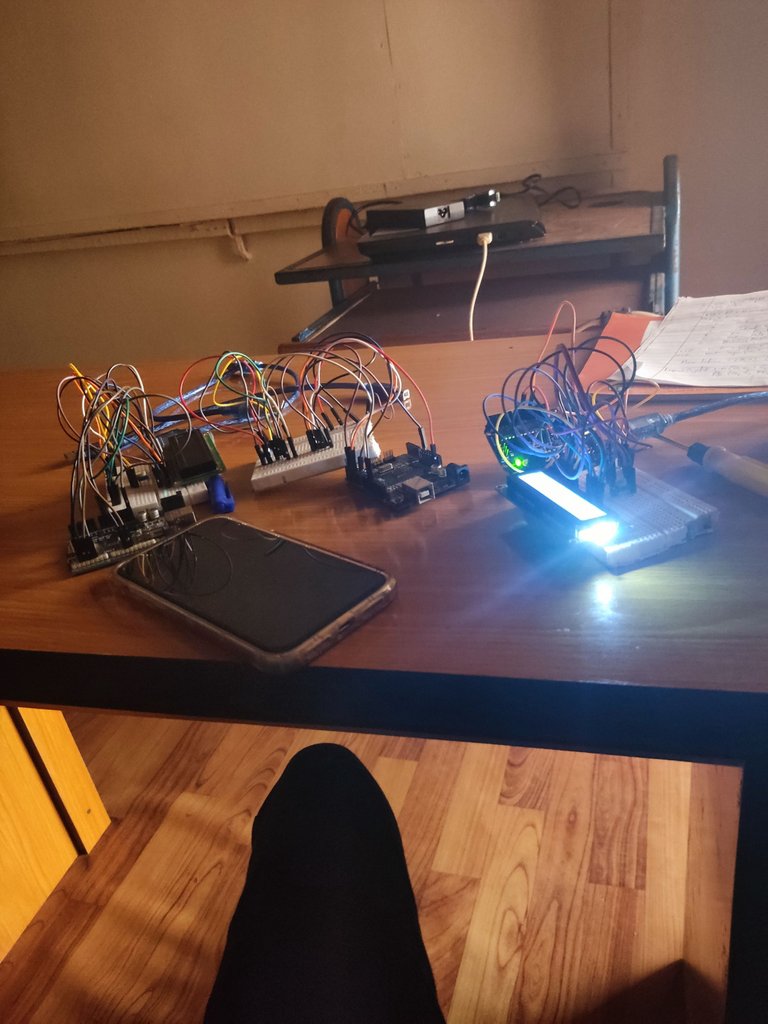
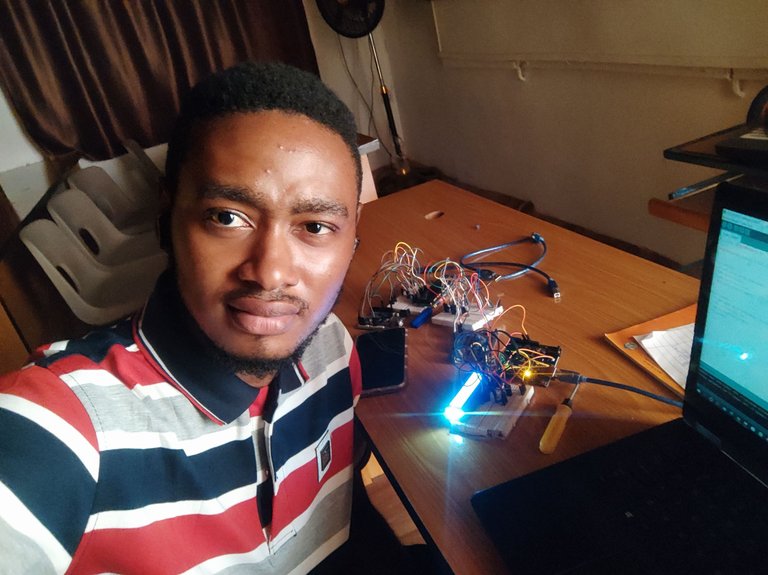
Today, we were introduced to LCD using Arduino. We were taught how to display a name on the LCD and let it move.
But due to the fact that we were a group project and the materials could not reach everyone, it was tough for me to totally understand how it was done; but I would put some time later into it for better understanding.
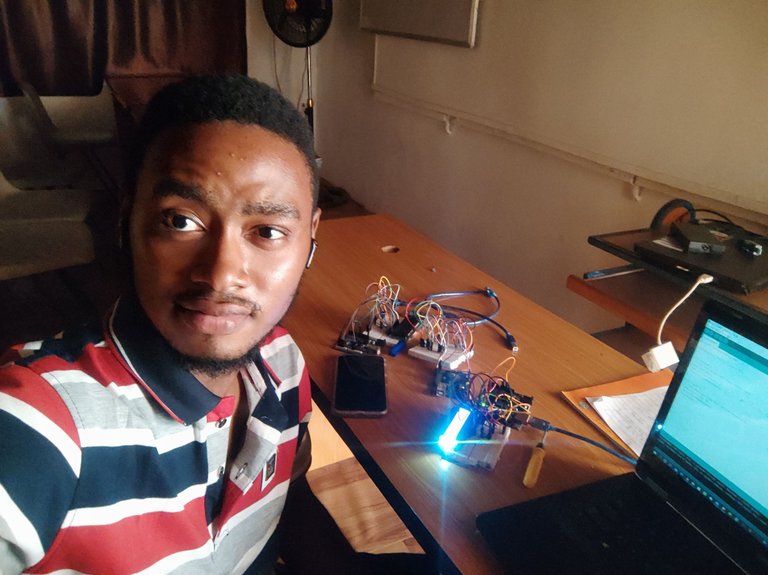
I had to wait behind still everyone to leave to get to do this myself. I didn't have all the time with the kit but had the materials to my self but unfortunately, the instructor was no longer available to help me out.
So I had to do some recap to what was taught and made the connections of the LCD to the Arduino and wrote down the codes on the Arduino software application.
The LCD has 16 pins in the 16 by 2 LCD display module and each have their names.
Pin 1: GND
Pin 2: Vcc
Pin 3: Contrast Voltage
Pin 4: Register Select
Pin 5: Read/Write
Pin 6: Enable
Pin 7-14: Data pin 0-7
Pin 15: LED positive
Pin 16: LED negative
I feel this posts would be best made in vlogs and hopefully, I would try raise some funds to get equipments to shoot videos on my practical experience and the necessary items needed.
To connect the LCD to my Arduino, I used this configuration.
| LCD PINS | ARDUINO |
|---|---|
| Register Select | 12 |
| Enable | 11 |
| Data pin 4 | 5 |
| Data pin 5 | 4 |
| Data pin 6 | 3 |
| Data pin 7 | 2 |
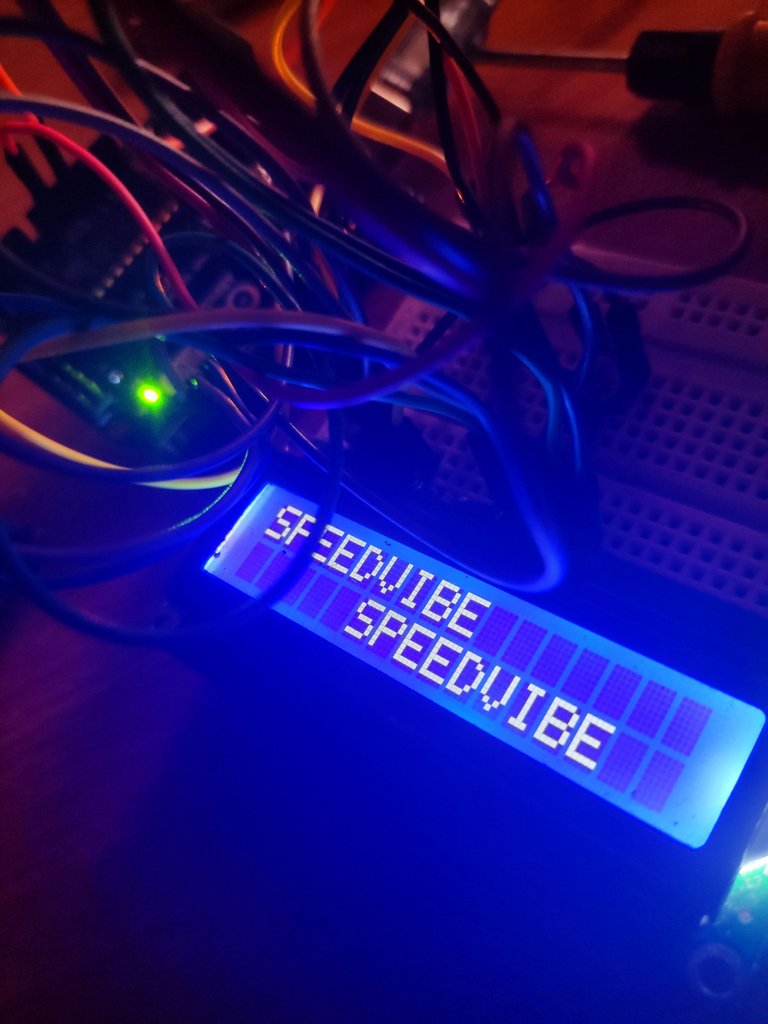
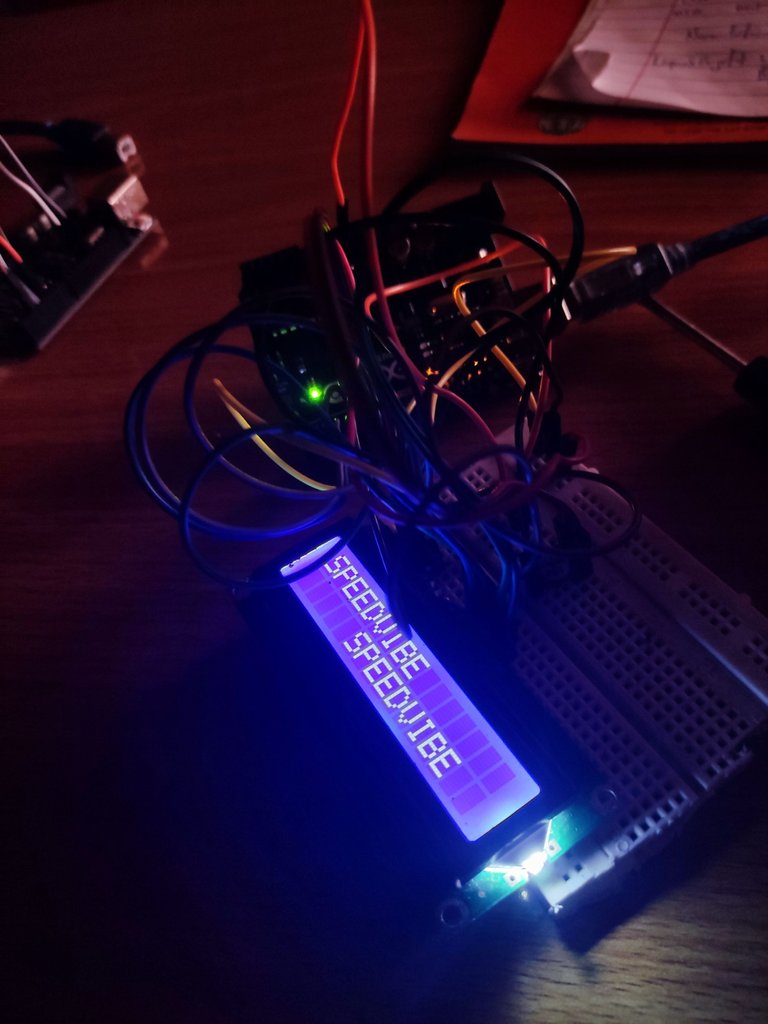
After making the connections, It was left to make the code on the Arduino which I did in the image below.
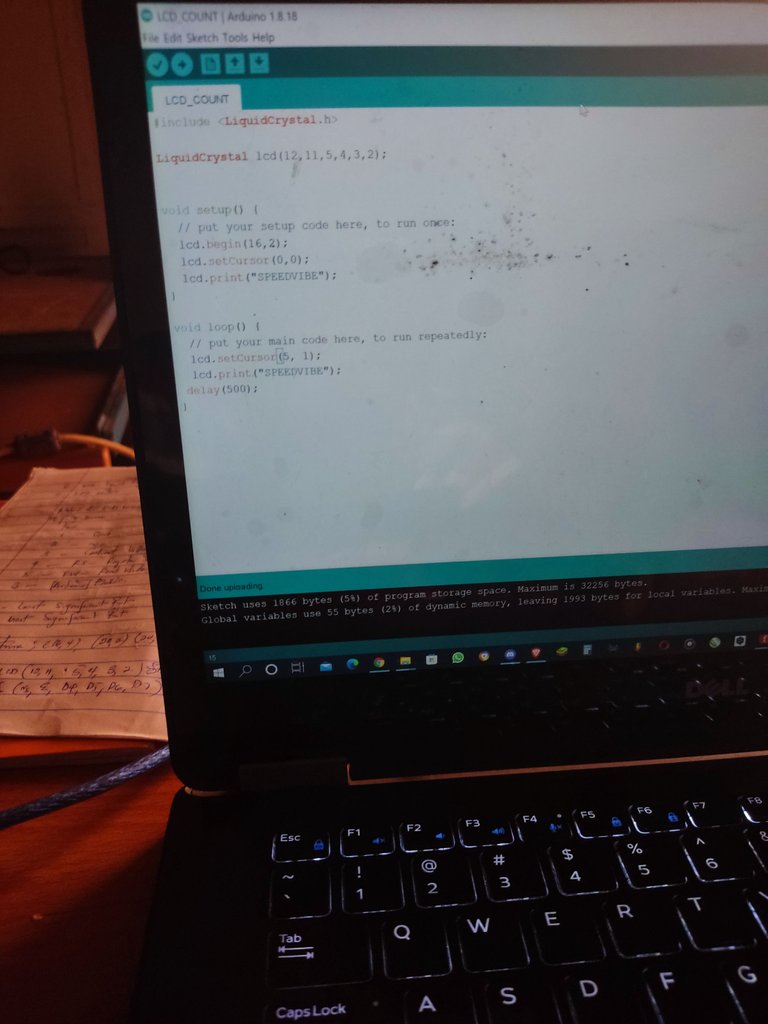
Below is the code written in the screen above.
#include <LiquidCrystal.h>
LiquidCrystal lcd (12, 11, 5, 4, 3, 2)

void setup () {
// put your setup code line to run once;
lcd.begin (16,2);
lcd.setcursor (0,0);
lcd.print ("SPEEDVIBE");
}

void loop () {
// put your main code here, to run repeatedly;
lcd.setcursor (5,1);
lcd.print ("SPEEDVIBE");
delay (500);
}
After writing down the codes, all I just needed to do was to verify and compile then upload the code to the Arduino which resulted the LCD display of SPEEDVIBE.
That's all for now, thanks for reading through.
WHO IS STARSTRINGS01

Starstrings01 AKA Giftedhands is a Hive lover, a Nigeria musician (Guitarist) and also a student who studies Mechatronics Engineering in the Federal University of Agriculture, Abeokuta.
His goal on Hive is to be more than a regular blogger but something more; someone with a purpose. That’s one of the reasons why he founded the newbies initiative @newbies-hive to help guide and support newbies. Kindly click here to follow @newbies-hive curation trail.
He battles and struggles with balancing education and being active on the chain but yet his love and passion for Hive keeps him on balance.

IF YOU LOVE THIS POST, YOU CAN KINDLY SUPPORT BY YOUR COMMENTS, REBLOG AND UPVOTE. IT WOULD BE MUCH APPRECIATED
https://twitter.com/Starstrings1/status/1501363958648877065
The rewards earned on this comment will go directly to the person sharing the post on Twitter as long as they are registered with @poshtoken. Sign up at https://hiveposh.com.
It is a great improvement and good start @starstrings01. And I pray and hope that you get the best out of the automation training as you were promised.
Also regarding the use of LCD with Arduino, I observed that it's a 16x2 LCD display screen as we have bigger LCD like the 20x4 too, to reduce the number pins the LCD takes on the Arduino board and also the use of lots of jumpper wires and variable resistor for adjusting brightness and constract of the LCD, I would suggest u use or checkout I2C LCD driver module which makes it possible to use just 4 pins to interface your LCD with Arduino board which consists of 2 power pins and 2 communication pins easily.
I'm very much open to assisting you in this journey when the need arises. And probably use it as a way of repaying u for the love and support you bestowed me and more.
I wish u success and more developmental growth towards this path 👍.
Yeah exactly, we were told about that driver module with only just two pins.
It's even true that you are in stuffs like this and Moreover, you live in Obantoko. I would like to know your place and even meet your family. I am willing to learn more.
nice one boss
Beautiful innovation. Wishing you the best. Well done
Wow, it is a good idea to use the break meaningfully. I was about to ask you how much tou bought it sef. This is the painful part - hardware is just expensive although just as the reward, but before yoi are able to learn the essential parts, monetary power has gone down. Infact, that is what is still delaying me from starting. That is why I delved back to my web scraping classes.