Setting up the NodeMCU Development Environment: A Step-by-Step Guide
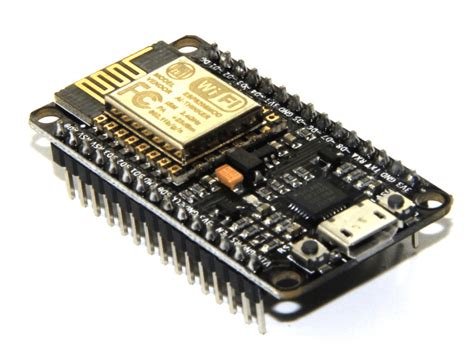
NodeMCU microcontrollers are a powerful and affordable platform for building IoT applications. They are based on the ESP8266 Wi-Fi chip and support the Lua programming language, making them a popular choice for developers and hobbyists alike.
In this post, we will provide a step-by-step guide on how to set up the development environment for NodeMCU microcontrollers, including installing the necessary drivers, software, and tools.
Step 1: Install the NodeMCU USB Driver
Before you can connect your NodeMCU microcontroller to your computer, you need to install the USB driver for the ESP8266 chip. Here's how to do it:
- Connect your NodeMCU board to your computer using a USB cable.
- Download the CH340/CH341 USB to serial driver from the manufacturer's website.
- Run the installer and follow the instructions.
Step 2: Install the Arduino IDE
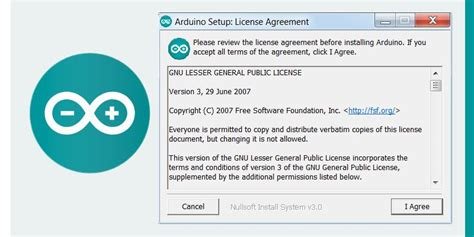
The Arduino Integrated Development Environment (IDE) is a popular tool for programming microcontrollers. It supports the ESP8266 chip and provides a user-friendly interface for writing, compiling, and uploading code to your NodeMCU microcontroller.
- Download the Arduino IDE from:
https://www.arduino.cc/en/software
- Run the installer and follow the instructions to install the software.
Step 3: Install the ESP8266 Board Manager
To use the Arduino IDE with your NodeMCU microcontroller, you need to install the ESP8266 board manager. Here's how to do it:
- Open the Arduino IDE.
- Go to File -> Preferences.
Go to Additional Boards Manager URLs and enter the URL below:
http://arduino.esp8266.com/stable/package_esp8266com_index.json
- Click OK to save the changes.
- Next go to Tools -> Board -> Boards Manager.
- Type "esp8266" in the search box.
- Select "esp8266 by ESP8266 Community" and install it.
Wait for the installation to complete.
Step 4: Select the NodeMCU Board and Port
Now that you have installed the necessary software and drivers, you can connect your NodeMCU microcontroller to your computer and start programming it. Here's how to do it:
- Connect your NodeMCU board to your computer using a USB cable.
- Open the Arduino IDE.
- Go to Tools -> Boards and select "NodeMCU 1.0 / ESP-12E Module".
- Go to Tools -> Ports and select the port that your NodeMCU board is connected to.
Step 5: Upload Your First Program
Now that you have set up the development environment, you can write and upload your first program to your NodeMCU microcontroller. Here's a simple "Hello, World!" program to get you started:
- Open the Arduino IDE.
- Go to File -> New.
Type the following code:
  Serial.begin(9600);
  Serial.println("Hello, World!");
}

void loop() {
  // do nothing
}
- Go to Sketch > Upload to upload the program to your NodeMCU microcontroller.
- Open the Serial Monitor to see the output.
Congratulations, you have successfully set up the development environment for your NodeMCU microcontroller! You can now start exploring the capabilities of this powerful platform and building your own IoT applications.
https://twitter.com/1492571933690499076/status/1628753330636718082
The rewards earned on this comment will go directly to the people( @ptmaker ) sharing the post on Twitter as long as they are registered with @poshtoken. Sign up at https://hiveposh.com.
https://leofinance.io/threads/@ptmaker/re-leothreads-2jnj3a4yj
The rewards earned on this comment will go directly to the people ( @ptmaker ) sharing the post on LeoThreads.
Thanks for your contribution to the STEMsocial community. Feel free to join us on discord to get to know the rest of us!
Please consider delegating to the @stemsocial account (85% of the curation rewards are returned).
You may also include @stemsocial as a beneficiary of the rewards of this post to get a stronger support.