M5Stack Core2 Development Kit
Espressif’s ESP32 microprocessor has quickly become popular and has been used in many IoT projects requiring Wi-Fi or BLE connectivity. Although these processors offer a lot of performance, it is often difficult for beginners and IoT enthusiasts to program them in a native environment.
To solve this problem and accelerate IoT development, M5 Stack introduces the new M5Stack Core2 Development Kit, a feature-rich ESP32-based development module that allows you to immediately prototype your IoT ideas. This development kit has an integrated 2" capacitive touch screen, a built-in battery and many other interesting sensors and modules. Best of all, it can be easily programmed using the Arduino IDE or Micro Python.
M5Stack focuses on building an ESP32-based stackable and modular all-in-one open source IoT development kit. M5Stack has been well-known in the global development board field in recent years. Their products are loved by most fans in Japan, and are sold to more than 100 countries including Japan, the United States, the United Kingdom, Germany, Australia, Belgium and Portugal. Its products have been used in various application scenarios such as smart home, smart office, STEM education, artificial intelligence, and robotics.
So let's take a closer look at this M5Stack Core2 development kit and examine the different sensors and modules in it.
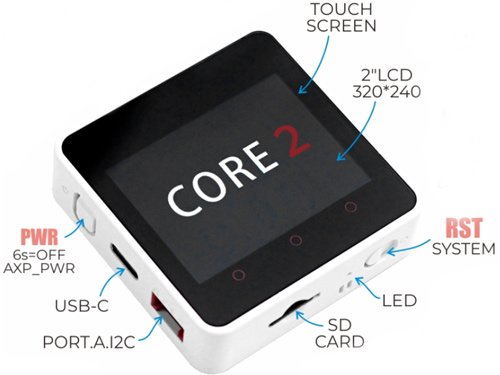
M5Stack Core2
My unit came with a small instruction sheet and the actual hardware itself. How-to cards have some useful links to some technical documentation and community pages for beginners to get started.
A Closer Look
If we take a closer look at the kit, we see that it has a neat square shape with the display on top and buttons and slots on the sides.
The display is a 2-inch capacitive touch display with a resolution of 300 x 240 pixels. Below the display you also find three capacitive touch buttons that can be programmed to work according to our needs. We have 1 power button, a USB Type-C port for charging the device, and 1 Grove port that allows you to connect other sensors and modules if needed. On the bottom you can see a reset button, a green LED as a power indicator and an SD card slot that supports up to 16G cards.
The board gets more interesting when we look at the back. The back label briefly describes the features and specifications of the ICs used on this board.
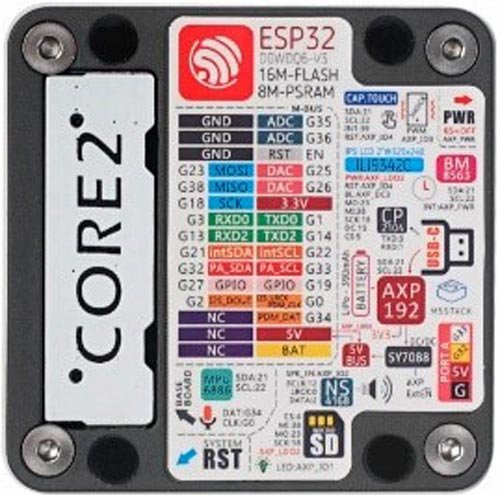
The brains behind the development kit is an ESP32 D0WDQ6 microprocessor and a dual-core Xtensa 32-bit chipset running at 240MHz with 16MB of flash memory and 8MB of PSRAM. It goes without saying that the ESP32 supports both Wi-Fi and Bluetooth (BLE) protocols. On the right side we can see the pins where the display is connected and the name of the display driver IC ILI9342. We have the RTC IC BM8563, then the USB Type-C connector to the USB driver IC CP2104 and the power management IC AXP192 which controls our battery charging and the 3.3V required for the board to regulate. Next is the SY7088 DC/DC converter IC to set the battery voltage to 5V.
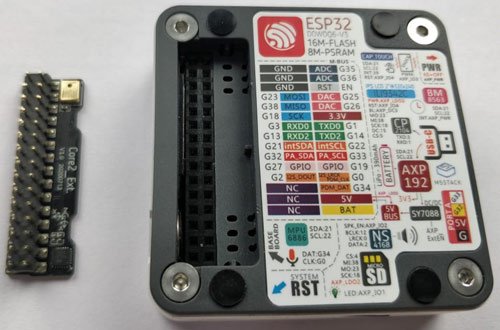
The NS4168 I2C amplifier IC is connected to the built-in speaker to play audio. Then there is the expansion board on our left, the picture below is the expansion board removed from the main board. As you can see, the expansion board consists of an onboard microphone and an MPU886 6-axis IMU sensor. After removing the header board, the header pins are exposed on the motherboard and can be used to connect with other modules.
M5Stack Core2 factory test program
Every new device comes with a standard factory test program that you can use to explore most of the development kit's capabilities. Now let's open it up and look at the example program. Just press the power button and the module will power on.
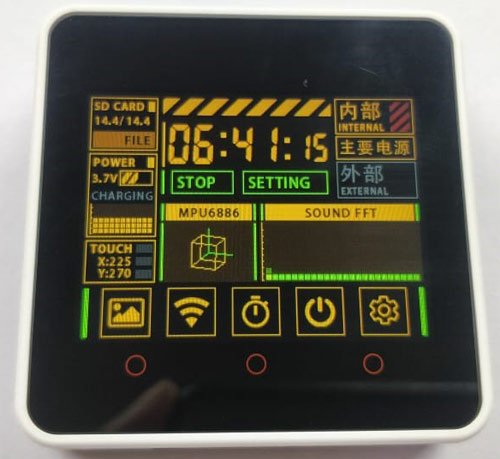
In addition to this, we can also use this Wi-Fi icon to search for Wi-Fi signals around us, stopwatch timer options, and in the setting options we can activate the built-in motor, sound and even test the TFT screen.
You can also find more information on this official M5Stack Core2 GitHub page.
Soon i will publish some projects made by me like this one in the image below:
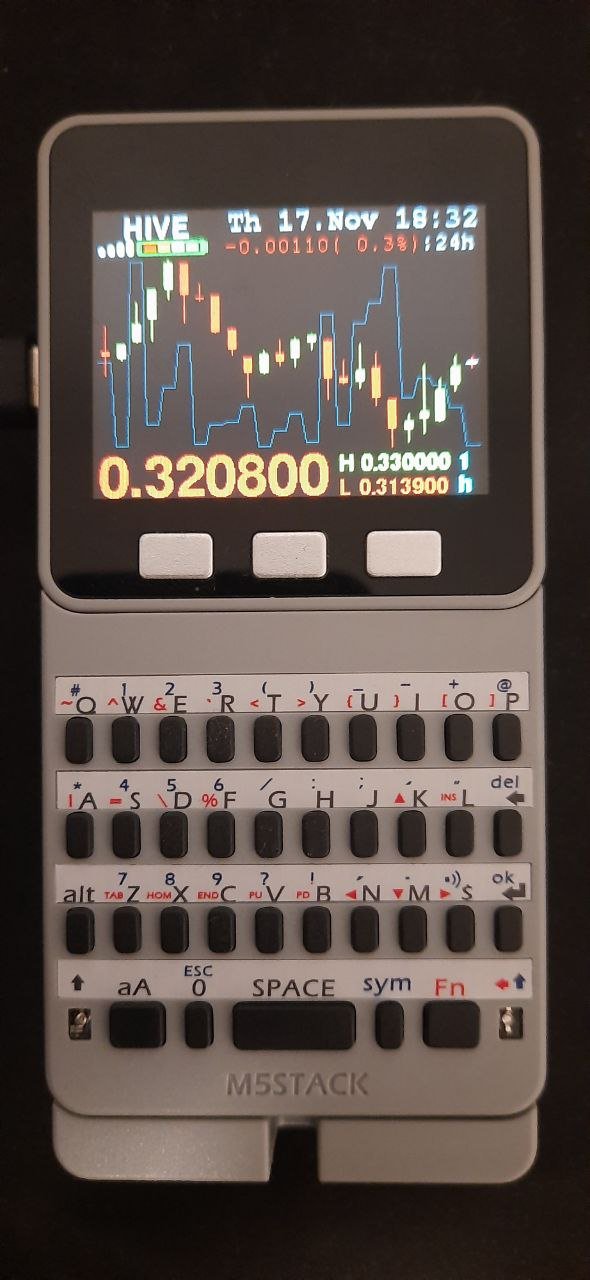
I hope you like it! Thank you for your time!
https://twitter.com/1492571933690499076/status/1593314582197669894
The rewards earned on this comment will go directly to the people( @ptmaker ) sharing the post on Twitter as long as they are registered with @poshtoken. Sign up at https://hiveposh.com.
Thanks for your contribution to the STEMsocial community. Feel free to join us on discord to get to know the rest of us!
Please consider delegating to the @stemsocial account (85% of the curation rewards are returned).
You may also include @stemsocial as a beneficiary of the rewards of this post to get a stronger support.
Congratulations @ptmaker! You have completed the following achievement on the Hive blockchain and have been rewarded with new badge(s):
Your next target is to reach 3250 upvotes.
You can view your badges on your board and compare yourself to others in the Ranking
If you no longer want to receive notifications, reply to this comment with the word
STOPCheck out the last post from @hivebuzz:
Support the HiveBuzz project. Vote for our proposal!
Excellent review, interesting and useful!
!discovery 10
Thank you buddy :)
INteresting device! thanks a lot sharing

!1UP
You're very welcome :)
You have received a 1UP from @gwajnberg!
@stem-curator
And they will bring !PIZZA 🍕.
Learn more about our delegation service to earn daily rewards. Join the Cartel on Discord.
I gifted $PIZZA slices here:
@curation-cartel(16/20) tipped @ptmaker (x1)
Send $PIZZA tips in Discord via tip.cc!
Amazing review! I didnt know this module but seems interesting :)