3D Printer Upgrade - Hot End Mod
Hello Everyone,
I'm a bit surprised to be making this post today, because with as many things that could have gone wrong with this project, everything went amazingly smooth with minor issues.
Let's check out the upgrade.
Firstly, it is important to state that this is not my design.
But I decided to make a post about this because it's going to be a visible component on my 3D printer on virtually every post to come, and I'm sure some people would have questions about it anyway.
I plan to tip my post rewards to the designer if I'm able to reach him. The tip will likely be in USD and there will be no sending Hive out, but whatever rewards I get, if they are minimal, I will bump up that tip to what I see as a reasonable amount for such an amazing piece of engineering.
This is the Thingiverse link:
Z-19 rev 1.7 --Creality mod
About the designer dan w58 (Thingiverse profile)
"Many years ago I was lead developer of an open source game (trading in space and fighting pirates); and I learned to use Blender 3D to model ships and orbital stations. So, when I recently bought my first 3D printer, I hit the ground sprinting. My profession is Electrical Engineer. My thing I do at night is play bass. My passions are meditation, nutrition and health, plus audio and accoustics. My dream is to start my own sound equipment factory. I bought the printer precisely to try and 3D print a first prototype for a very portable bass speaker/amplifier." -dan w58
Very impressive, I share some things in common with Dan, and I hope he has achieved some progress with his dreams and goals. Thanks for the great design Dan!
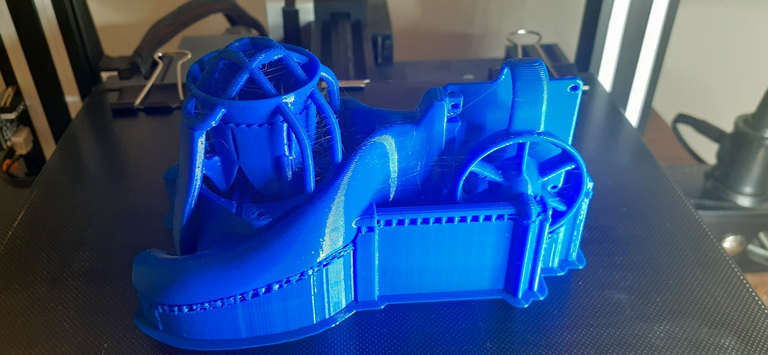
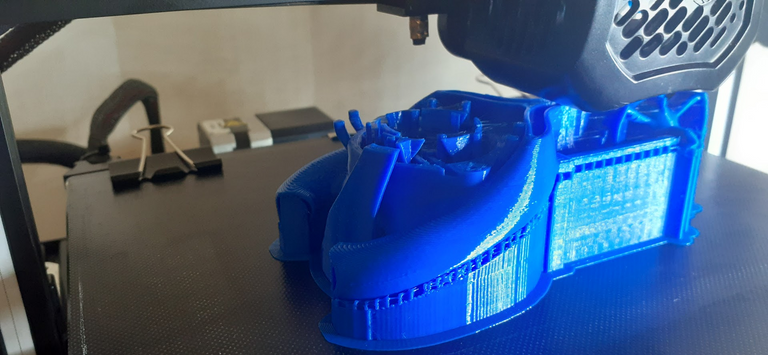
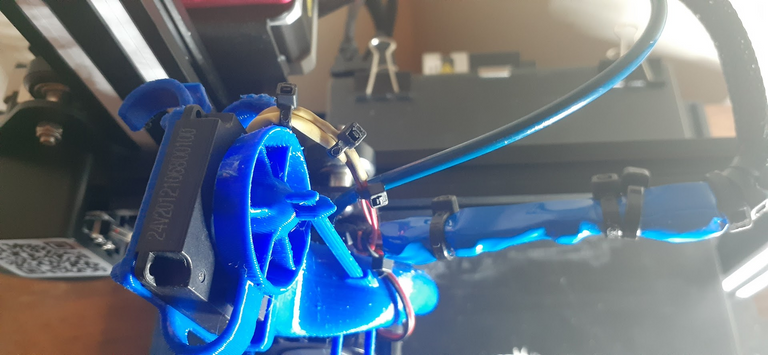
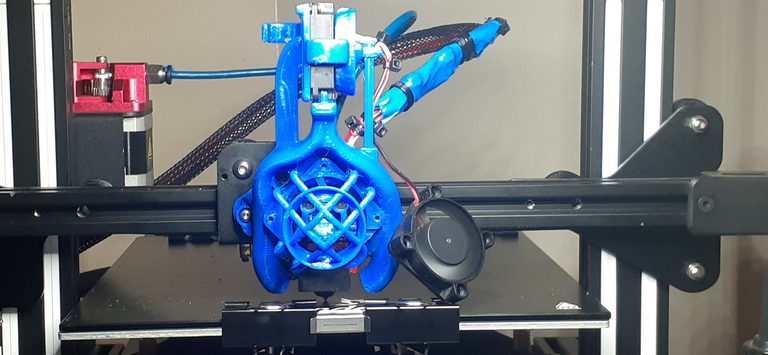
I'm sure the viewer is curious to see what this thing even is.. So let me start with the complete assembled photo, and I will explain the process from there.
Z-19 rev 1.7 --Creality mod on Ender 3 V2

This is a hot end mod, and it's much different than the previous stock Ender 3 V2 hot end.
Previous Post
I've been planning to upgrade for a while now, because the stock hot end was inefficient in many ways.
This small casing contained the hot end cooling fan and also a parts fan, all squished in there with barely any room for the air flow to be proper.
I even discovered my parts fan had a poor soldering joint (not done by this guy..) and there was no power to the fan at all, which means I was getting no parts cooling, and still producing decent prints, so now I expect the prints will be super nice.
So let's check out some photos.
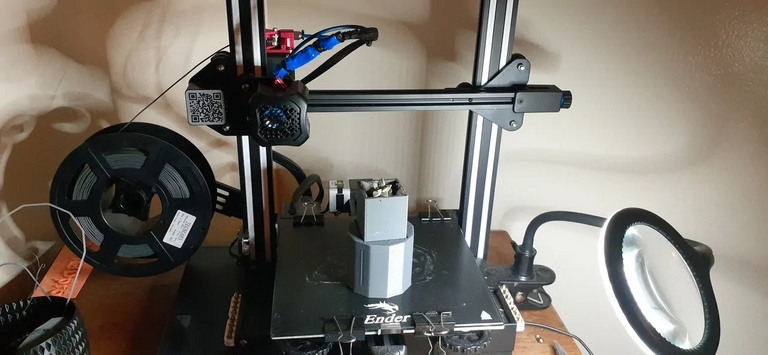
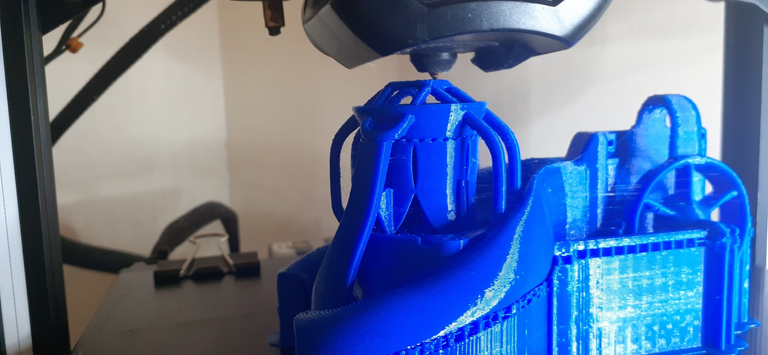
I started this before bed, because I like to take risks sometimes :D
Initial layers 👍
Went to bed at this point..
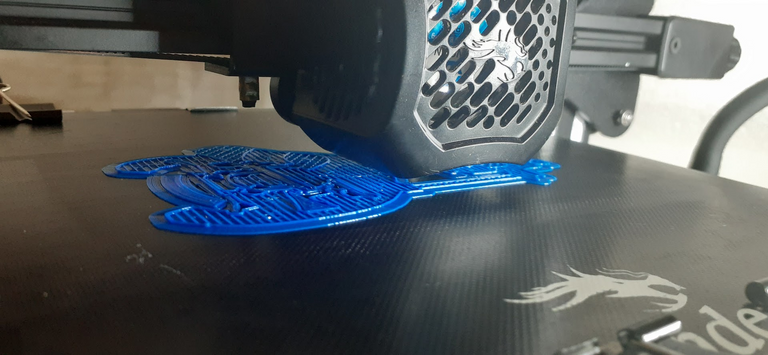
Woke up to..
Super happy waking up to this!!!!
As the last layer was extruded, I was sure this would be a success unless something catastrophically went wrong with removing supports (snapping the part by accident, a real risk when you don't know your own strength and suck at patience.)
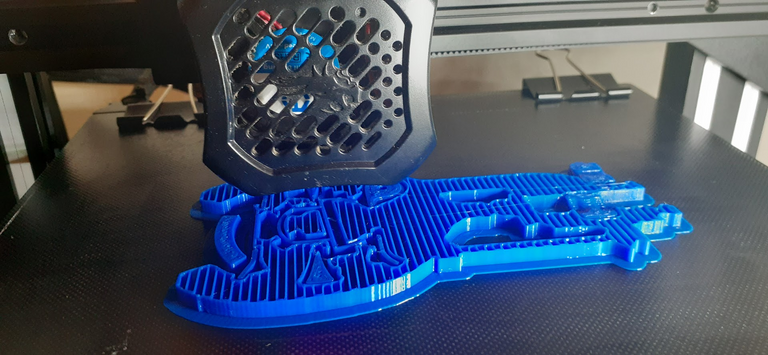
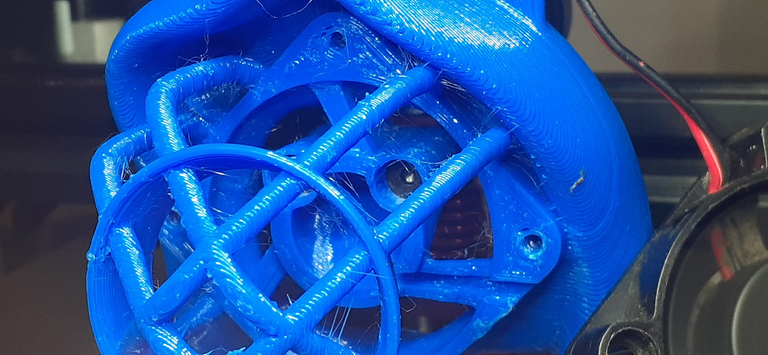
I started removing supports and realized it was not going to be an easy task.
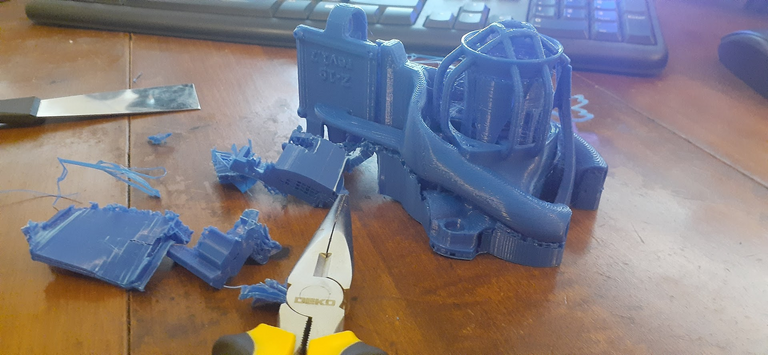
I used some pretty basic tools to remove supports. They weren't too hard to remove, but it took about 30 minutes while being careful not to accidently break off the wrong pieces. At one point I almost did and was the point I stopped and took a photo.
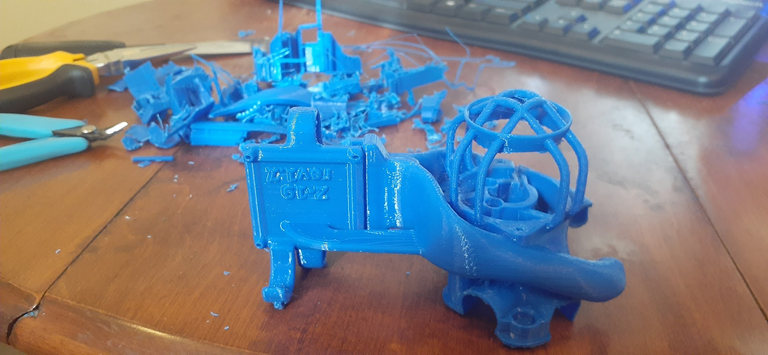
There was a lot of support material! But everything went good :)
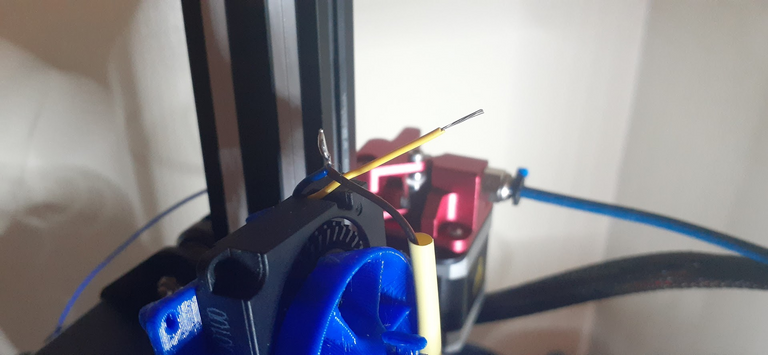
After I assembled the mod to the printer, I realized the parts fan was not working and prepared to hastily fix it.
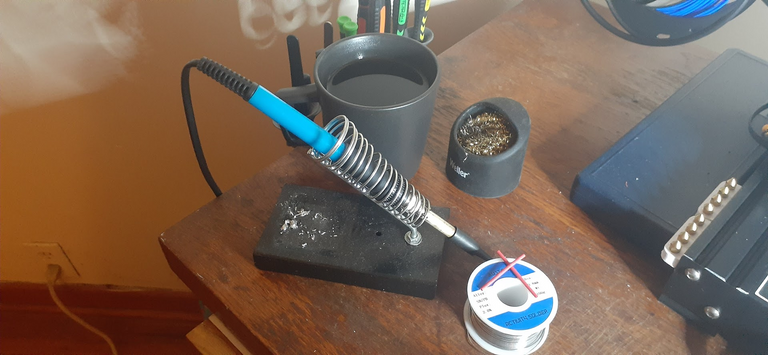
I grabbed my soldering kit and prepared.
Please don't put drinks by electronics like this. I tend to do things that I know could end in terrible results or even death. Keep your coffee on a different table.
I just put it there for the photo :)
How about that soldering job :P
It's imperative to use heat shrinks or at the very least electrical tape or even hot glue to cover the soldered joint. This might be common sense to most involved with electrical work, but many might not know, always shield electrical connections. If the positive and negative touch, there will be undesirable results to say the least.
Also ensure there is no power to the printer and it's unplugged while soldering.
Admittedly I worked with "hot" wires because I have enough experience to know I could pull it off, and I was in a hurry..
I don't recommend doing what I did if you are a beginner, or even seasoned with electrical work, it's just poor practice and quite dangerous.
Will I do it again in the future? Probably but I prefer to solder wires with no current flowing through them.
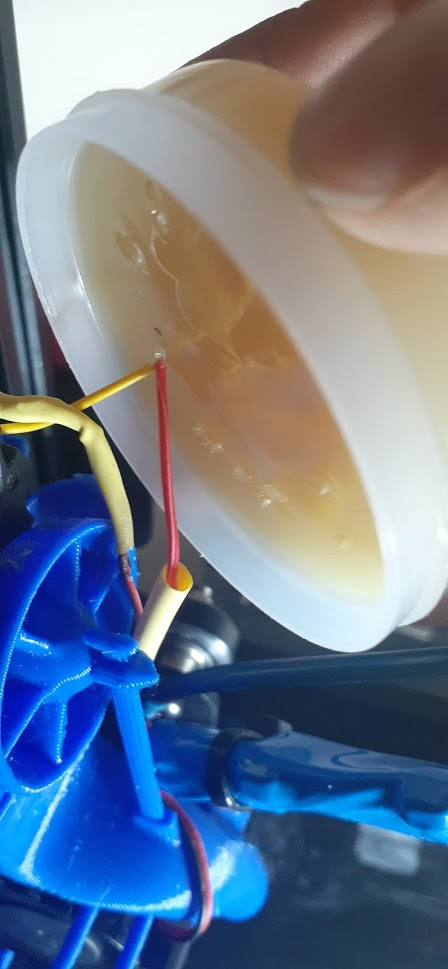
I like to go heavy on the flux, and generally hold my breath and blow the air around trying to avoid breathing in the fumes. It's good to have a fume extractor, but I don't have one.
(I could 3D print one :D )
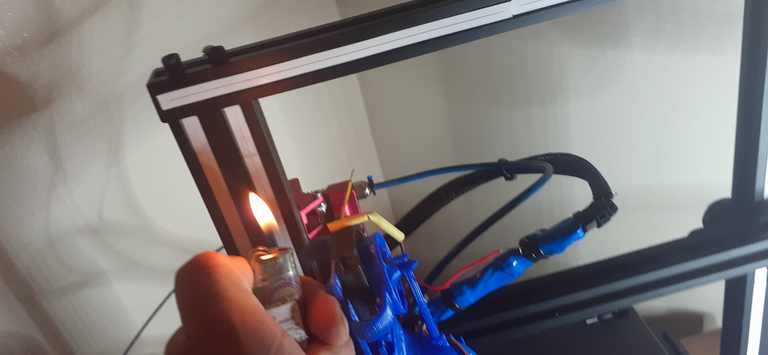
This is also dangerous and not recommended, but there are no hair dryers or heat blowers of any kind in my home, so.. I had to risk my life one more time..
Everything went great with the parts fan fix!
After that 1st layer, the parts fan will kick on and blow air through those tubes extending down to the bed plate!!! What an amazing piece of engineering!
Now let's talk about the obvious "tilt".
Unfortunately this part does not connect flush to my printer.
One of the screw holes doesn't line up :(
The entire unit is held by 1 screw.
That's not good but it's not a huge deal really, because there is no pressure of any kind on the casing. It just holds fans in place and moves with the hot end itself.
It's aesthetically unpleasing to the eye a little to have a slight tilt to the part and not perfectly center, but the advantages of this upgrade far outweigh any small visual gripes.
I have some ideas on how to fix this in the future, and also ideas on how to fix expected issues with the screw holes, for now I will work on dialing in the printer with a better hot end and working parts fan.
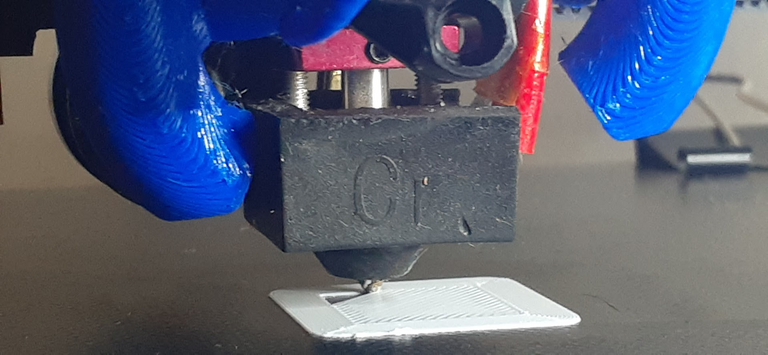
My first print (while typing this post) completed with some issues.
XYZ 20mm Calibration Cube (Thingiverse link)
There's some layering issues going on, and it doesn't look like over extrusion to me.
After a major upgrade like this, it's expected that current settings will not be proper, so now it is back to work on calibration.
UPDATED :
After some careful inspection, I realized I connected the hot end mod incorrectly, and that the most important mounting point was the one I missed, directly on the hot end itself.
I was fortunate to have some M3 35 mm hex screws, as they were the exact screws I needed and not stock on the machine.
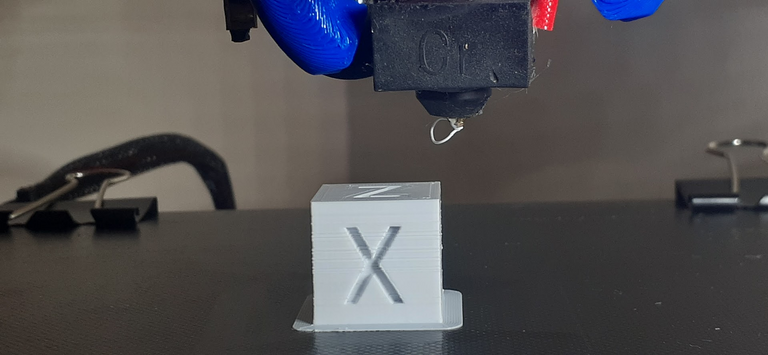
Let's see the difference now:
The hot end mod is now perfectly aligned where it is supposed to be and much better secured.
Back to work I go.
Thanks everyone for stopping by, and for all the amazing support.
Have a great day! ~~@print3dpro
Looks awesome.
Thanks so much!
Congratulations @print3dpro! You have completed the following achievement on the Hive blockchain and have been rewarded with new badge(s) :
Your next target is to reach 1000 upvotes.
You can view your badges on your board and compare yourself to others in the Ranking
If you no longer want to receive notifications, reply to this comment with the word
STOP3d printing is magic.
Indeed! Thank you for the support! 😃
The printer settings on Thingiverse for this project state 100% infill. In your 4th and 5th picture that doesn't seem like 100% infill. Am I seeing that right? Maybe that's why taking off the supports was such a delicate procedure?
You're seeing it right, I used 80% infill because I'm paranoid about pancaking, even though I have flow rates down a bit. That could also be problematic, I need to run calibration tests again.
After getting it hooked up properly everything seems pretty nice. I probably should have gone with 100%, but the overall result is a success and I'm pleased with it.
I tried to examine this model in Tinkercad but the mesh is too complex to import. Maybe this is a sign I am too reliant on Tinkercad. Rather than a browser I need to finally look into an alternative open source program to download.
Fusion 360 was recommended to me. I have it downloaded and installed but haven't really used it yet because I was intimidated by the interface and just so busy with other things right now.
I'm not so sure it's opensource, but they pretty much offer it as a freeware.
Me and you are in the same boat with that because I use Tinkercad to try to remix stuff from thingiverse and it never really goes great for me. I think it's mostly beginner based and quite limited in its functions, but pretty great for learning imo due to the simplicity and nice interface.
Epic! Pure epic!
Thanks man!
3d printing gets very expensive very fast.
I have a Yoda 3D printed that I won on a full time daily coding bootcamp I frequented physically when I was starting my career as a dev (I miss face to face classes), but never decided to invest the money in buying a printer. Whenever I need I order a part 3d printed by a third party. It is slower but seems to be cheaper and higher quality than doing by myself.
Congratulations for taking this step.
Hello, thank you for the feedback!
The money I've spent after purchasing the printer exceeds the cost of the printer at this point, and rolls of filament are certainly not cheap. You are very right about this!
I think a developer would definitely have an edge in 3D printing. I'm not much of a programmer, and I am pretty sure some programming skills would help me with troubleshooting certain things.
Troubleshooting seems to be a non-stop thing, as issues are constantly arising.
In fact after installing this upgrade, my printer has been layering very badly and I have been on this for days trying to figure it out, even installing the old hardware again as a troubleshooting step.
It's very tedious and time consuming, albeit very rewarding.
We might see better/cheaper/smaller 3D printers that are more reliable with less maintenance in the future.
I also miss face to face human interaction like you mentioned about your classes. There is a push towards complete digitalization I think. That's another topic entirely.
Thanks again for the great comment!