Get started quickly with Disco Diffusion v5 ~ Generative AI Art
My previous two posts covered some art and tips for using the Disco Diffusion workbook for making text to image AI generative art.
They do contain tutorial vids and you can check them out here:
- Dabbling with Generative Art
- The importance of text Prompts
Additionally, a good video for text prompt creation is this:
The Rundown
So when you have the Disco Diffusionworkbook open, then you need to login with your google account.

Although it can be scary looking and is definitely cluttered don't fret too much. Just read and if you don't understand, click to see what happens. This tutorial will try to convey the minimum things you need to do to start getting results and be relatively comfortable with the interface.
The next step is to connect , this simply means we are asking Google to give us a cloud computing instance with lots of RAM :) preferably.

If you instead get a pop-up saying you have no GPU available you will need to try again later for one, usually I try in an hour or two. You only get roughly 12 hours of rendering time and sometimes if paid usage is up then there just aren't any free resources available.
Ok so now to check what machine we did get if it connected succesfully.
Scroll down to 1. SET UP and click the arrow next to the title or the grey bar for it to open and show more options.

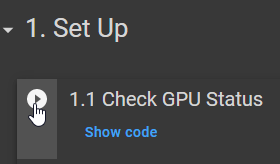
When the panel opens the only option we care about is 1.1 Check GPU Status
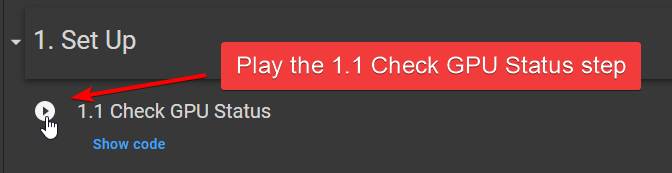
Pressing the play button next to it, will run the code required to check what type of machine you have. You will be shown a warning, and should say Run Anyway
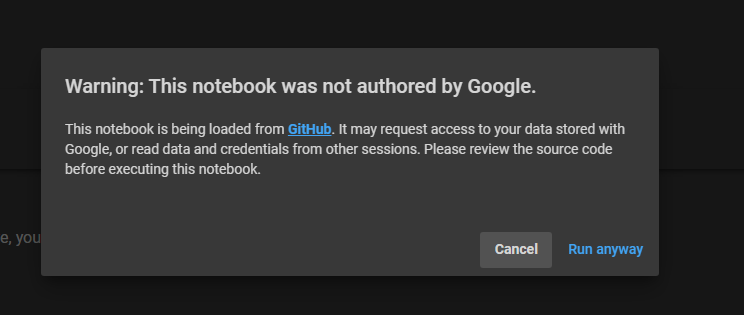
The GPU status will then display your machine type.
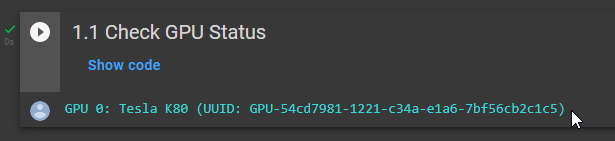
As you can see we just got the TESLA K80 and that is the one machine you do not want. Since resources are shared for free with everyone there are times you get these rubbish machines. For comparison the Tesla K80 takes about an hour and a half to generate a 1000px image which takes a K4 only 15 minutes.
We need to try and disconnect then do the same steps as above to get a different machine.
To disconnect without refreshing the window, you need to TERMINATE the session.
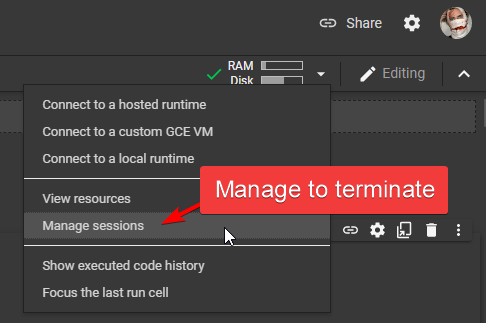
In your top bar where it shows Ram and Drive click the little down arrow to open the flyout menu and select manage sessions like in the image.
In the sessions pop-up you will see it show a single entry and a TERMINATE button.
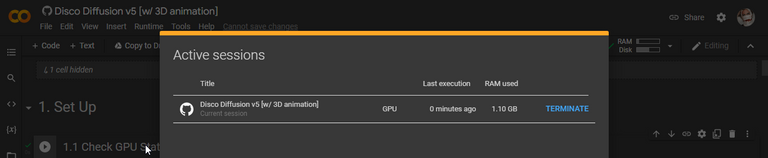
Click terminate and confirm to close the session. This will disconnect you from the K80 computer.
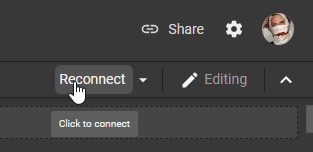
Next you need to reconnect again, and hopefully they provide you with something different.
1.1 Check GPU Status and press the play button again to see which machine you got.
Mine said K80 again, and really it is not worth running on that type unless you are willing to wait over an hour for your first results.
So I will now Terminate my session again and refresh my browser and hopefully after connecting again I will get a different machine.
Fingers crossed.
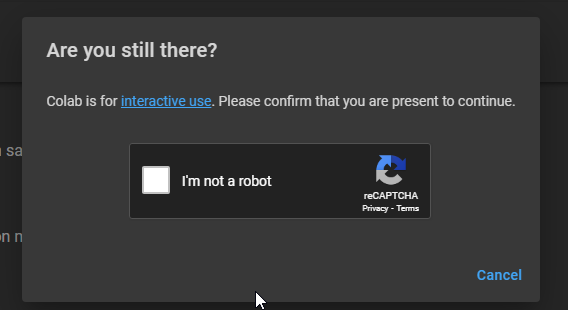
After multiple refreshes and terminations I finally got a different machine. Also note google will do robot check, and annoyingly they do them twice in a row every time.
Now when I run 1.1 Check GPU Status I get back that I have a Tesla T4 machine running. That is great.

Now we can move on to doing setup.
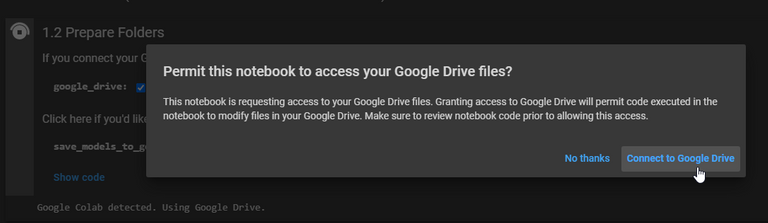
Right below 1.1 Check GPU Status you will see 1.2 Prepare Folders

Play that setting so Google can connect to your Google Drive and setup a place to store your final images. This is very important when running multiple batches since you do not have time to save an image as it finishes manually.
Accept and allow the google drive connection.
Then you can close that panel 1. Set Up or you can scroll past all the messy code to our next step.

Settings
Scroll down until you see step 3. Settings , it looks like this:
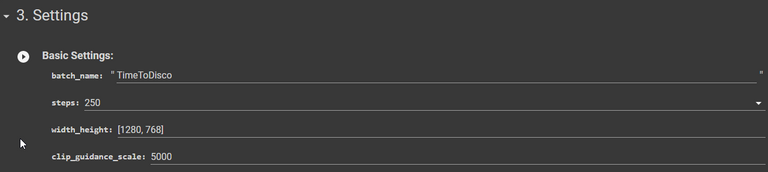
The only data we will change is the batch_name this is only so we can identify the folder easily in our google drive. If you do not want to then you can leave it as is.
You can call the batch_name after the type of images you are trying to get.
Steps are just how many iterations the AI should make to produce an image, the more steps the longer it takes.
The resolution we will also leave as is but if you want you can reduce it for quick tests. Resolutions must always be multiples of 64 so you have to be able to divide the chosen resolution width and height each by 64.
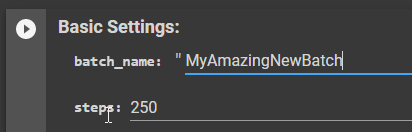
We will leave those and only change batch_name now.
Then you can scroll down and open the Extra Settings panel, in this panel we will only change the setting intermediate saves from 0 to 2. This will save 2 extra images for us one at 33% complete and one at 66% complete.

Next scroll down to step 4. Diffuse! , do not play anything yet. We are only preperaring now.
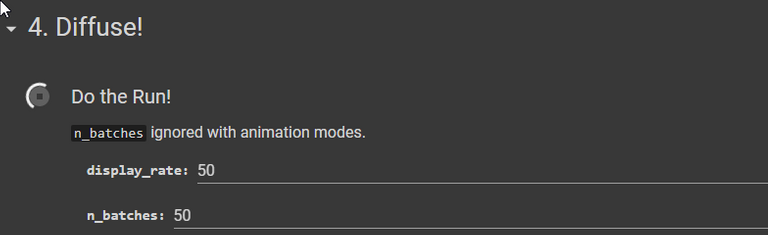
The two settings named display_rate and n_batches just mean the following: It tells the AI to show the preview every 50 steps out of 250 (if you left it at 250) and to make 50 images.
Ideally if you are starting you are watching the images being created so you want to see previews sooner. Try a display_rate of 20 for quicker previews. I usually just make 5 images at a time or even 3 since my free time will never last for 50 and I want to experiment with lots of different types of PROMPTS.
The Prompts
Now we are almost ready, and this is a very important part. The AI takes the sentences or description you provide it and tries to generate an image based on your text input.
Scroll back up a little to the PROMPTS panel.
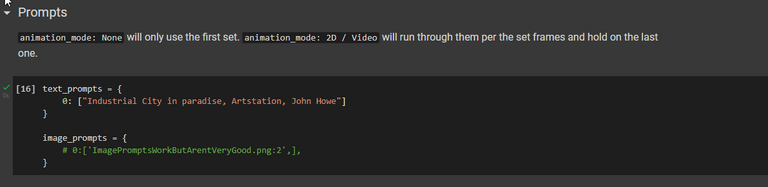
As you can see I have already changed mine, yours will be different with sample text in. This is the minimum you need:
image_prompts = {text_prompts = {
0: ["Your fancy or plain description goes here."]
}
# 0:['ImagePromptsWorkButArentVeryGood.png:2',],
}
I generally just replace all the text inside the prompts panel. Since selecting from very long text can get messy.
I copy all the code back and forth from notepad, and only update my description part before removing all the text in the panel and then copying my new code block in.
Do watch the video above and the other tutorials for more on prompts.
For the most part if you just want a "field of flowers at sunset" then you can just say that and replace the current prompt text with this:
image_prompts = {text_prompts = {
0: ["A field of flowers at sunset."]
}
# 0:['ImagePromptsWorkButArentVeryGood.png:2',],
}
I leave the default image code they have and the structure, just change the text at frame 0: between the apostrophes.
Running Everything
- Now you have finished doing your setup,
- You have a fast computer to work with and not a trash K80,
- You have connected your google drive
- You have given a
batch_name - You have either decided to increase the
stepsor leave the default 250 steps. - You have set your
display_ratefor faster preview images. - You have decided how many final images you want in
n_batches - You have gone back up and thought of a good prompt to tell the AI what you want to see and copied this prompt to a text document for easier editing.
Now it is time to finish the installation and let it all begin.
The last thing to do is for the workbook to run through the complete instruction list. This includes installing required software etc. Basically all the things we left alone.
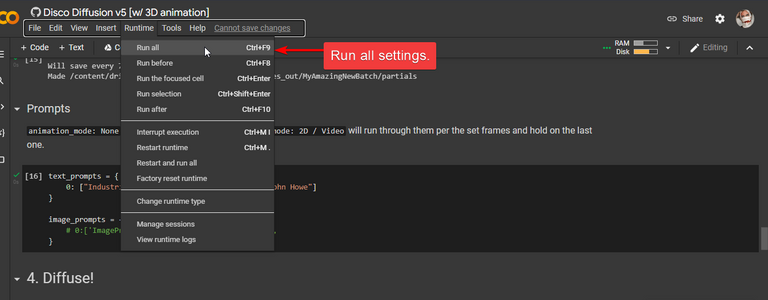
The simplest is to press CTRL + F9 or you can navigate to the top menu and select Runtime and then select Run all
The very first time this will take a bit longer because it is doing downloads, but on consecutive batches you will only need to PLAY the prompts and step 4 diffuse! again.
I recommend just always using CTRL + F9 to make sure you never missed a setting.
Once everything is running you will see the active steps being ran will have a spinning line around a stop button like this:
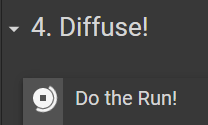
That means if you have started generating your image and really want to stop it you just press the STOP icon and it will stop. You can then go change your prompts or what you need to do and re-run everything with Ctrl + F9.

At first you will see noise, and below the image you will see a bar indicating progress for the current image and time remaining. The image above is at step 164 out of 240.
On the left you see the stop. To stop it will cancel the current image generation.
Sometimes your results just are not what you want then it is fine to restart.
Keep in mind once you free time is up google will disconnect you.
If you leave the window unattended too long they will also disconnect you.
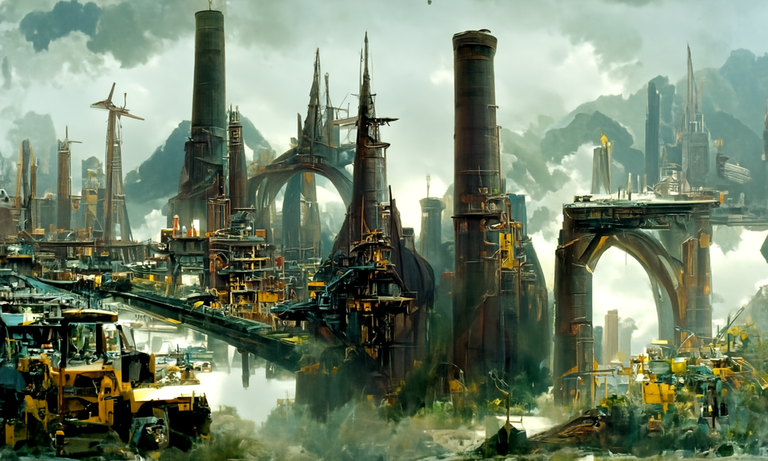
And this is the current image being processed from my "Industrial City in Paradise" with the style of the artist "John Howe" prompt above:
I hope this helps you, @beeber , @insaneworks.
https://twitter.com/korrek_penderis/status/1501634287199739905
The rewards earned on this comment will go directly to the person sharing the post on Twitter as long as they are registered with @poshtoken. Sign up at https://hiveposh.com.
Hope you get to use it :) !PIZZA
A tractor city! Damn that looks awesome!
I know I've said that I will be checking this out, soon, perhaps I might have said that I will do this immediately, and I meant it, I have started the thinking process of doing this. I have a bit of a flu today so not going to work so perhaps today I will do what I promised to do. :)
No rush, I know how things go, we do what we do when we do them , dare to say you will and when then you won't do it then and that is the story what I know and how it goes.
😁
Exactly! When then when then.
PIZZA Holders sent $PIZZA tips in this post's comments:
penderis tipped eve66 (x1)
@penderis(2/5) tipped @insaneworks (x1)
Please vote for pizza.witness!
No. No. No. Just TESLA K80 and I've been trying on and off for about 4 hours now. Also tried with that, accepting the long generating time, changed the things should be changed, accepted the google drive use and I get: not working. Only errors and red balls. Tried also not changing anything. At this point I think doomscrolling and watching the news of dead people and burnt houses could be more soothing and lower my blood pressure a bit.
But before that, I will collect the keys of my keyboard from the floor. That's how fun this has been. Perhaps I missed something vital and messed this up. Perhaps another day again.
I came here to complain about this because that usually helps. If you mention that something isn't working then it almost immediately starts working and I seem like an idiot. Or insane. But as it's hard to keep the insane profile, I do anything to maintain that image.
So hoping this helps. My complain.
Haha, sorry maybe google got hacked by russia. If they start being funky I just let it be and come back few hours later or next day, but I think maybe if you try the evening maybe. Maybe if you share the errors I can help see what might have gone wrong. You can skip the drive preconnect and it will anyway run when you run the big one which with F9
Perhaps Russia, perhaps me, who knows. But let's assume it was the not so dangerous one, meaning me. :D
Seems that this worked! Me complaining. Something's coming out...
!PIZZA !LUV
@penderis(1/4) gave you LUV. H-E tools | connect | <><
Tap to help.
I am about to try a run myself and I see in the time I made the tutorial to now they did change how that workbook looks. The steps are the same although things may look rather different for one thing they have moved
1. Set upinto the tutorial window, all the code showing though can be ignored and just focus on filling in the relevant fields to do with your prompts.I will try document changes in my tutorial later.
Great tutorial. Thank you for sharing this.