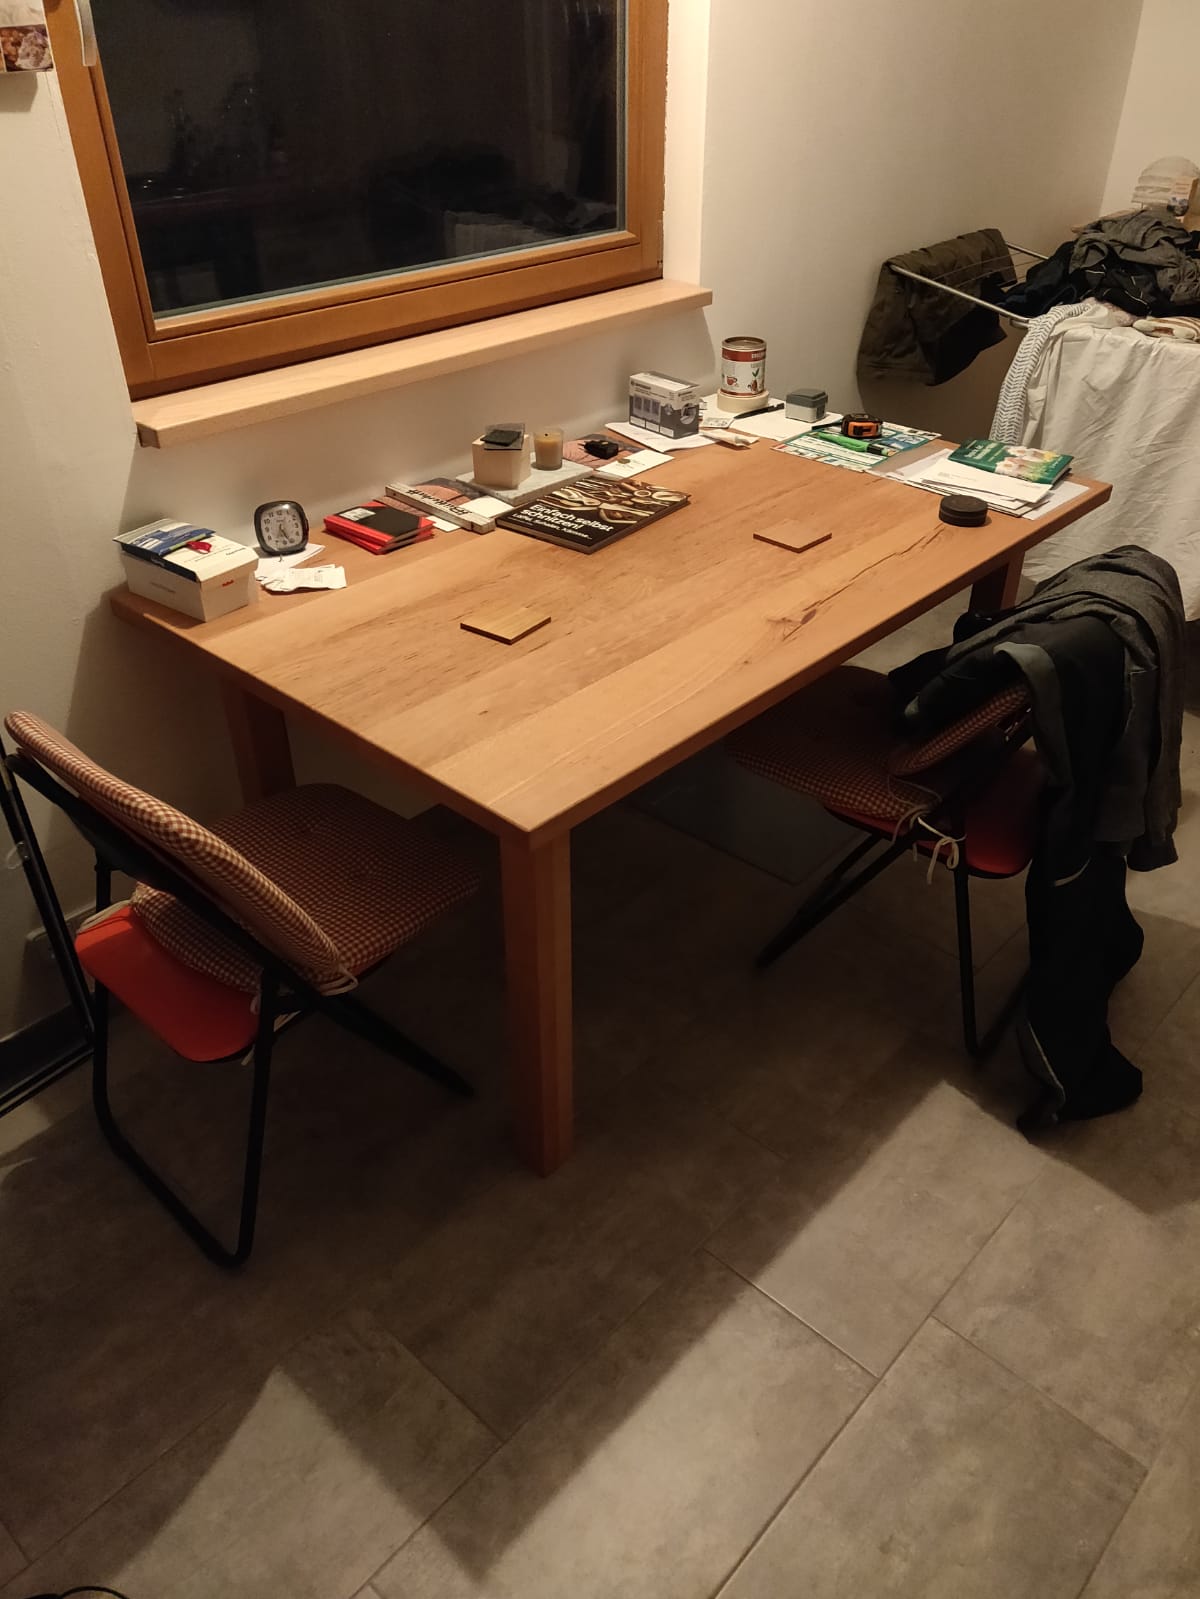
The dining table
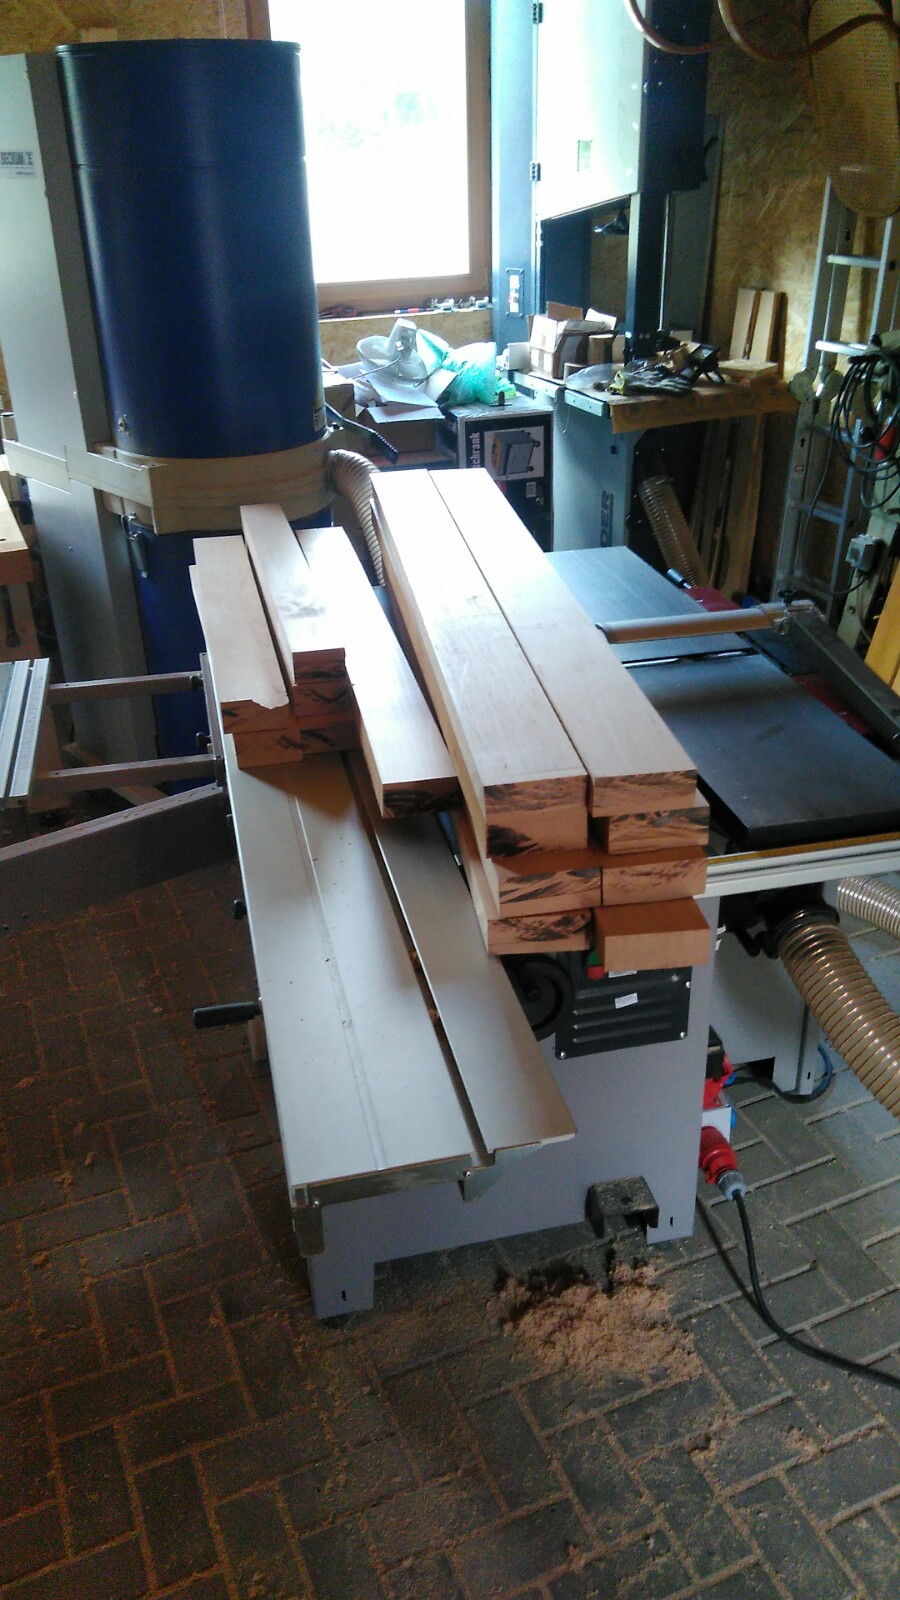
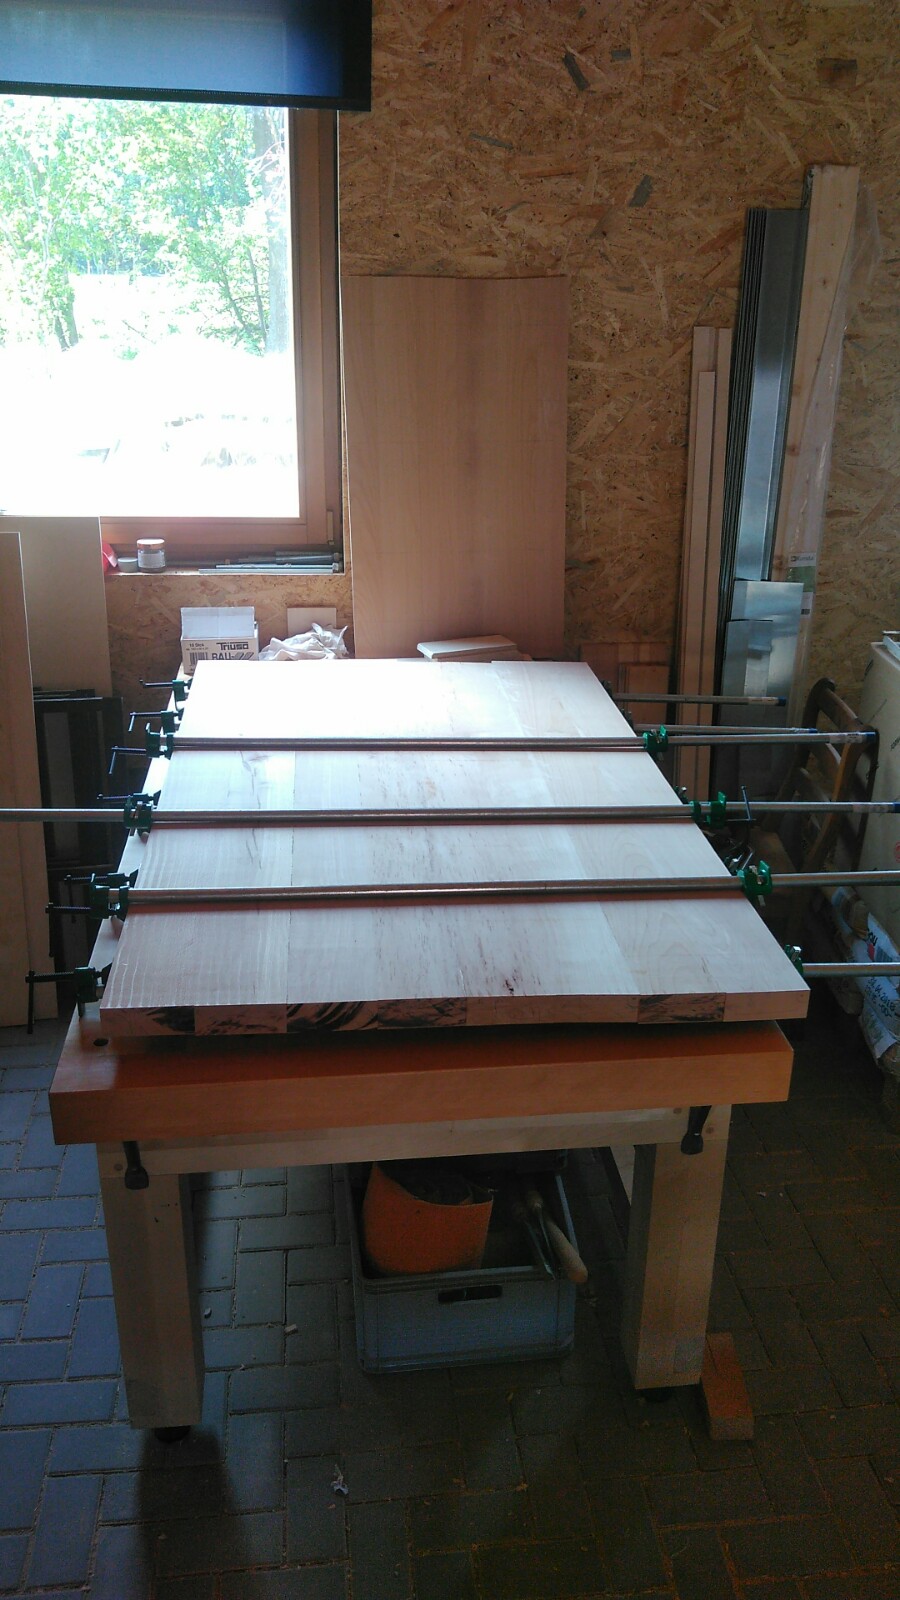
A wooden dining table that was actually intended for a customer. It was supposed to be a nice, large dining table that a customer wanted, unfortunately a small but crucial error occurred with the first table, which is why this table could not be delivered. I will come back to the mistake later. The top of the table consists of individual planks that are glued together. For this, the individually aligned planks had to be temporarily clamped together after being glued.
Ein Esstisch aus Holz der eigentlich für einen Kunden gedacht war.
Es sollte ein schöner großer Esstisch werden, den sich ein Kunde gewünscht hat, leider ist beim ersten Tisch ein kleiner aber entscheidender Fehler aufgetreten, weshalb dieser Tisch nicht ausgeliefert werden konnte.
Auf den Fehler komme ich dann später noch zu sprechen.
Die Platte des Tisches besteht aus einzelnen Bohlen, die miteinander verleimt wurden.
Dafür mussten die einzelnen ausgerichteten Bohlen nach dem leimen vorübergehend zusammengeklemmt werden.
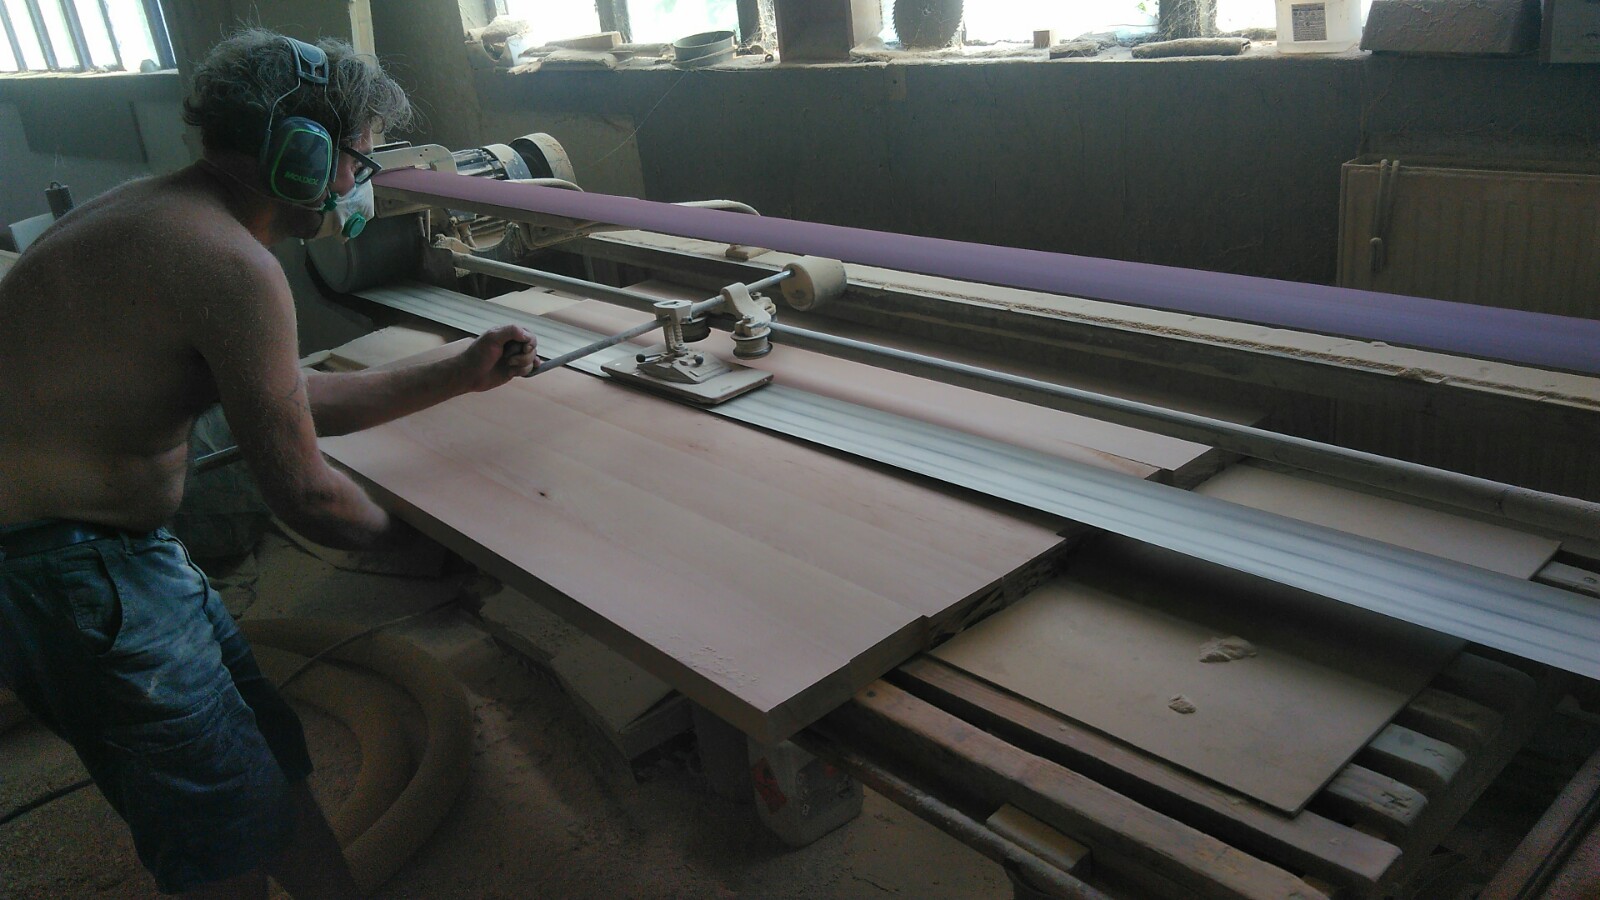
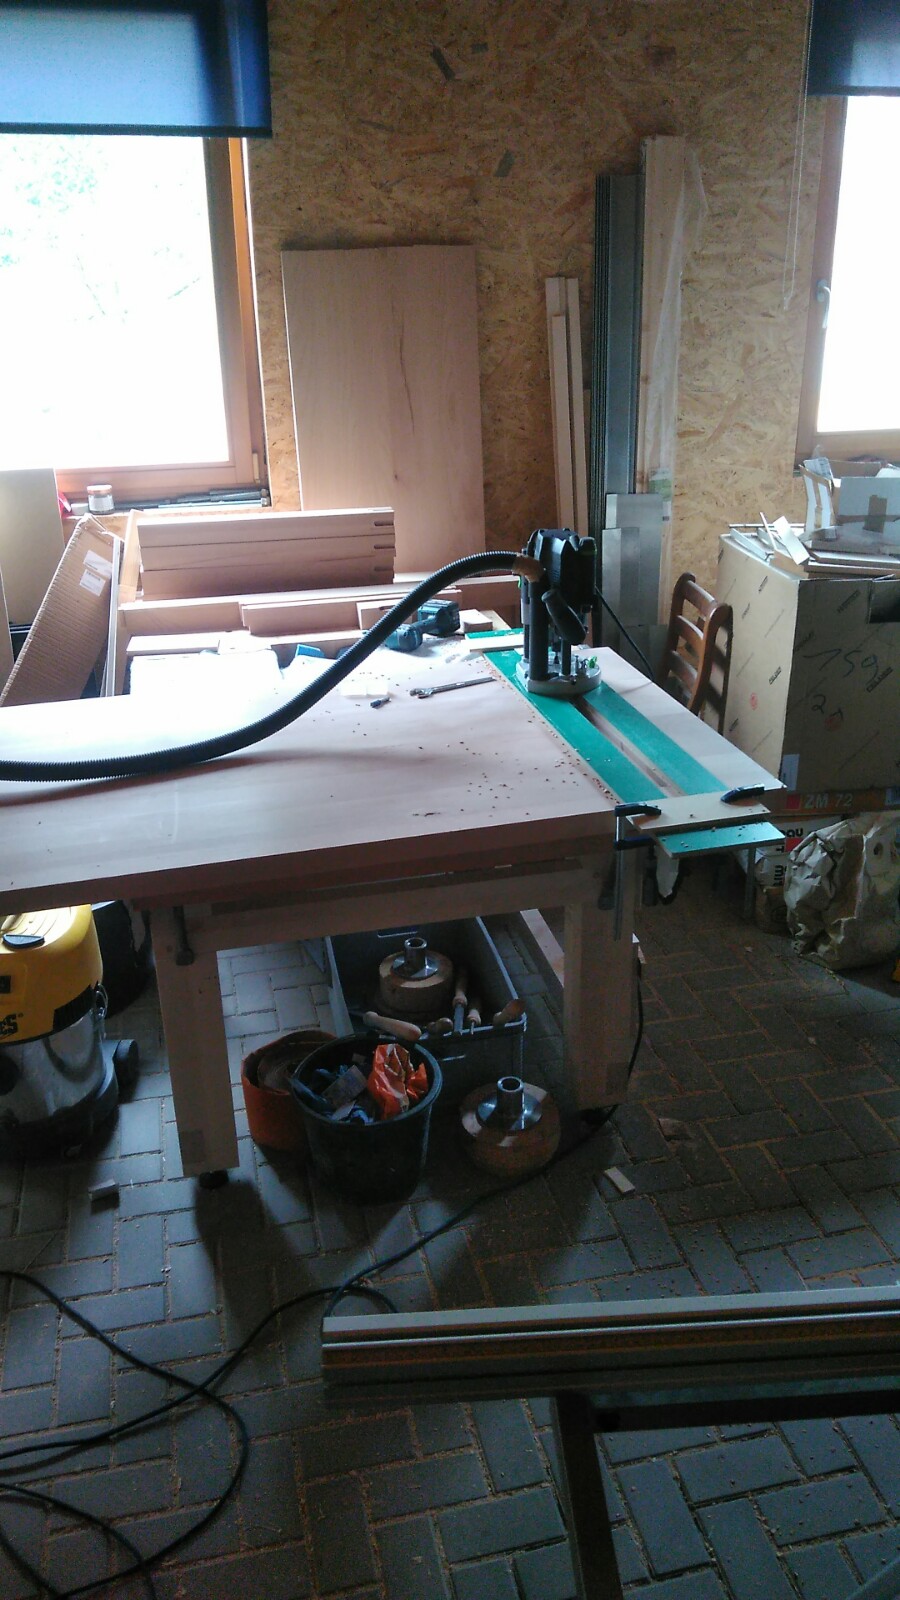
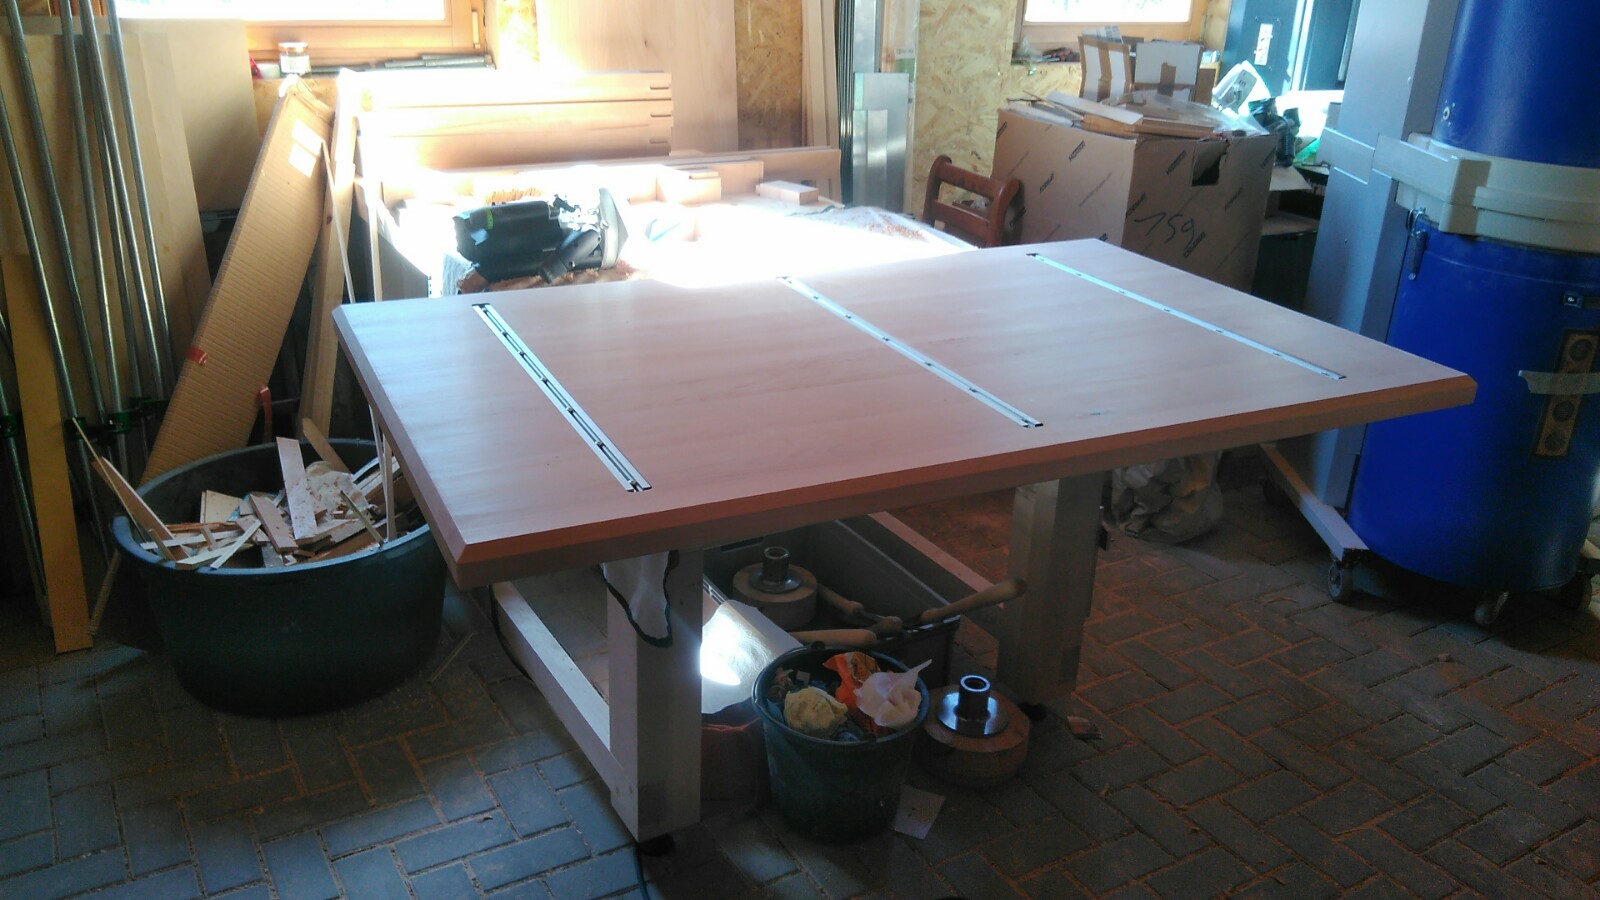
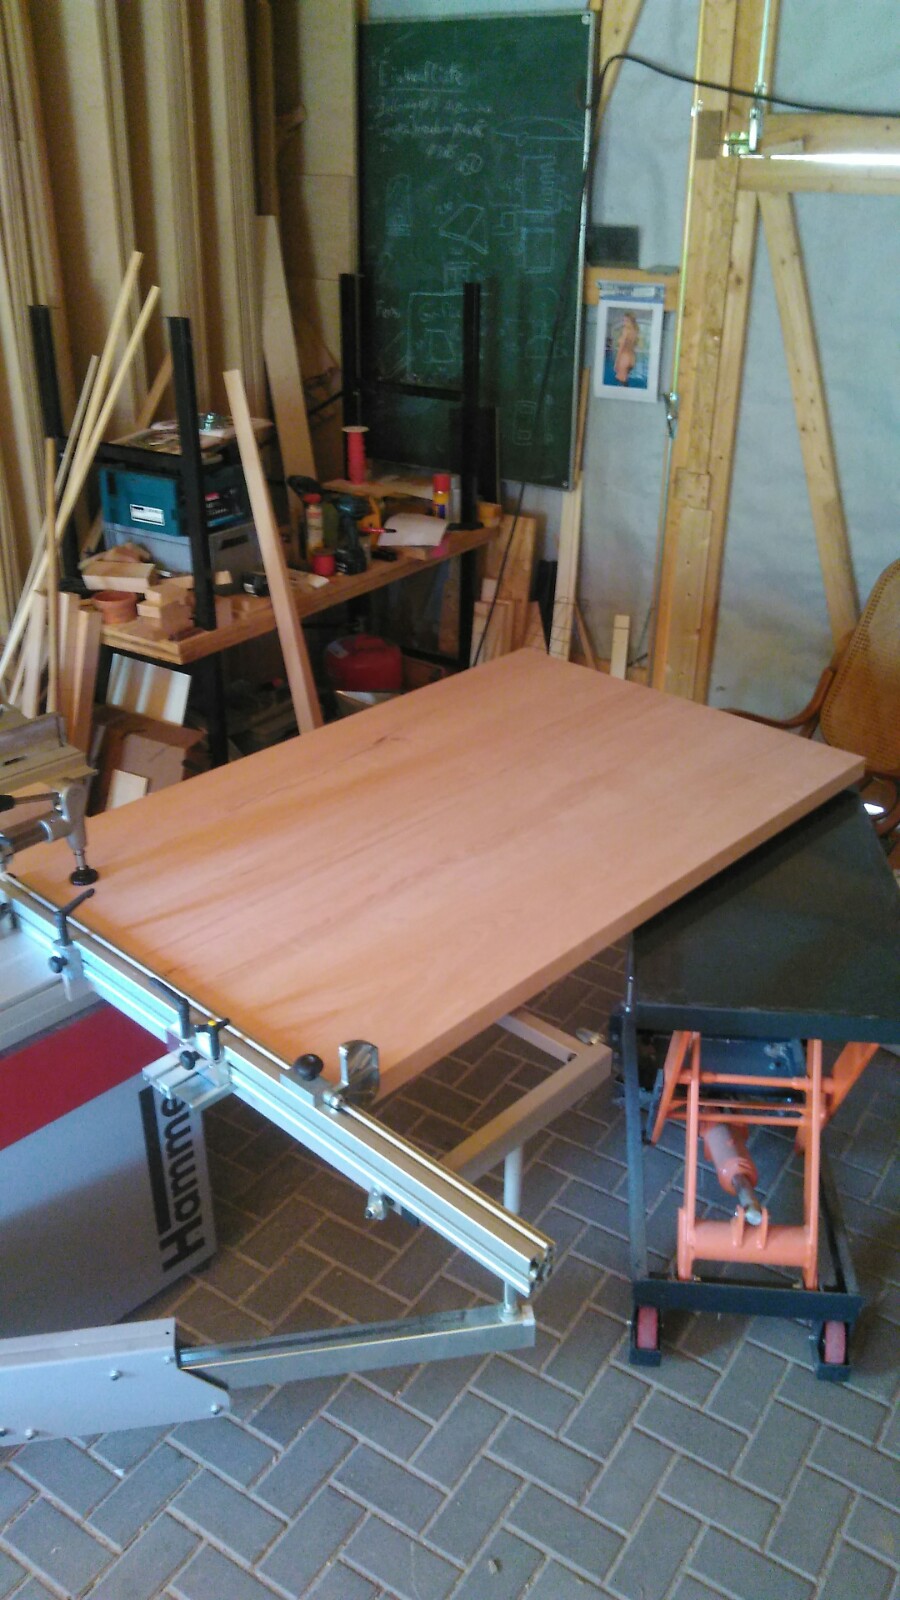
After the glue had dried, the glued board was taken to a nearby carpentry shop to be sanded flat, as I don't have the necessary machine. After that was done, grooves were milled into the plate, into which I then inserted aluminum rivets to prevent the table top from throwing itself later. The table top was chamfered all around so that it later appears less massive. Another unsightly detail that occurred at this point (probably due to vibrations when grinding) were some knotholes, from which the knot practically fell out, which then led to a hole in the plate. I was able to solve this problem with the help of shellac (a natural alternative to epoxy resin), which is heated and can then be filled into the holes to close them. After all the work on the table top was finished, it was oiled.
Die verleimte Platte wurde dann nachdem der Leim getrocknet war zu einer naher Tischlerei gebracht, um plan geschliffen zu werden, da ich nicht die dafür nötige Maschine besitze.
Nachdem das geschafft war, wurden Nuten in die Platte gefräst, in die ich dann Alugratleisten eingesetzt habe, um zu verhindern, das sich die Tischplatte später wirft.
Die Tischplatte wurde umlaufend angefast, damit sie später weniger massiv wirkt.
Ein weiteres unschönes Detail was zu diesem Zeitpunkt aufgetreten ist (wahrscheinlich aufgrund von Vibrationen beim schleifen) waren einige Astlöcher, aus denen dann praktisch der Ast herausgefallen ist, was dann zu einem Loch in der Platte geführt hat. Dieses Problem konnte ich mit Hilfe von Schellack beheben (eine natürliche Alternative zu Epoxidharz) dieser wird erwärmt und kann dann in die Löcher gefüllt werden, um diese zu schließen.
Nachdem dann alle arbeiten an der Tischplatte abgeschlossen waren, wurde diese noch geölt.
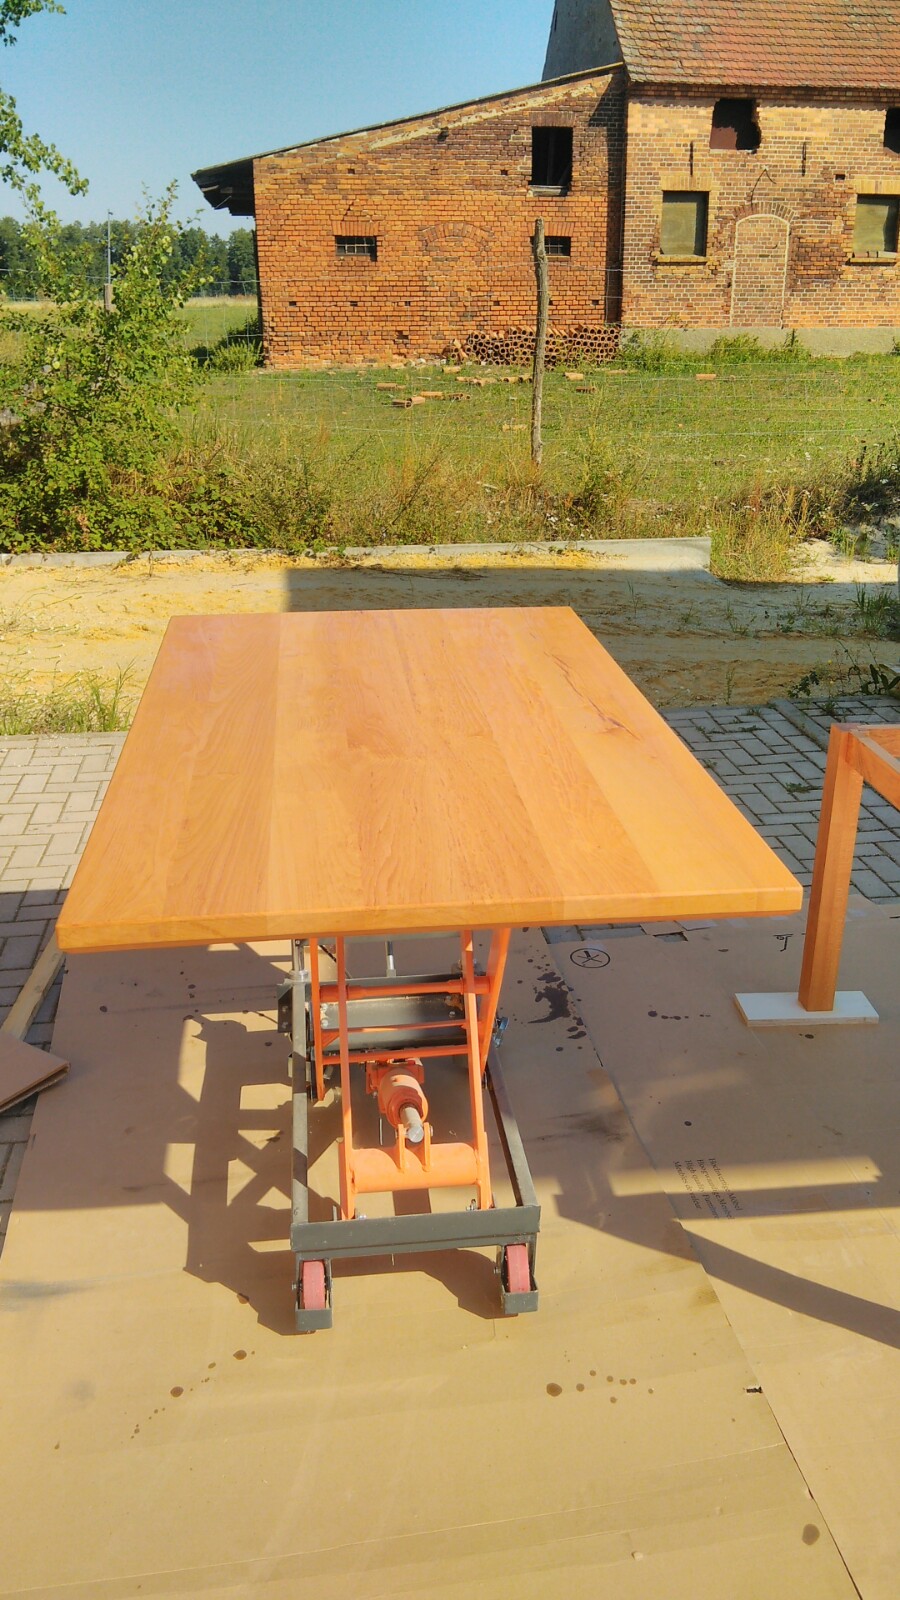
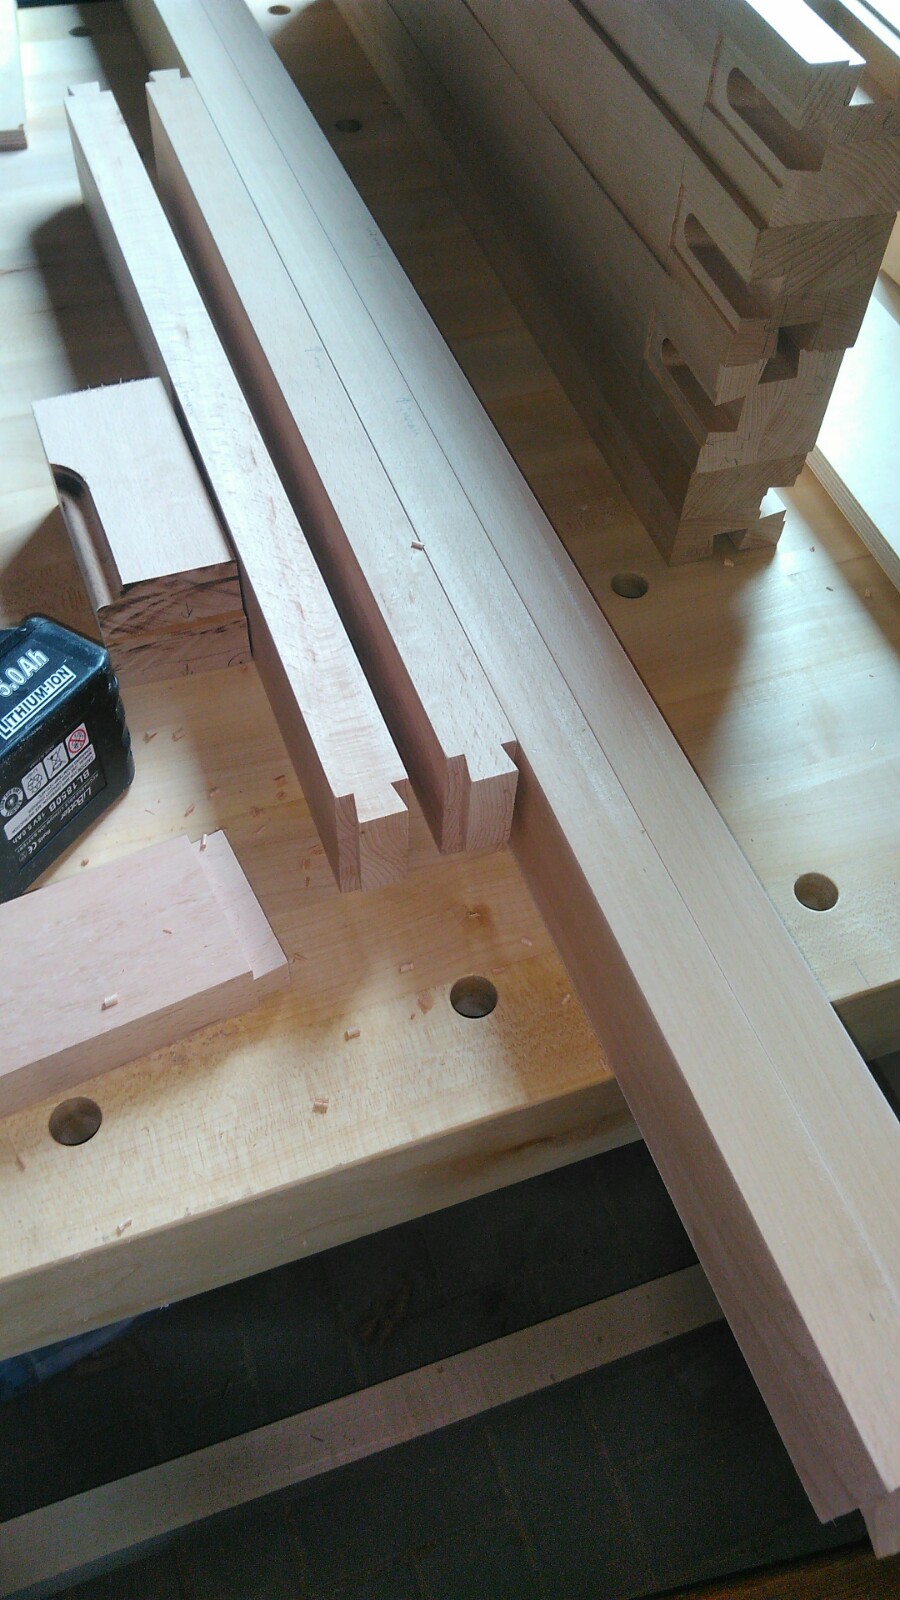
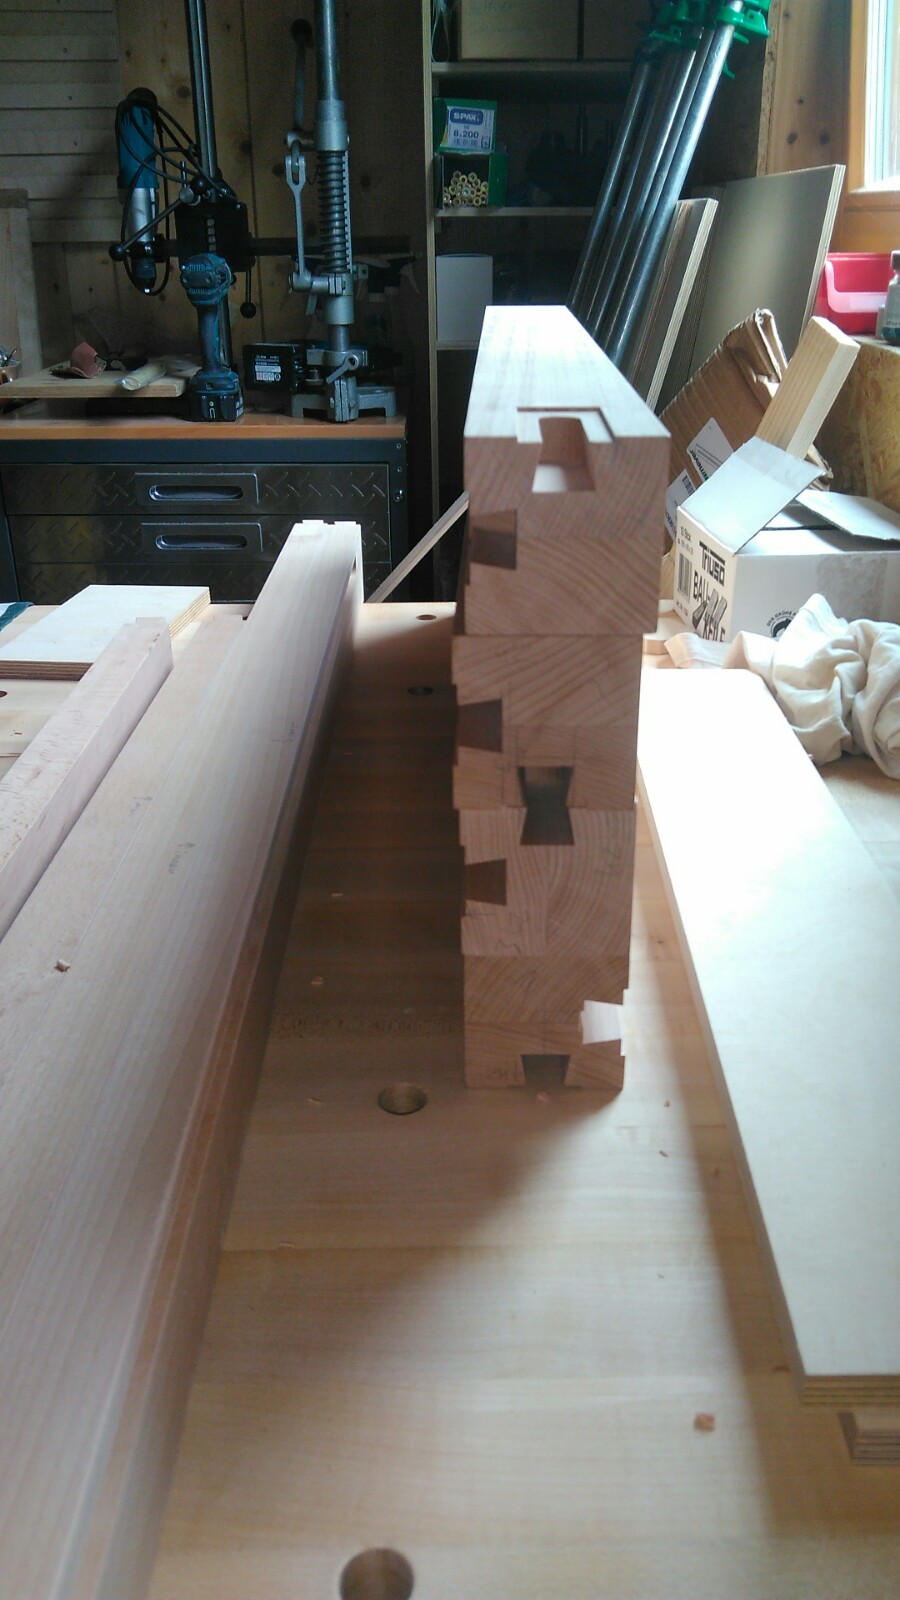
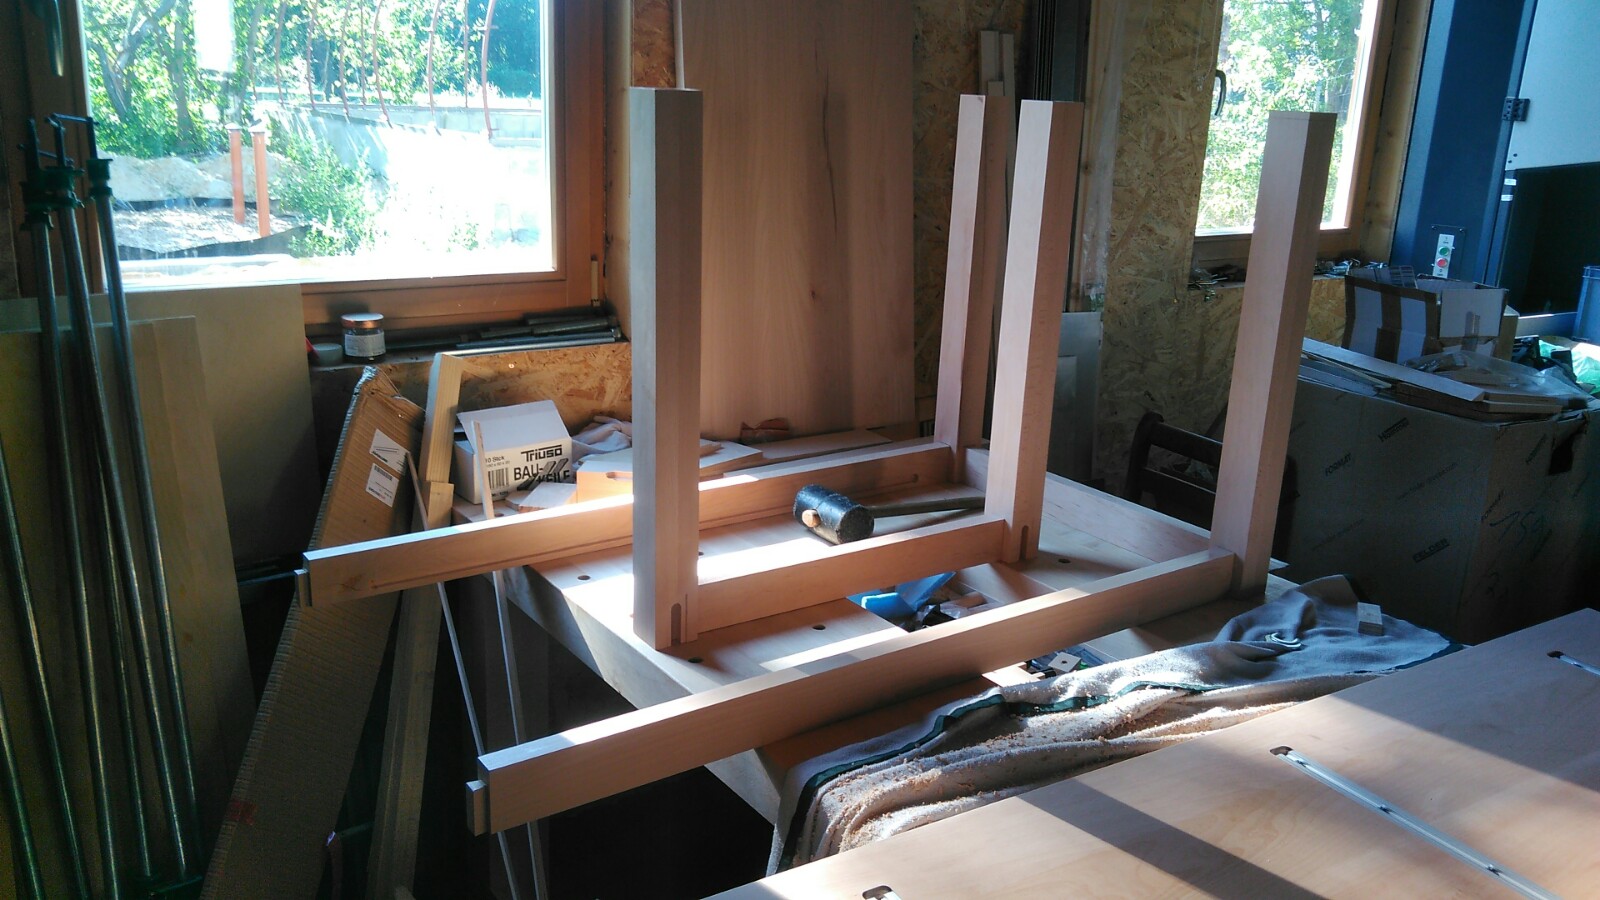
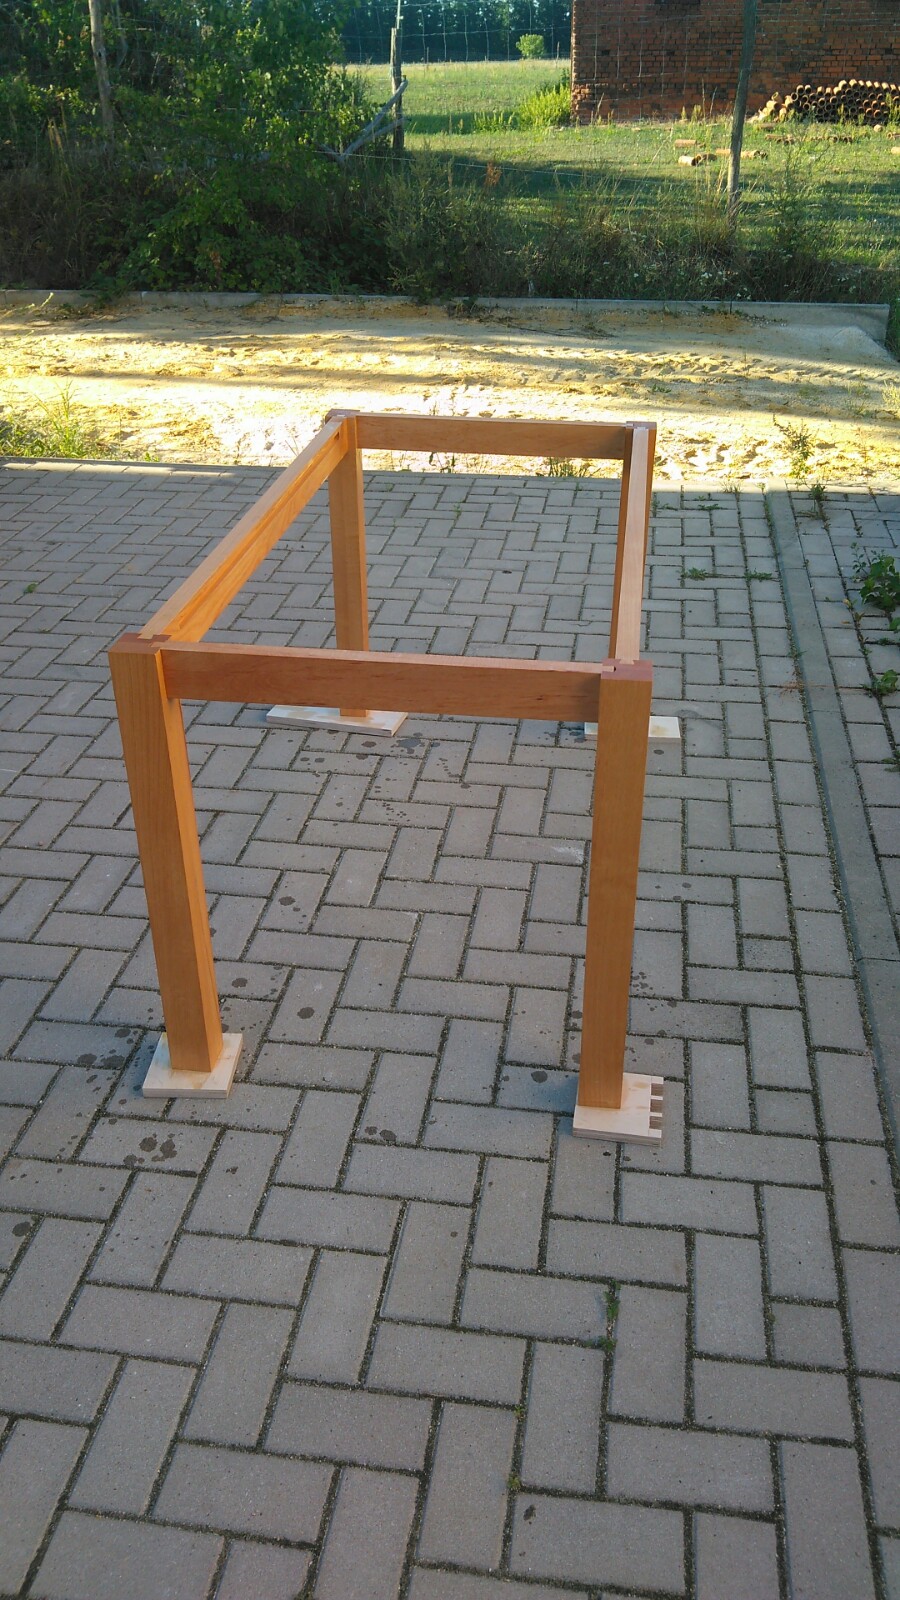
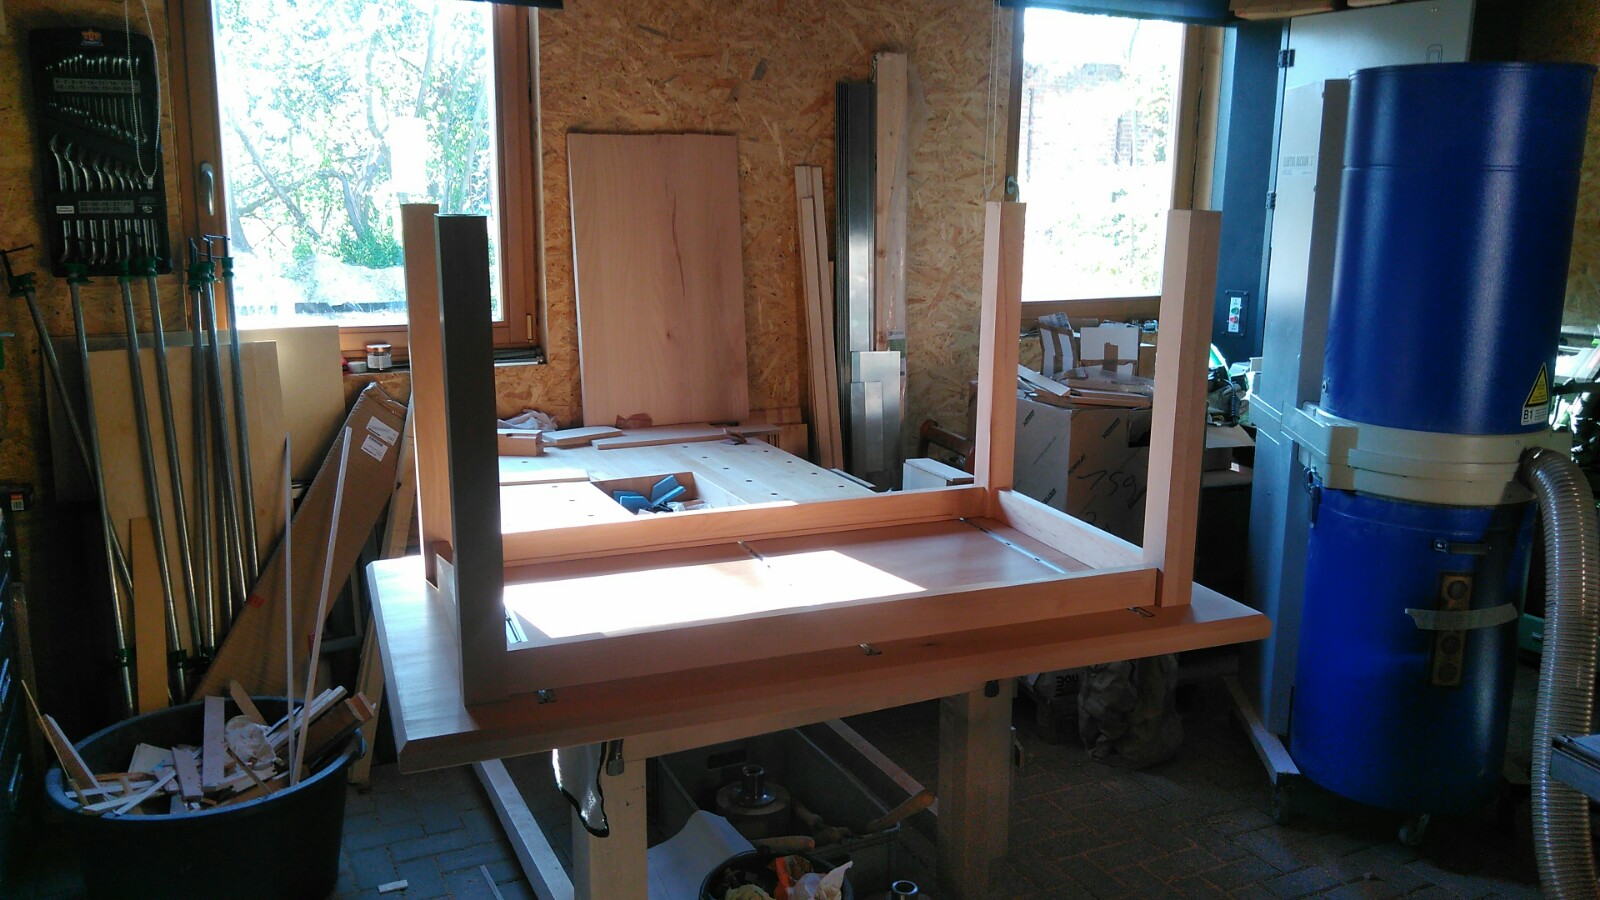
The legs are also made of planks glued together. The milled burr from my last post was then used again on the legs or the frame, because it looks much more appealing when no screws are visible. There is also a hole in the legs of the table so that a felt buffer can be inserted there, which then protects the floor. I then put the individual components of the frame together and then also oiled the construction. Now the frame could be connected to the top, the table was ready.
Die Beine bestehen auch aus zusammengeleimten Bohlen..
Die Gratfräsung aus meinem letzten Post kam dann bei den Beinen, bzw. dem Gestell wieder zum Einsatz, da es deutlich ansprechender aussieht wenn keine Schrauben sichtbar sind.
Zusätzlich gibt es eine Bohrung in den Beinen des Tisches, um dort einen Filzpuffer einsetzen zu können, der den Boden dann schont.
Die einzelnen Komponenten des Gestells habe ich dann zusammengefügt und die Konstruktion dann auch geölt.
Nun konnte das Gestell mit der Platte verbunden werden, der Tisch war fertig.

Regarding the problem, why the table could not be delivered to the customer, unfortunately I only noticed the error when the table was already ready. Two of the planks were not glued against the annual rings, which can later lead to warping of the board. But now I can look forward to a nice table that I can use very well for eating and doing my paperwork.
Zu dem Problem, weshalb der Tisch nicht an den Kunden ausgeliefert werden konnte, leider ist mir der Fehler erst aufgefallen, als der Tisch bereits fertig war.
Zwei der Bohlen wurden nicht entgegen der Jahresringe verleimt, was später zu Verwindungen der Platte führen kann.
Nun kann ich mich aber über einen schönen Tisch freuen, des ich zum essen und erledigen meines Papierkrams sehr gut gebrauchen kann.
Posted with STEMGeeks
Congratulations @peershof! You have completed the following achievement on the Hive blockchain and have been rewarded with new badge(s) :
You can view your badges on your board and compare yourself to others in the Ranking
If you no longer want to receive notifications, reply to this comment with the word
STOP