Splash Screen | Android App Development | Lecture#49 | Hive Learners
𝓖𝓻𝓮𝓮𝓽𝓲𝓷𝓰𝓼
Hello dear Hive Learners, We cover the firebase data push, retrieve and remove the data. Today we will learn a new very useful feature in Android App that is a splash screen. You can call it a Welcome screen or first impression of an App. It shows the company information for 1 or more seconds when a user opens the app as new. When a user opens an app after installing then after the splash screen we can show the intro pages. But today we will learn how to implement the splash screen for two seconds.
GitHub Link
Use this GitHub project to clone into your directory. The following lecture will update it so you will never miss the latest code. Happy Coding!
What Should I Learn
- How to add Splash screen
Assignment
- Implement the Splash screen
Procedure
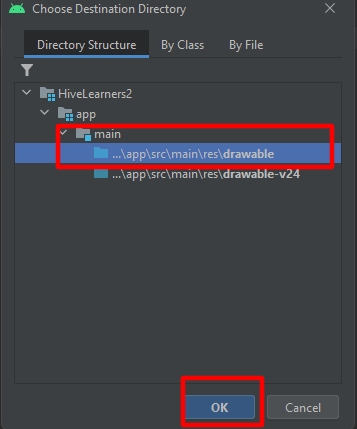
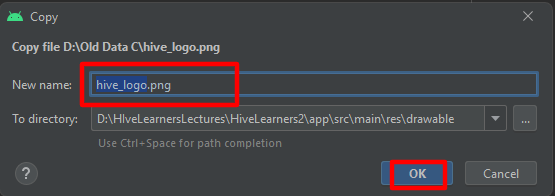
First of all, we need a logo. I am adding a Hive Learners logo in the resource folder. The location will be res> drawable. Copy the Hive Learners logo and press paste it into the drawable folder of our project. Make sure that the name is in lowercase and does not contain any special character of space than the underscore_ symbol. My logo name is hive_learners.png. Follow these steps.
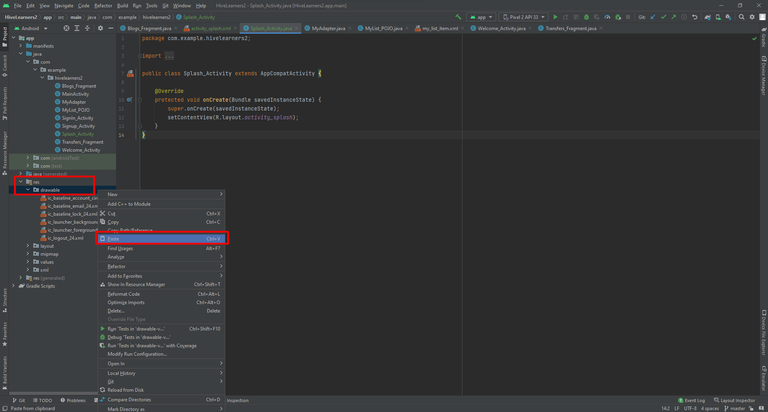
Paste it into the simple drawable folder
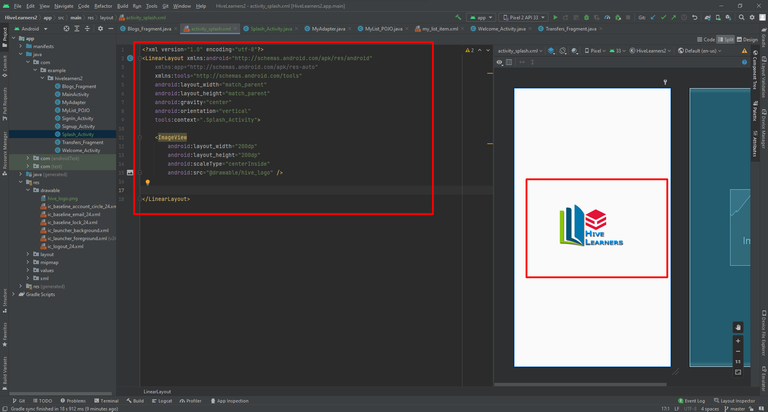
Now we need to create a new empty activity and name it as Splash_Activity. Now enter in its XML file. Change the parent layout to Linear Layout and add gravity to the center. Add an ImageView and set it's the source of our logo. Also, set the scale type to center inside.
<?xml version="1.0" encoding="utf-8"?>
<LinearLayout xmlns:android="http://schemas.android.com/apk/res/android"
    xmlns:app="http://schemas.android.com/apk/res-auto"
    xmlns:tools="http://schemas.android.com/tools"
    android:layout_width="match_parent"
    android:layout_height="match_parent"
    android:gravity="center"
    android:orientation="vertical"
    tools:context=".Splash_Activity">

    <ImageView
        android:layout_width="200dp"
        android:layout_height="200dp"
        android:scaleType="centerInside"
        android:src="@drawable/hive_logo" />


</LinearLayout>
Now open Splash_Activity.java and write a code for a handler that will run for two seconds. After the 2 seconds, we will finish the Splash Activity and redirect the user to Login Page.
new Handler().postDelayed(new Runnable() {
            @Override
            public void run() {

                // After two seconds 1000ms = 1 Second

            }
        }, 2000);
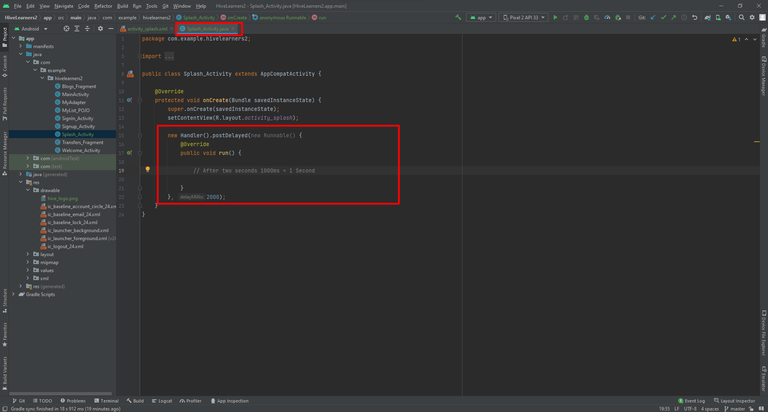
We need to redirect it to the Login Page after two seconds and finish this splash screen. So we will add these two lines in the run of the handler.
startActivity(new Intent(Splash_Activity.this, SignIn_Activity.class);
                finish();

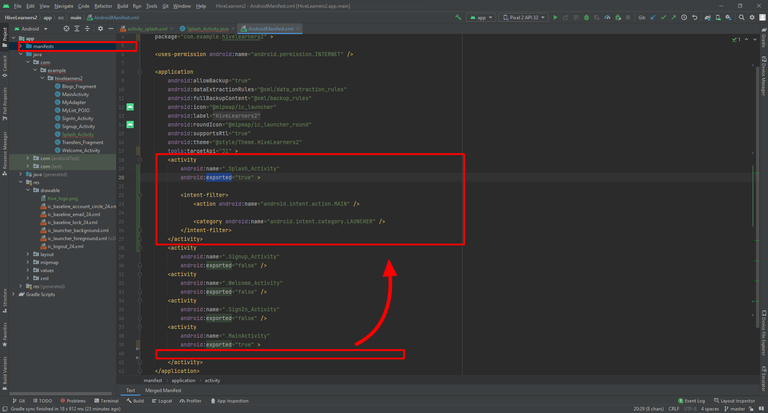
The last thing we need to do is change the starting page in the manifest. Move the intent-filter code to the Splash Activity tag. Also, set exported to true.
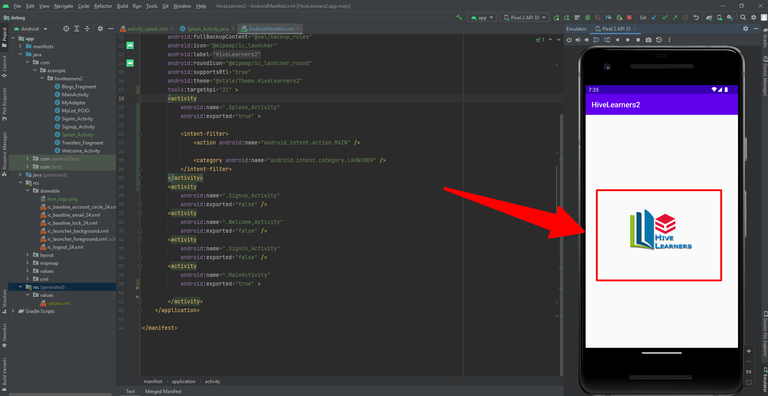
Run the app and check the starting page of the app.

Thank You

Yay! 🤗
Your content has been boosted with Ecency Points, by @faisalamin.
Use Ecency daily to boost your growth on platform!
Support Ecency
Vote for new Proposal
Delegate HP and earn more
Thanks for your contribution to the STEMsocial community. Feel free to join us on discord to get to know the rest of us!
Please consider delegating to the @stemsocial account (85% of the curation rewards are returned).
You may also include @stemsocial as a beneficiary of the rewards of this post to get a stronger support.
Congo pongo for being consistent with this learning series. !1UP
Click this banner to join "The Cartel" discord server.
Play for Free!
You have received a 1UP from @dlmmqb!
@stem-curator, @neoxag-curator
And they will bring !PIZZA 🍕.
Learn more about our delegation service to earn daily rewards. Join the Cartel on Discord.
PIZZA Holders sent $PIZZA tips in this post's comments:
@curation-cartel(4/20) tipped @faisalamin (x1)
Please vote for pizza.witness!