Android App Development |Tab Layout | Lecture#43 | Hive Learners
𝓖𝓻𝓮𝓮𝓽𝓲𝓷𝓰𝓼
Hello beautiful members of Hive learners, In lecture 42 we learn how to save data in firebase and how to update the existing data. We also implement the onComplete listeners for it. Today we will learn a very useful tool in the app which is Tab Layout. It is simple a layout that can contain more than one screen. The fun part is that each screen can have a separate XML and java file. These are called fragments. The fragment is a lightweight activity. We can use it to show data or pass data to other activities or fragments.
GitHub Link
Use this GitHub project to clone into your directory. The following lecture will constantly update it so you will never miss the latest code. Happy Coding!
What Should I Learn
- What is Fragment
- How to implement Tab layout
Assignment
- Create a Tab Layout
Procedure
For the Tab Layout, we will use the Welcome Activity. We will show the Tab Layout at the bottom of the buttons. We need t to add the Tab Layout in the XML file and a ViewPager that will help us to show activities on Tab Change.
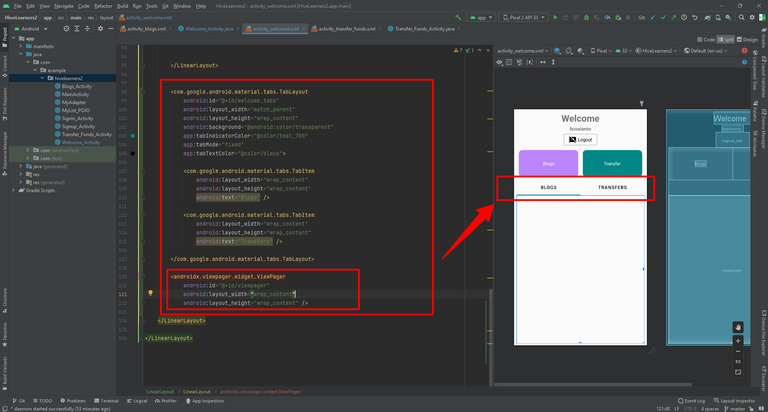
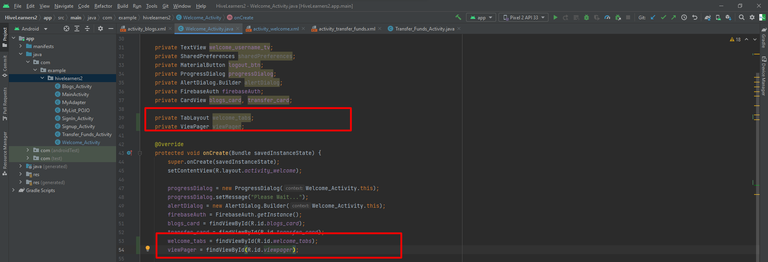
Tab Layout added in the XML now we need to declare and initialize the Viewpager and Tab Layout in the JAVA file.
Now we need to create two fragments. Blogs_Fragment and Transfers_Fragment. Here is how you can create fragments.
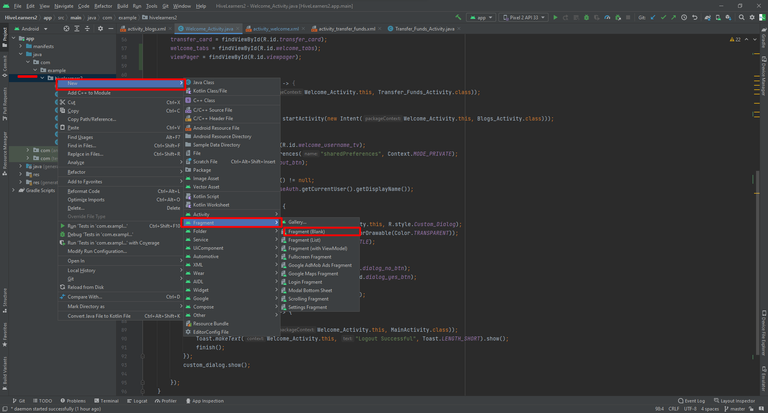
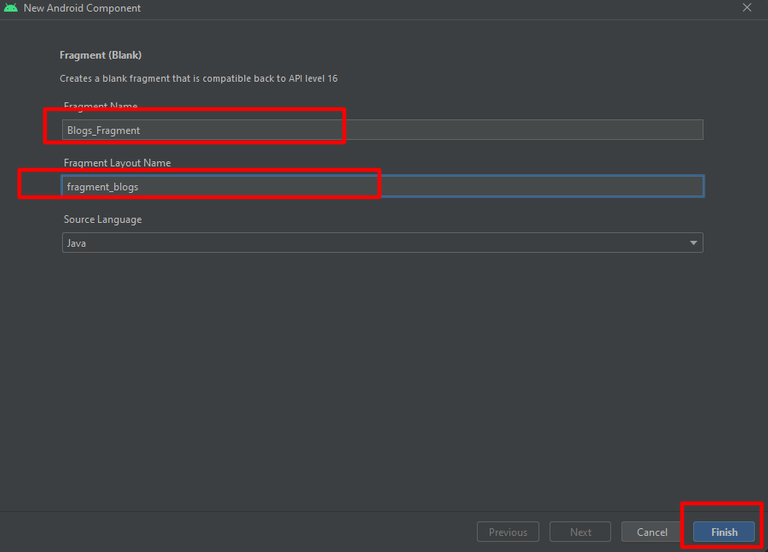
With the same method, we create the Transfers_Fragment
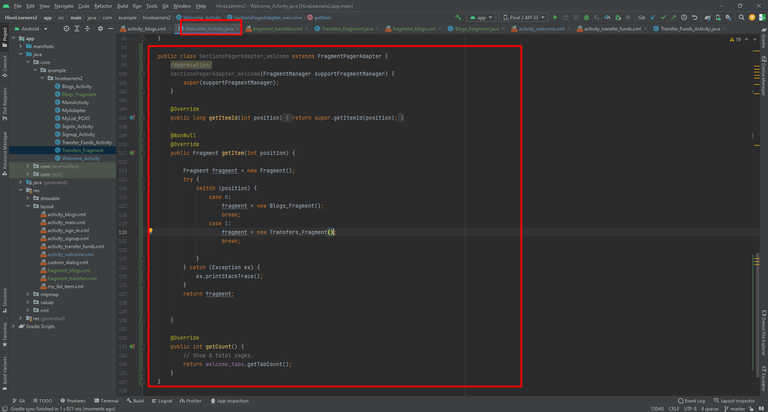
Now we need to create an adapter class to set it in the ViewPager. It will help us to change the Fragment on Tab Layout scroll/change. I add the Adapter in the same Welcome_Activity class. Here is the code.
public class SectionsPagerAdapter_welcome extends FragmentPagerAdapter {
        @SuppressWarnings("deprecation")
        SectionsPagerAdapter_welcome(FragmentManager supportFragmentManager) {
            super(supportFragmentManager);
        }

        @Override
        public long getItemId(int position) {
            return super.getItemId(position);
        }

        @NonNull
        @Override
        public Fragment getItem(int position) {

            Fragment fragment = new Fragment();
            try {
                switch (position) {
                    case 0:
                        fragment = new Blogs_Fragment();
                        break;
                    case 1:
                        fragment = new Transfers_Fragment();
                        break;

                }
            } catch (Exception ex) {
                ex.printStackTrace();
            }
            return fragment;


        }

        @Override
        public int getCount() {
            // Show 8 total pages.
            return welcome_tabs.getTabCount();
        }
    }
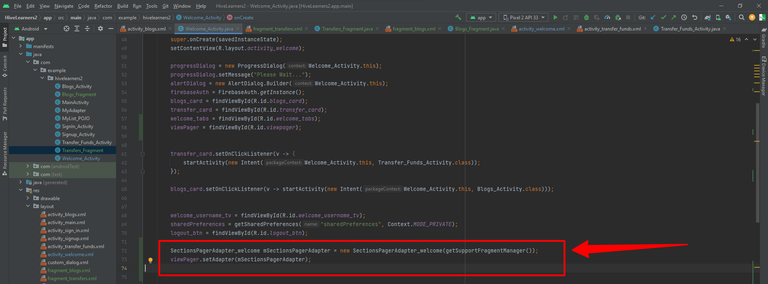
declare and initialize this class in our activity and set the ViewPager adapter to this.
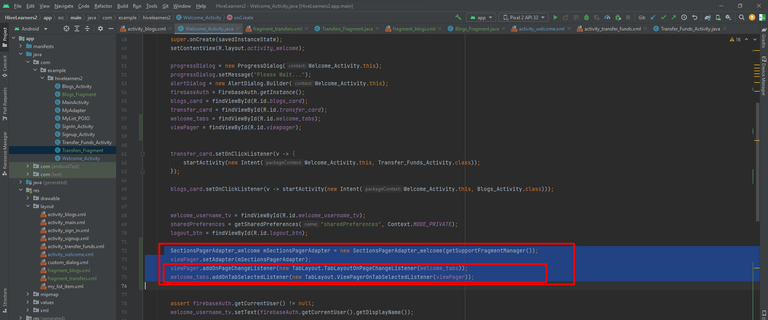
Now we need to add addOnPageChangeListener to viewpager and set it to the Tab Layout. Then we need to add a addOnTabSelectedListener of Tab Layout and set viewpager in it. It will create a connection between ViewPager and Tab Layout.
We have successfully created the Tab Layout. In the next lecture, we will learn how to add content in the Fragments.

Thank You

Yay! 🤗
Your content has been boosted with Ecency Points, by @faisalamin.
Use Ecency daily to boost your growth on platform!
Support Ecency
Vote for new Proposal
Delegate HP and earn more
Hello @faisalamin
Your post is amazing and technical work you do I like it very much I learn a lot from your posts.
Thank You brother, I am happy that you learn something new.
Thank you so much
Thanks for your contribution to the STEMsocial community. Feel free to join us on discord to get to know the rest of us!
Please consider delegating to the @stemsocial account (85% of the curation rewards are returned).
You may also include @stemsocial as a beneficiary of the rewards of this post to get a stronger support.