Android App Development | Beginner Course | Lecture#7 | Hive Learners
𝓖𝓻𝓮𝓮𝓽𝓲𝓷𝓰𝓼
Hello, dear community members, I hope you all are well. Today we are going to learn a new widget implementation. In this lecture, you can set a custom image on the mobile screen. Like showing the app logo or fetching images from the database in future learning. So let's jump into it.
GitHub Link
Use this GitHub project to clone into your directory. It will always get updated in the next lecture. So that you will never miss the latest code. Happy Coding!.
What Should I Learn
- What is ImageView
- How to set add an image to the project
- How to set image in ImageView
Assignment
- Add an image to your project
- Show that image in ImageView
Procedure
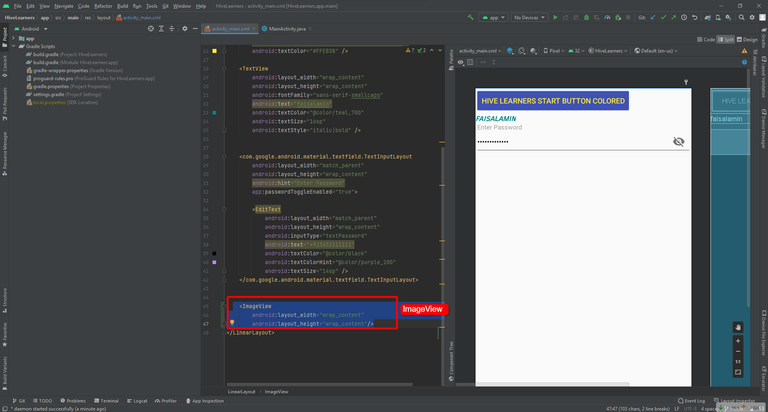
First, we need to add the ImageView code to our design file. I add the code in the same activity where we left it in the previous lecture. I set height and weight to wrap_content.
  <ImageView
        android:layout_width="wrap_content"
        android:layout_height="wrap_content"/>
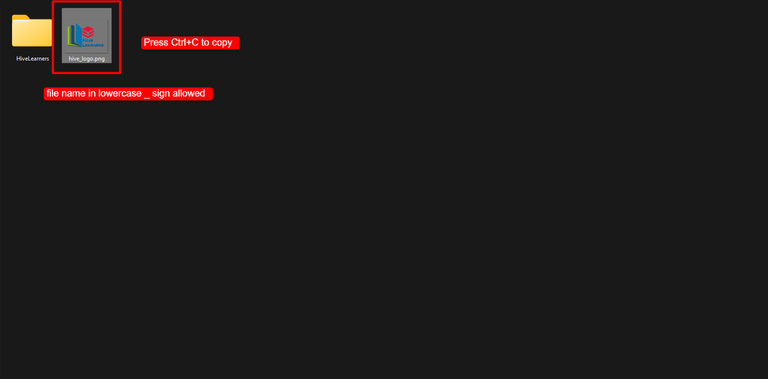
Now copy an image from your computer by pressing ctrl+c on windows. Make sure that there is no special sign in the image name and it must be in lowercase letters.
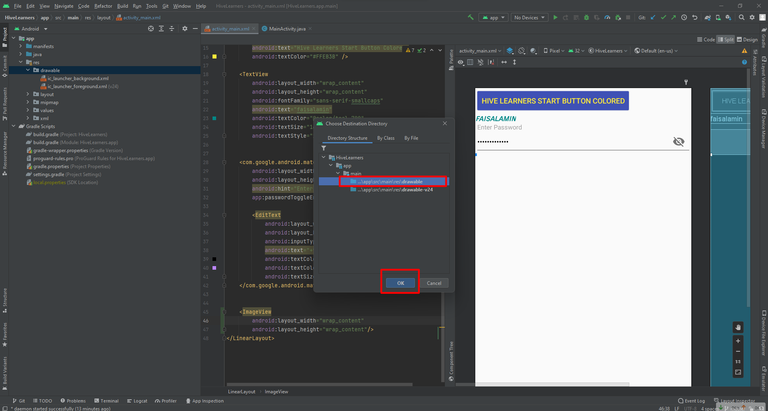
Now open this path structure app>res>drawable in Android Studio and paste the file into the drawable folder and follow these mockups.
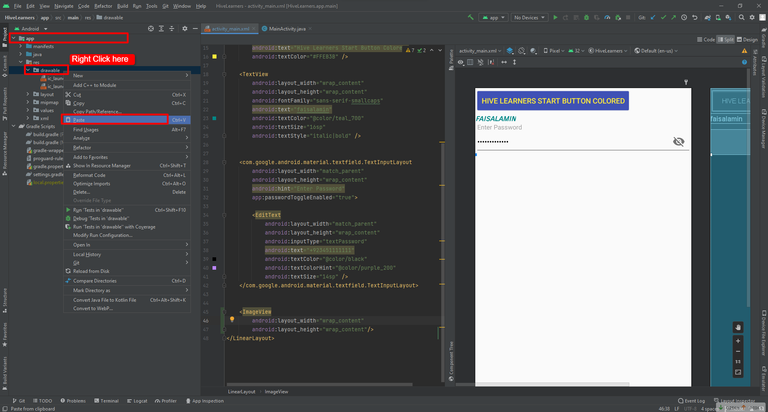
Select the simple drawable folder and click on Ok. It will paste the file into the drawable folder and now the file can be used in our project.
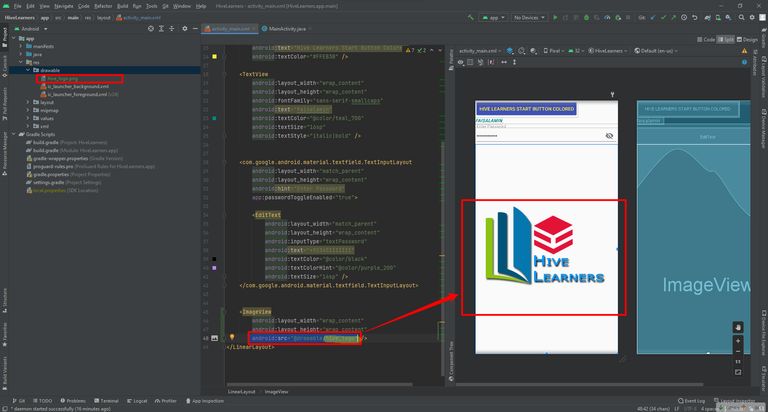
To show the file to our mobile screen use this code with the filename in your ImageView tag as shown here. Change hive_logo with your file name.
android:src="@drawable/hive_logo"
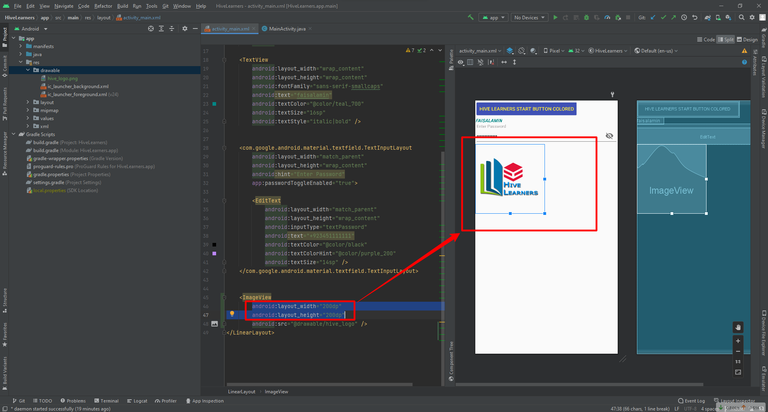
As we see that the image is very big we can set the height and width to get the specific size of the image
android:layout_width="200dp"
        android:layout_height="200dp"
Here is the complete main_activity.xml code.
<?xml version="1.0" encoding="utf-8"?>
<LinearLayout xmlns:android="http://schemas.android.com/apk/res/android"
    xmlns:app="http://schemas.android.com/apk/res-auto"
    xmlns:tools="http://schemas.android.com/tools"
    android:layout_width="match_parent"
    android:layout_height="match_parent"
    android:orientation="vertical"
    tools:context=".MainActivity">

    <Button
        android:id="@+id/start_btn"
        android:layout_width="wrap_content"
        android:layout_height="wrap_content"
        android:backgroundTint="#3F51B5"
        android:text="Hive Learners Start Button Colored"
        android:textColor="#FFEB3B" />

    <TextView
        android:layout_width="wrap_content"
        android:layout_height="wrap_content"
        android:fontFamily="sans-serif-smallcaps"
        android:text="faisalamin"
        android:textColor="@color/teal_700"
        android:textSize="16sp"
        android:textStyle="italic|bold" />


    <com.google.android.material.textfield.TextInputLayout
        android:layout_width="match_parent"
        android:layout_height="wrap_content"
        android:hint="Enter Password"
        app:passwordToggleEnabled="true">

        <EditText
            android:layout_width="match_parent"
            android:layout_height="wrap_content"
            android:inputType="textPassword"
            android:text="+923451111111"
            android:textColor="@color/black"
            android:textColorHint="@color/purple_200"
            android:textSize="14sp" />
    </com.google.android.material.textfield.TextInputLayout>


    <ImageView
        android:layout_width="200dp"
        android:layout_height="200dp"
        android:src="@drawable/hive_logo" />
</LinearLayout>

Thank You

Great lessons!
!1UP
Thanks Buddy
You have received a 1UP from @luizeba!
@stem-curatorAnd they will bring !PIZZA 🍕
Learn more about our delegation service to earn daily rewards. Join the family on Discord.
Yay! 🤗
Your content has been boosted with Ecency Points, by @faisalamin.
Use Ecency daily to boost your growth on platform!
Support Ecency
Vote for new Proposal
Delegate HP and earn more