[ESP-ENG] Tutorial - Autocad Parte II / Tutorial - Autocad Part II
¡Saludos! Les presento la segunda parte del tutorial de Autocad. Si aún no has visto la primera entrega te invito a que lo hagas.
Introducción al AutoCad
Greetings! I present to you the second part of the Autocad tutorial. If you haven't seen the first installment yet, I invite you to do so.
Introduction to AutoCad
¡Comencemos ahora! - Let's start now!
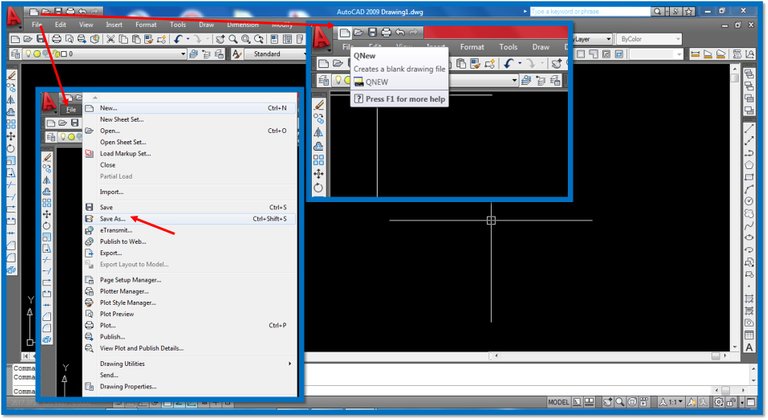
Abrimos el programa, hacemos clic en hoja en blanco y luego en archivo para guardar como DWG dándole un nombre al mismo.
We open the program, click on blank sheet and then on file to save as DWG giving it a name.
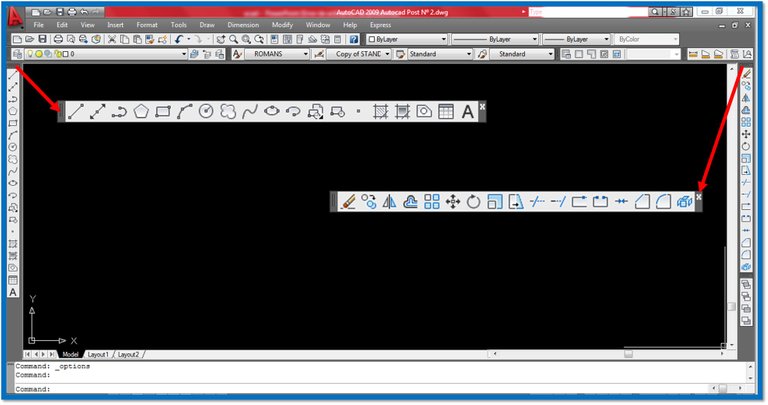
Observamos las barras de herramientas donde se encuentran los botones de acceso rápido a los diferentes comandos.
We look at the toolbars where the quick access buttons to the different commands are located.
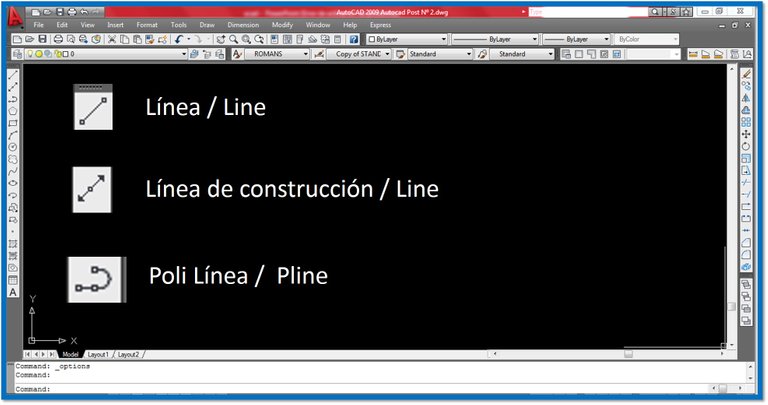
- Línea o Line se utiliza para dibujar diferentes líneas o rectas en el plano. Puedes llamar con el botón o escribir sobre la barra de comandos L seguidamente presionando Enter.
Polilínea o PolyLine se utiliza para dibujar diferentes líneas sucesivas y conectadas. Se activan con el botón o escribe sobre la barra de comandos PL seguidamente presionando Enter.
Líneas de construcción o Xline se utiliza para dibujar líneas o rectas que servirían de referencia para un dibujo determinado, son líneas extendidas infinitamente. Las activas con el botón o escribe sobre la barra de comandos XL seguidamente presionando Enter.
- Line is used to draw different lines in the plane. You can call with the button or write on the L command bar and then press Enter.
- Polyline or is used to draw different successive and connected lines. Activate them with the button or type over the command bar PL and then press Enter.
- Construction Lines or XLine is used to draw lines or straight lines that would serve as a reference for a given drawing, they are infinitely extended lines. Activate them with the button or write on the command bar XL then press Enter.

Polígono se utiliza para dibujar la figura geométrica polígono dándole diferentes lados y dimensiones. Se activa con el botón o escribe sobre la barra de comandos la palabra Polygon seguidamente presionando Enter.
Rectángulo se utiliza para dibujar la figura geométrica Rectángulo dándole diferentes dimensiones. Se activa con el botón o escribe sobre la barra de comandos la palabra Rec seguidamente presionando Enter.
Círculo o circle se utiliza para dibujar la figura geométrica polígono dándole diferentes lados y dimensiones. Se activa con el botón o escribe sobre la barra de comandos C seguidamente presionando Enter.
Polygon is used to draw the geometric figure polygon giving it different sides and dimensions. Activate it with the button or write on the command bar the word Polygon and then press Enter.
Rectangle is used to draw the geometric figure Rectangle giving it different dimensions. Activate it with the button or write on the command bar the word Rec and then press Enter.
Circle or circle is used to draw the geometric figure polygon giving it different sides and dimensions. Activate it with the button or write on the command bar C then press Enter.
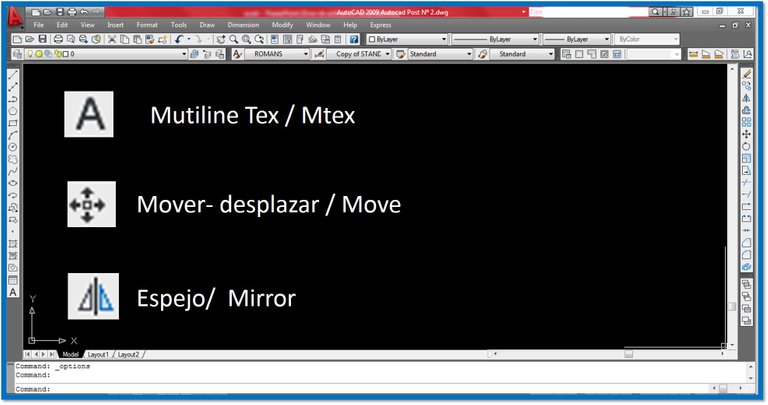
- Multitexto o Mtex se utiliza para escribe textos en el plano, alguna descripción con diferentes fuentes y formatos. Se activa con el botón o escribe sobre la barra de comandos la palabra MT seguidamente presionando Enter.
- Mover o Move se utiliza para desplazar un objeto de un lugar a otro dentro del plano de dibujo. Se activa con el botón o escribe sobre la barra de comandos la palabra M seguidamente presionando Enter.
- Simetría o Mirror se utiliza para hacer una copia simétrica de un objeto. Se activa con el botón o escribe sobre la barra de comandos la palabra MI seguidamente presionando Enter.
-Multi-text or Mtex is used to write texts on the map, some description with different fonts and formats. Activate it with the button or write over the command bar the word MT then pressing Enter.
Move or Move is used to move an object from one place to another within the drawing plane. You can activate it by clicking on the button or by typing the word M on the command bar and then pressing Enter.
Symmetry or Mirror* is used to make a symmetrical copy of an object. It is activated with the button or by typing over the command bar the word MI then pressing Enter*.
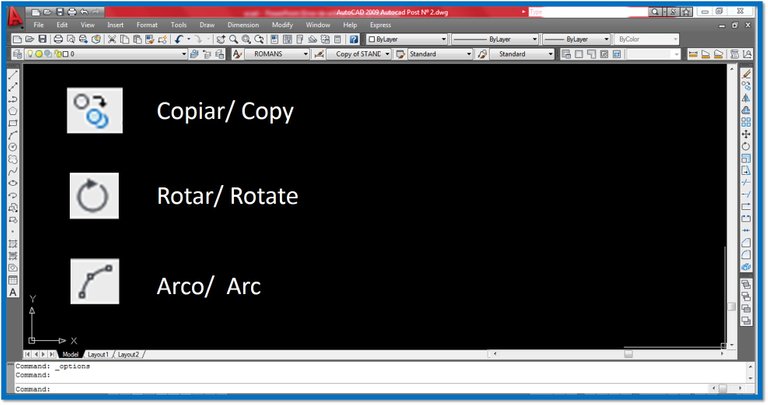
Copiar o Copy se utiliza para copiar o reproducir mismos objetos en el plano. Se activa con el botón o escribe sobre la barra de comandos la palabra CP seguidamente presionando Enter.
Rotar o Roate se utiliza para copiar o girar objetos en el plano. Se activa con el botón o escribe sobre la barra de comandos la palabra RO seguidamente presionando Enter.
Arco o Arc se utiliza para dibujar arcos combinando valores en su punto central, inicio y final. Se activa con el botón o escribe sobre la barra de comandos la letra A seguidamente presionando Enter.
Copy or Copy is used to copy or reproduce the same objects on the plane. It is activated with the button or by typing the word CP on the command bar and then pressing Enter.
Rotate or Roate is used to copy or rotate objects in the plane. Press the button or type RO on the command bar and then press Enter.
Arc or Arc is used to draw arcs by combining values at their central point, start and end. You can activate it by clicking on the button or by typing A on the command bar and then pressing Enter.

¿Cómo aplicar los comandos?
Rectángulo: hacemos clic en el botón para rectángulo, luego debes especificar el primer punto haciendo clic en el espacio de dibujo. Seguidamente indicar si tomaras la opción de dimensiones, dándole valores de ancho y largo para que se forme.
Arco: haciendo clic en los tres puntos inicio, centro y final.
Zigzag: con poli línea desactivando el ortogonal tecla (F8).
Línas curvas con poli línea, una vez activado el comando hacemos clic en el espacio de dibujo e introducimos en la barra de comando la letra A seguido de Enter.
Rectángulo con esquinas fileteadas, luego de hacer el rectángulo, activamos el comando Filet, dándole un valor al radio deseado para suavizar las esquinas.
Texto: comando Mtex, configuramos el valor de la fuente para visualizar el escrito.
How to apply the commands?
Rectangle: we click on the button for rectangle, then you must specify the first point by clicking on the drawing space. Then indicate if you will take the option of dimensions, giving it width and length values to be formed.
Arc: click on the three points: start, center and end.
Zigzag: with poly line deactivating the orthogonal key (F8).
Curved lines with poly line, once the command is activated we click on the drawing space and introduce in the command bar the letter A followed by Enter.
Rectangle with filleted corners, after making the rectangle, we activate the Filet command, giving a value to the desired radius to smooth the corners.
Text: Commands Mtex, we set the value of the font to display the writing.
Siempre visualizar la barra de comandos ya que el programa te va indicando a través de ella los datos o pasos a seguir para ejecutar un comando.
Always display the command bar as the program will indicate through it the data or steps to be followed to execute a command.
Sin duda AutoCAD es una herramienta universal de trabajo para los arquitectos e ingenieros que posee además mucha versatilidad.
Si te gustaría un tutorial de 3D en AutoCAD donde puedas hacer cilindros tubos, cubos en fin figuras tridimensionales. Déjalo saber en los comentarios y con gusto prepararé una Parte III.
Without a doubt, AutoCAD is a universal work tool for architects and engineers that also has a lot of versatility.
If you would like a 3D tutorial in AutoCAD where you can make cylinders, tubes, cubes and three-dimensional figures. Let me know in the comments and I will be happy to prepare a part III.
¡Gracias por leerme! Espero que les sea de utilidad.
Thanks for reading me! I hope you find it useful.
🚨Te invito a visitar otras publicaciones de tutoriales interesantes.🚨
I invite you to visit other interesting tutorial publications.
Google forms
Introducción al AutoCad
Sigueme en Instagram / Follow me on Instagram @cpingenieria
Discord: carlosp18

Sin duda sería excelente el tutorial para 3D, lo espero!
Enhorabuena, su "post" ha sido "up-voted" por @dsc-r2cornell, que es la "cuenta curating" de la Comunidad de la Discordia de @R2cornell.