
¡Hola a toda la comunidad de #GEMS! // Hi to #GEMS comunity!
Espero que, a pesar de las circunstancias, se encuentren bien. Es tarde les traigo la parte II de la reparación de la fuente de alimentación ATX. Si no sabes de qué hablo, por favor visita el siguiente enlace (Clic sobre la imagen):
I hope that, despite the circumstances, they are doing well. It is late I bring you part II of the repair of the ATX power supply. If you don't know what I'm talking about, please visit the following link (Click on the image):

Resumiendo, habíamos detectado un corto-circuito fuerte en el sector primario de la misma, causando el daño de 6 componentes: 2 Transistores NPN modelo 13007, 2 resistencias de 220K, un diodo rectificador de 2A y un fusible de 5A250V.
Al reemplazar todos los componentes, la fuente funcionaba, sin embargo el indicador de PG (Power Good) no nos mandaba la señal de tensión correcta, lo que significa que aún había un problema en el sector primario. Al final pudimos detectar que los capacitores de la entrada principal estaban dañados: Uno en corto-circuito y el otro con media capacidad de funcionamiento. Así que procedí a reemplazarlos y a probar.
In short, we had detected a strong short-circuit in the primary sector of it, causing the damage of 6 components: 2 NPN Model 13007 Transistors, 2 220K resistors, a 2A rectifier diode and a 5A250V fuse.
By replacing all components, the source was working, however the PG (Power Good) indicator was not sending us the correct voltage signal, which means there was still a problem in the primary sector. In the end we were able to detect that the capacitors at the main input were damaged: one short-circuited and the other half-functional. So I proceeded to replace them and test.
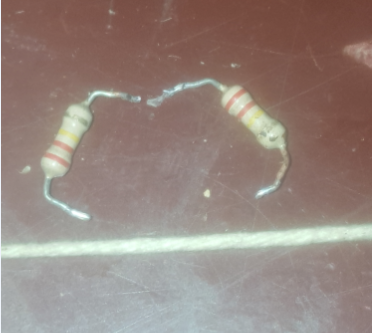
También aprovechamos la ocasión para reemplazar las dos resistencias de que habíamos colocado anteriormente, de 330K, por las originales de 220K, para descartar de una vez por todas que también hayan contribuido con la falla en el PG.
We also took the opportunity to replace the two resistors that we had previously placed, 330K, with the original 220K, to discard once and for all that they have also contributed to the failure in the PG.
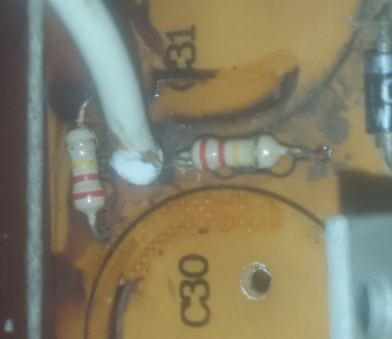
Colocamos y calzamos las resistencias en su lugar para luego realizar la respectiva soldadura en la parte posterior.
We place and wedge the resistors in place and then perform the respective welding on the back.
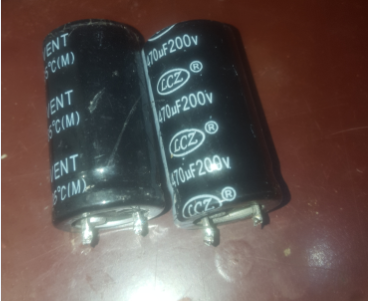
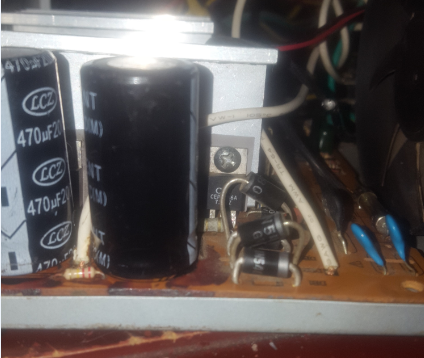
Es hora de colocar los capacitores. Se reclicaron de una fuente ATX dañada en el sector secundaria. Están como nuevos.
It is time to place the capacitors. They were recycled from a damaged ATX source in the secondary sector. They are like new.
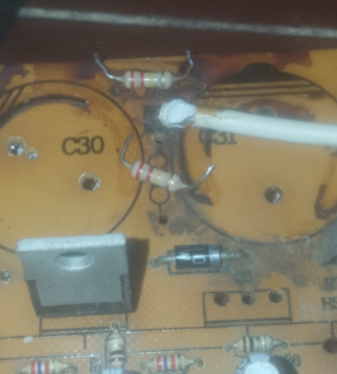
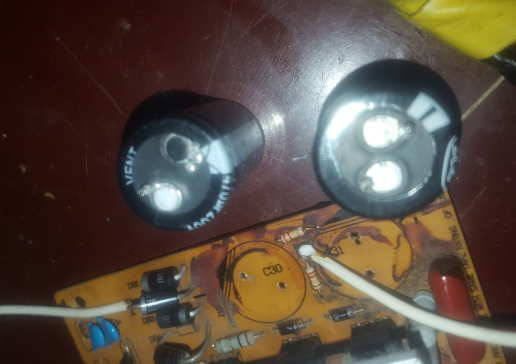
Capacitores colocados en su lugar. Quisiera hacerles también una pequeña observación.
Capacitors in place. I would also like to make a small observation.
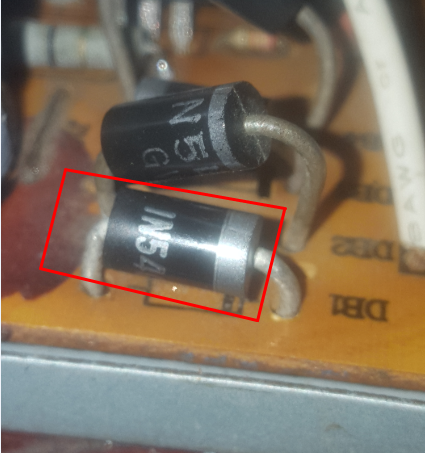
Tuve que reemplazar este Diodo, pues en las mediciones que hice antes de ensamblar los nuevos capacitores, pude detonar que este diodo estaba dañado, tenía continuidad en ambos sentidos, sin ningún tipo de resistencia, casuando también una parte de la falla principal que estamos corrigiendo.
I had to replace this Diode, because in the measurements I made before assembling the new capacitors, I could detonate that this diode was damaged, it had continuity in both directions, without any resistance, also coinciding with a part of the main fault that we are correcting .
Realizando prueba principal / The first test
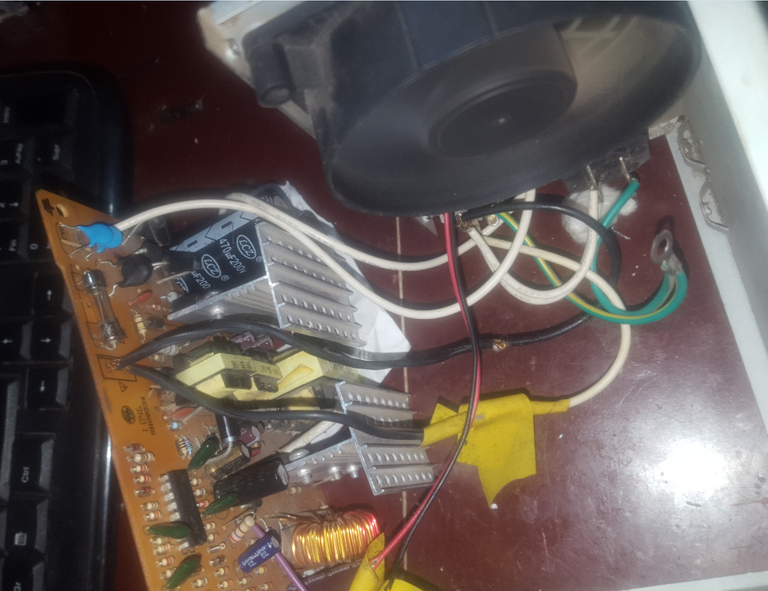
Al realizar la primera prueba (Puente entre el cable verde y negro), la fuente enciende sin problemas. En la imagen de arriba podemos ver que el fancooler está funcionando, pero no se emocionen, eso no significa que todo está bien (La última vez también estaba así y ya vieron qué sucedió...).
When performing the first test (jumper between the green and black wire), the source turns on smoothly. In the image above we can see that the fancooler is working, but do not get excited, that does not mean that everything is fine (Last time it was also like this and you already saw what happened ...).
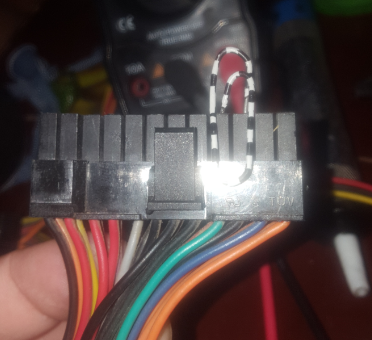
Este es el puente entre el cable verde (PWR_ON) y el cable negro (GND). Se utiliza para hacer arrancar la fuente sin necesidad de instalarla en una tarjeta madre.
This is the bridge between the green wire (PWR_ON) and the black wire (GND). It is used to start the power supply without installing it on a motherboard.
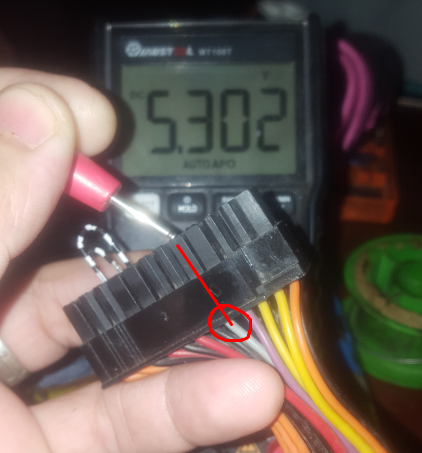
¡PERFECTO! Como podemos ver en la imagen de arriba, el cable gris (PG) ahora nos muestra un voltaje de salida de +5.3V, quiere decir que la estabilización fue correcta y eso nos indica que todo quedó perfecto. Recuerden que PG es una señal de tensión de +5V que es enviada a la tarjeta madre para indicarle que ES SEGURO utilizar la fuente de alimentación y todos sus tensiones están correctas.
PERFECT! As we can see in the image above, the gray cable (PG) now shows us an output voltage of +5.3V, it means that the stabilization was correct and that indicates that everything was perfect. Remember that PG is a +5V voltage signal that is sent to the motherboard to indicate that it is SAFE to use the power supply and all its voltages are correct.
Procedemos entonces con el ensamblaje:
Then we proceed with the assembly:
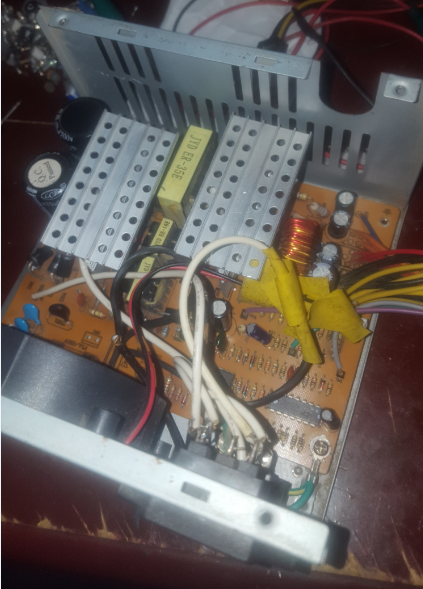
Colocamos la placa de nuestro circuito eléctrico correctamente en el chásis de la fuente de alimentación. Ten mucho cuidado al realizar este caso, que a veces hay cables que están a punto de romperse (Por moverlos tanto durante la reparación) y se pueden romper. También es importante (Aunque no lo uses), atornillar la Tierra de la entrada de corriente alterna al chasis, tal como se ve en la esquina inferior derecha (Cable de color verde debajo del capacitor).
We place the board of our electrical circuit correctly in the chassis of the power supply. Be very careful when doing this case, that sometimes there are cables that are about to break (by moving them so much during the repair) and they can break. It is also important (Even if you don't use it), screw the Earth from the AC input to the chassis, as seen in the lower right corner (Green wire under the capacitor).
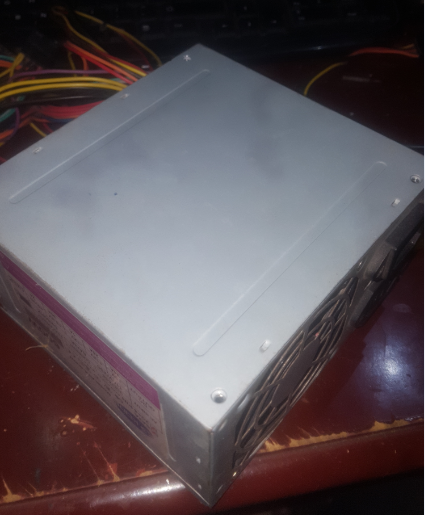
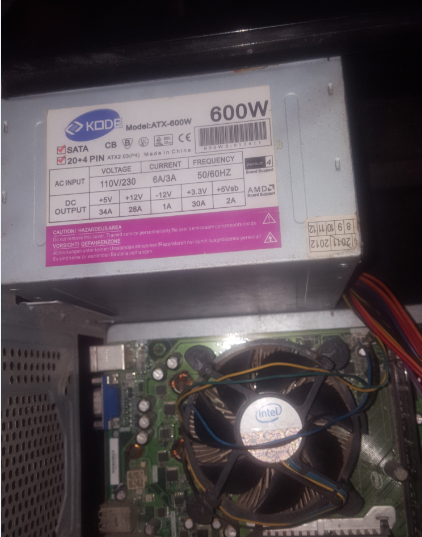
Con nuestro chasis completamente armado, ahora procedemos a instalarlo en el computador donde estaba funcionando.
With our chassis fully assembled, we now proceed to install it on the computer where it was working.
Listo. Colocado en su lugar sin ninguna complicación. Ahora la hora de la verdad. verificar si lo que hicimos quedó realmente bien (A pesar de que las mediciones indican que todo está bien).
Ready. Placed in place without any complications. Now the moment of truth. check if what we did turned out really well (even though the measurements indicate that everything is fine).

¡Excelente! Parece que nuestro equipo funciona. Lo que ven en la imagen es un intento de BOOT fallido debido a que no conecté ninguna unidad de almacenamiento con sistema operativo, en pocas palabras, no le conecté el Disco Duro. Ahora le colocaré el Disco Duro para comprobar que la fuente tiene la fuerza suficiente para remolcar todo. De ser así, entonces definitivamente todo salió estupendo.
Excellent! Our device seems to be working. What you see in the image is a failed BOOT attempt because I did not connect any storage unit with operating system, in short, I did not connect the Hard Drive. Now I will put the Hard Drive to check that the source is strong enough to tow everything. If so, then it definitely turned out great.
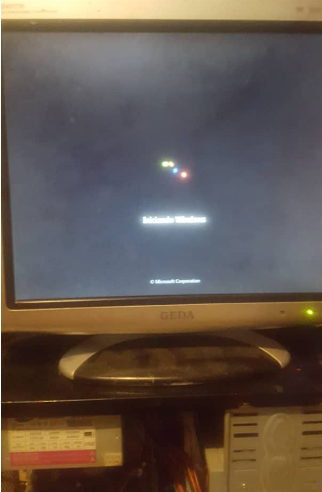
¡Bien! Está cargando el sistema operativo. Eso significa que la fuente de alimentación está funcionando perfectamente.
Well! You are loading the operating system. That means that the power supply is working perfectly.

Bueno amigos, esto fue todo. Con este post queda concluída la reparación desde cero (0) de una fuente de alimentación. Cabe descatar que esta es mi primera reparación de esta magnitud, en la que el problema no era físicamente visible, por lo que se tuvo que diagnosticar mediante puras mediciones precisas, lo que nosotros los técnicos llamamos "Exploración".
Agradezco enormemente, como siempre, a @appreciator, @curie, @blocktrades, @cervantes y @hive.curation, por apoyar y seguir mis publicaciones.
Well folks, this was it. This post concludes the repair from scratch (0) of a power supply. It should be ruled out that this is my first repair of this magnitude, in which the problem was not physically visible, so it had to be diagnosed using purely precise measurements, what we technicians call "Exploration".
I am very grateful, as always, to @appreciator, @curie, @blocktrades, @cervantes and @ hive.curation, for supporting and following my posts.
¡Hasta la próxima reparación!