Lego Technic McLaren F1 car: Stage one
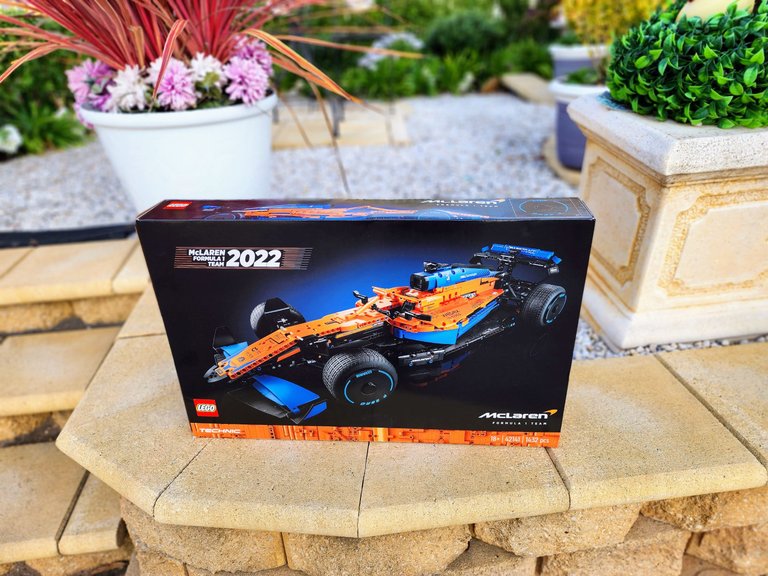
It's been a little while since I finished my last Lego Technic build and I've been missing the fun of it. I decided it was time for another one so hightailed it to the shop and picked up the Lego Technic 2022 McLaren F1 car which you see pictured above in my front yard. It's sweet! A sixty five centimetre long, 1432 piece, model that I'm really looking forward to completing; Can you tell I'm excited? I am...in case you cannot.
A couple days ago I started the first stage which was a lot of fun...and yes, I had snacks. There's no other way to do it people; snacks and Lego building are synonymous.
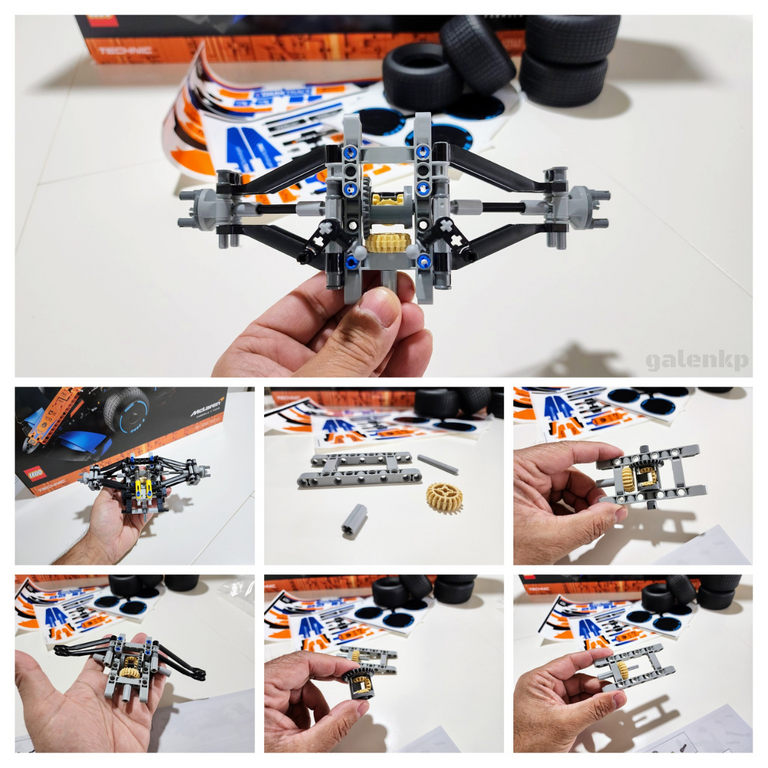
The collage above shows the very first stages which, with sets like this, generally always begin with a gearbox or differential. In this case that grey 'H' part in the centre of the collage is the first part one assembles, with the shaft and yellowish gear as well; below it you can see the actual differential assembly in my fingers prior to it being fitted.
This part lies at the heart of the rear differential and suspension section and the lower images in the collage above show how the the parts come together. Those long black pieces are suspension wishbones which were cool to build as I've not built a set using them before.
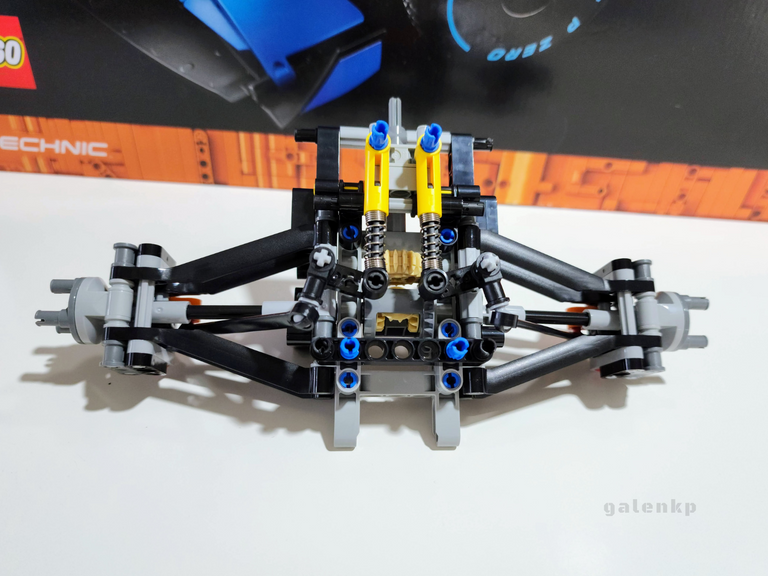
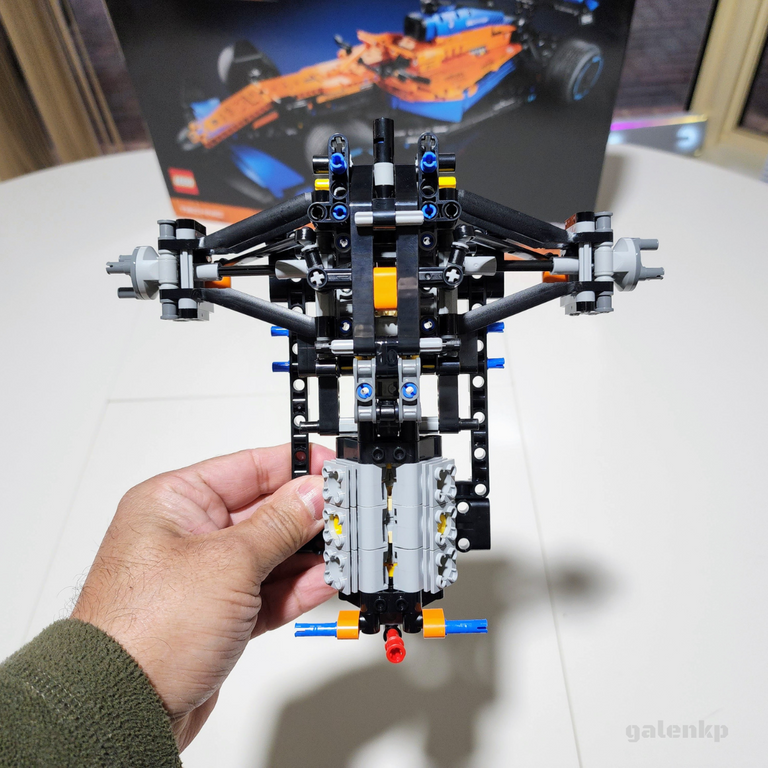
Below is the completed rear suspension and differential assembly.
The wheels will eventually click ono the grey parts to left and right and the whole rear end will operate pretty much like the real Formula One car; you can see the shock absorbers in the image below which helps the suspension work on the model and real car - These are the yellow things with the springs in them.
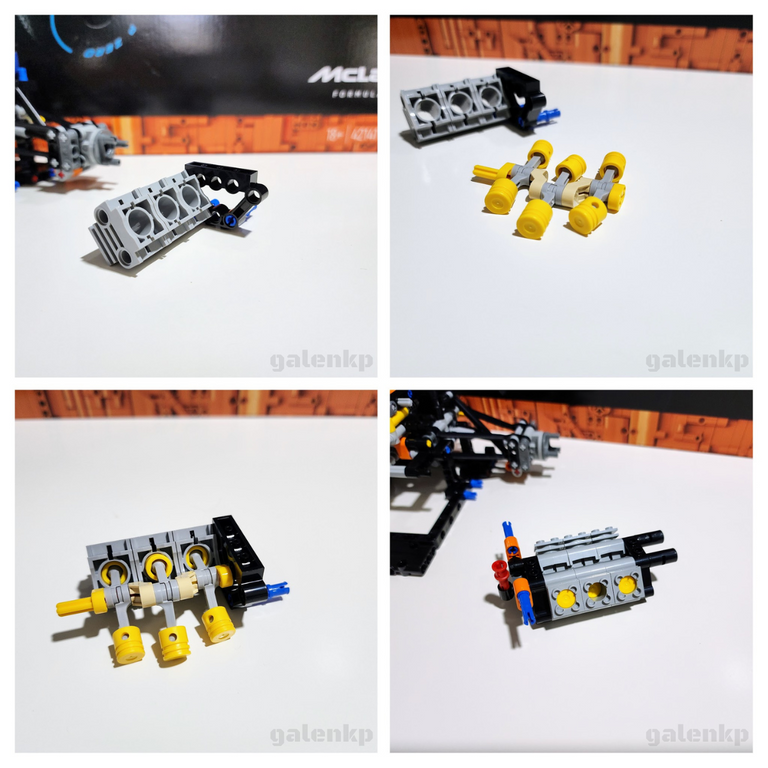
Once to this stage the rear assembly is put aside for a bit whilst the engine comes together. You can see this below and, again, this was a first for me as I've not built a Lego Technic engine quite like this one before.
If you look at the images below you'll see how the pistons fit into the cylinders within the engine block on a crank shaft (below left) so that as the car moves the pistons will pump up and down inside the engine just like the real car. I'll admit to stopping for a little while and playing with the engine once I had it together, because it's super cool.
From here the beginnings of the floor and body frame are fitted to the rear differential and suspension assembly and the engine is inserted ensuring the crank shaft connects securely into the rear differential. This basically takes the lineal drive from the engine to the differential which changes its direction to right angles to drive the wheels...the same as the real life car.
Here's a YouTube video of Will Buxton, F1 journalist, making the car. It's only ten minutes long and is a great demonstration of how it all comes together and includes some background on the car itself. If you skip to about 9:30 you'll see the car done though. It's pretty epic.
I took my time with this initial stage as I wanted to get it right and there were a couple of tricky parts. It took me about two and a half hours and I enjoyed the process...Snacks help with the enjoyment aspect too; I had cheese and crackers if you're wondering.
I'll probably get to the next stage this weekend as I tend to be rather busy during the week and will grab some shots of it for a follow up build-post as usual.
Design and create your ideal life, don't live it by default - Tomorrow isn't promised so be humble and kind
All images in this post are my own
Sounds Lego Technic build is something really very interesting that you build. I like it, specially shape of it. Thanks for sharing!
Indeed.
Super, good construction.
@tipu curate
!PGM
Upvoted 👌 (Mana: 27/47) Liquid rewards.
BUY AND STAKE THE PGM TO SEND A LOT OF TOKENS!
The tokens that the command sends are: 0.1 PGM-0.1 LVL-0.1 THGAMING-0.05 DEC-15 SBT-1 STARBITS-[0.00000001 BTC (SWAP.BTC) only if you have 2500 PGM in stake or more ]
5000 PGM IN STAKE = 2x rewards!
Discord
Support the curation account @ pgm-curator with a delegation 10 HP - 50 HP - 100 HP - 500 HP - 1000 HP
Get potential votes from @ pgm-curator by paying in PGM, here is a guide
I'm a bot, if you want a hand ask @ zottone444
Thanks mate, it's been a lot of fun so far...I'm looking forward to getting it completed.
So fun! I can't remember the last time I built something like this. It most have been more than 20 years ago. sigh those times.
As the trend says "today, I knew envy!"
😂
It's a cool set for sure and has been enjoyable to build with some different elements than I've seen before. It's been a rather long time since I built a Technic set, the last was the remote control Volvo Hauler which I started well over a year ago. I thought it was time.
I can't say I've not eat snacks in the meantime of course, but snacks make building Lego more fun.
I hope you get to build some Lego sometime, but for now you're doing pretty well with your cuatro's.
Well, cuatros are my Legos. You know. 😂
Those sets look incredible. When I used to travel a lot to Margarita's Island, I saw a lot of sets like that one in toy stores. Always refrained from buying them. The worst part is that I had the money for it. It is a shame I never did since I enjoy a lot building things.
I'll try to get my hands on one. Maybe try to build a cuatro with Legos to see if it works. 😂
The envy thing is because I can't eat snacks like woodworking, lest I wanna get poisoned or something. 😂
Regret.
Yep, I have things I wish I did at the time looking back in it. These days I just do it because I'll be dead eventually and then won't get the chance. Although, when I'm dead I'm planning to haunt some fuckers so that'll be fun.
I would like to see that post you do when you get a Lego set mate, I'll look out for it.
I wouldn't expect anything less from you. 😂😂
We shall see if I can get my hands on one of them sometime soon.
Some may think I'm joking, but I knew you'd understand that I was serious. Don't worry, you're not on the list...Or are you?
Ha, ha, ha, ha. My motto is to never cross the G-dog. 😂
My guess is no, but who knows. 😂
You'll know when I'm dead.
That's a grin sentence. But I guess that's par for the course in the famous Australian refrain from political correctness. Just an awesome thing!
Yes, we're a little irreverent at times, us Aussies. I don't see any point in swaying.
Neither do I. That's why I don't have many friends. Have make it a habit not taking crap from anybody. 😎
Nice, good job. These lego technic sets take a lot of patience and nice snacks of course. My son just finished the lego technic lambo a couple of days ago. His room is filled with lego technic cars, and burning a hole in our wallet. :)
I always seem to have crips when building lego but none are as complex as these. Cheese and crackers sounds right! Will watch that video. Looks magic already just the first session you have done
https://twitter.com/jalp21/status/1569675794217066499
The rewards earned on this comment will go directly to the people( @jlinaresp ) sharing the post on Twitter as long as they are registered with @poshtoken. Sign up at https://hiveposh.com.
Siempreme gustaron los Legos pero por temas de dinero nunca pude comparme Legos tecnico, son equipos de construccion increibles y de muy buena calidad. Disfrute mucho leer y ver las fotos de tu post.
Buena means good I think, and I see the word Legos so I assume this comment means Lego is good.
I don't speak Spanish though, so can't be sure.
Hehe reminds me that F1 is coming to Singapore soon!
Yep, it's the next race and I'm sad I won't be there. I usually go to the Singapore race but mTters here prevent it this year. I'll be watching though.
oh man oh man~ Lego's!!!! I love them!! Time to make some time to follow your lead in posting something lego~~~ Also, nice change of photo~ The real you looks a lot real than the previous one. hahaha~ Its great to know you here.
You build Lego? Get on it man! Post it too. This LEGO community is mine, I started it as a place to drop my own Lego builds...feel free to use it if you like, a few others do.
And thanks, I used to use my own photo a long time ago until someone started using it (and other people's) in his posts without permission which was very weird. Anyway, I figured I'd go back to it for a while and see how it goes.
Lego build with my son blog coming up next!~ :) You know funny thing I realized myself lately is that I take fewer and fewer pictures/selfies of myself than I used to. I tried taking a selfie with the same vibe... but brotha it feels like it aint da same. :) I like the beard~ I tried but it grew in patches and not evenly so went back to clean shave.
I'm not much of a selfie guy, but I've not been able to convince someone their camera won't break if they point it at me and take a photo...so I have to take them myself. Lol.
Go Lego!
To be fair, that thing is as cool as the other side of the pillow! What I would have done to have had something like this when I was younger. Just Awesome! Makes me feel like I should do another post about my current racecar build.
I've enjoyed all of the Technic builds I've done but this one is simply awesome. I'm a huge F1 fan so when I saw this I had to have it. I have a lot of Lego around the place, but this one will take pride of place.
I remember your raccar build posts from way back. They were good.
That engine is very cool and unusual for a Lego set
I didn't expect it to be honest, but when I saw the parts I was like, this is going to be cool. I was right. 😉
Probably more reliable than the car at Monza last weekend. :D
Well, one of them anyway, the #4 did pretty well..
I ran to YouTube to see if I saw you in the video, well, you have another chance. You must build that F1 and show it to us in a video, yes? How many hours will it take you to put it together? Will you be able to do it ? I'm sure you can!!
It's unlikely I'll put myself on Hive in a video, I don't enjoy being the centre of attention and I'm so horrid to look at I don't want to scare anyone. Also, yes of course I'll be able to build this set. I've done many others and this is similar, albeit with a few different elements. It'll take around 15-17 hours all up as I generally take it slow to enjoy the process.
When are you starting your own Lego build?
sweet progress. Cool stuff!
Indeed.