Servicing an Old Dell Laptop [Eng+Spa]

Greetings to the Hive DIY community, it's nice to be able to post again after a while, power failures had damaged the computer that I had just assembled a few months ago.
The computer still has problems, it is not fully repaired, if you connect something to a USB port, the computer turns off, but as it is at this moment I can work while I finish the repairs.
On this occasion I share with you a maintenance that I performed on my father's laptop, it is something simple that we should take into account at least once a year.

I do not intend to make an explicit tutorial to follow step by step, I share with you how I performed the maintenance, as a guide on how to do the job.
The first thing was to do the easiest thing, which was to change the battery. This is a laptop with quite a bit of history and it was time to replace the battery, but we couldn't find the original replacement.
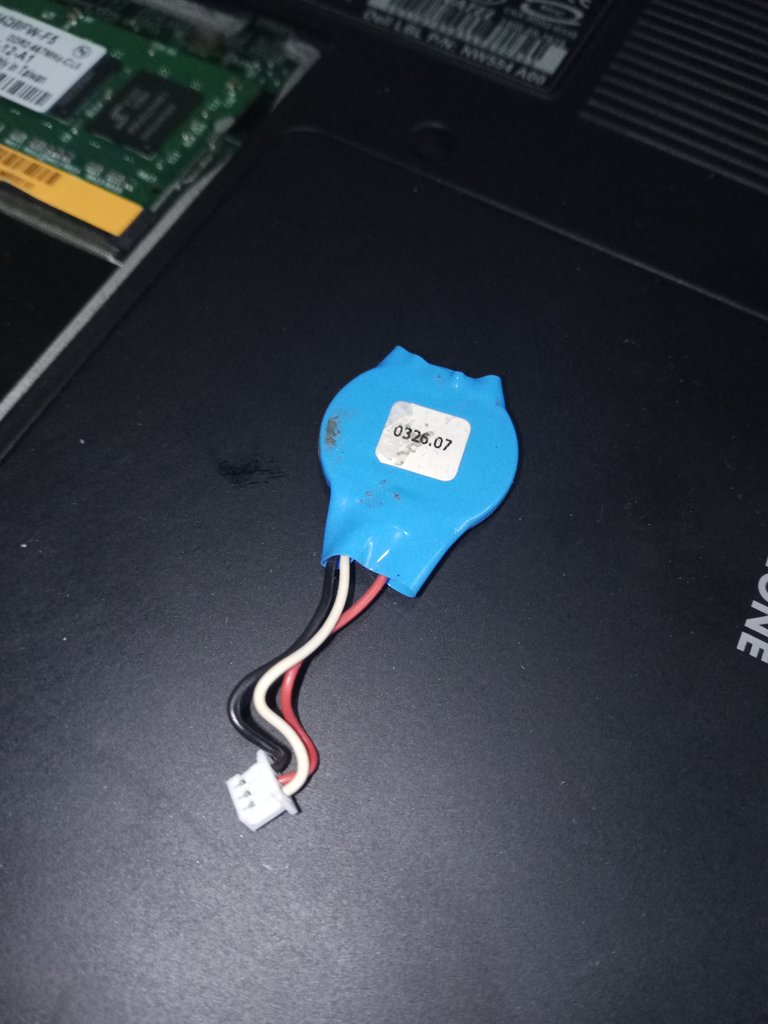
The closest thing we could find was a replacement that had only two connections, not three like the original.
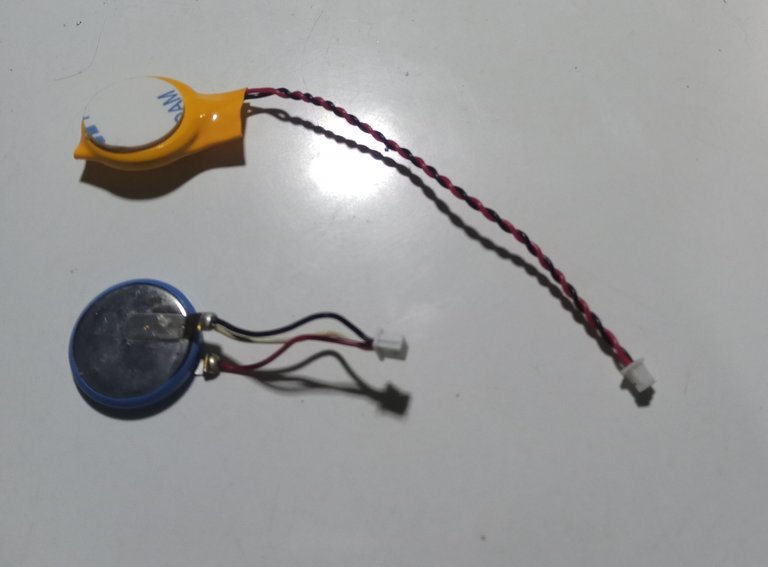
They had offered to do the modification for $10, but I think that's an absurd price for that job, even more so if I can do it at home, it's a fairly simple modification.
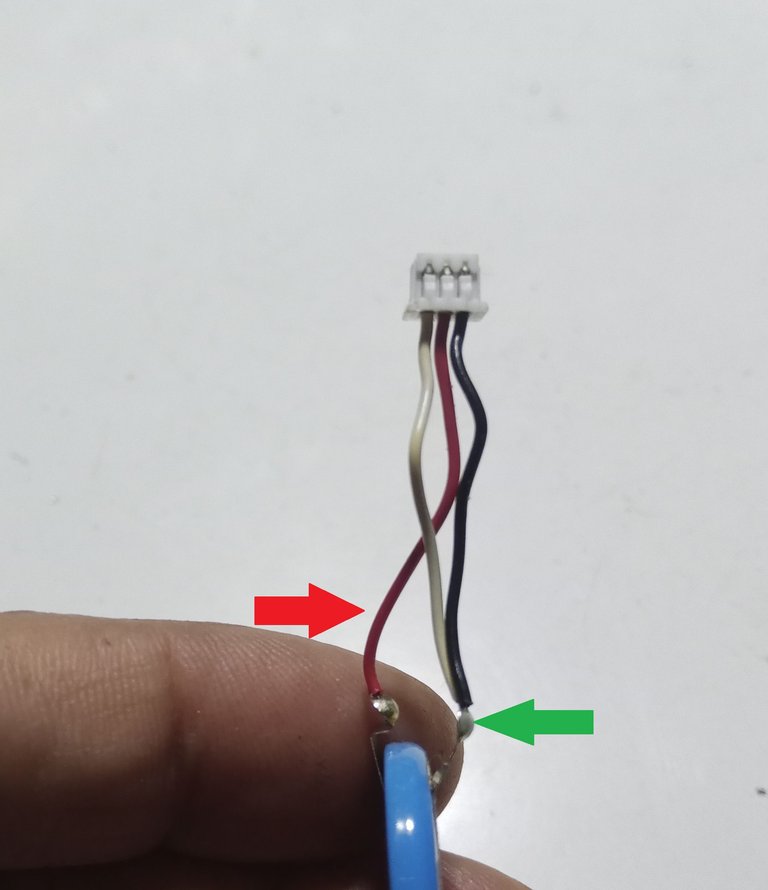
I took apart the original battery to see the arrangement of the connections, the positive terminal has a red cable and the negative terminal has black and white cables.
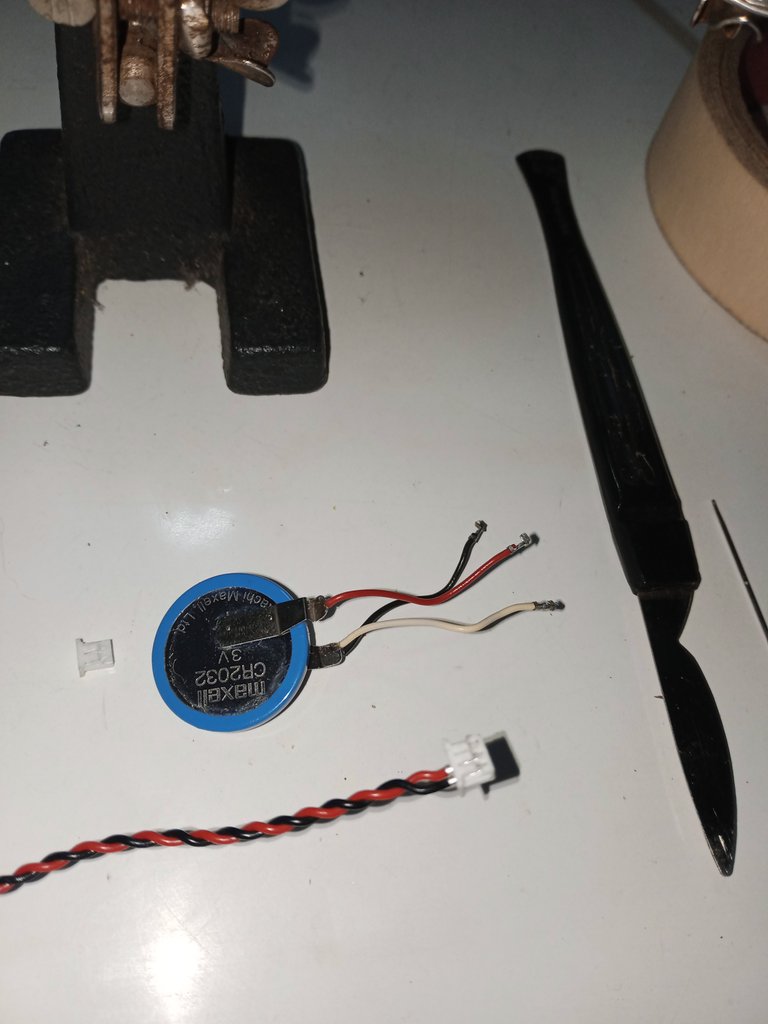
I swapped the original battery connector with the replacement battery connector, being careful to keep the same order, the red wire, from the positive pole, goes to the center of the connector.
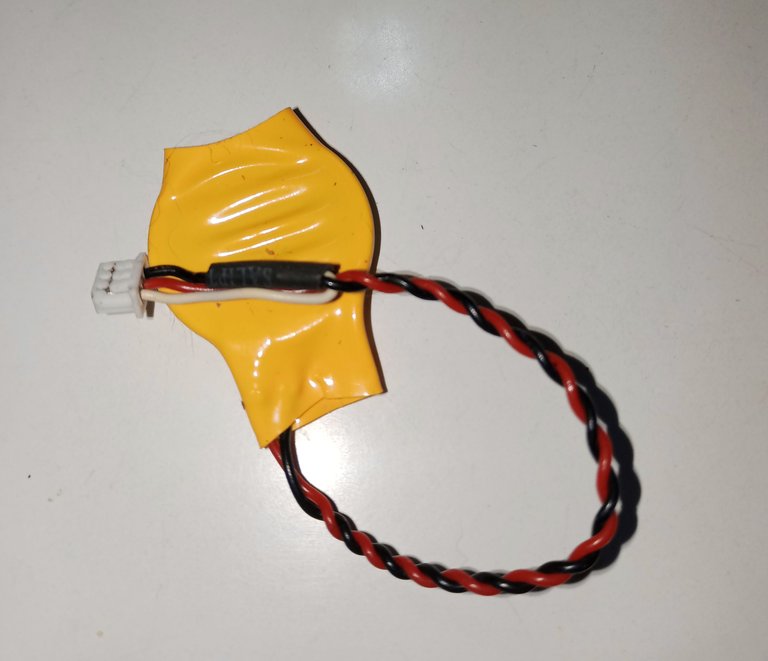
I soldered the white wire from the negative connector to the black wire that goes to the negative battery terminal and now I can move on to servicing the laptop. (I saved the $10 the tech support wanted to charge)

This laptop is not very difficult to disassemble.
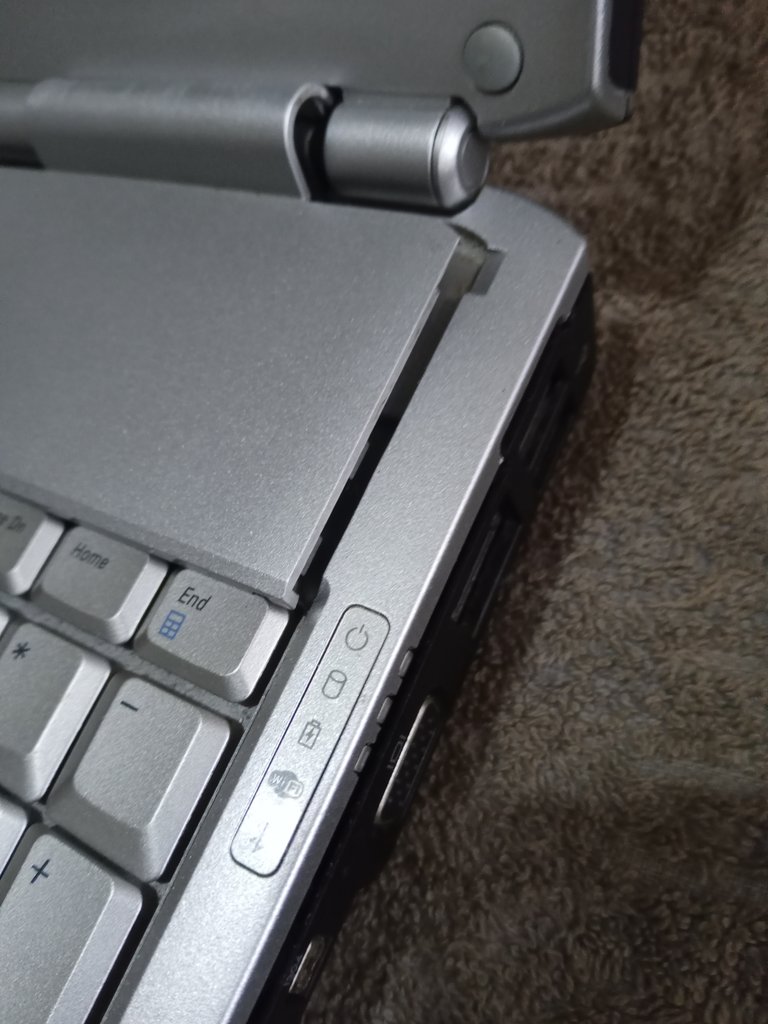
Remove the cover over the keyboard to access the connectors and screws and to be able to remove the keyboard.
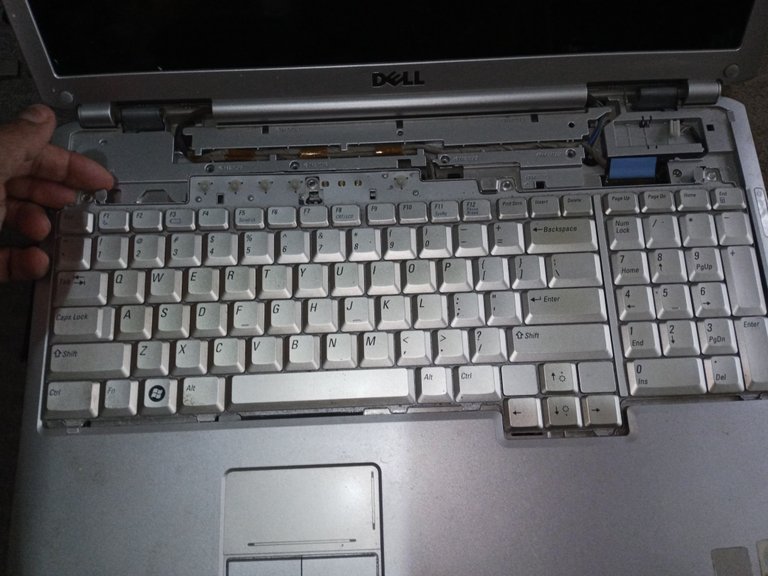
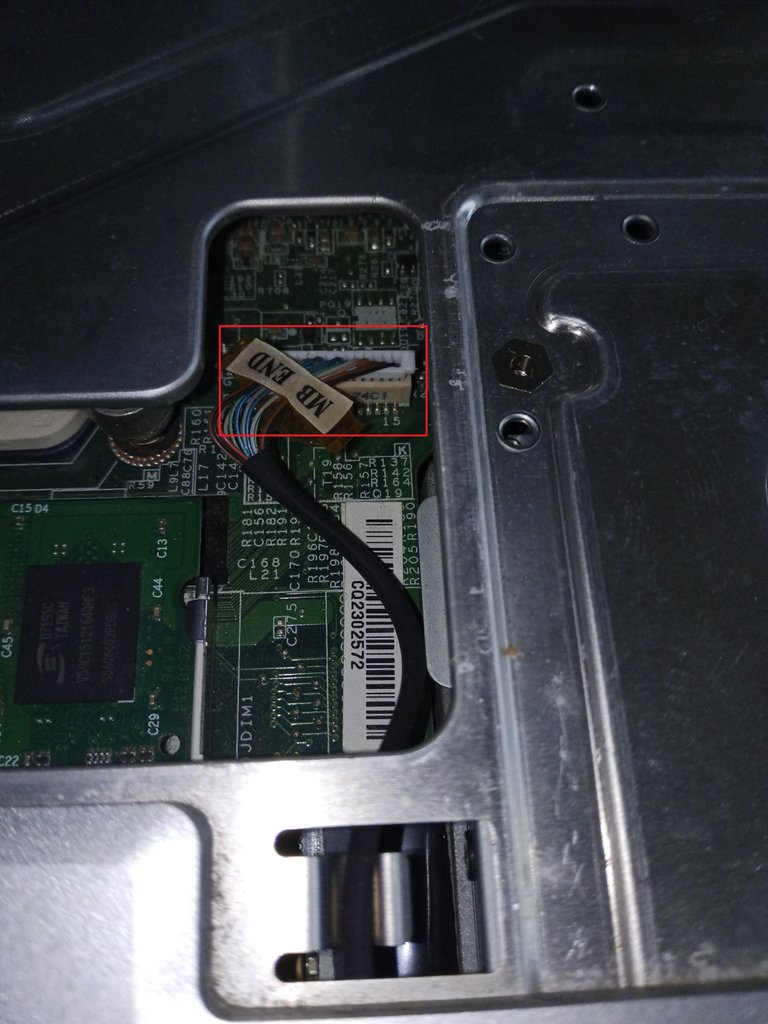
The keyboard has a connector and does not have a Flex cable, which makes it very comfortable to do the work. (highlight the connector in a red box)

Separate all the connecting cables and remove the screws that were under the cover that blocked the keyboard.
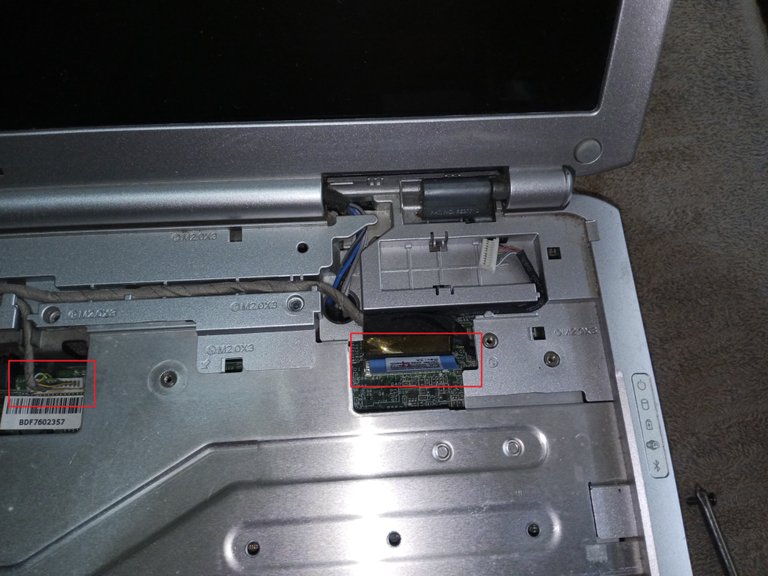
Remove the screws from the bottom of the laptop, but don't take any pictures, I didn't really plan to share this work, so I only have the pictures I took as a check when I was doing the service.
But there are no hidden screws, you just have to remove the small covers and then move on to remove the screws from the large cover.

The laptop case had one of the plastic supports detached, there were also broken parts and a piece of the case was missing in one corner.
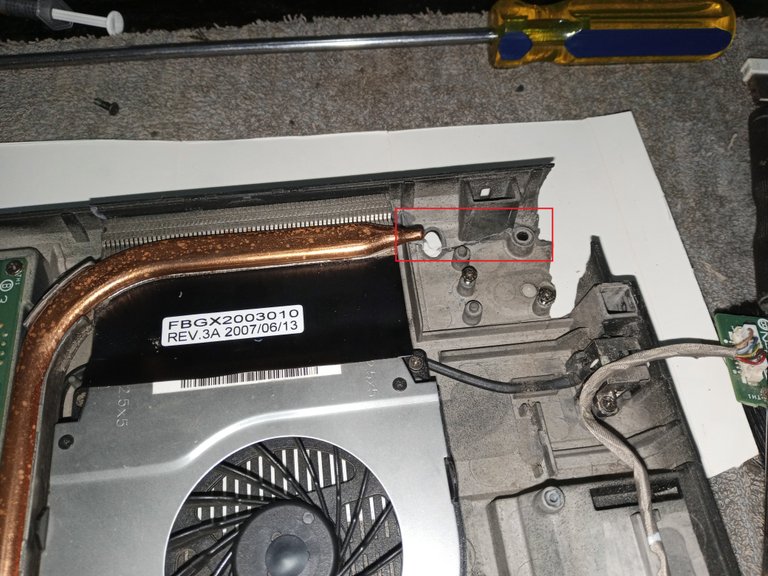
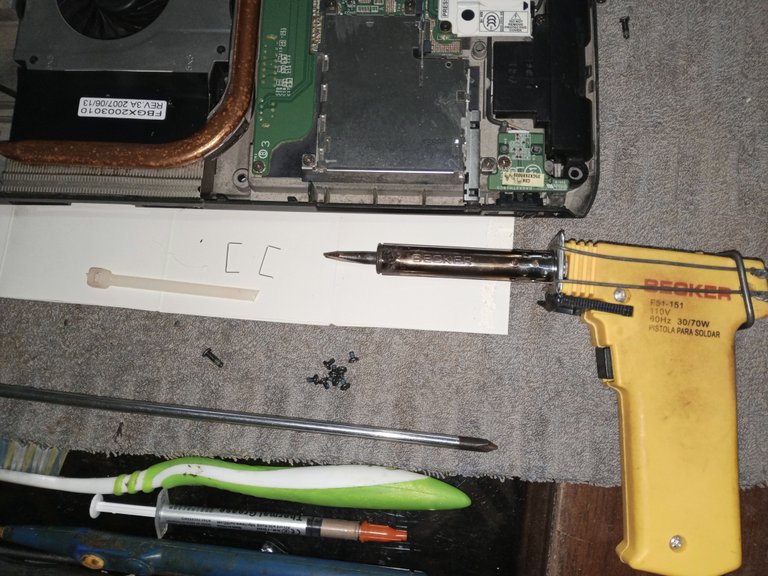
I had to resort to epoxy glue to weld the broken parts, I wanted to weld the plastic and put staples with heat, but that type of plastic did not melt with the soldering iron.
My father had told me that the laptop was getting very hot, so it wasn't hard to think that it had been a long time since the cooling system had been cleaned.

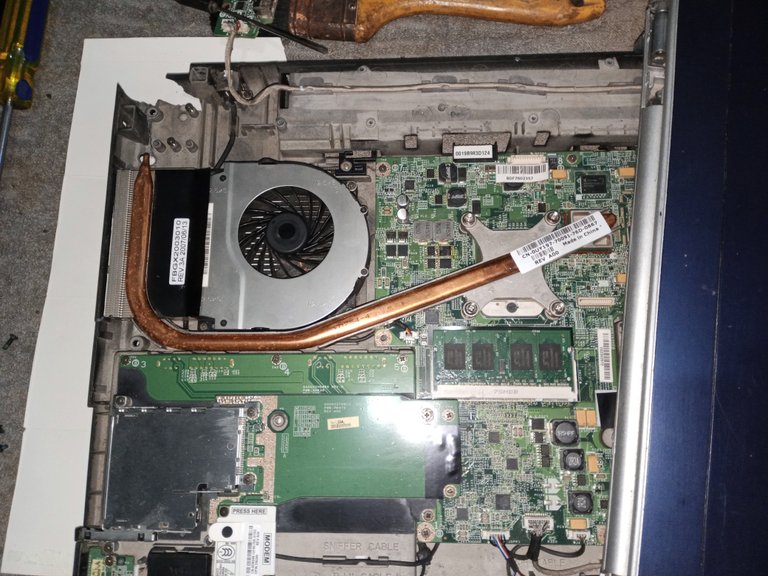
To access the cooling coil, you have to loosen the screws on the plate above the processor (the large circle, highlighted in blue, are screws that have a pressure spring).
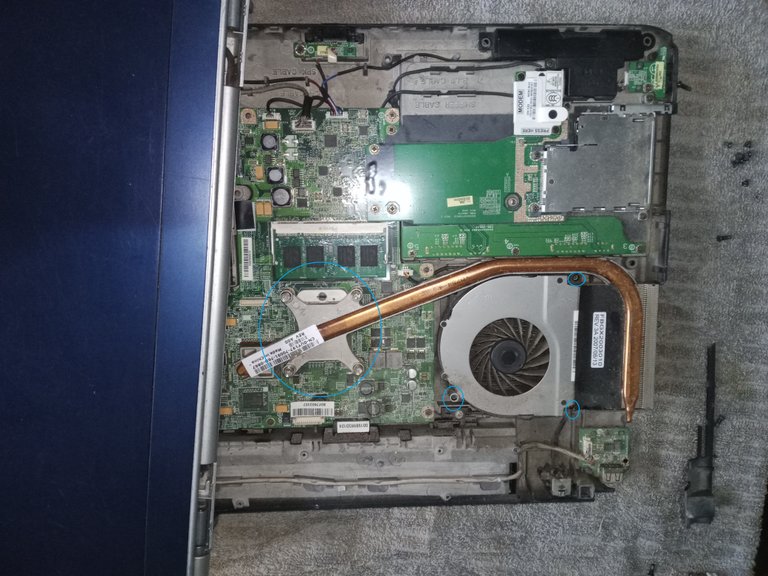
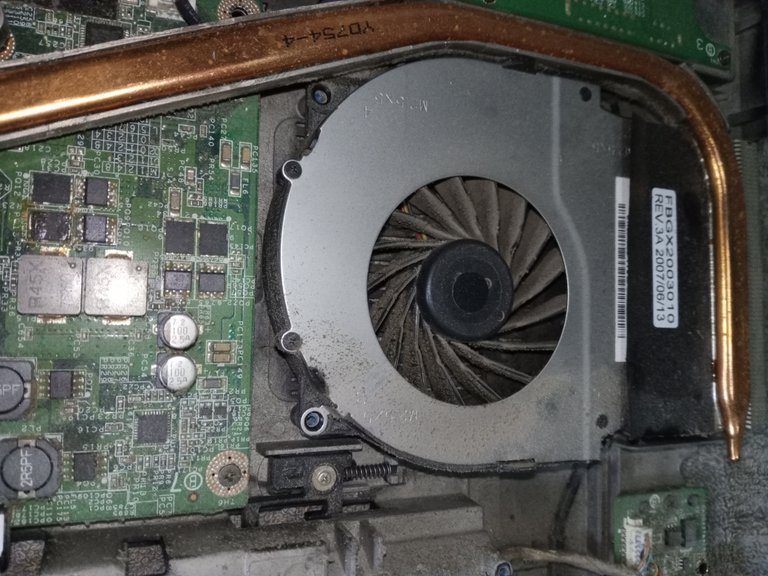
The fan and the coil are visible, covered in dirt.
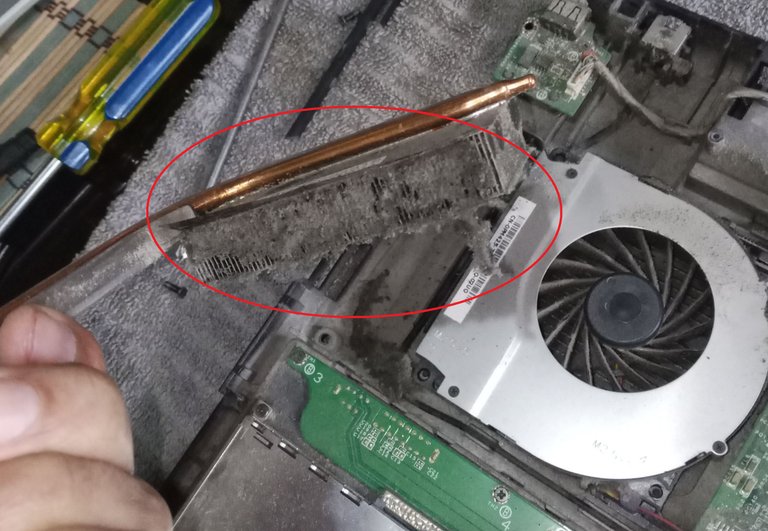
The grille was almost completely blocked by dust.
The thermal grease was petrified, I spent a day and a half with a brush and alcohol, soaking for hours and then trying to remove the remains of the old thermal grease that was stuck on the processor and heat sink.

Cleaning the fan, with an old toothbrush, was a bit easier.

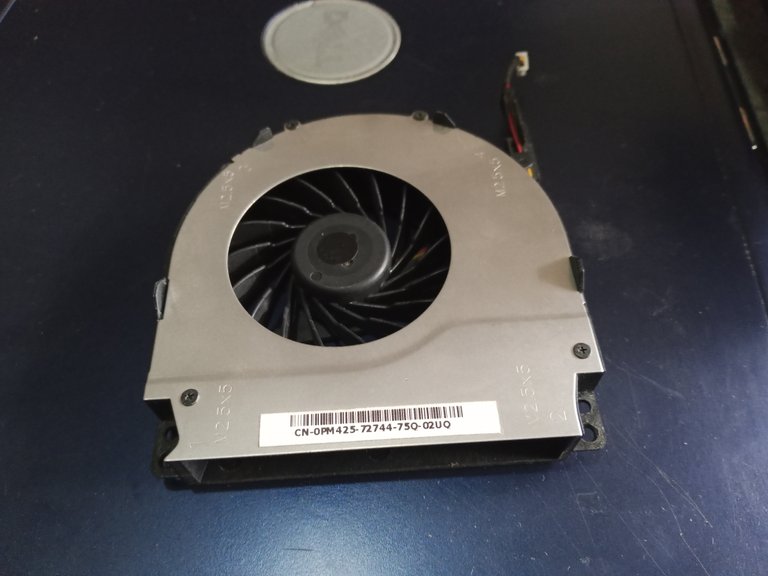
Then finish cleaning the heatsink plate and the grill.
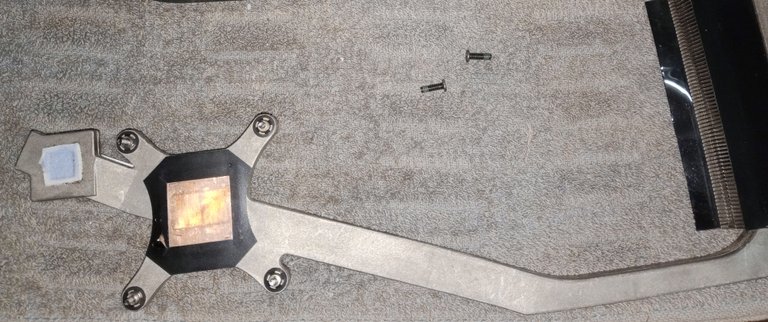
I had some thermal grease left over from a couple of months ago when I built this computer I'm working on, I hadn't used it.
It wasn't the best quality, but it was what I had on hand at the time.

After applying the thermal grease on the processor and placing the heatsink plate, you have to pay special attention to make sure it is firm, the heatsink plate must fit very well on the processor.
Well, after assembling all the parts and connecting all the cables that I had removed, I was able to finish the maintenance.

It's a laptop from a long time ago, when the infamous Vista operating system made its appearance on the scene, but for the use that dad gives it on a daily basis, it's enough.
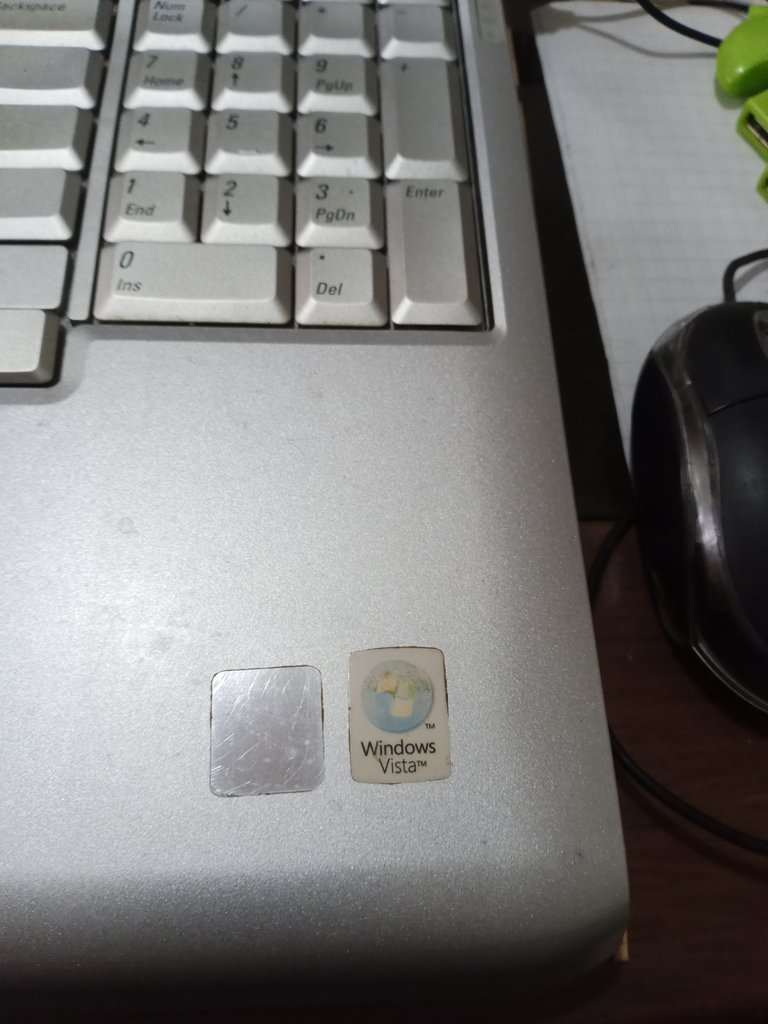
(P.S.: The OS was changed a while ago to something more decent.)
Well, I was able to finish the post, today there were only four power outages in the day, now I have to finish repairing my UPS, before the electric service burns another computer.
You have to take life a little as a joke when you live in situations like this.

I hope you have a great week.
Thank you very much for stopping by and reading me.
Peace.
- The images, unless indicated, are screenshots of the work in my workshop
- I used Google Translate for the English language.
- The decorative title in Spanish was made with the help of the TextStudio application.
- The workshop banner was made in paint.


Saludos a la comunidad de Hive DIY, es grato poder publicar nuevamente después de un tiempo, los fallos eléctricos habían dañado el computador que recién había armado hace unos meses.
Aun el computador tiene problemas, no está totalmente reparado, si conectas algo a un puerto USB, el computador se apaga, pero como está en este momento puedo ir trabajando mientras termino las reparaciones.
En esta ocasión les comparto un mantenimiento que le realice a la laptop de mi padre, es algo sencillo que deberíamos tener en cuenta por lo menos una vez al año.

No pretendo hacer un tutorial explícito a seguir paso a paso, les comparto como realice el mantenimiento, como una orientación de como hacer el trabajo.
Lo primero era hacer lo más sencillo, que era el cambio de batería, esta es una laptop con bastante recorrido y ya tocaba reemplazar la batería, pero no encontramos el repuesto original.

Lo más parecido que conseguimos era un reemplazo que tenía solo dos conexiones, no tres como la original.

Nos habían ofrecido hacer la modificación por 10 $, pero me perece un precio absurdo por ese trabajo, más aún si puedo hacerlo en casa, es una modificación bastante simple.

Desarme la batería original para ver el arreglo de las conexiones, el terminal positivo tiene un cable en color rojo y el terminal negativo tiene los cables en negro y blanco.

Intercambio el conector de la batería original por conector de la batería de reemplazo, con cuidado de mantener el mismo orden, el cable rojo, del polo positivo, va al centro del conector.

Soldé el cable blanco del conector negativo al cable negro que va al terminal negativo de la batería y ahora puedo pasar a hacer servicio al laptop. (me ahorré los 10 $ que quería cobrar el servicio técnico)

Este laptop no tiene mayor dificultad para desmontar.

Retire la cubierta que está sobre el teclado, para tener acceso a los conectores y tornillos y para poder retirar el teclado.

El teclado tiene un conector y no tiene un cable tipo Flex, lo que hace muy cómodo para hacer el trabajo. (resalte el conector un recuadro en color rojo)

Separe todos los cables de conexión y retire los tornillos que estaban bajo la cubierta que bloqueaba el teclado.


Retire los tornillos de la parte inferior del laptop, pero no tome fotos, yo en realidad, no tenía pensado compartir este trabajo, por lo que solo tengo las imágenes que fui tomando como control cuando hacía el servicio.
Pero no hay tornillos ocultos, solo hay que ir retirando las cubiertas pequeñas y luego pasar a retirar los tornillos de la cubierta grande.

La carcasa del laptop, tenía uno de los soportes plástico desprendido, había también partes rotas y le faltaba un pedazo de la carcasa en una esquina.

Tuve que recurrir al pegamento epóxido para soldar las partes rotas, quería soldar el plástico y colocar grapas con calor, pero ese tipo de plástico no se derretía con el soldador.

Padre me había comentado que el laptop se calentaba mucho, por lo que no fue difícil el pensar que hace mucho que no se le hacía una limpieza al sistema de enfriamiento.

Para acceder al serpentín de enfriamiento, hay que aflojar los tornillos de la placa sobre el procesador (el círculo grande, resaltado en color azul, son tornillos que tienen un resorte de presión).

Queda a la vista el ventilador y el serpentín cubiertos de suciedad.

El serpentín estaba casi totalmente bloqueado por el polvo.

La grasa térmica estaba petrificada, pase un día y medio con un pincel y alcohol, remojando por horas y luego tratando de retirar los restos de la grasa térmica vieja que estaba adherida sobre el procesador y el disipador de calor.

La limpieza del ventilador, con un viejo cepillo de dientes, fue algo más sencillo.


Luego termine de limpiar la placa del disipador y el serpentín.

Me quedaba grasa térmica de hace un par de meses atrás en que arme este computador en que estoy trabajando, no la había usado.
No era la de mejor calidad, pero era lo que tenía a la mano en el momento.

Después de aplicar la grasa térmica sobre el procesador y colocar la placa del disipador hay que tener mucha especial atención en que quede bien firme, la placa del disipador debe quedar muy bien ajustada sobre el procesador.

Bueno, luego de montar todas las partes y conectar todos los cables que había retirado, pude dar por terminado el mantenimiento.

Es un laptop de hace buen tiempo, cuando el infame sistema operativo Vista hizo su aparición en escena, pero para el uso que le da padre en el día a día es suficiente.

P.D.: Hace tiempo que le cambiaron el SO por algo más decente.
Bueno, ya pude terminar la publicación, hoy solo hubo cuatro cortes de electricidad en el día, ahora tengo que terminar de reparar mi UPS, antes de que el servicio eléctrico me queme otro computador.
Hay que tomarse un poco en broma la vida cuando vives en situaciones así.

Espero que tengan una excelente semana.
Muchas gracias por pasar y leerme.
Paz.
- Las imágenes, a menos que se indique, son capturas del trabajo en mi taller
- He usado el traductor de Google para el idioma Inglés.
- El título decorativo en español fue hecho con ayuda de la aplicación de TextStudio.
- El banner del taller fue hecho en paint.
Lo de la cantidad de sucio en el sistema de refrigeración en verdad que era notable :)
Estoy pensando que puede que te salga mejor comprar un UPS que seguir tratando de reparar el que tienes.
!ALIVE !LUV !BBH
@soltecno, @pedrobrito2004(3/4) sent you LUV. | tools | discord | community | HiveWiki | <>< daily
Es posible, las tiendas de repuestos me venden repuestos que no son los que pido, y que tampoco son los reemplazos de lo que quiero comprar.
No puedo simplemente poner cualquier repuesto, tiene que ser el reemplazo correcto.
This post has been manually curated by @bhattg from Indiaunited community. Join us on our Discord Server.
Do you know that you can earn a passive income by delegating to @indiaunited. We share more than 100 % of the curation rewards with the delegators in the form of IUC tokens. HP delegators and IUC token holders also get upto 20% additional vote weight.
Here are some handy links for delegations: 100HP, 250HP, 500HP, 1000HP.
100% of the rewards from this comment goes to the curator for their manual curation efforts. Please encourage the curator @bhattg by upvoting this comment and support the community by voting the posts made by @indiaunited.
Many thanks to my friend @bhattg and the @indiaunited community for supporting my work.
Sending Love and Ecency Curation Vote!
 Follow Eceny's curation trail to earn better APR on your own HP. : )
Thank you very much @untilwelearn for reading and supporting my post.
Sorry for replying so late, there were power outages.
It's totally fine. Keep up the good work! :)
I've given up on PCs because the last two failed me miserably. I admire your courage, determination, and patience in working on that one:)))
Thank you very much for reading and commenting.
I really appreciate your kind comment, my friend. This job was simple, but very slow. Removing the thermal grease when it is so hard and stuck to the CPU is a difficult job.
There was no electricity for a good part of the day.
Sorry for responding so late.
Que bueno leerte por aqui de nuevo, había pasado un buen tiempo y pense que tu salud o algún accidente te habia pasado una mala jugada. Una lastima que tu PC y la electricidad hayan decidido jugarte una mala pasada pero aqui estas, te mando los mejores deseos para que puedas continuar escribiendo y trayendo cosas, realmente admiro tu perseverancia y todo lo que sabes hacer, sin conocerte he llegado a apreciarte mucho por aquí.
Amigo, muchas gracias por pasar. Ha sido complicado, tratar de llevar todo en paz, cada día te puedes quedar sin electricidad o si hay electricidad, tienen cuatro cortes de servicio en un día.
Muchas gracias por el apoyo.
Que tengas un excelente final de semana.
!PIZZA
$PIZZA slices delivered:
@nupulse(1/15) tipped @soltecno
Querido, si hay algo con lo que no me gusta meterme es con una laptop, eres un maestro. En serio, hacerle mantenimiento a una laptop es delicadamente engorroso. Me encanta nos compartas tus conocimientos.
Yo tengo mucha fe en su capacidad, he visto su trabajo y estoy seguro de que podrías lograr hacer un buen servicio.
Muchas gracias por leerme y comentar, cuídese.