Repairing silicone applicator [Eng+Spa]
English
Greetings, I wish you the best you can be, according to your possibilities. And that they have a very good spirit to continue improving and progressing in their lives.
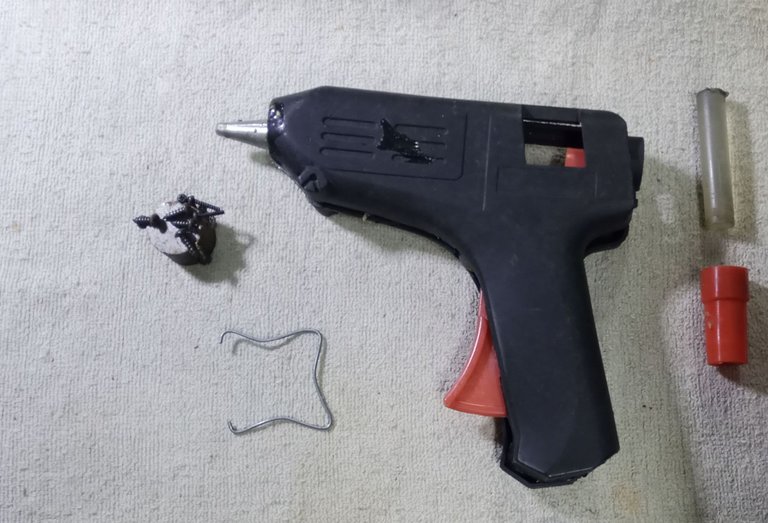
Once again I find myself calmly sharing with you some workshop work. This time, I deal with one of my guns to apply the silicone stick. They are really simple, very useful in the workshop, crafts and in minor repairs. Perhaps by looking at the work, you can solve a problem that may arise.
At a certain point I left it connected and forgot about it. The silicone stick applicator system is very primitive: it has no control or power switch, much less a fuse or electrical protector.
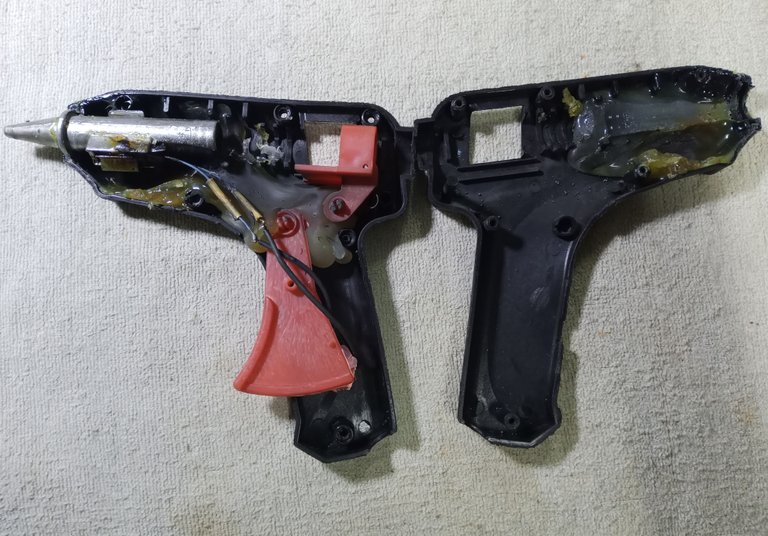
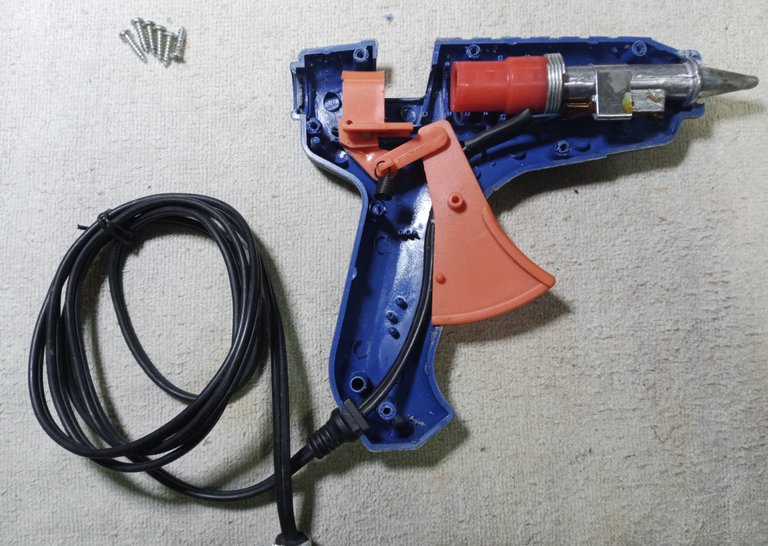
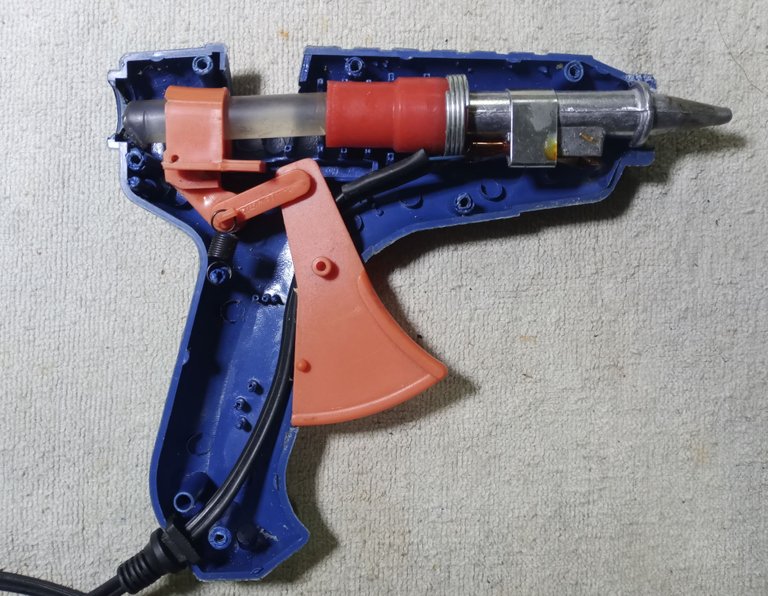
By leaving it forgotten without disconnecting it from the electrical outlet, it heated without stopping and the bar melted inside the casing, it is a complete disaster.
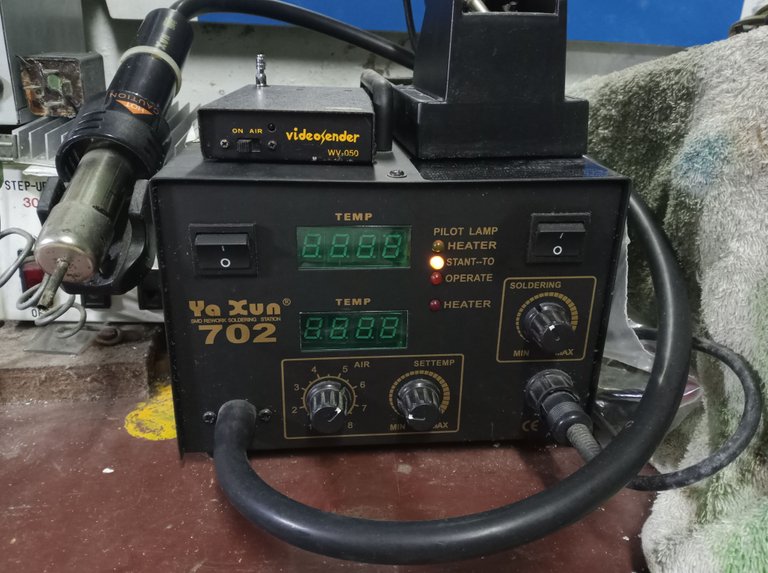
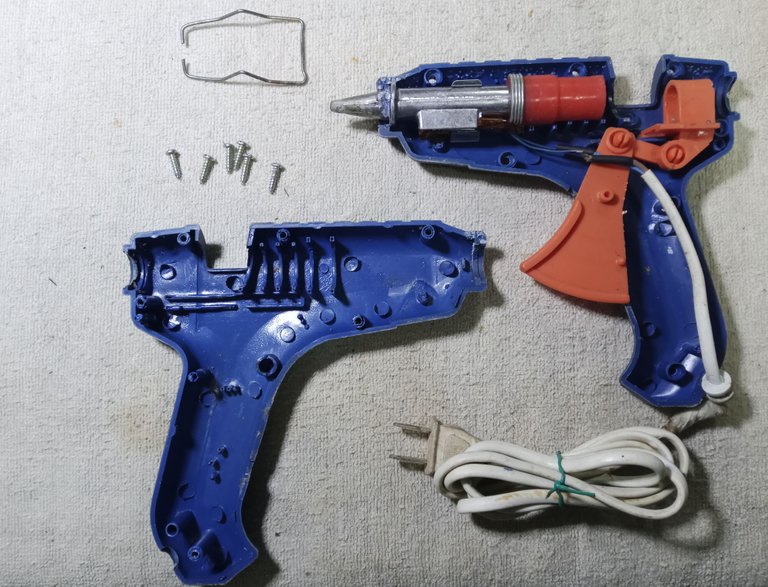
In order to separate the covers, I used the hot air station, I could have used a good hair dryer on maximum power, had I not had the air station.
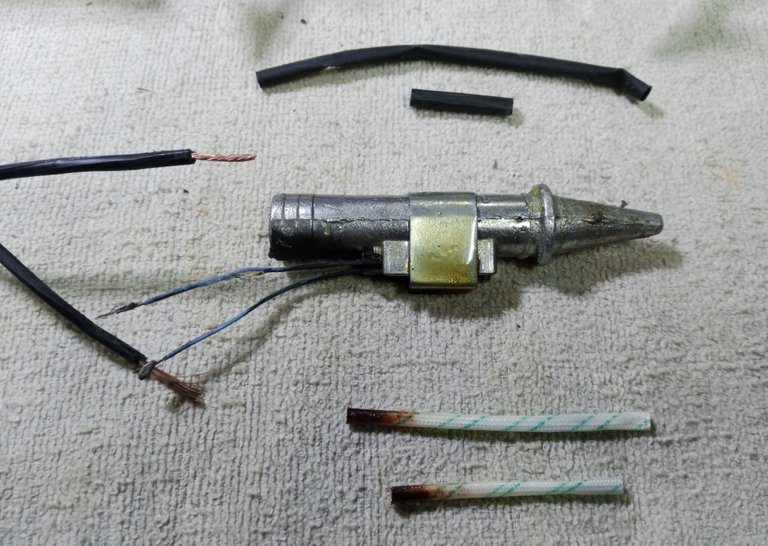
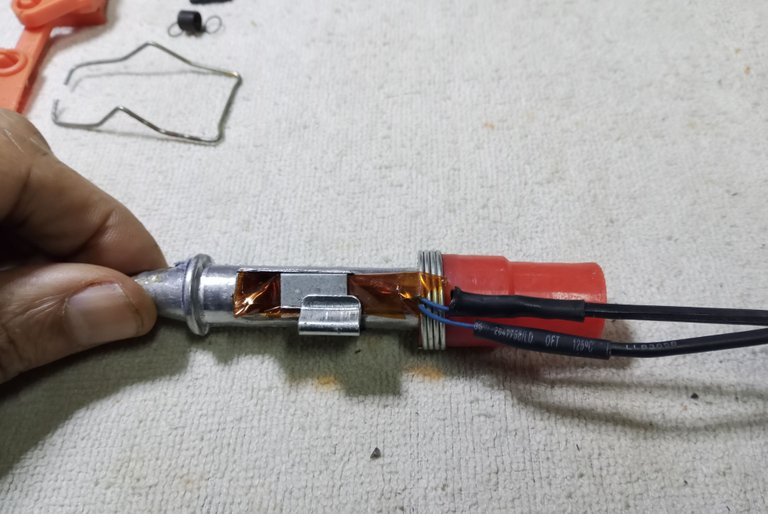
The heart of the tool itself is a resistor that is clamped onto one side of a metal tube. Connected to the cable that goes to the wall outlet. The rest is a plastic trigger inside the gun housing, contained with a spring to push the bar down the barrel.
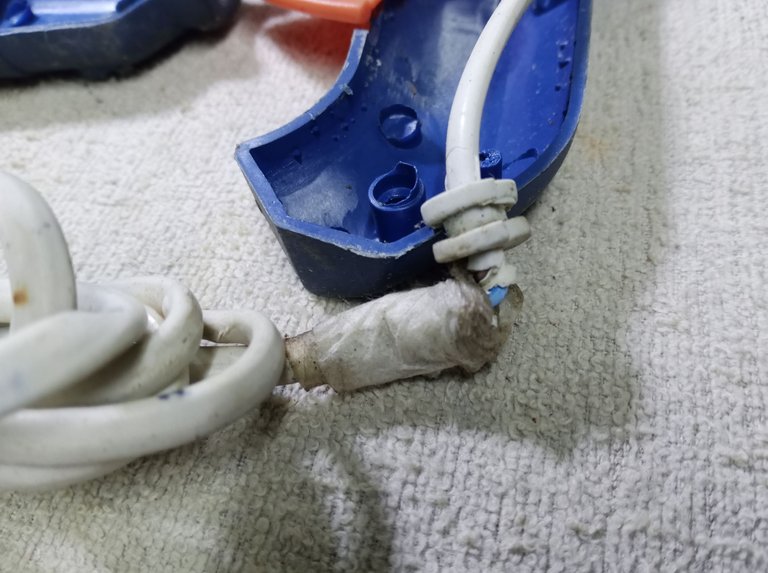
The cable that comes from the factory is of a very low caliber, of very doubtful quality, which is one of the reasons why it is very cheap.
I usually change it, and I recommend, if you have the knowledge to do it, it's a good idea. But this time I had not made the change, after spending a lot of time running alone, the cheap cable melted and made several shorts inside the plastic jacket. Thank God it didn't catch fire and nothing serious happened.
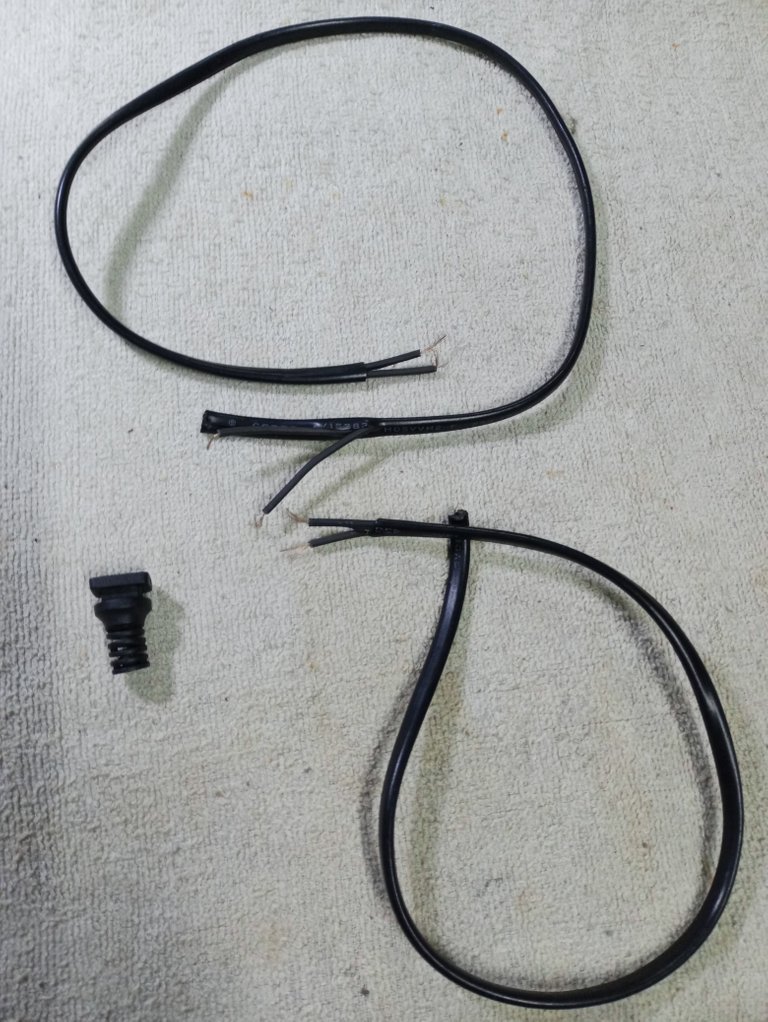
I was only able to recover the plastic cap that prevents the cable from breaking, I am going to recycle it. So I use a 4 mm (5/32”) drill bit, to clean and enlarge the hole where the cable will go through that I will use.

I take advantage of a cable that I recycle from a damaged lamp, which is of much better quality than the one that these silicone applicators come from the factory.

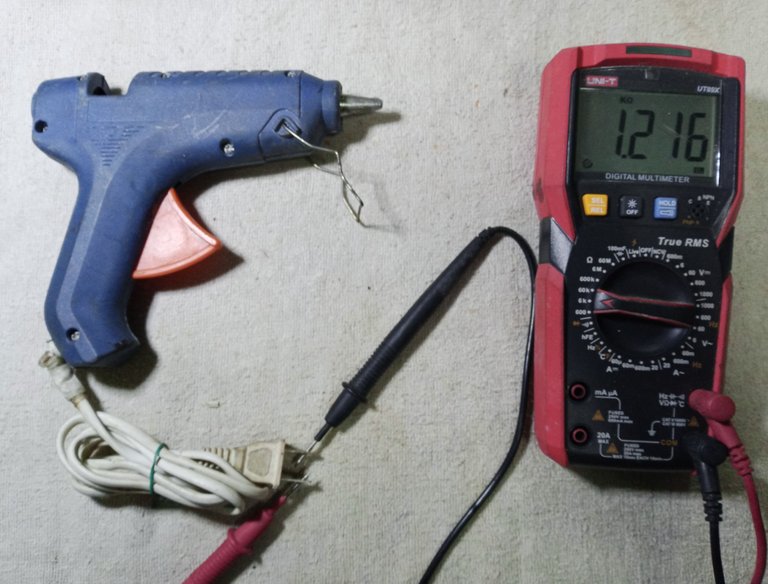
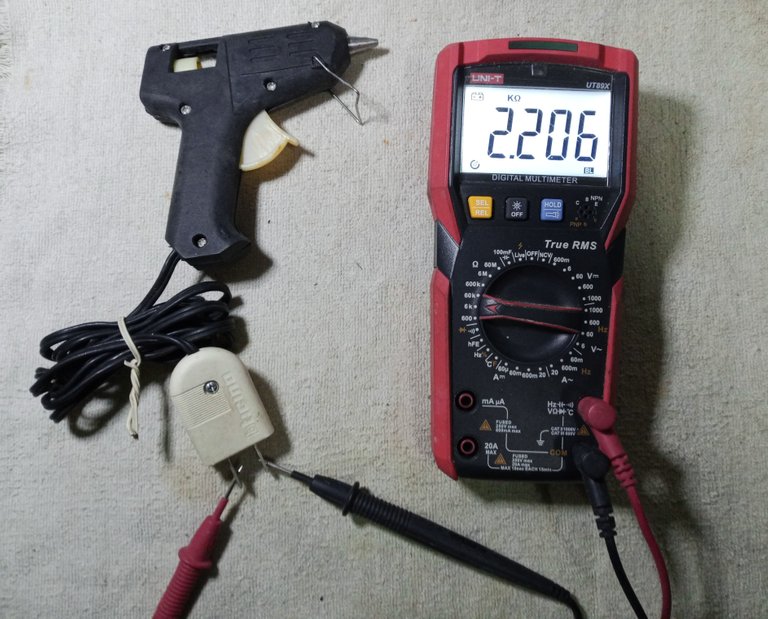
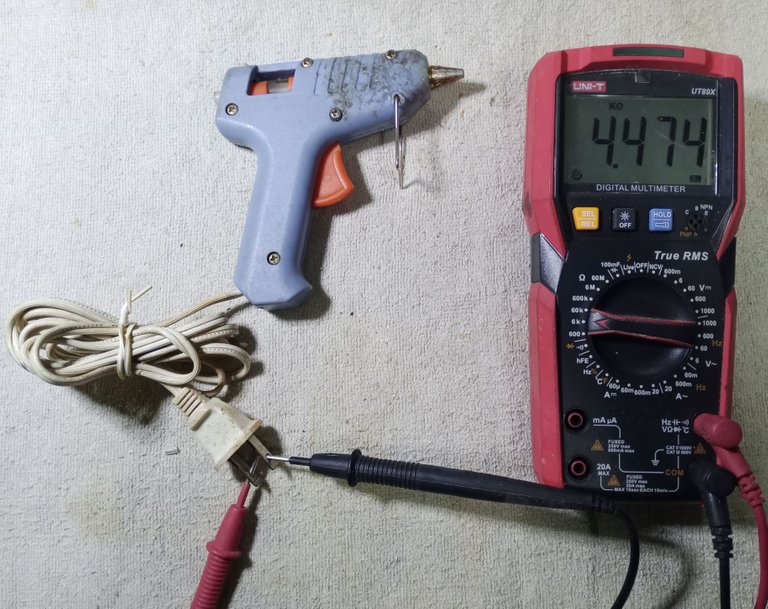
Here is an important piece of information, the first thing to check before working on any of these guns is to check the resistance. It is the heart of the team, if it is damaged, then: the good parts of the gun remain as spare parts for another that is damaged.
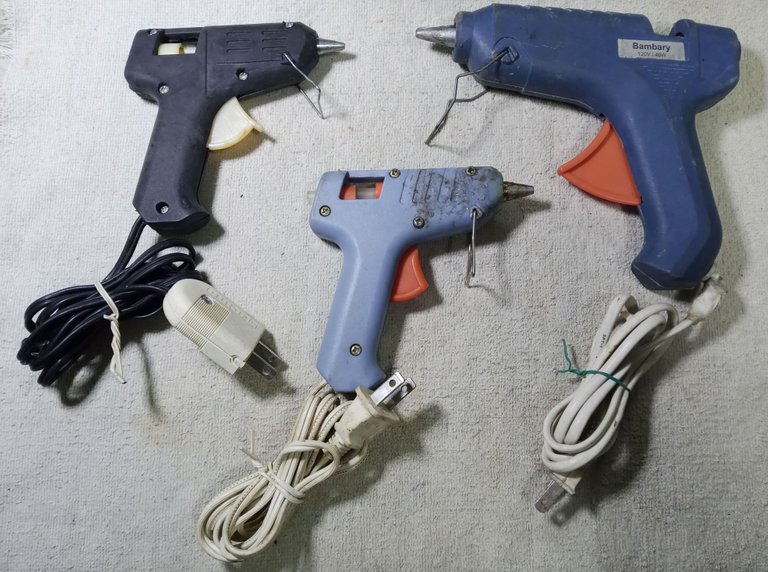
As a reference, I measured the other silicone applicators that I have in the workshop. They are different brands, sizes and powers, but they will help me get an idea of how big the one I am repairing should be.
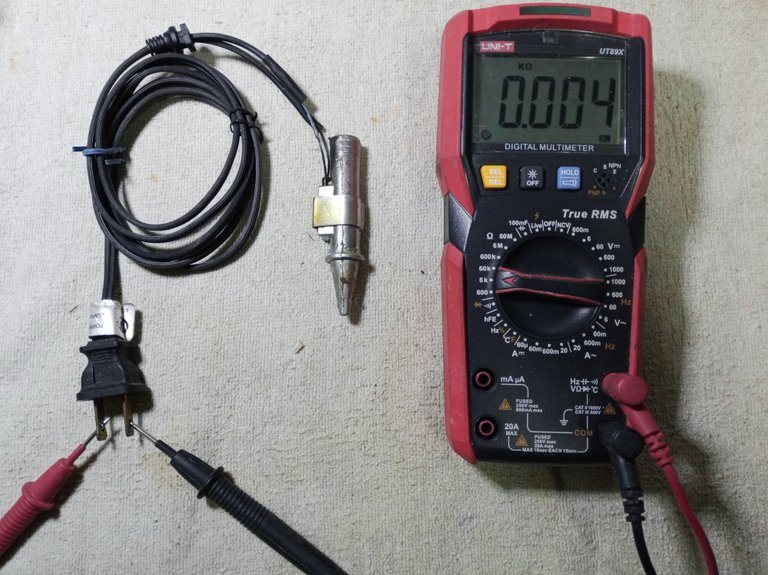
The values go from 1200 to 4400 Ohm, so a value of 4 Ohm tells me that the resistance is not open, but the damage is different. It is what we used to say in short circuit.
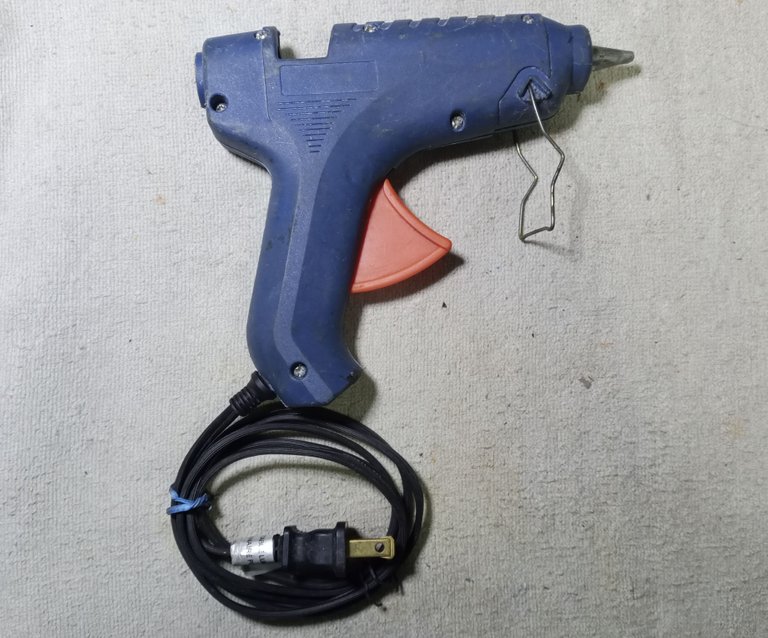
It was a little disappointing, but I can only recycle the parts, (it only lasted me about eleven years of use. Anyway, thanks for everything). Without losing heart, I take advantage of the cable that I had already prepared for the repair and I will use it to change it into another silicone gun, which had a deteriorated cable.
If the rubber stopper that protects the cable is missing or missing at the end of the casing, the cable can start to break.
I soldered to the resistor, protected the solder with a liner of heat shrink, and then attached the mechanism that pushes the bar, attached the spring.
To assemble you have to place a piece of bar, to make the job easier.
I hope to be more careful and to be able to work for a long time with this other silicone applicator.
Thank you very much for stopping by and reading.
I have used the Google translator for the English language.
The images were made in my workshop, during the repair process.
As always, it's a good idea to take a light electrical training course. If you don't have the basics: I highly recommend not working with electricity.
Have an excellent week.
Peace.
Español
Saludos, les deseo que estén lo mejor que se pueda estar, según sus posibilidades. Y que tengan un muy buen ánimo para seguir mejorando y progresando en sus vidas.
Una vez más me hallo compartiendo tranquilamente con ustedes, algo de trabajo de taller. En esta ocasión, me ocupo de una de mis pistolas para aplicar la silicona en barra. Son realmente simples, muy útiles en el taller, artesanías y en reparaciones menores. Puede que viendo el trabajo, ustedes puedan resolver algún problema que se les llegara a presentar.
En cierto momento la dejé conectada y la olvidé. El sistema del aplicador de la silicona en barra, es muy primitivo: no tiene control ni interruptor de encendido, mucho menos fusible o protector eléctrico.
Al dejarla olvidada sin desconectarle de la toma eléctrica, calentó sin detenerse y la barra se derritió dentro de la carcasa, es todo un desastre.
Para poder separar las cubiertas, me ayudé de la estación de aire caliente, podía haber usado un buen secador de cabello en la máxima potencia, de no haber tenido la estación de aire.
El corazón de la herramienta en sí es una resistencia que se sostiene con una grapa, en un lado de un tubo metálico. Conectada al cable que va a la toma de la pared. El resto es un gatillo plástico dentro de la carcasa de la pistola, contenido con un resorte para empujar la barra por el tubo.
El cable que trae de fábrica, es de un calibre muy bajo, de calidad muy dudosa, es uno de los motivos por lo que es muy económica.
Por lo general, suelo cambiarlo, y les recomiendo, si tienen el conocimiento para hacerlo, es una buena idea. Pero yo en esta ocasión no había hecho el cambio, al pasar mucho tiempo funcionando solo, el cable barato se derritió e hizo varios cortos dentro del forro plástico. Gracias a dios no se incendió y no paso nada grave.
Solo pude recuperar el tope plástico que evita que se parta el cable, lo voy a reciclar. Así que uso una broca de 4 mm (5/32”), para limpiar y aumentar el agujero por donde pasara el cable que usaré.
Aprovecho un cable que recicle de una lámpara dañada, que es de mucha mejor calidad que el que traen de fábrica estas aplicadoras de silicona.
Acá un dato importante, lo primero a comprobar antes de avanzar con el trabajo en cualquiera de estas pistolas es verificar la resistencia. Es el corazón del equipo, si está dañada, entonces: las partes buenas de la pistola quedan como repuesto para otra que se llegue a dañar.
Como referencia medí las demás aplicadoras de silicona que tengo en el taller. Son marcas, tamaños y potencias diferentes, pero me ayudarán a tener una idea de cuanto debería medir la que estoy reparando.
Los valores van desde 1200 a 4400 Ohm, así que un valor de 4 Ohm me indica que no está abierta la resistencia, pero el daño es otro. Es lo que acostumbramos a decir en corto circuito.
Fue un poco decepcionante, pero solo puedo reciclar las partes, (solo me duro unos once años de uso. Igual, gracias por todo). Sin perder el ánimo, aprovecho el cable que ya había preparado para la reparación y lo usaré para cambiarlo en otra pistola de aplicar silicona, que tenía el cable deteriorado.
Si le falta o se pierde el tope de goma que protege al cable, al final de la carcasa, el cable puede comenzar a partirse.
Soldé a la resistencia, protegí la soldadura con un forro de termocontráctil y luego coloque el mecanismo que empuja la barra, fije el resorte.
Para armar hay que colocar un trozo de barra, para hacer el trabajo más fácil.
Espero tener más cuidado y poder trabajar por un largo tiempo más con esta otra aplicadora de silicona.
Muchas gracias por pasar y leerme.
He usado el traductor de Google para el idioma Inglés.
Las imágenes fueron hechas en mi taller, durante el proceso de reparación.
Como siempre, es buena idea, tomar un curso ligero de capacitación en electricidad. Si no tiene los conocimientos básicos: le recomiendo encarecidamente no trabajar con electricidad.
Que tengan una excelente semana.
Paz.
I am sorry that you could not save the first gun, but 11 years is a very good length of time for an electrical tool. I enjoy reading your repairs. !pizza
Thank you. I usually take great care of my tools, they have fed me, and for me, they are like old friends.
I am glad that you like my work, I put a lot of encouragement into each repair or service.
Likewise, I will be happy even more, if at some point you find it useful.
This post has been manually curated by @bhattg from Indiaunited community. Join us on our Discord Server.
Do you know that you can earn a passive income by delegating to @indiaunited. We share more than 100 % of the curation rewards with the delegators in the form of IUC tokens. HP delegators and IUC token holders also get upto 20% additional vote weight.
Here are some handy links for delegations: 100HP, 250HP, 500HP, 1000HP.
Please contribute to the community by upvoting this comment and posts made by @indiaunited.
I am very pleased to greet you once again, my good friends. I hope you have a very good week.
https://twitter.com/2165453306/status/1615181170270142464
The rewards earned on this comment will go directly to the people( @pedrobrito2004 ) sharing the post on Twitter as long as they are registered with @poshtoken. Sign up at https://hiveposh.com.
Wow hombre, qué hermosas herramientas de trabajo tiene y qué satisfactoria reparación has hecho, hacer este tipo de reparaciones toman su tiempo y paciencia, de hecho nos relaja, la otra vez estuve haciendo una reparación de un pedal de máquina de cocer, el resultado fue satisfactorio, lo mejor fue ver la cara de alegría de mi esposa por haberle reparado la máquina.
Sí, es muy cierto. Cuando logras hacer estas reparaciones, el sentimiento de satisfacción es muy agradable. Más que un trabajo, para mí es un momento divertido. Lo paso muy bien.
Que bueno que usted piense de la misma manera.
Gracias por leerme y dejar un comentario. Espero que tenga una buena semana. De preferencia, muy tranquila.
Yay! 🤗
Your content has been boosted with Ecency Points, by @soltecno.
Use Ecency daily to boost your growth on platform!
Support Ecency
Vote for new Proposal
Delegate HP and earn more
Thanks for the support, I really appreciate it. I hope you spend a calm week and in the best possible health.
Qué genial nos enseñes a reparar esto, personalmente he reparado algunos pero no me duran mucho, esos cables que traen son muy débiles para la cantidad de calor que hace dentro de la pistola, siempre se terminan rompiendo quemando, derritiendo, ponerle un cable nuevo más grueso como veo en las imágenes y como explicas es lo mejor, además de tomar todas las precauciones que indicas.
Sí, es un detalle en estas herramientas. Asumo que es en parte para venderlas a un precio bastante bajo. Pero en verdad es mejor cambiar el cable por uno de mejor calidad, número 16 AWG o 14 AWG. No vale la pena colocar un cable más grueso porque se corre el riesgo de quemar la resistencia.
El peligro de que haga corto el cable: es que puede llegar a causar un accidente.
Muchas gracias por leerme y comentar. Lo aprecio mucho.
Lo ves de afuera y parece un sistema más complejo pero la verdad que es sencillo, no tenia ni idea que si quedaba conectado podia arruinarse, uno pensaria que no es asi pero bueno en el post se puede ver lo que pasa. No todo siempre se puede salvar auque hasta ahora venias invicto pero que bueno que recuperaste algunas piezas, no tengo una pistola de silicona pero en varias ocaciones llegue a necesitarle y pense en comprar una pero por uno u otro motivo no lo compre. ¿Tenes idea si todas las pistolas de silicona son asi o hay alguna mejor que otra? La verdad que desconozco y me entro la curiosidad.
Saludos, amigo. Lo cierto es que he llegado a ver una marca que otra de calidad, en una compañía en que trabaje, y era igual. Pero los materiales y el cable eléctrico era de mejor calidad.
Por lo menos en las marcas que he reparado los últimos veinte años, no he visto variaciones.
He estado pensando en recrearla, colocando un sistema mejor. Pero aún no termino las ideas. No sé si hay un modelo mejor hoy día.
El problema sería de que el costo es tan barato de las que consigues en las tiendas, que no podría competir a nivel comercial. Pero si me sería útil hacer un modelo a mi medida, para uso personal.
Gracias por pasar un momento y comentar la publicación.
Claro super entiendo porque en general la gente lo compra para utilizar en alguna manualidad o reparación y tal vez como no lo usan tanto no se les rompe al corto plazo. Yo estaba pensando más en un usuario cosplayer por ejemplo que lo usa para sus prendas y creaciones pero es verdad, entre comprar un aparato caro que te dure más tiempo y otro que es casi descartable por el precio la gente se decanta por esta ultima opcion ademas que seguramente es super economico el sistema que tiene para producir a gran escala por eso todas las marcas usan lo mismo.
Congratulations @soltecno! You have completed the following achievement on the Hive blockchain And have been rewarded with New badge(s)
Your next payout target is 2000 HP.
The unit is Hive Power equivalent because post and comment rewards can be split into HP and HBD
You can view your badges on your board and compare yourself to others in the Ranking
If you no longer want to receive notifications, reply to this comment with the word
STOPCheck out our last posts:
Greetings, it's nice to be able to greet you. I hope you are as well as possible and that this new year is generous with good for you.
Now I have to work to reach the next goal.
We can't wait to see you get new badges @soltecno! 😉