Hacks led bulb [Eng+Spa]
English

Greetings from my workshop, wishing and hoping that you have a calm and very productive week. We're still trying to solve the computer problem, so I won't be very active for a few days.
I take advantage of the opportunity to share in the DIY community. And it is something that I enjoy, repairing and improving everything that falls within my reach to the best of my ability.
Some time ago, I was given a led floodlight as a gift, and I took the opportunity to improve its performance and shared the process in a post.
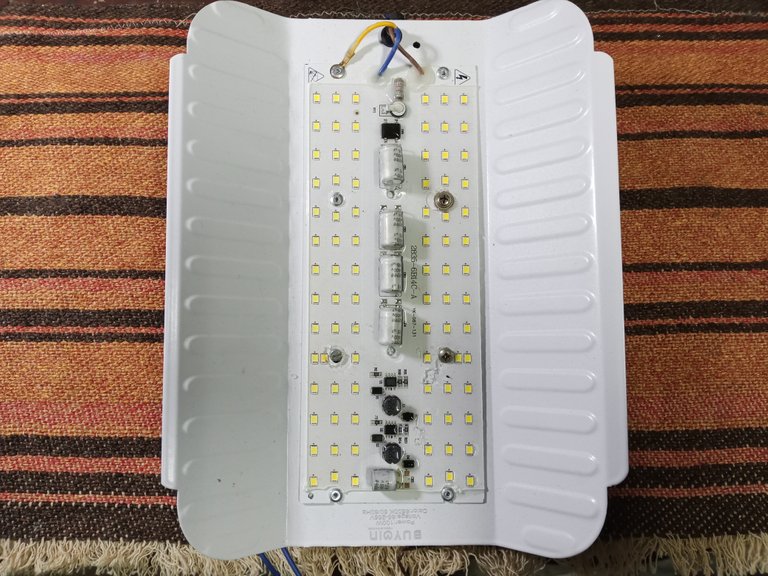
It could lower the intensity of the current and thus extend the useful life of the leds and also had the option of improving heat dissipation, which is what causes the leds to be damaged over time.
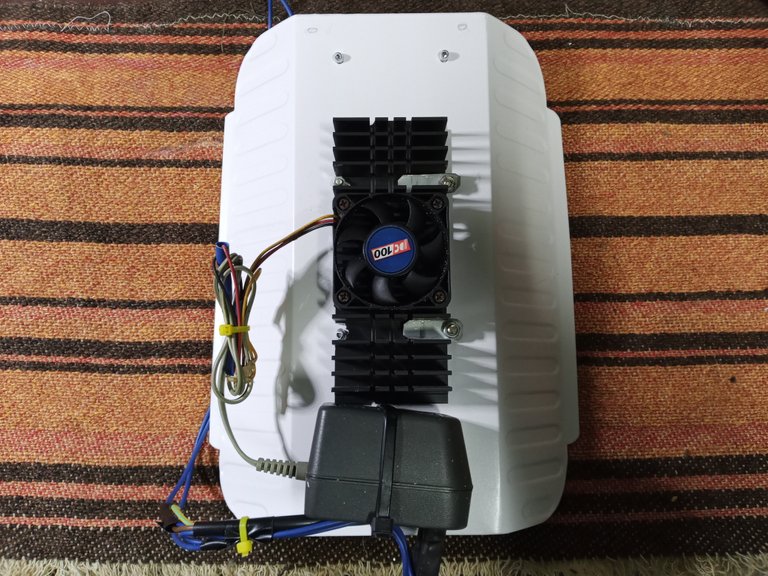
Opt to improve the heat sink by adding a PC cooler with its respective fan.
And in the comments, one of you suggested that I improve a light bulb for regular use. And that's what this post will be about, add a heatsink instead of lowering the current intensity of the leds, which would lengthen the life time of the led. But, on the other hand, it would reduce the brightness of the bulb, it would not shine as brightly.
What I did was to improve heat dissipation, passively, it was not practical to place a fan.
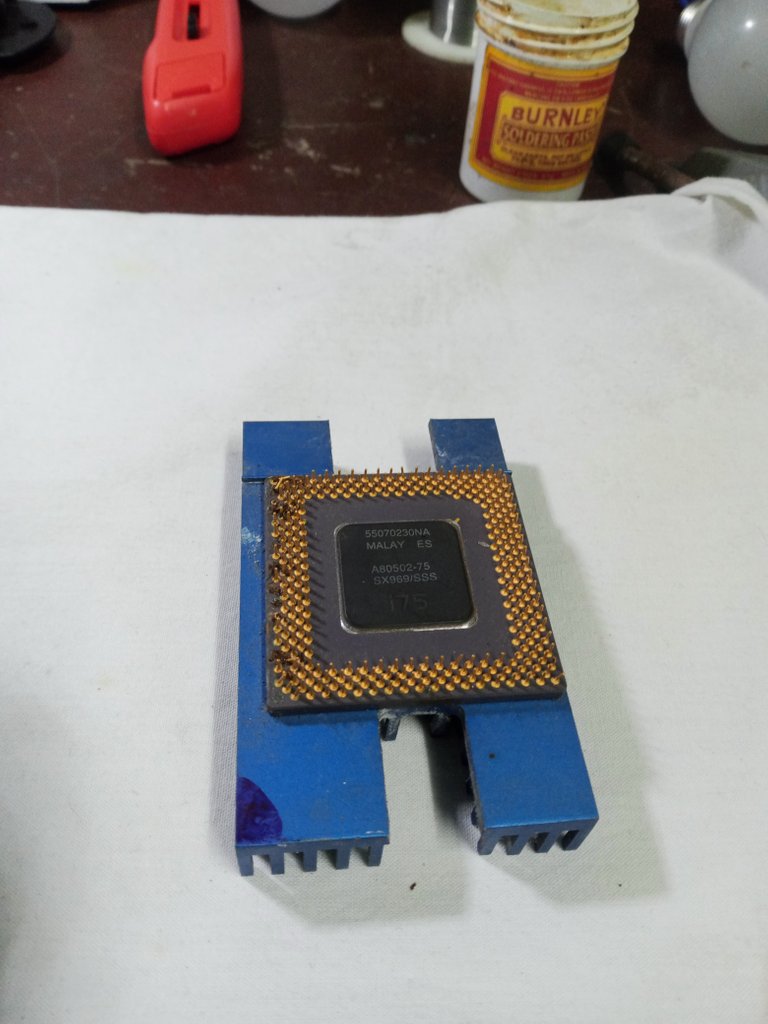
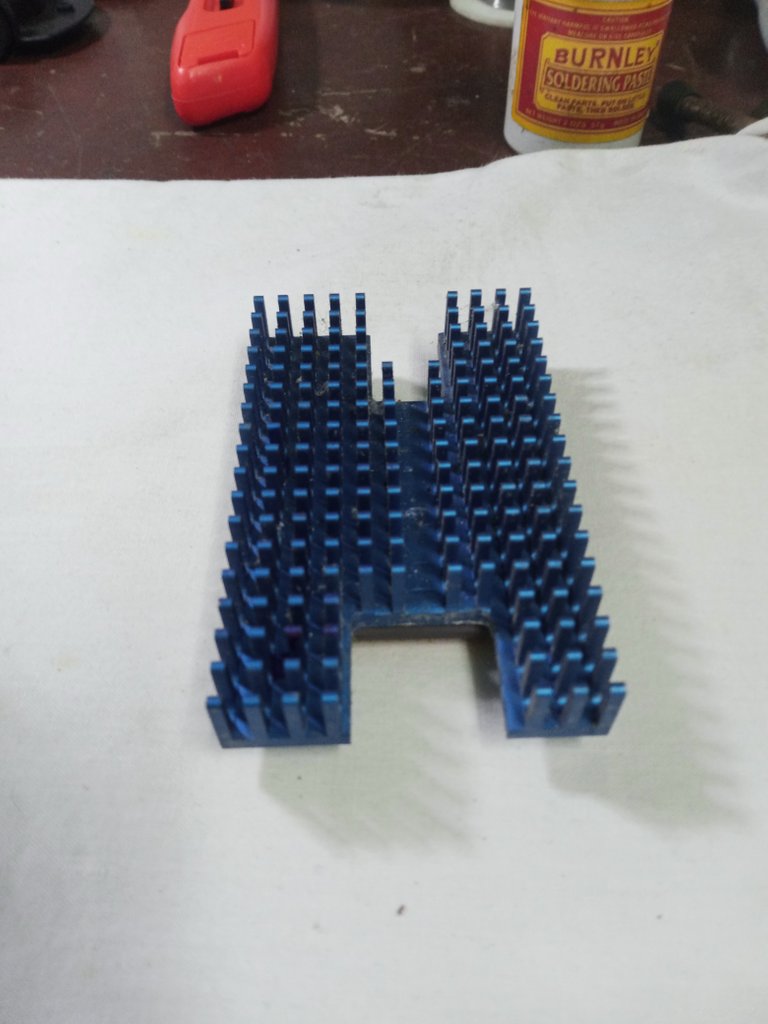
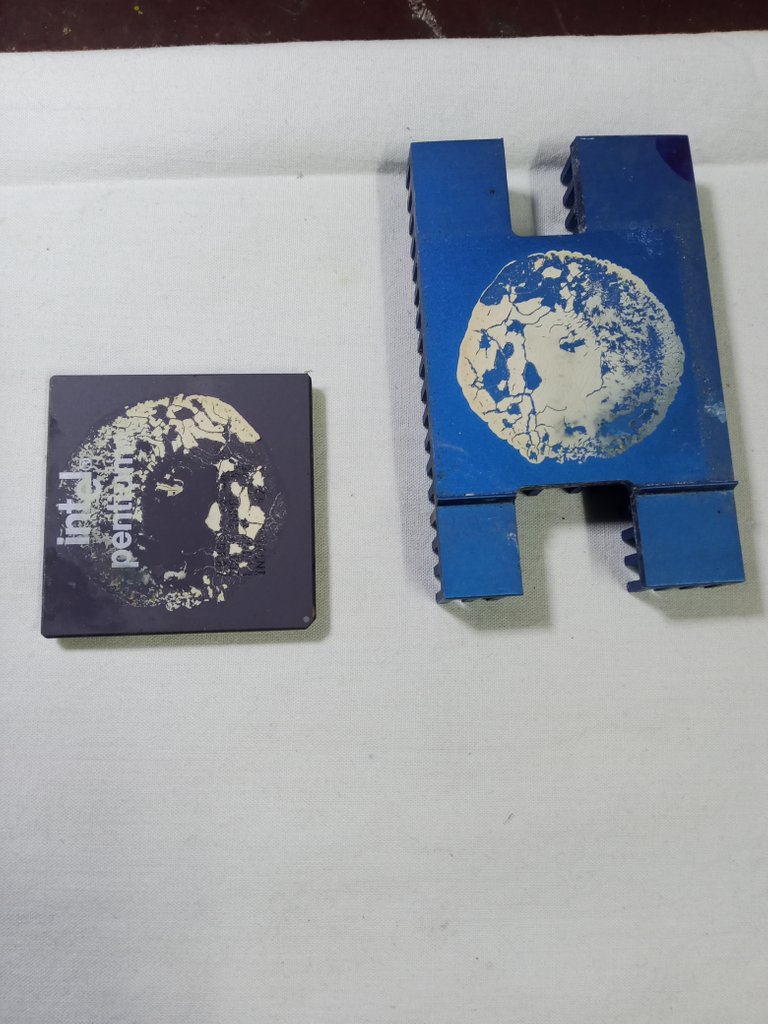
A recycled aluminum heatsink from a computer was simpler. I have a number of parts in the spare parts warehouse, and I was able to get a Pentiun heatsink, which I thought was quite appropriate.
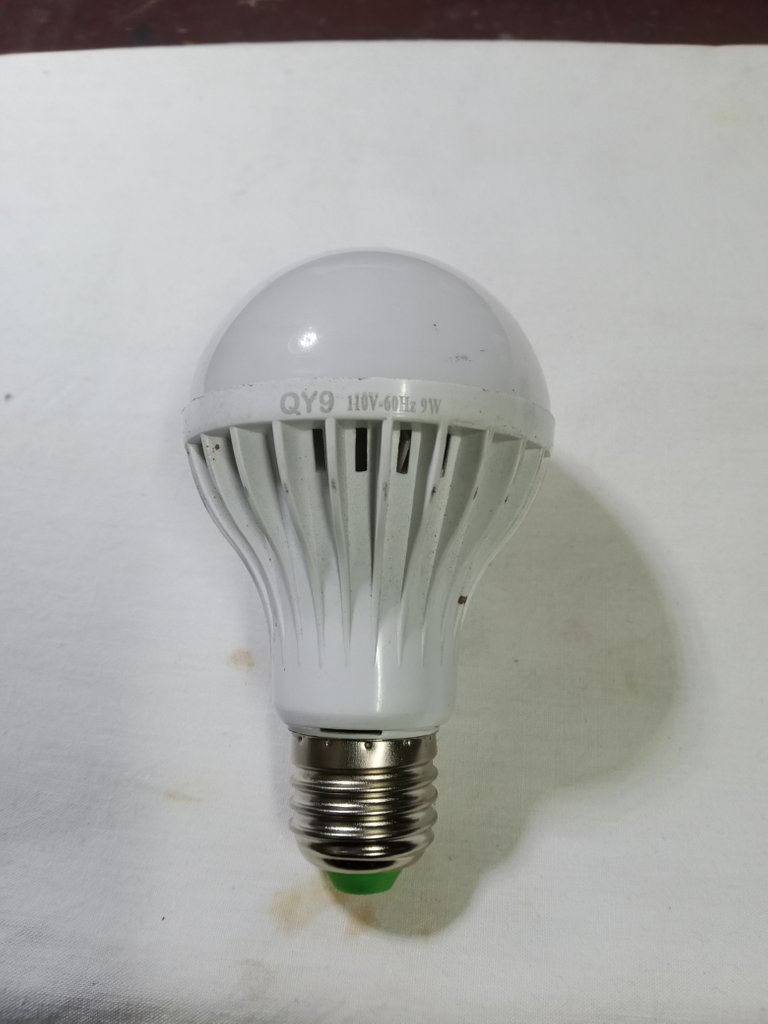
Take advantage of a damaged led bulb that you had to work on.
Separate the heatsink from its integrated and remove the remains of thermal paste.
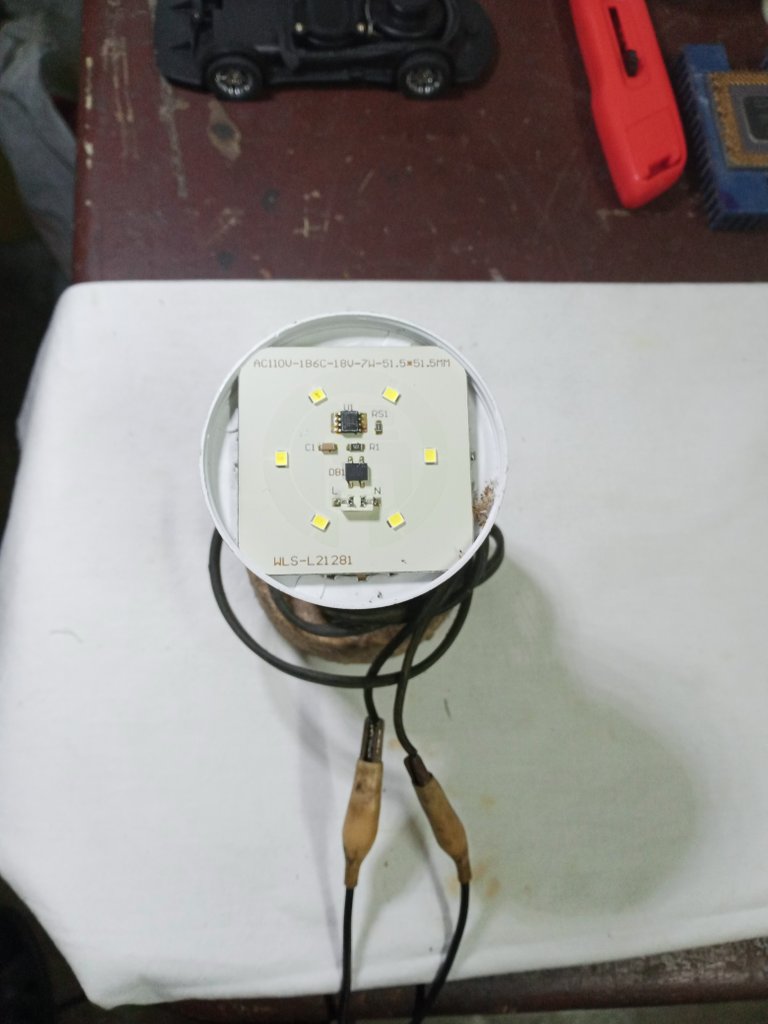
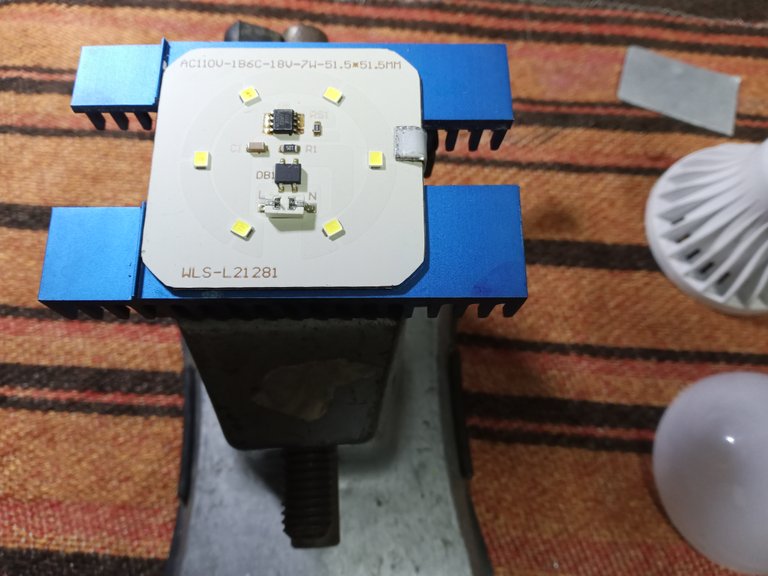
I made a template with the led plate, to make the perforation through which the power supply cable would pass and that the whole set fit without problems.
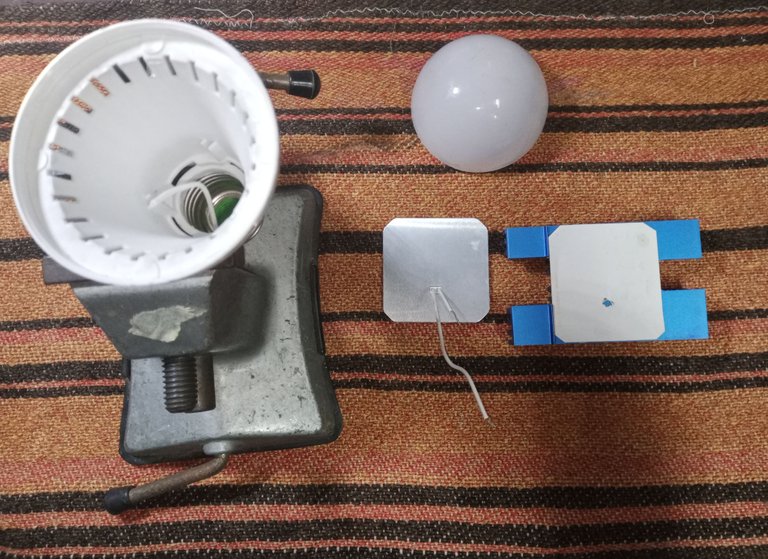
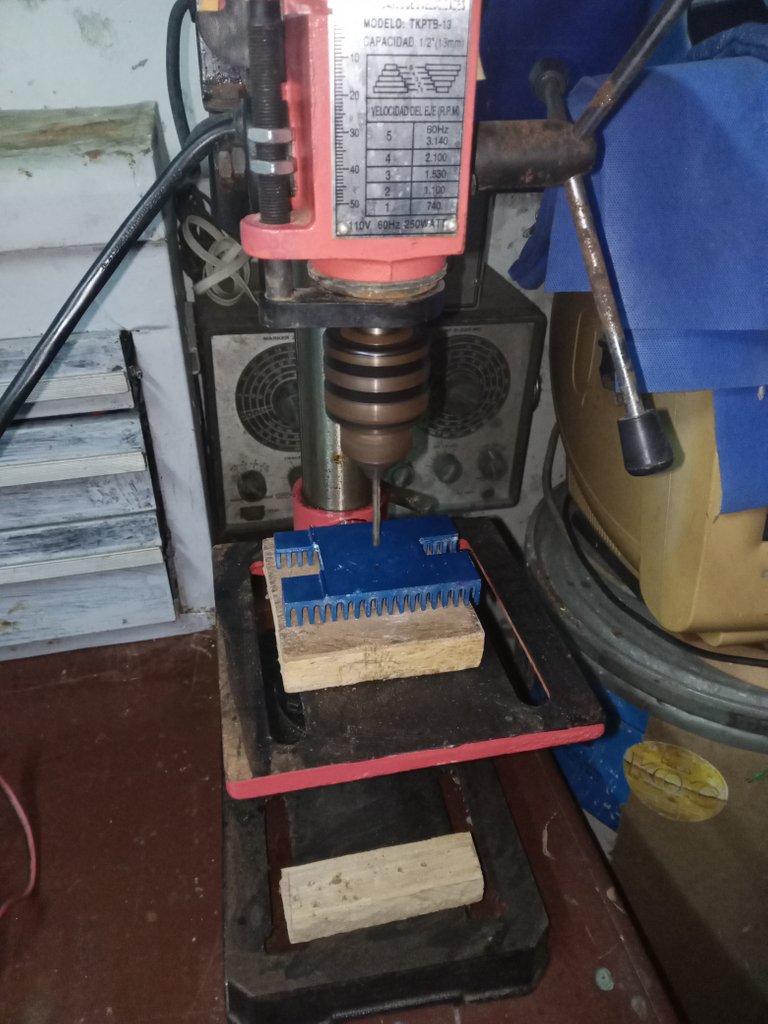
I put the whole together, add thermal paste and secure the aluminum heatsink with a clip made from a piece of recycled sheet metal from a computer case.
Now at this point I could make: a decorative lamp or assemble the light bulb on its plastic base with its E-27 thread for the socket for regular use. And since the idea was to make a light bulb for normal use that could last longer without losing its shine, I assembled the light bulb on a base with its thread.
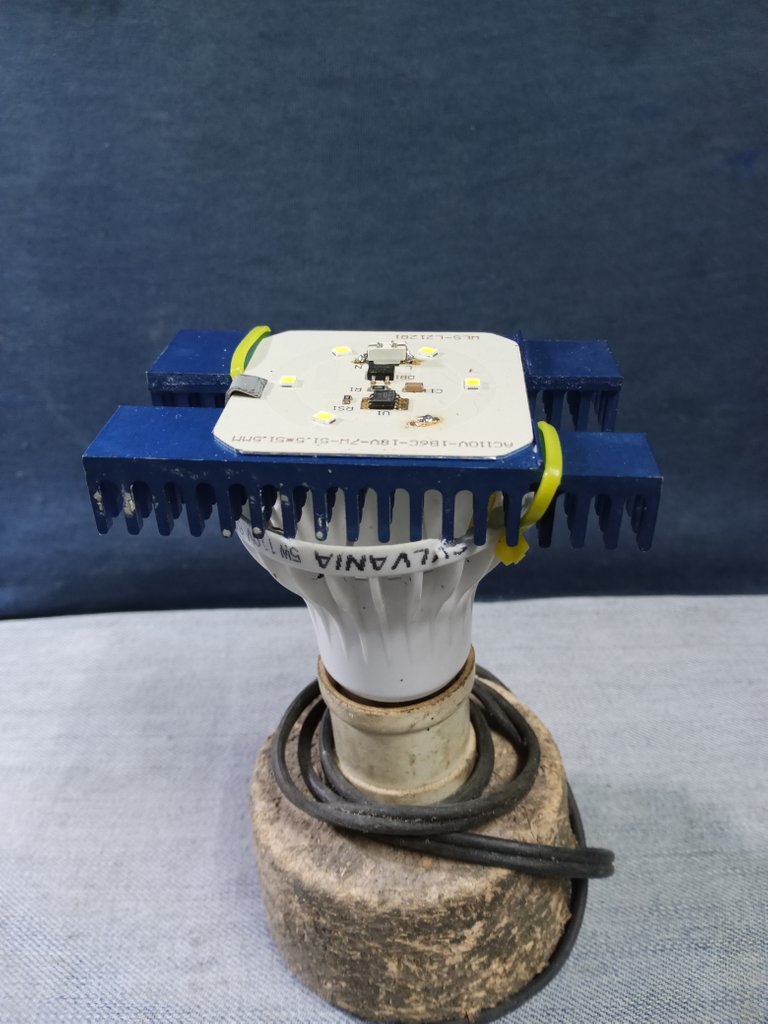
I had to lengthen the cables a little more, the factory length is very fair, I used cables that I recovered from computer connections. And fasten the heatsink to the base with zip ties.
I wasn't going to put in the white plastic shade, to give it an industrial look, something out of the ordinary, to make the light bulb look interesting. But then my brother told me that it was better to place the plastic screen so that the light was distributed more evenly.
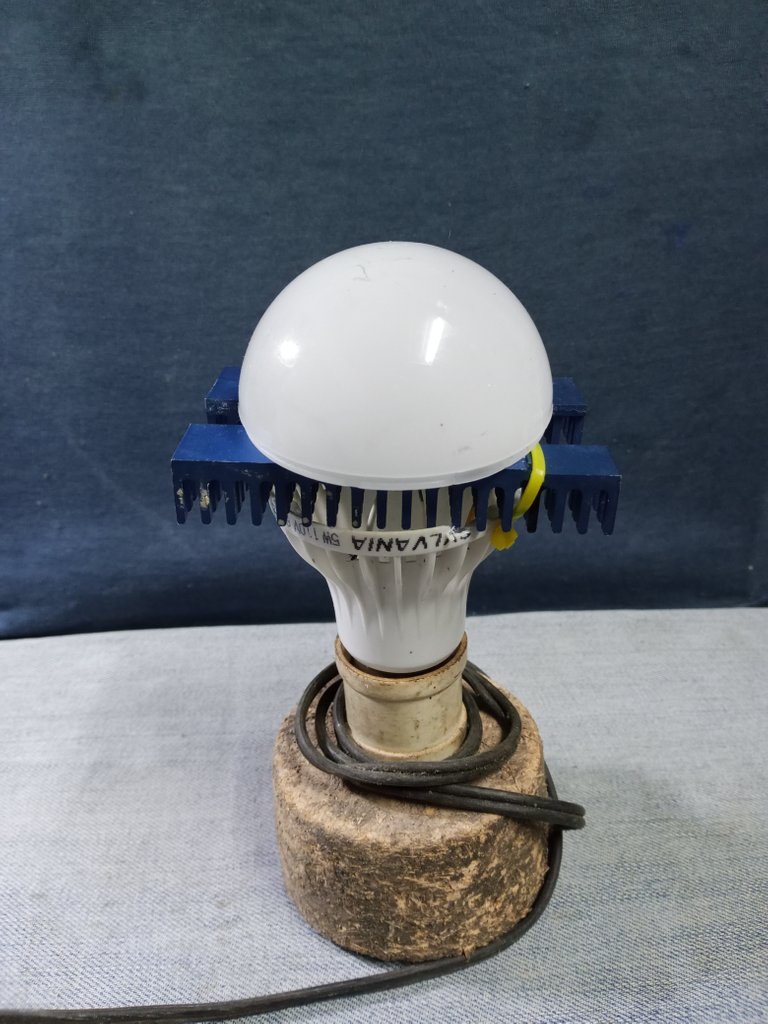
So in the end I put the white screen with some epoxy, just a little, in case I have to check it later.
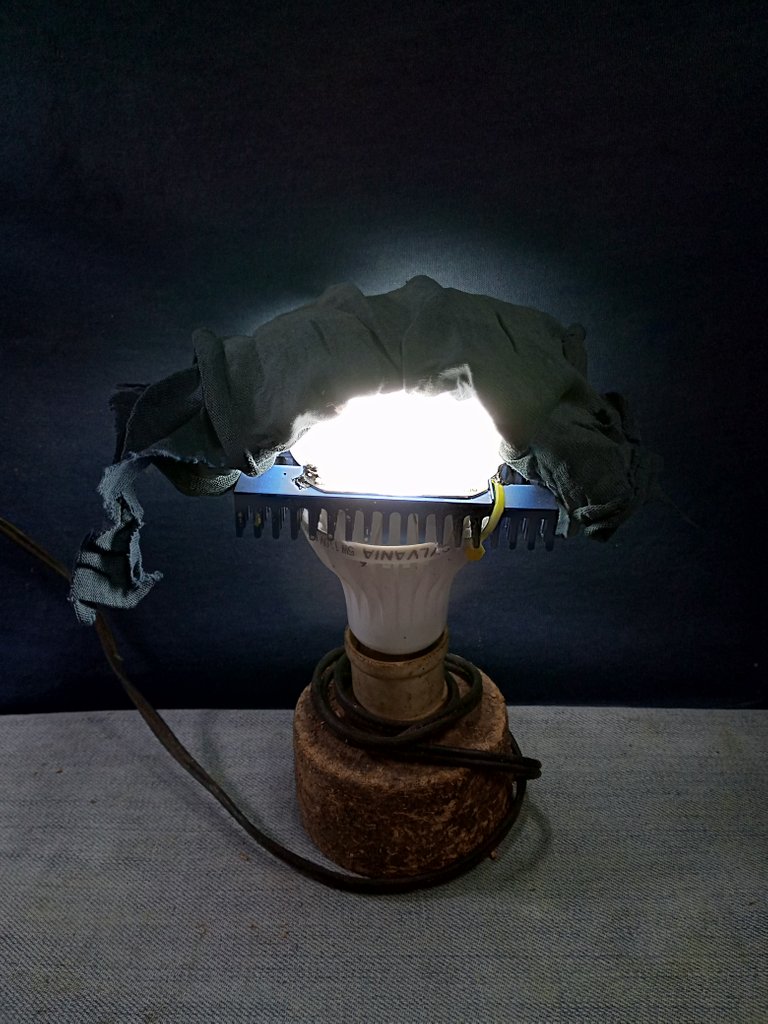
Place a piece of cloth on top of the light to be able to take the image.
It's an experiment, now it should increase the life of the bulb by a lot, the amount of heat it can handle is much higher now and the leds should work safer.
I am confident that it will improve the life time of the leds, even so I have to test how long it works to verify if the ideas are valid in real world practice.
Thank you very much for stopping by and reading.
Have a great day.
Peace.
If you do not have basic knowledge in electricity, I recommend that you do not intervene electrical equipment, to avoid accidents.
It's not a tutorial, I'm just sharing a little of my work from the workshop, and maybe you can get an idea that will be useful to you.
The images are captures of my work in the workshop.
I have used Google translate for the English language.
Español
Saludos, desde mi taller deseando y esperando que tengan una semana tranquila y muy productiva. Aún estamos tratando de resolver el problema del computador, así que no estaré muy activo por unos días.
Aprovecho que tengo la oportunidad de compartir en la comunidad DIY. Y es algo que disfruto, reparar y mejorar en la medida de mis posibilidades todo lo que cae en mi alcance.
Hace un tiempo, me regalaron un reflector de led, y aproveché la oportunidad para mejorar su funcionamiento y compartí el proceso en una publicación.
Podía bajar la intensidad de la corriente y así alargar la vida útil de los leds y también tenía la opción de mejorar la disipación de calor, que es lo que a la larga del tiempo hace que se dañen los leds.
Opte por mejorar el disipador de calor agregando un disipador de PC con su respectivo ventilador.
Y en los comentarios alguno de ustedes, me propuso hacer la mejora de un bombillo de uso regular. Y de eso tratará esta publicación, agregue un disipador en vez de bajar la intensidad de la corriente de los leds, lo que alargaría el tiempo de vida del led. Pero, por otra parte, reduciría el brillo del bombillo, no alumbraría con tanta intensidad.
Lo que hice fue en mejorar la disipación del calor, de forma pasiva, no era práctico colocar un ventilador.
Era más sencillo un disipador de aluminio reciclado de un computador. Tengo en el depósito de repuestos cantidad de partes, y pude conseguir un disipador de Pentiun, que me pareció bastante apropiado.
Aproveche un bombillo led dañado en que tenía que trabajar.
Separe el disipador de su integrado y elimine los restos de pasta térmica.
Hice una plantilla con la placa de los leds, para hacer la perforación por donde pasara el cable de alimentación eléctrica y que calce todo el conjunto sin problemas.
Armo el conjunto, agrego pasta térmica y aseguro al disipador de aluminio con un clip hecho con un trozo de lámina reciclada de un case de computador.
Ahora en este punto ya podía hacer: una lámpara decorativa o armar el bombillo en su base plástica con su rosca E-27 para el sócate de uso regular. Y como la idea era hacer un bombillo de uso normal que pueda durar más tiempo sin perder su brillo, arme el bombillo en una base con su rosca.
Tuve que alargar los cables un poco más, el largo de fábrica queda muy justo, use cables que recupere de conexiones de computador. Y ajuste el disipador a la base con abrazaderas plásticas.
No iba a colocar la pantalla blanca de plástico, para darle un aspecto industrial, algo fuera de lo común, que el bombillo tuviese un aspecto interesante. Pero luego me comento mi hermano que era mejor colocar la pantalla plástica para que la luz se distribuyera de forma más uniforme.
Así que al final coloque la pantalla blanca con algo de epoxi, solo un poco, por si más adelante me tocase revisarlo.
Coloque un trozo de tela encima de la luz para poder sacar la imagen.
Es un experimento, ahora debería aumentar la vida útil del bombillo por mucho, la cantidad de calor que puede manejar es mucho mayor ahora y los leds deberían trabajar más seguros.
Tengo confianza que mejore el tiempo de vida de los leds, aun así tengo que probar cuanto tiempo funciona para verificar si la ideas son válidas en la práctica del mundo real.
Muchas gracias por pasar y leerme.
Que tengan un excelente día.
Paz.
Si no tienes conocimientos básicos en electricidad, te recomiendo que no intervengas equipos eléctricos, para evitar accidentes.
No es un tutorial, solo les comparto un poco de mi trabajo del taller, y que tal vez le puedan sacar una idea que les sea útil.
Las imágenes son capturas de mi trabajo en el taller.
He usado el traductor de Google para el idioma inglés.
This post has been manually curated by @bhattg from Indiaunited community. Join us on our Discord Server.
Do you know that you can earn a passive income by delegating to @indiaunited. We share more than 100 % of the curation rewards with the delegators in the form of IUC tokens. HP delegators and IUC token holders also get upto 20% additional vote weight.
Here are some handy links for delegations: 100HP, 250HP, 500HP, 1000HP.
100% of the rewards from this comment goes to the curator for their manual curation efforts. Please encourage the curator @bhattg by upvoting this comment and support the community by voting the posts made by @indiaunited.
Greetings, thank you very much for the support.
Yay! 🤗
Your content has been boosted with Ecency Points, by @soltecno.
Use Ecency daily to boost your growth on platform!
Support Ecency
Vote for new Proposal
Delegate HP and earn more
Thanks for supporting my work.
Have a nice day.
https://twitter.com/2165453306/status/1638428828845391872
The rewards earned on this comment will go directly to the people( @pedrobrito2004 ) sharing the post on Twitter as long as they are registered with @poshtoken. Sign up at https://hiveposh.com.
De verdad que terminó con un aspecto interesante.
Stay !ALIVE
!LOLZ
!GIF Good Job!
!MEME
!PGM
!LUV
!CTP
Via Tenor
BUY AND STAKE THE PGM TO SEND A LOT OF TOKENS!
The tokens that the command sends are: 0.1 PGM-0.1 LVL-0.1 THGAMING-0.05 DEC-15 SBT-1 STARBITS-[0.00000001 BTC (SWAP.BTC) only if you have 2500 PGM in stake or more ]
5000 PGM IN STAKE = 2x rewards!
Discord
Support the curation account @ pgm-curator with a delegation 10 HP - 50 HP - 100 HP - 500 HP - 1000 HP
Get potential votes from @ pgm-curator by paying in PGM, here is a guide
I'm a bot, if you want a hand ask @ zottone444
@soltecno! You Are Alive so I just staked 0.1 $ALIVE to your account on behalf of @pedrobrito2004. (3/10)
The tip has been paid for by the We Are Alive Tribe through the earnings on @alive.chat, feel free to swing by our daily chat any time you want.

Credit: unuma
Earn Crypto for your Memes @ HiveMe.me!
Caramba! Leer con detalle todo tu trabajo, tu ingenio y ver que funciona, es impresionante. Me ha encantado, es un hack en definitiva con mucha utilidad y seguiste tratando que mantenga estética. Gracias por compartir con nosotros.
Es realmente muy sencillo en los últimos modelos de bombillos. Y puede doblar el tiempo de vida útil. A la larga nos ahorra algo de dinero.
Gracias por pasar un momento y dejar un comentario.
Congratulations, your post has been upvoted by @dsc-r2cornell, which is a curating account for @R2cornell's Discord Community. We can also be found on our hive community & peakd as well as on my Discord Server
Felicitaciones, su publication ha sido votado por @dsc-r2cornell. También puedo ser encontrado en nuestra comunidad de colmena y Peakd así como en mi servidor de discordia
Saludos, muchas gracias por el apoyo @abiga554. Me alegro de que le haya parecido interesante mi publicación.
Espero que alguien más vea la información, le sea útil y llegue a crear algo mejor.
I would recommend using thermal paste for better heat transfer.
although the aluminum half foot does an excellent job of dissipating heat.
I always thought that the weak point of LED lamps is the current driver for LEDs.
Greetings, yes, I put thermal paste on it, but I didn't think it was necessary to add more images.
It is normal that when placing a heatsink we add the thermal paste, so I did not think it was necessary to add the image.
I didn't want to make the post too long.
Thanks for coming and commenting.
Me gusta que hayas planteado una solución pero no lo consideres una realidad absoluta, en el sentido que esta probando si realmente funciona y alarga su vida útil. Desconocía totalmente que los leds podían dañarse por la temperatura y esa relaciona que existe entre la potencia que brindan y el calor que tienen que manejar. Siempre se aprenden cosas interesantes contigo.
Los leds son puestos a trabajar al límite de su capacidad en estos bombillos. Por eso su vida es tan reducida.
En mejores condiciones, ya sea bajando la intensidad de la corriente o mejorando la forma de manejar el calor. Pueden durar mucho tiempo más en servicio.
Probé bajando la intensidad de la corriente, pero entonces brillaban mucho menos. No me gusto mucho esa solución, que muchos otros han aplicado, así que mejore la forma de manejar el calor.
Usar un ventilador, era posible, pero no era muy práctico. Un disipador era una forma de manejar la temperatura de forma simple y más practica.
Muchas gracias por pasar y comentar amigo.