Preparación para una fiesta de disfraces/ Preparing for a costume party
Hola comunidad de Hive y makers de C/3D Printing espero que estén teniendo una buena semana. Les cuento, una amiga cumple años esta semana y me invito a una fiesta con temática de Harry Potter, no soy super fan de la franquicia, me gustan solo las primeras tres películas.
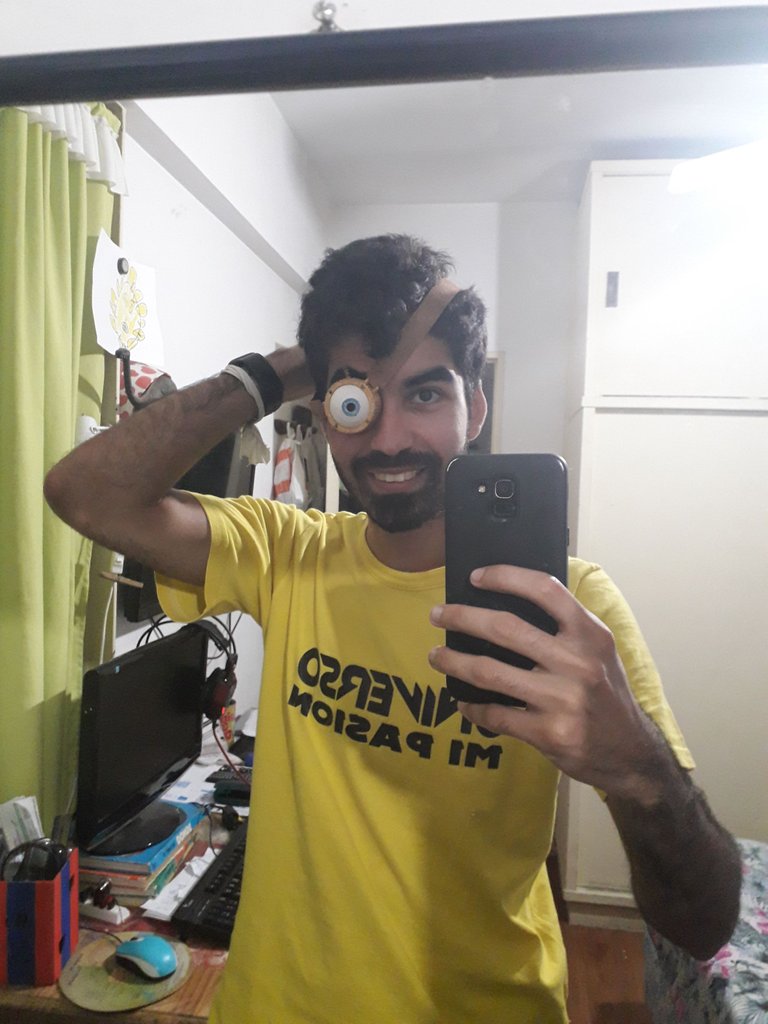
Mi amiga me dijo que tenía que ir disfrazado de Alastor Ojoloco Moody que es el personaje que tiene una prótesis ocular mágica, así que como cuento con una impresora decidí imprimirme un ojo que encontré en thinguiverse.
Además, decidí imprimir la primera varita de Albus Dumbledore de regalo para mi amiga.
Hello community of Hive and makers of C / 3D Printing I hope you are having a good week. I'll tell you, a friend has a birthday this week and she invited me to a Harry Potter-themed party, I'm not a super fan of the franchise, I only like the first three movies.
My friend told me that I had to go dressed up as Alastor Mad-Eye Moody, who is the character who has a magic eye prosthesis, so since I have a printer I decided to print an eye that I found on thinguiverse.
Also, I decided to print the first Albus Dumbledore wand as a gift for my friend.
https://www.thingiverse.com/thing:1761058
https://www.thingiverse.com/thing:3648956
Para imprimir el ojo utilice la siguiente configuración.
Altura de capa 0.1 (Es una pieza con mucho detalle y necesito que se vea bien)
Grosor de pared de 0.8
Relleno 15% Giroide
Boquilla 210º
Cama caliente 50º
Velocidad 40 mm/s
Soporte en árbol
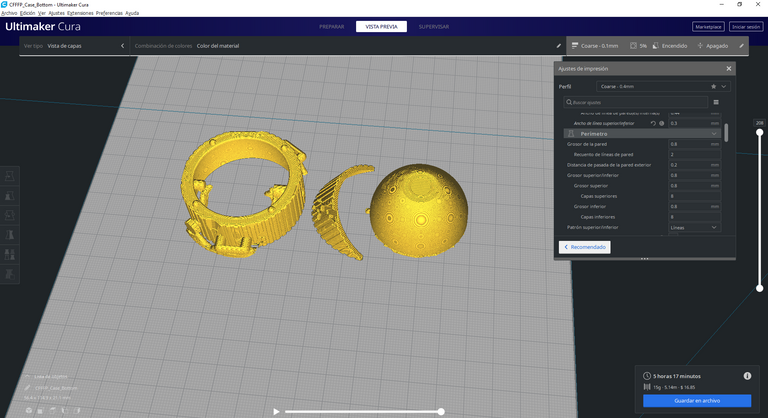
To print the eye use the following settingsLayer height 0.1 (It is a piece with a lot of detail and I need it to look good)
0.8 wall thickness
Filling 15% Gyroid
210º nozzle
Heated bed 50º
Speed 40 mm / s
Tree support
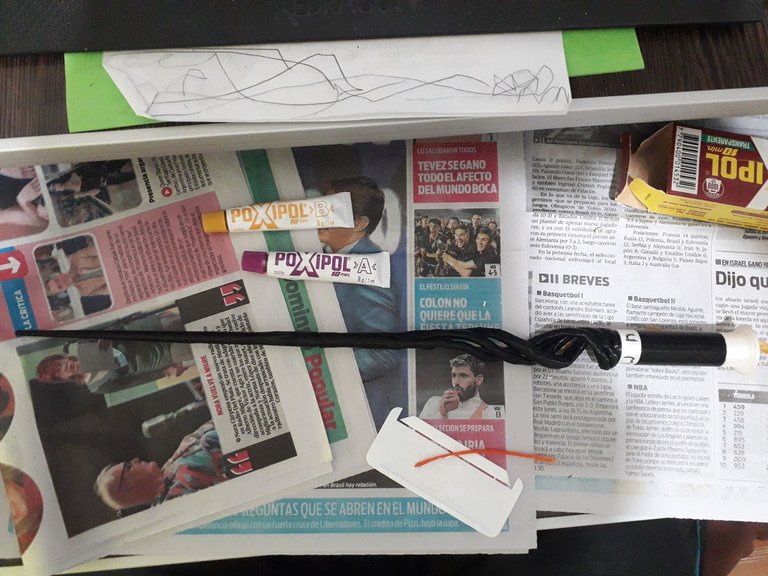
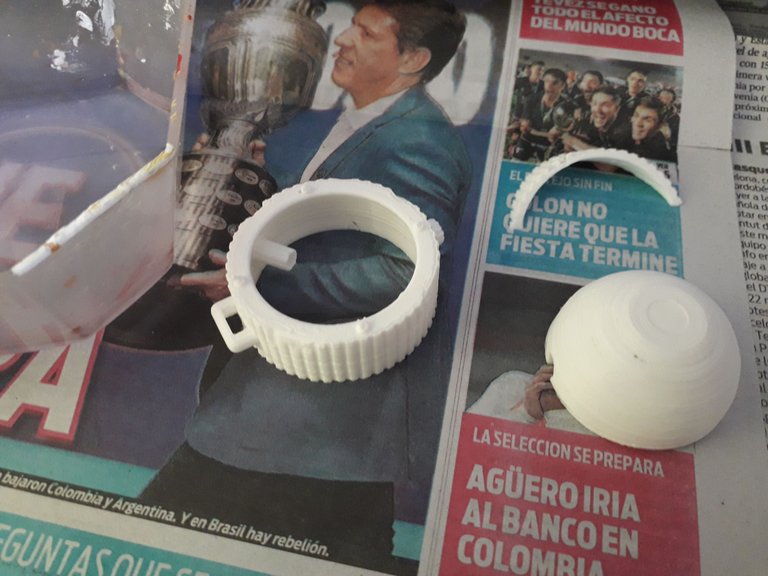
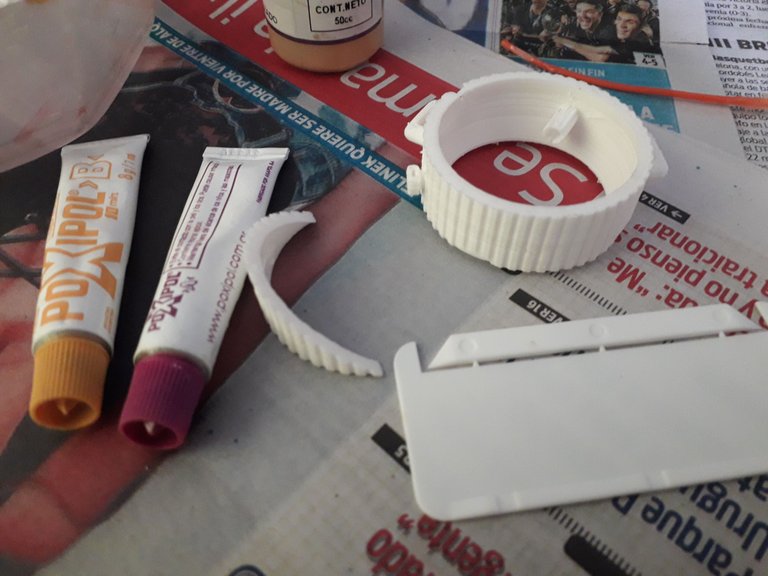
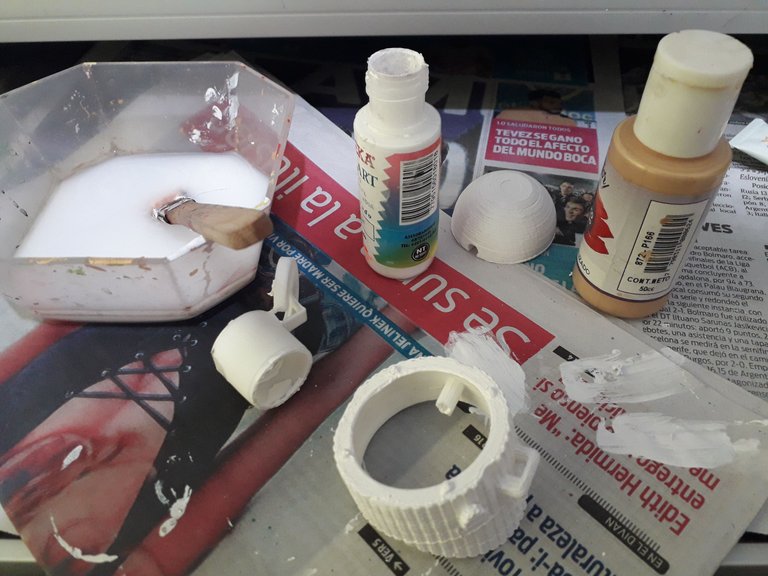
Decidí imprimir las piezas por separado, así cuando salía una ya las podía ir pintando. Comencé con unas capas de acrílico blanco, para que las siguientes capas se unieran bien. Espere un rato a que seque (Mentira encendí el ventilador para que se seque más rápido porque soy muy ansioso) y utilice pegamento epoxi para unir las piezas del marco, este pegamento cuando seca es realmente resistente. Posteriormente aplique unas capas de acrílico dorado para darle su color tan característico, mientras esperaba a que seque esa parte comencé a pintar el ojo con un iris azul y a realizar algunos detalles.
I decided to print the pieces separately, so when one came out I could paint them. I started with a few layers of white acrylic, so that the next layers would bond well. Wait a while for it to dry (Lie I turned on the fan to make it dry faster because I am very anxious) and use epoxy glue to join the frame pieces, this glue when dry is really resistant. Later, I applied a few layers of golden acrylic to give it its characteristic color, while I waited for that part to dry I began to paint the eye with a blue iris and to make some details.
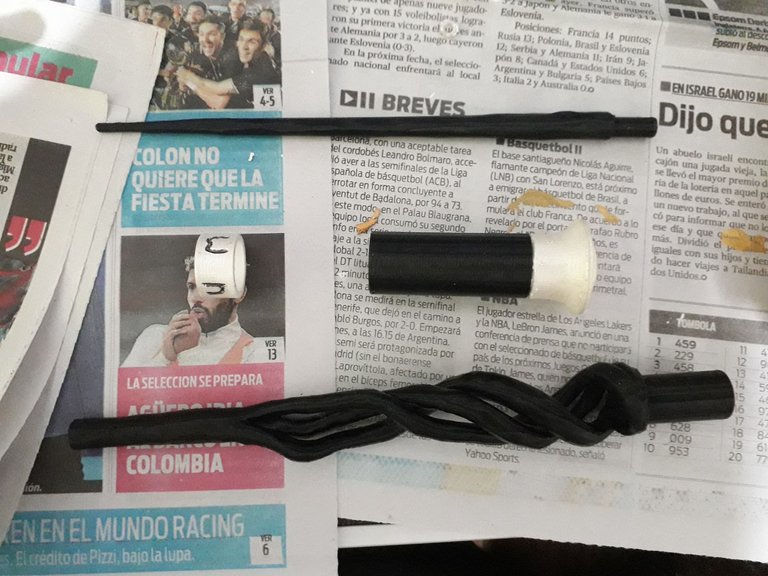
Mientras estaba esperando a que sequé el acrílico comencé a ensamblar la varita que había impreso, para ir aprovechando el tiempo. No voy a extenderme mucho ya que no tiene mayor complicación para imprimir, más que nada la punta de la varita tiene que tener mucho relleno para que sea resistente y no se rompa. Pinte las piezas blancas con un blanco perlado para que quede brilloso y agregue un detalle negro con microfibras negras en las runas de la varita. Uní las piezas y las fijé con pegamento epoxi.
While I was waiting for the acrylic to dry, I began to assemble the wand that I had printed, to take advantage of the time. I am not going to extend much since it does not have major complications to print, more than anything the tip of the wand has to have a lot of padding so that it is resistant and does not break. Paint the white pieces with a pearl white to make it shiny and add a black detail with black microfibers on the runes of the wand. I joined the pieces and fixed them with epoxy glue.
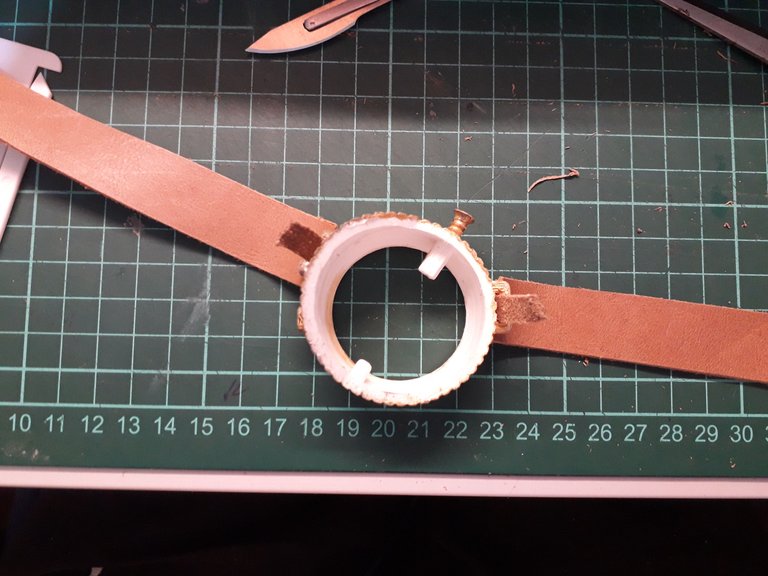
Volviendo a la prótesis del ojo, tras esperar a que secara comencé a agregar detalles de desgaste con una mezcla de negro y dorado, además de usar blanco para generar detalles de reflejo como si la pieza fuera de metal, mientras esperaba que seque comencé a cortar unas tiras de cuero que tenia de un retazo en mi cuarto y lo uní a las ranuras del costado del marco.
Returning to the eye prosthesis, after waiting for it to dry I began to add wear details with a mixture of black and gold, in addition to using white to generate reflective details as if the piece were metal, while waiting for it to dry I began to cut some strips of leather that I had from a scrap in my room and attached it to the grooves on the side of the frame.
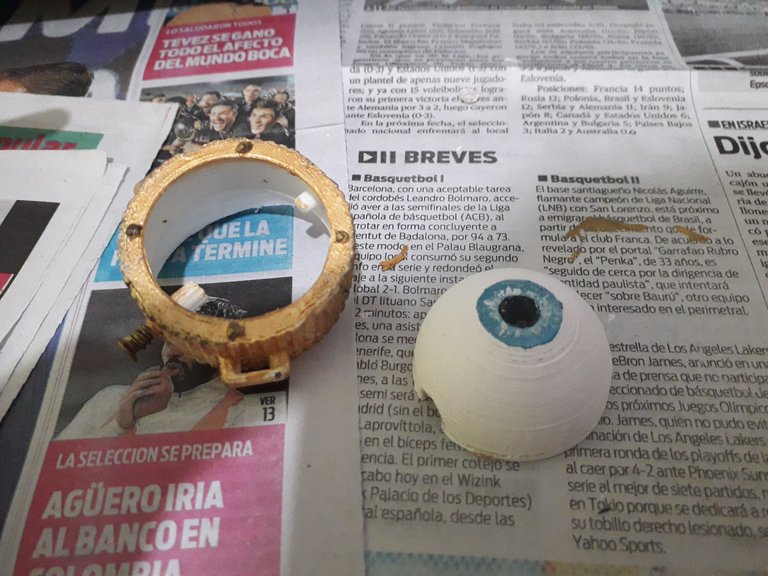
A las piezas les di unas capas de laca al agua transparente para que queden mas brillosos, aparte este detalle en el ojo queda genial ya que lo hace verse un poco mas realista y reaviva los colores. Ensamble todo y quedo listo para utilizarse en la fiesta de cumpleaños, el único detalle que todavía no resolví es como voy a engancharlo a mi cabeza.
I gave the pieces some layers of transparent water-based lacquer to make them more shiny, apart this detail in the eye is great since it makes it look a little more realistic and revives the colors. Assemble everything and it is ready to be used at the birthday party, the only detail that I have not resolved yet is how I am going to attach it to my head.
Your artistic ability shines high through 3D printing. The Alastor Mad-Eye Moody look is the perfect look for you for this occasion, and that Albus Dumbledore wand came out really nice too! This was a very thoughtful 3D printed/handmade gift for your friend!
Fantastic job my friend, keep up the great work!
Muchas gracias, realmente disfrute mucho hacer estos trabajos. Con el tiempo quiero seguir trayendo cosas interesantes para el grupo
Congratulations @nitsuga12! You have completed the following achievement on the Hive blockchain and have been rewarded with new badge(s):
Your next target is to reach 20 posts.
You can view your badges on your board and compare yourself to others in the Ranking
If you no longer want to receive notifications, reply to this comment with the word
STOPTo support your work, I also upvoted your post!
Check out the last post from @hivebuzz: