Diseño de chapas identificatorias para mascotas/ Design of identification badges for pets
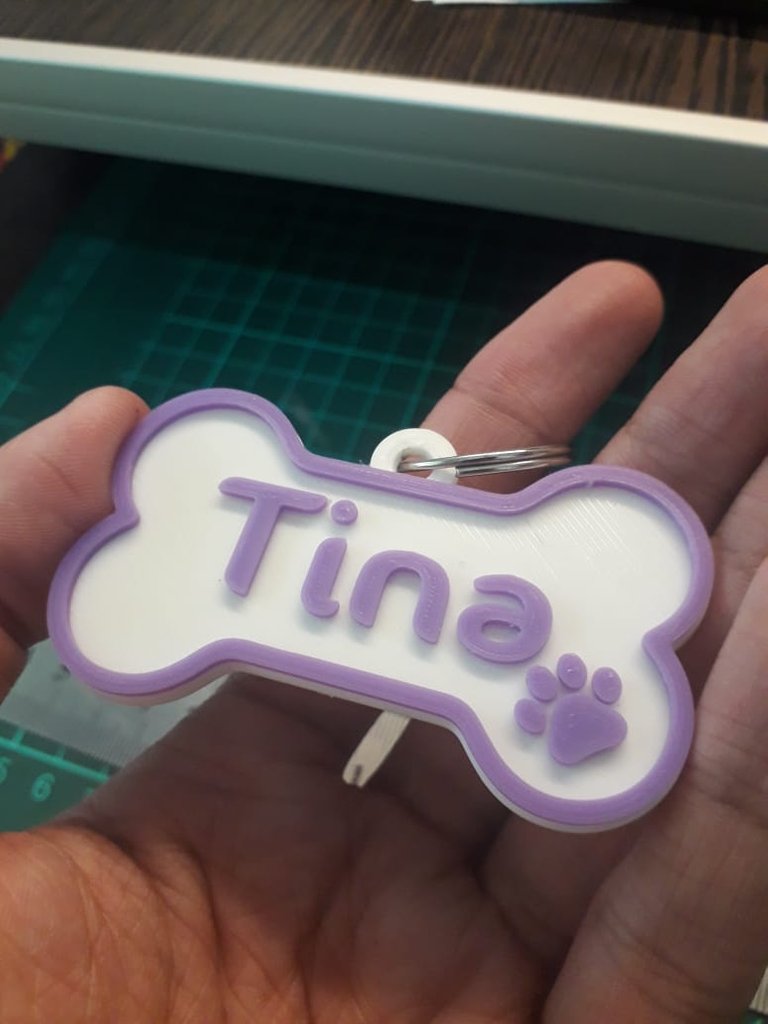
Hola makers de la comunidad de hive, soy Nitsu y hoy quiero mostrarles como hago chapas identificatorias para perro. Hace un tiempo se me ocurrió diseñar unas chapas simples para venderlas y tuvieron un buen éxito durante un tiempo.
Hello makers of the hive community, I'm Nitsu and today I want to show you how I make dog tags. Some time ago I had the idea to design some simple dog tags to sell and they had a good success for a while.
Las chapas están totalmente diseñadas por mí, la base y el reborde de la chapa las vuelvo a usar para no tener que rediseñarlas siempre y lo único que voy haciendo es cambiar el nombre y el número de teléfono.
The badges are totally designed by me, the base and the flange of the badge I reuse them so I don't have to redesign them every time and the only thing I keep doing is changing the name and the phone number.
Yo utilizo Photoshop para generar una imagen PNG del nombre y del número para posteriormente en Illustrator vectorizarlos y guardarlos como SVG para poder abrirlos en el programa Tinkercad, esta explicación es a grandes rasgos como para que vayan teniendo una idea, pero ahora voy a ir explicando mejor cada paso para que ustedes, si quieren puedan empezar a venderlas, hacerlas para sus mascotas o regalársela a alguna mascota de familiar o conocido.
I use Photoshop to generate a PNG image of the name and the number to later vectorize them in Illustrator and save them as SVG to be able to open them in the Tinkercad program, this explanation is just to give you an idea, but now I will explain each step better so that you can start selling them, make them for your pets or give them as a gift to a pet of a relative or acquaintance.
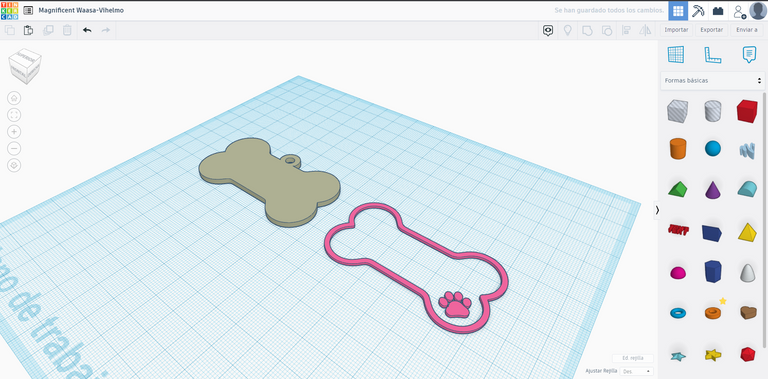
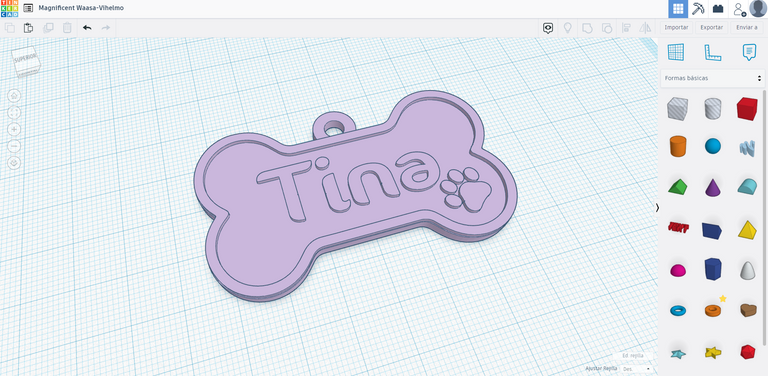
Primero comencé abriendo el programa online Tinkercad, importe los STL de la base y el reborde de la chapa.
First I started by opening the online program Tinkercad, imported the STLs of the base and the sheet metal flange.
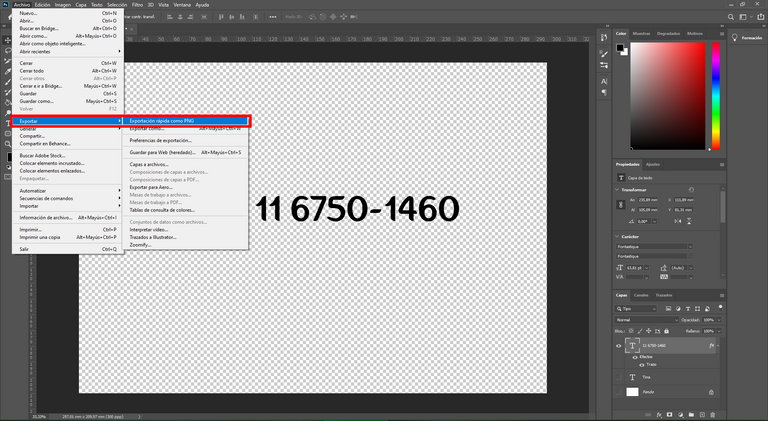
Posteriormente abrí Photoshop, agarré la herramienta de texto y elegí una tipografía que me pareció interesante para hacer esta chapa. Una recomendación que puedo dar sobre la tipografía es que elijan una que sea fácil de leer y que no tenga mucha complejidad ya que recordemos que tenemos que imprimirla y tiene que poder entenderse. Cuando ya tenemos el nombre del animal y el número exportamos las imágenes en PNG.
Then I opened Photoshop, grabbed the text tool and chose a font that I found interesting to make this badge. A recommendation I can give about the typography is to choose one that is easy to read and that does not have too much complexity since we have to remember that we have to print it and it has to be understandable. Once we have the name of the animal and the number we export the images in PNG.
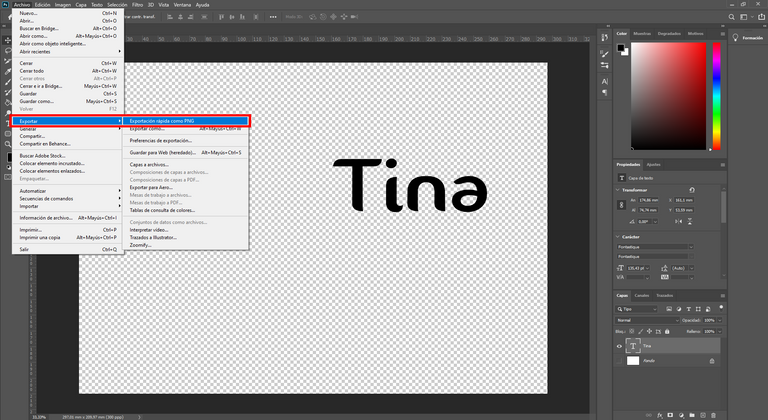
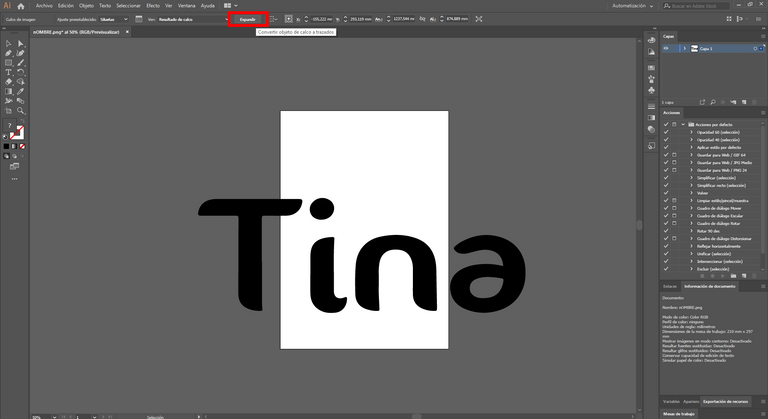
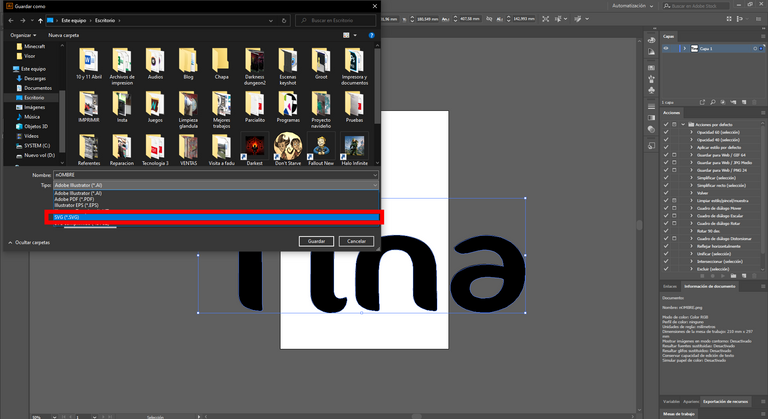
Abrimos los archivos PNG con Illustrator para vectorizarlos, seleccionamos la imagen, le hacemos clic y en la barra superior elegimos CALCO DE IMAGEN y apretamos sobre SILUETA, para que solo detecte la silueta de la imagen. Tras hacer esto hacemos clic en el botón de la barra que dice expandir. Ya en este momento podemos guardar el archivo como .SVG
We open the PNG files with Illustrator to vectorize them, select the image, click on it and in the upper bar choose IMAGE CALC and click on SILhouette, so that it only detects the silhouette of the image. After doing this we click on the expand button on the bar. Now we can save the file as .SVG.

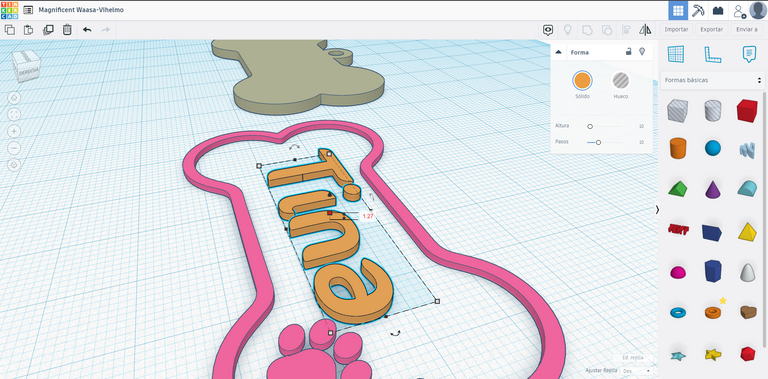
Hacemos lo mismo con ambas imágenes así podemos exportarlos en tinkercad, cuando ya tenemos todos los archivos podemos elegir los espesores e ir acomodando las cosas. En mi experiencia recomiendo que la base tenga un espesor de 2.5 mm de esta forma contamos con el espesor suficiente para poner el número de teléfono ya que este será un bajo relieve y al mismo tiempo es lo suficientemente ancho para tener una buena resistencia. En el caso del nombre y el reborde de la chapa yo coloco un espesor de 1.2 o 1.5mm, esta parte al ser más fina recomiendo que no sea muy alta porque se puede romper.
We do the same with both images so we can export them in tinkercad, when we have all the files we can choose the thicknesses and go arranging things. In my experience I recommend that the base has a thickness of 2.5 mm in this way we have enough thickness to put the phone number as this will be a low relief and at the same time is wide enough to have a good resistance. In the case of the name and the flange of the plate I place a thickness of 1.2 or 1.5mm, this part being thinner I recommend not to be too high because it can break.

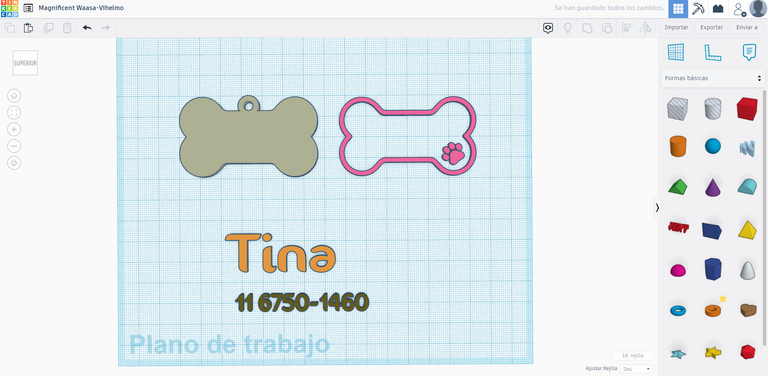
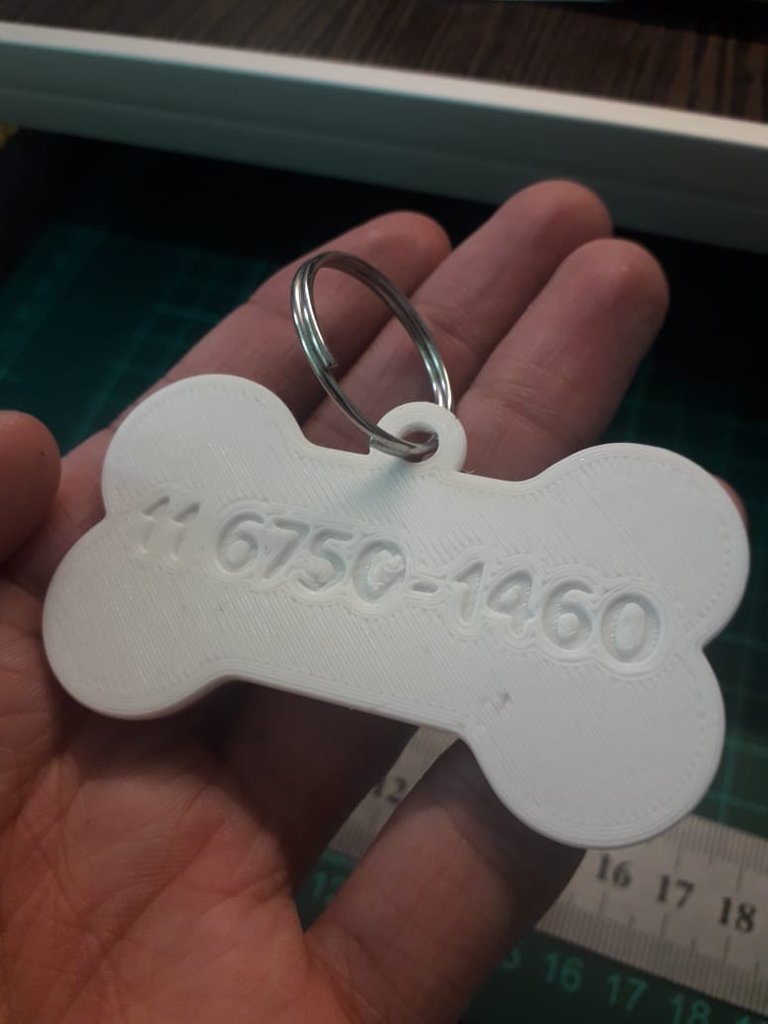
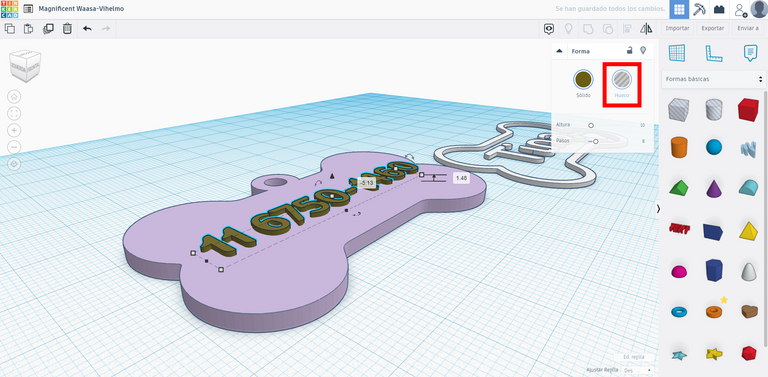
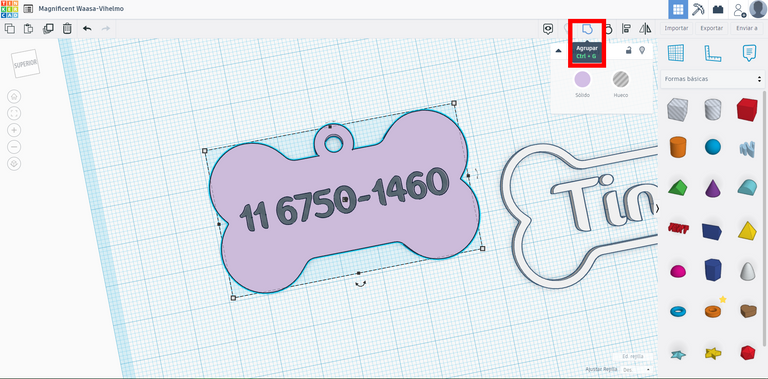
Coloque el número de contacto en caso de extravió debajo de la chapa y seleccione que esa pieza sea hueca, de esta manera generamos una especie de corte logrando así dejar un bajo relieve del número, al terminar esto hay que seleccionar ambas piezas y fusionarlas para que quede todo unido.
Place the contact number in case of loss under the sheet metal and select that piece to be hollow, in this way we generate a kind of cut thus leaving a low relief of the number, when this is finished you have to select both pieces and merge them so that everything is united.
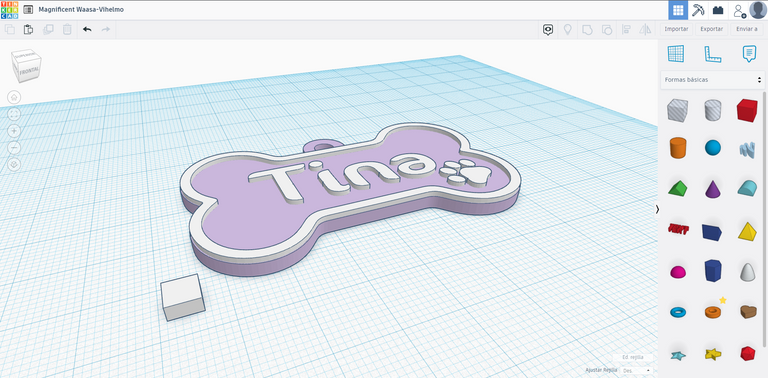
Por últimos tenemos dos opciones para imprimirlo, podemos fusionar la base junto al reborde superior e imprimirlo en nuestro laminador cambiando el Gcode para deterlo en determinada capa y cambiar el color. Sino la otra opción es generar un pequeño cubo con el espesor de la pieza inferior y fusionar este cubo con la pieza superior, de esta manera al terminar de imprimir la pieza de abajo e imprimir la siguiente pieza la impresora imprime hasta esa altura y luego continúa imprimiendo sobre la pieza, pero esta explicación la voy a dejar para otro momento, yo personalmente decidí imprimir cambiando el Gcode desde mi laminador.
Finally we have two options to print it, we can merge the base together with the top flange and print it in our laminator changing the Gcode to determine it in a certain layer and change the color. But the other option is to generate a small cube with the thickness of the bottom piece and merge this cube with the top piece, this way when you finish printing the bottom piece and print the next piece the printer prints up to that height and then continues printing on the piece, but I will leave this explanation for another time, I personally decided to print by changing the Gcode from my laminator.
Notas
El texto fue traducido con DeepL
Notes The text was translated with DeepL
Nice work, man.
What slicer do you use? In Cura slicer you can define the z offset so you don't need to print the little cube when changing color. ;-) I've printed the HIVE-BLOG logo and the christmas ornaments like that.
Uso el CURA, lo que no me gusta de esa técnica que solo te da 5 o 10 segundos para cambiar el color, no tengo la maquina cerca así que si no escucho cuando termina pierdo la impresión