How I Upgraded my Video Editing Skills Part 2!
Hello Hivers, I am back again, and I want to continue my story on how my video editing skills have been improved.
hope you enjoyed part one, and here is the continuation.
As I said earlier, about how skeptical I was at the beginning of the program, and how things changed after a couple of days, I became really excited, I couldn’t even wait for the next couple of days so I could go back and learn more.
The first week of training was mainly about the basics of editing, and so when I went on Monday (the following week) we moved on to the effects aspect, which is more technical and complicated than transitions. Many times I watched music videos, or edited videos in general, I always wondered how it was done, and this was probably the main reason I joined the training, because I wanted to know all about effects and visuals.
I always thought you could only perform them on an app called ‘Adobe After Effects’ and it was as I started learning, I knew Premier Pro is actually very effective when comes to effects.
We began with locating the effects panel, and when I got there, I saw different effects that I never thought I would set my eyes on. There were different effect categories, and each category had no less than five effects under them.
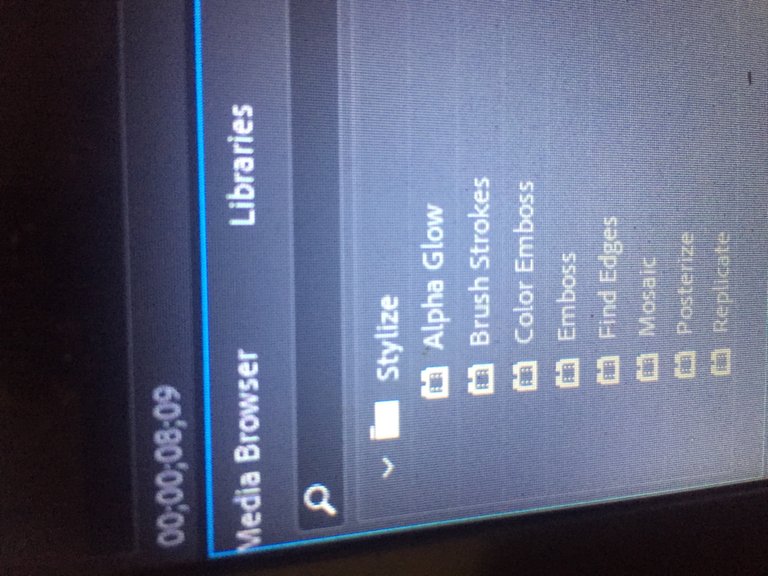
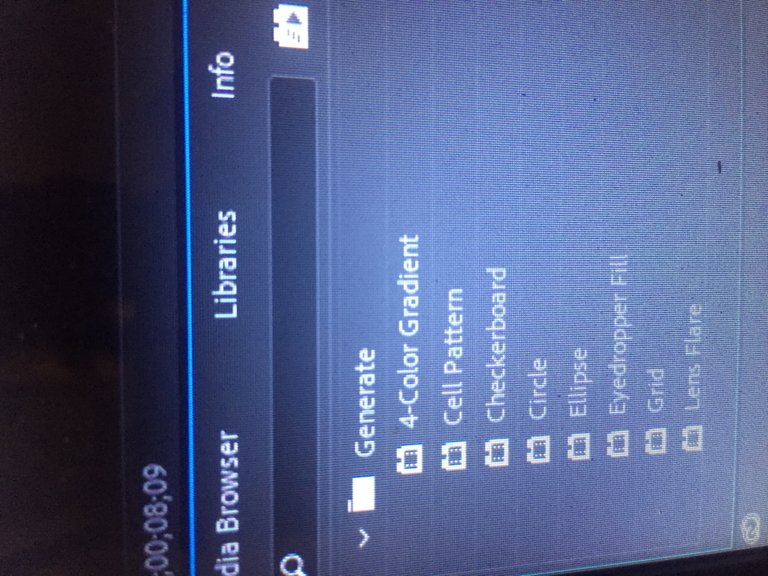
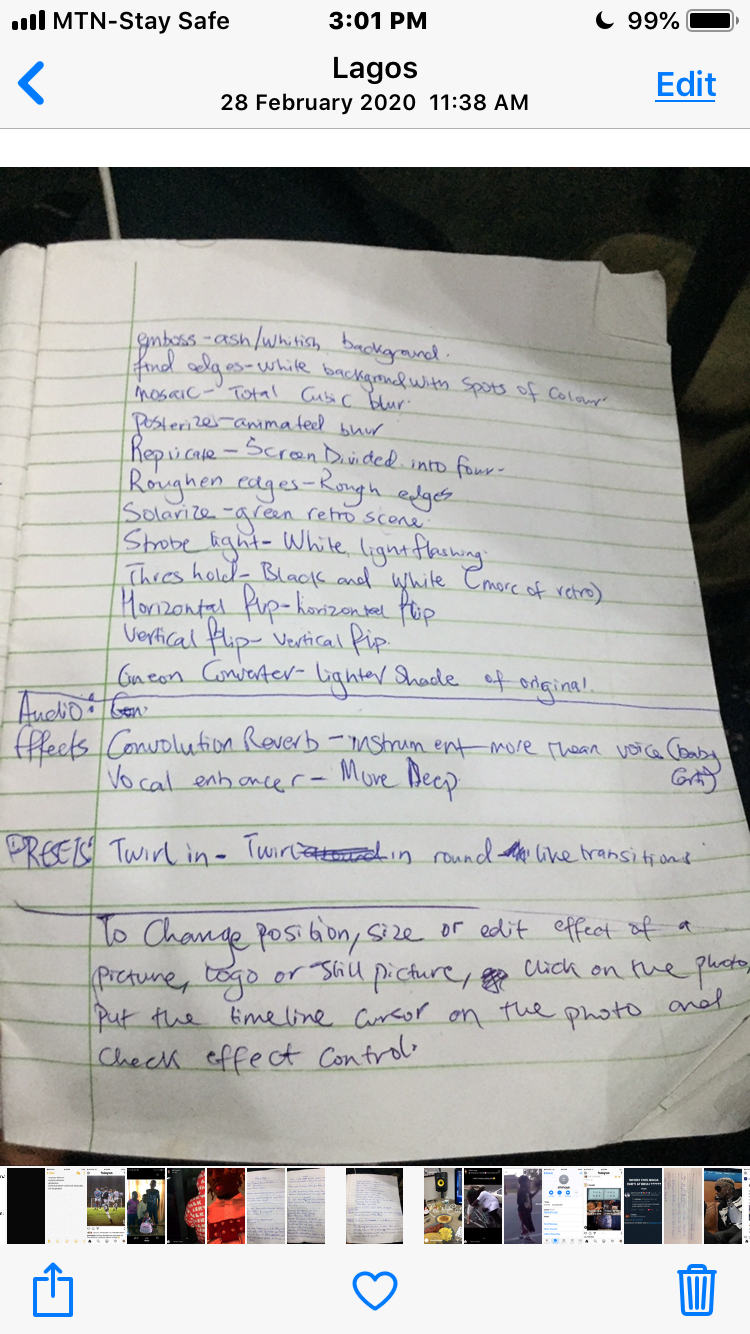
Some of the categories that caught my eyes are:
Stylize, and some examples are: emboss, mosaic, posterize, solarize, threshold, etc. This mainly changes the color of what you’re working with, to either black and white, retro, animated, etc, depending on the effect chosen.
Generate is another effect, and some examples under it are: grid, pain bucket, lightning, etc. That’s main use of this, is to add a special effect to a video, for example; if you use the lightning effect, you can make it seem like there’s a lightning storm in an area, or if you use the paint bucket effect, you can almost change the color of someone’s shoes, from its original color, to your desired color.
And lastly, the Distort, and some examples are: Offset, spherize, wave wrap, magnify, etc. The main function of this effect, is to change the dynamic of how the video will come out. For example, the spherize would make the edges of the video look most spherical, rather than the normal square shaped video. The wave wrap would make the video move, and glitter, in a wave style. This is mainly used for text, if you want the text to look almost look like it’s dancing or in motion.
And the magnify, is used to maximize a particular section of a video or picture.
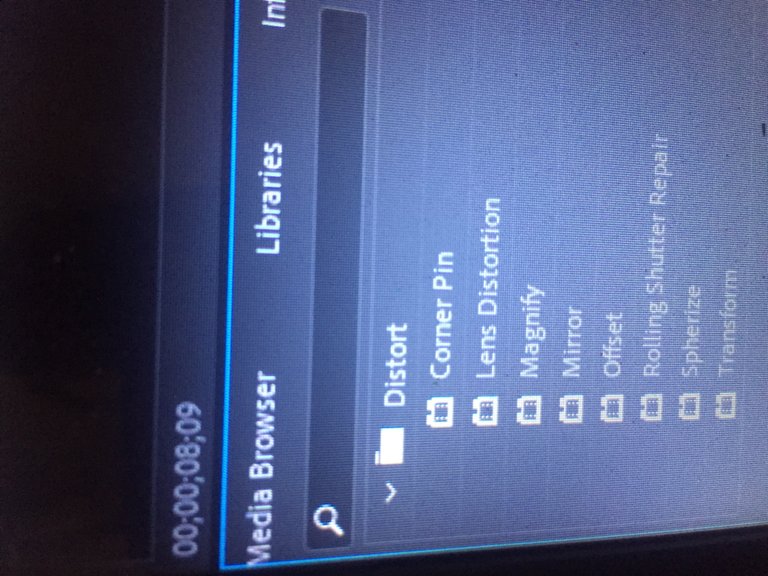
You perform this, by masking(drawing) out a particular segment, and selecting magnify. This shows that this is exactly where you want to magnify, this is also used in advertisements, if you want to emphasize an email address, phone number, etc.
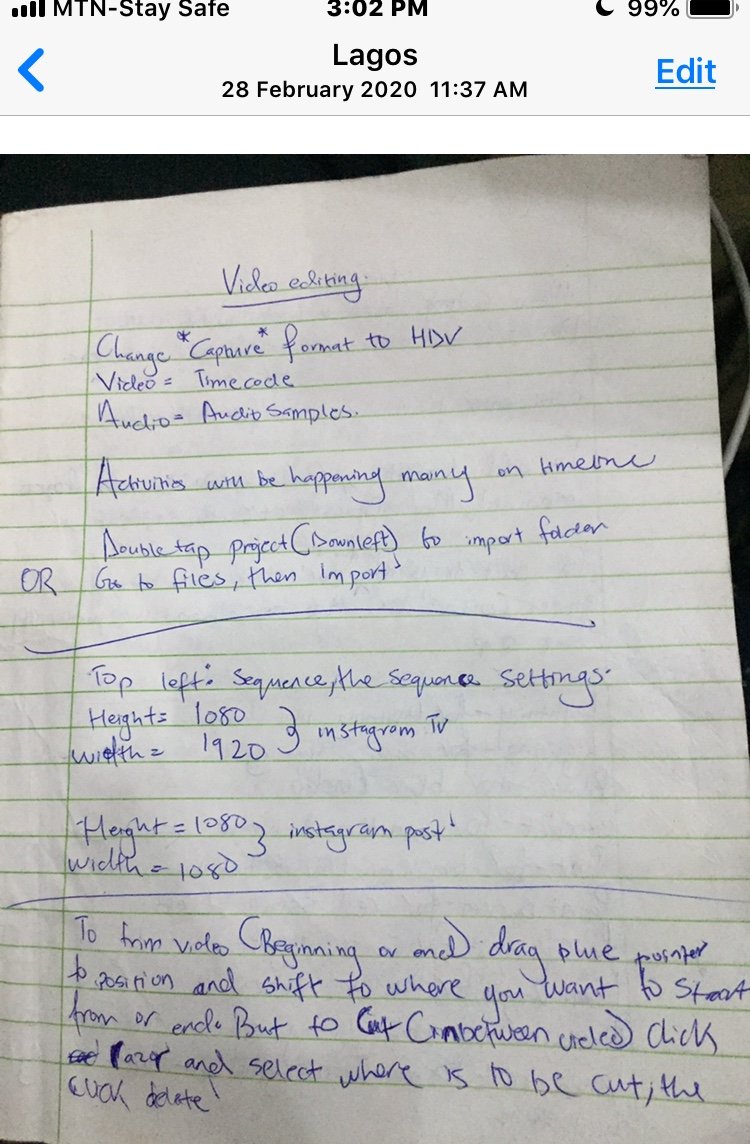
It took us about three days to finalize everything related to effects, and we went on to learn about the graphics section, which mainly deals with text, color, font, etc. It was very easy to master, and we went into the last segment, which was to render, and learn how to export. You do this by clicking Ctrl M, going to file, then export, and then media.
I learned that the best format is his HDV, that videos should always be set to timecode, and that the audio should be set to Audio samples.
We also learned the different aspects ratios for different purposes,
such as: (Height:1080, width:1920) for full monitor size, and (Height:1080, width,1080) for an instagram post.
The last thing I learnt, which help me massively, was the final aspect of the program, which was to work with your group to make a video This wasn’t easy, as we had to go outside to start recording, and it ended as a success because we were able to get different pictures and videos, to make a short film . It was really nice, and we submitted with confidence and satisfaction, and although we didn’t win, that bond and collaboration helped me a lot, in making me a better editor today.
After some weeks of practicing, i was able to gain confidence to even talk some upcoming artists to be part of their editing team back then.

Hope you enjoyed my story, thank you and see you soon.
A very interesting read. After Effects are for animating graphics mainly and Premire are for editing video contents in entirety. Which skill are learning from? I will like to improve myself also.
Great post @stef1234
thanks, was actually a program 2 years ago, but youtube can offer a lot of tutorials, both basics and advanced.
Congratulations @stef1234! You have completed the following achievement on the Hive blockchain and have been rewarded with new badge(s):
Your next target is to reach 40 posts.
Your next target is to reach 1750 upvotes.
You can view your badges on your board and compare yourself to others in the Ranking
If you no longer want to receive notifications, reply to this comment with the word
STOPCheck out the last post from @hivebuzz:
Support the HiveBuzz project. Vote for our proposal!
thanks hivebuzz
You're welcome @stef1234, great work!
Support us back and vote for our witness.
You will get one more badge and bigger upvotes from us when we notify you.