[ESP/ENG] Te enseño como reparar un cargador de laptop si el cable está dañado / I show you how to repair a laptop charger if the cable is damaged.
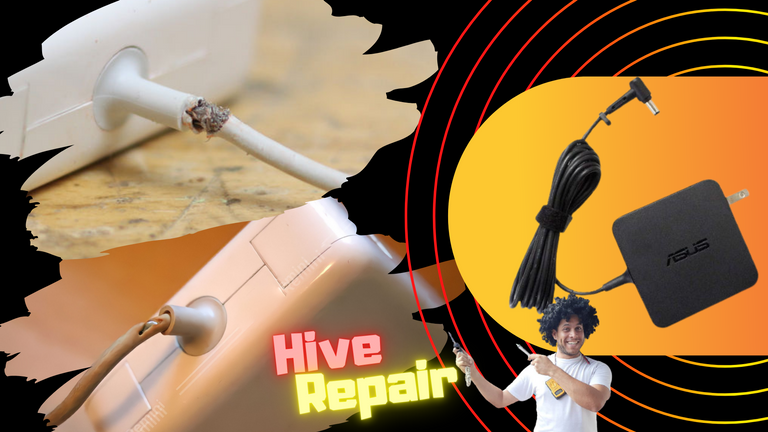
El día de hoy les enseño como reparé el cargador de la laptop de una amiga. Ella me contó que estaba teniendo problemas con el cargador de su laptop, que a veces cargaba cuando movía el cable. Resulta que el cable de dicho cargador se encontraba algo deteriorado en la base del protector de goma, así que le dije que yo podría repararlo.
Entonces, manos a la obra apreciados Hivers...
Welcome everyone to my blog dear Hivers, I hope you are doing great, wishing you always find the inspiration and creativity needed and essential to create quality content on this amazing platform.
Today I show you how I repaired a friend's laptop charger. She told me that she was having problems with the charger of her laptop, which sometimes charged when she moved the cable. It turns out that the charger cable was a bit damaged at the base of the rubber protector, so I told her that I could repair it.
So, let's get to work, dear Hivers...

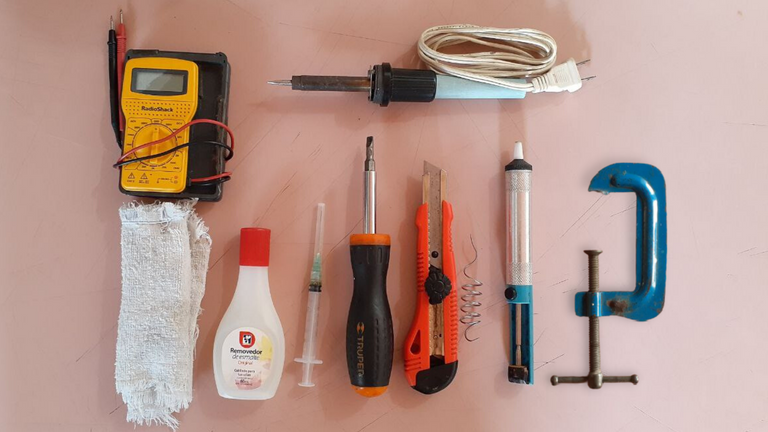
Las herramientas, dispositivos y materiales que utilizaremos para esta reparación serán los siguientes:
- Multímetro
- Cautín
- Estaño
- Extractor de estaño
- Cutter
- Destornillador de pala
- Paño pequeño
- Removedor de esmalte
- Jeringa
- Prensa pequeña
The tools, devices and materials we will use for this repair will be as follows:
- Multimeter
- Soldering iron
- Tin
- Tin stripper
- Cutter
- Flat head screwdriver
- Small cloth
- Enamel remover
- Syringe
- Small press
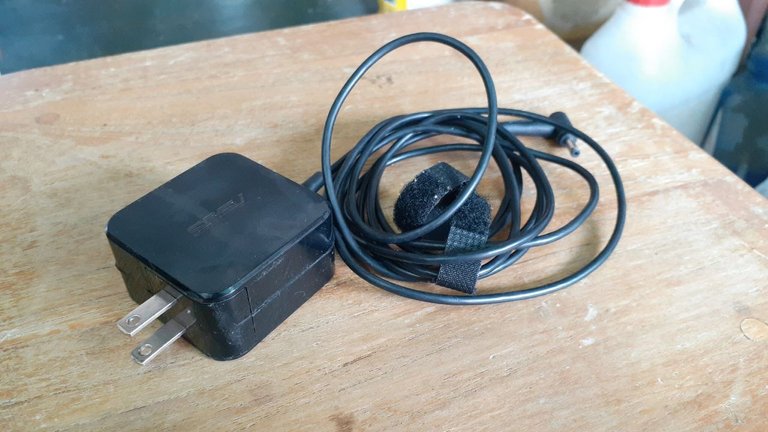
Este es el cargador que voy a reparar, se trata de un cargador ASUS para laptop.
Descripción:
Entrada: CA 100 ~ 240 V, 50 ~ 60 Hz
Salida: 19 V, 2,37 A
Potencia máxima: 45 W
Punta: 4.0mmx1.35mm
This is the charger that I am going to repair, it is an ASUS laptop charger.
Description:
Input: AC 100 ~ 240 V, 50 ~ 60 Hz
Output: 19 V, 2.37 A
Maximum power: 45 W
Tip: 4.0mmx1.35mm
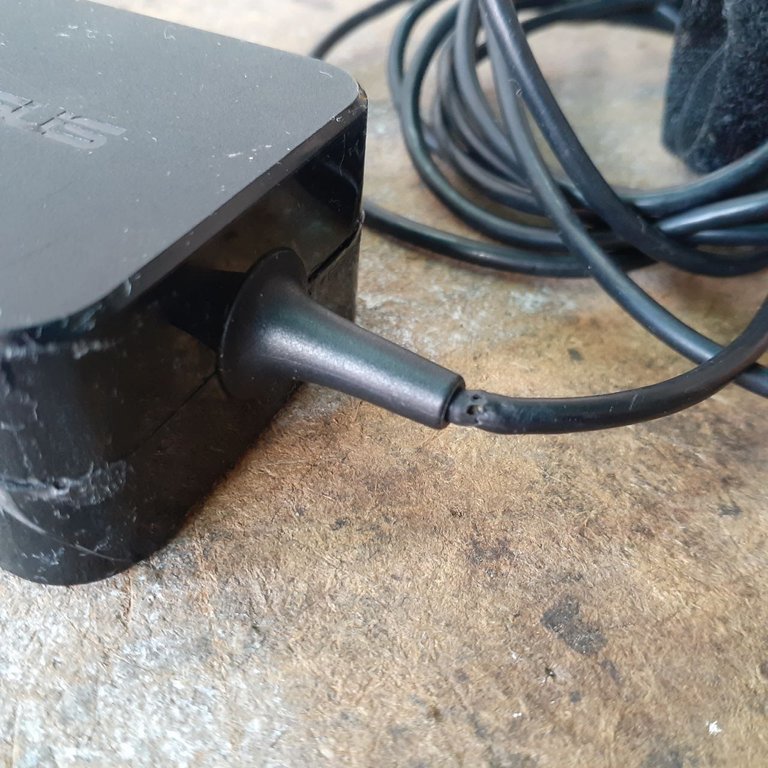
Aquí podemos observar el punto donde el cable se encuentra defectuoso, justo al final del protector de goma, esto debido a una mala manipulación del dispositivo.
Here we can see the point where the cable is defective, just at the end of the rubber protector, due to poor handling of the device.
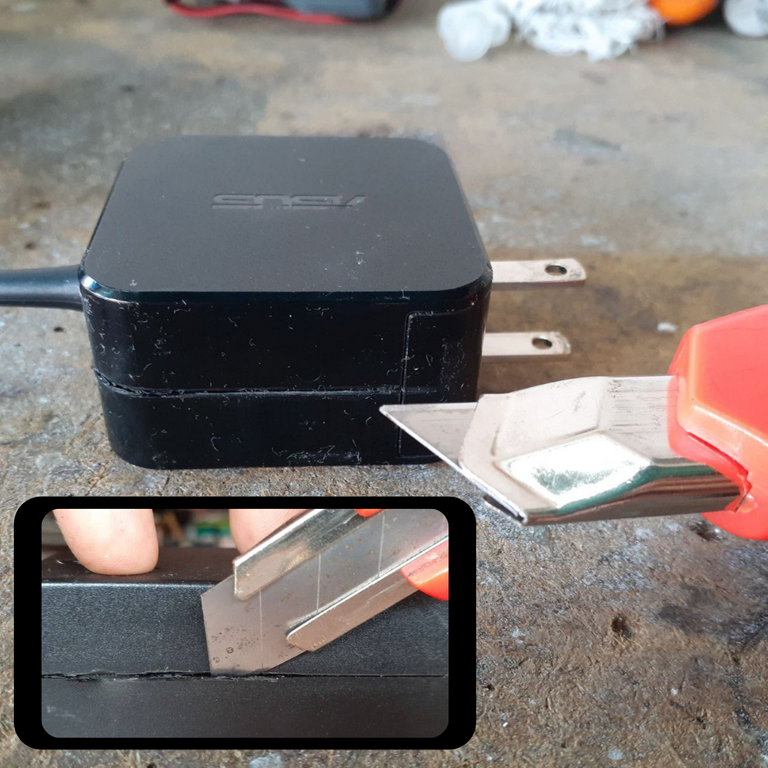
Comenzaremos destapando el cargador, inicialmente utilizaremos un cutter, con este lo que haremos será ir separando la carcasa plástica, ya que esta compuesta por dos partes, entonces introducimos la punta del cutter en la línea divisoria, peno no perpendicularmente sino como lo ven en la miniatura de la imagen e iremos avanzando así a lo largo de dicha división hasta llegar al punto donde comenzamos, repetiremos esta operación un par de veces.
We will begin uncovering the charger, initially we will use a cutter, with this what we will do will be separating the plastic casing, since it is composed of two parts, then we introduce the tip of the cutter in the dividing line, not perpendicularly but as you see in the thumbnail of the image and we will advance along this division until reaching the point where we started, we will repeat this operation a couple of times.
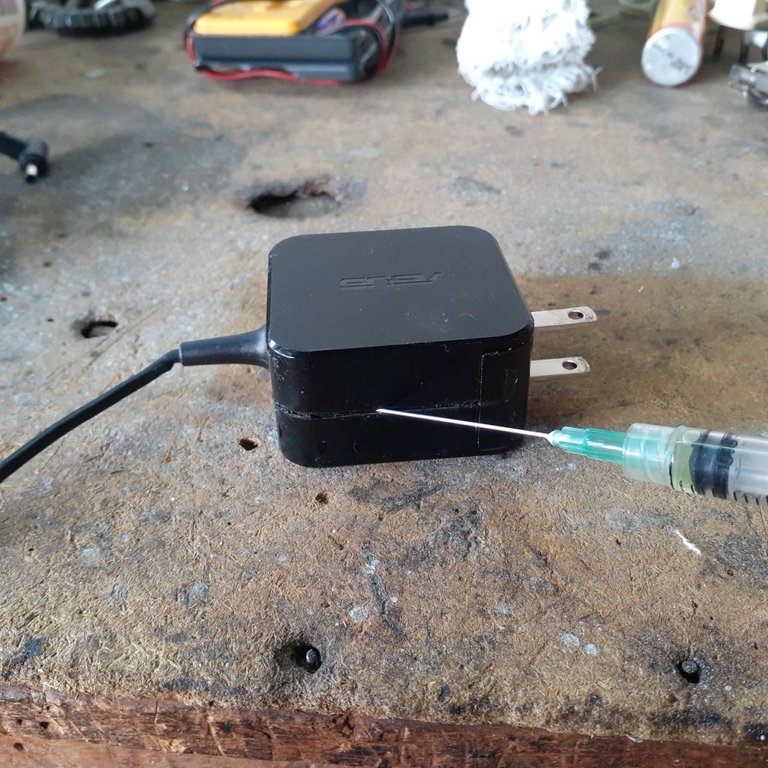
Cuando hayamos realizado el paso anterior, llenaremos la jeringa con removedor de esmalte e iremos aplicando pequeñas cantidades con cuidado, dentro y a lo largo de la división de la carcasa, lo que hará que el pegamento que une las dos partes de la carcasa se debilite y nos permita separarlas. Dejaremos actuar el removedor 10 minutos aproximadamente.
When we have done the previous step, we will fill the syringe with enamel remover and we will apply small quantities carefully, inside and along the division of the casing, which will make the glue that joins the two parts of the casing weaken and allow us to separate them. We will leave the remover to act for approximately 10 minutes.
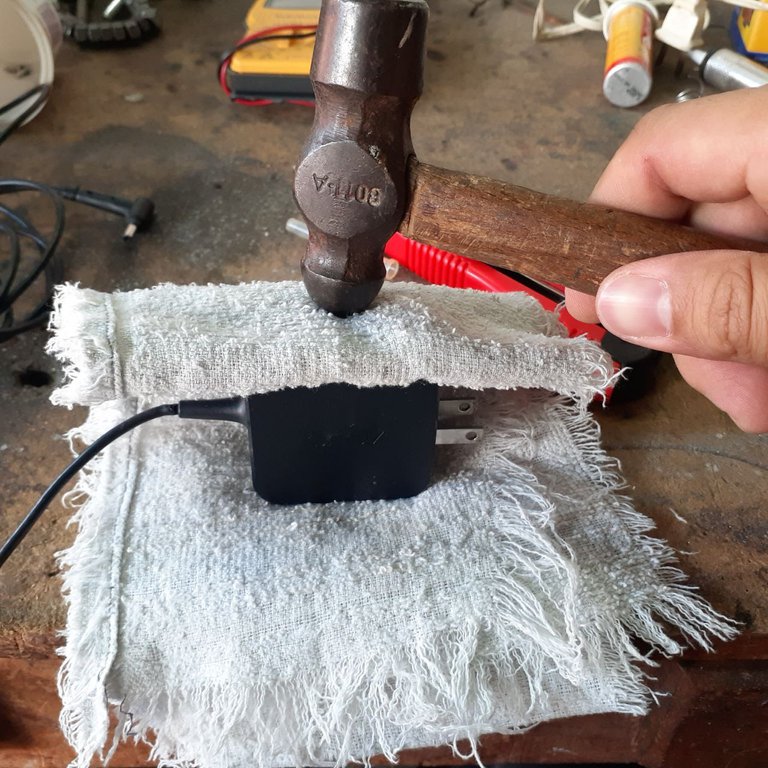
Pasado los 10 minutos, el siguiente paso será aplicar algunos golpes con un martillo justo a lo largo de la línea divisora de la carcasa, tomando la precaución de no golpearlo muy fuerte y proteger el cargador con un paño, para no dejar marcas. Esto ayudará a aflojar un poco más la carcasa.
After 10 minutes, the next step will be to apply a few blows with a hammer just along the dividing line of the casing, taking care not to hit it too hard and to protect the charger with a cloth, so as not to leave marks. This will help to loosen the casing a little more.
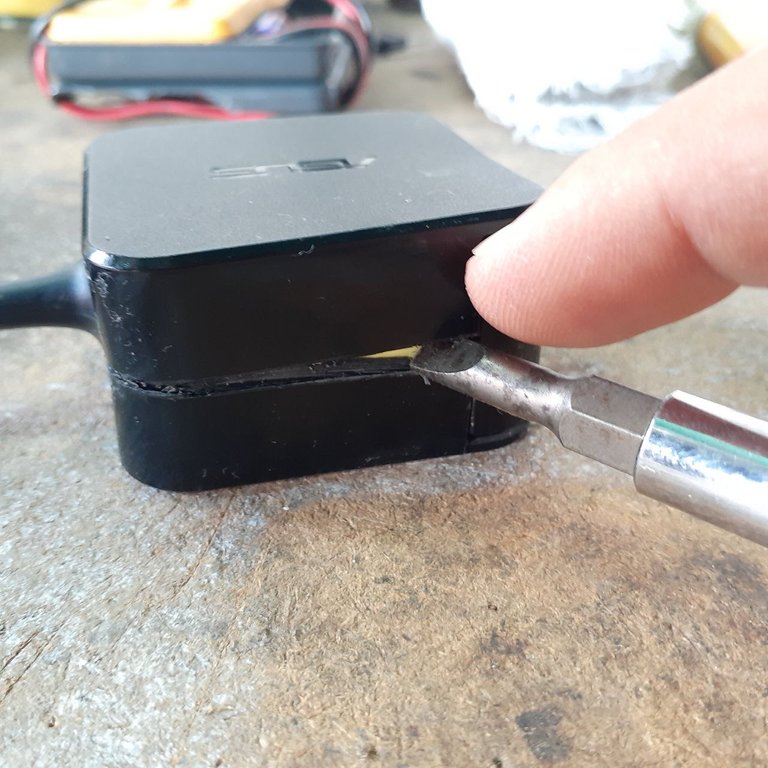
En este paso terminaremos de separar la carcasa con la ayuda de un destornillador y nuestras manos
In this step we will finish separating the casing with the help of a screwdriver and our hands.

Y es así como finalmente tendremos el cargador destapado, aquí vemos la tarjeta electrónica compacta y las dos partes que componen la carcasa.
And this is how we will finally have the charger uncovered, here we see the compact electronic card and the two parts that make up the housing.
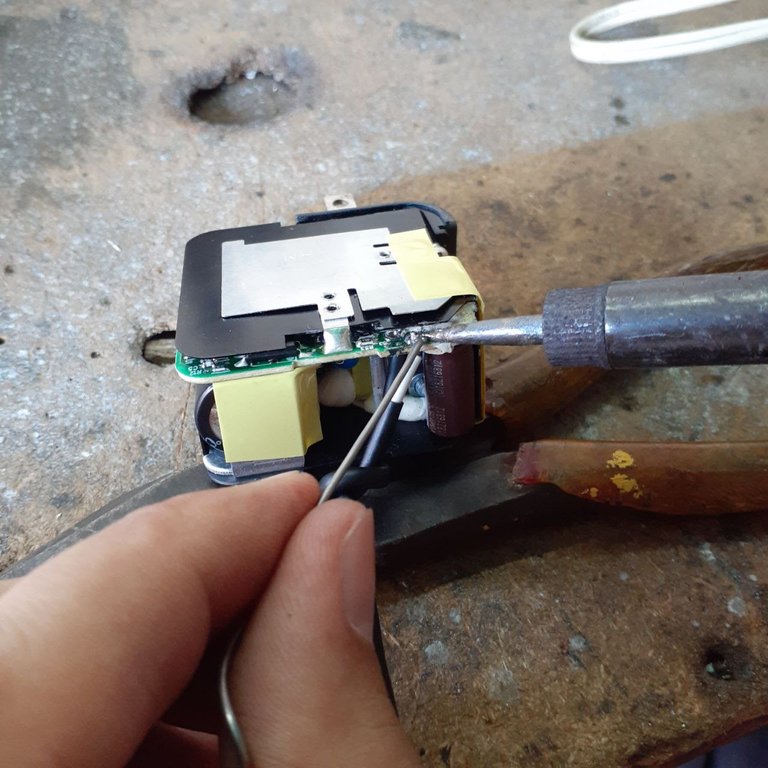
El procedimiento que sigue es quitar el cable del cargador compuesto por dos conductores, positivo y negativo respectivamente, de la tarjeta electrónica con la ayuda del cautín. Una vez hecho esto, alimentaremos con electricidad el cargador y comprobaremos con la ayuda del multímetro si en la salida de voltaje de la placa electrónica esta presente el voltaje de corriente continua que se marca en la etiqueta de características eléctricas.
The procedure that follows is to remove the charger cable composed of two conductors, positive and negative respectively, from the electronic board with the help of the soldering iron. Once this is done, we will feed electricity to the charger and check with the help of the multimeter if the DC voltage marked on the electrical characteristics label is present at the voltage output of the electronic board.
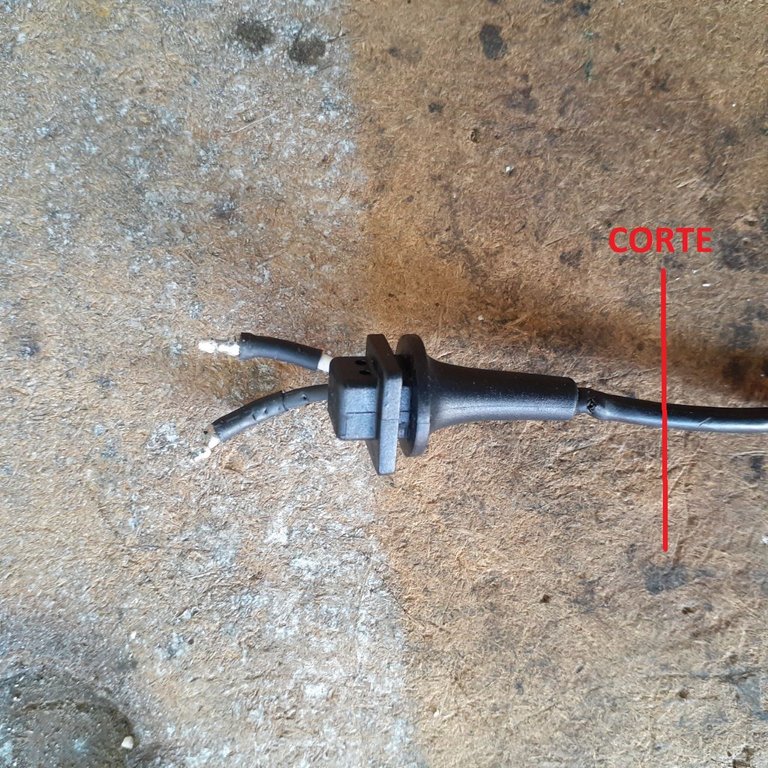
Cuando hayamos retirado el cable, realizaremos un corte en este, para deshacernos del trozo de cable dañado.
When we have removed the cable, we will make a cut in it, to get rid of the damaged piece of cable.
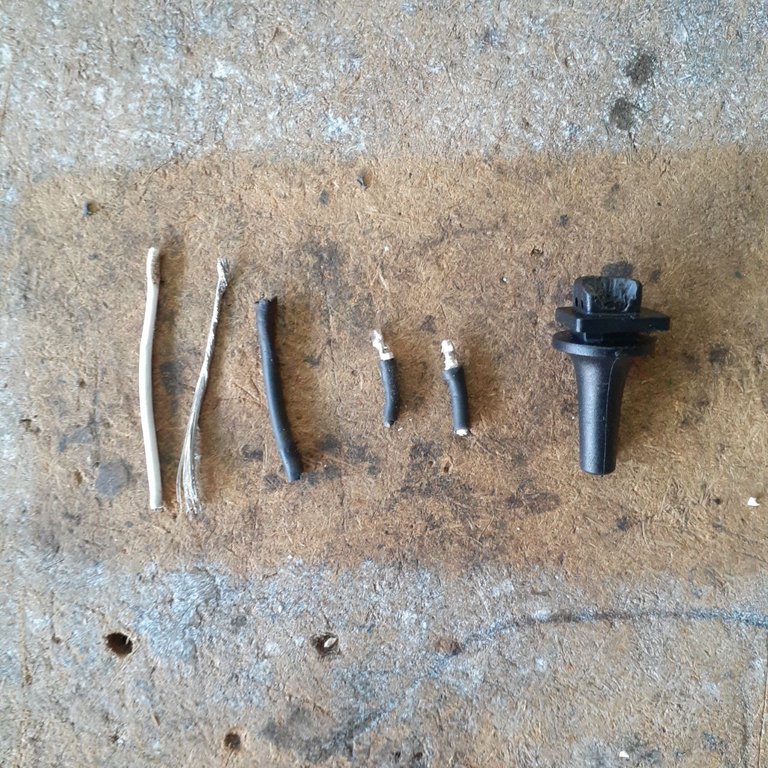
Luego retiraremos los restos de cable del protector de goma y prepararemos este último para que el cable en buen estado pueda pasar por el sin problema pero asegurándonos que quede justo.
Then we will remove the cable remains from the rubber protector and we will prepare the latter so that the cable in good condition can pass through it without any problem but making sure that it is just right.

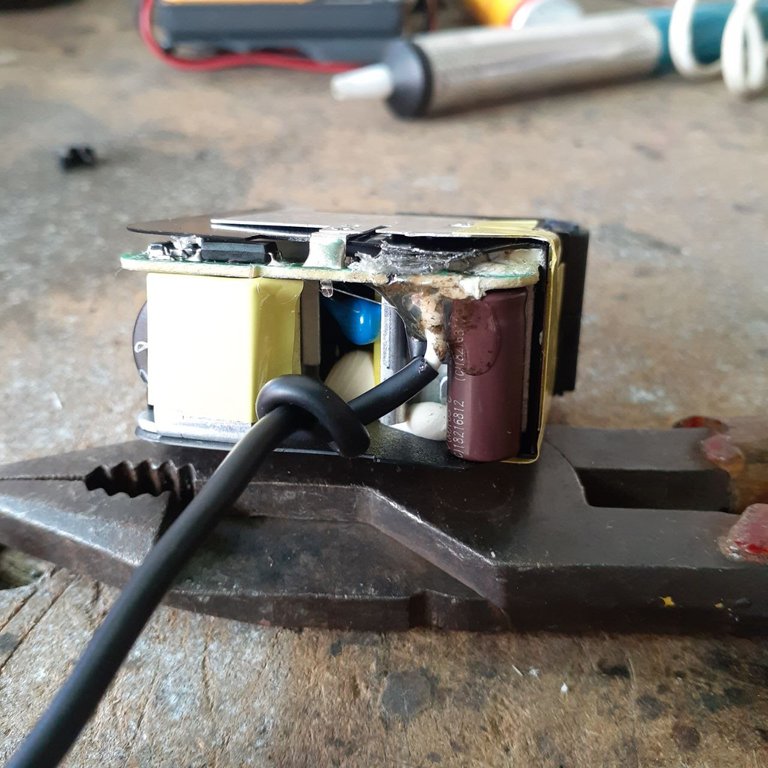
Así se verá el conjunto una vez realizado el paso anterior, luego también de introducir el cable a través del protector de goma y de pelar las puntas de ambos conductores. En este punto ya casi está listo para ser instalado de nuevo en la placa electrónica.
This is what the assembly will look like once the previous step is done, after also inserting the cable through the rubber protector and stripping the tips of both conductors. At this point it is almost ready to be installed again on the electronic board.
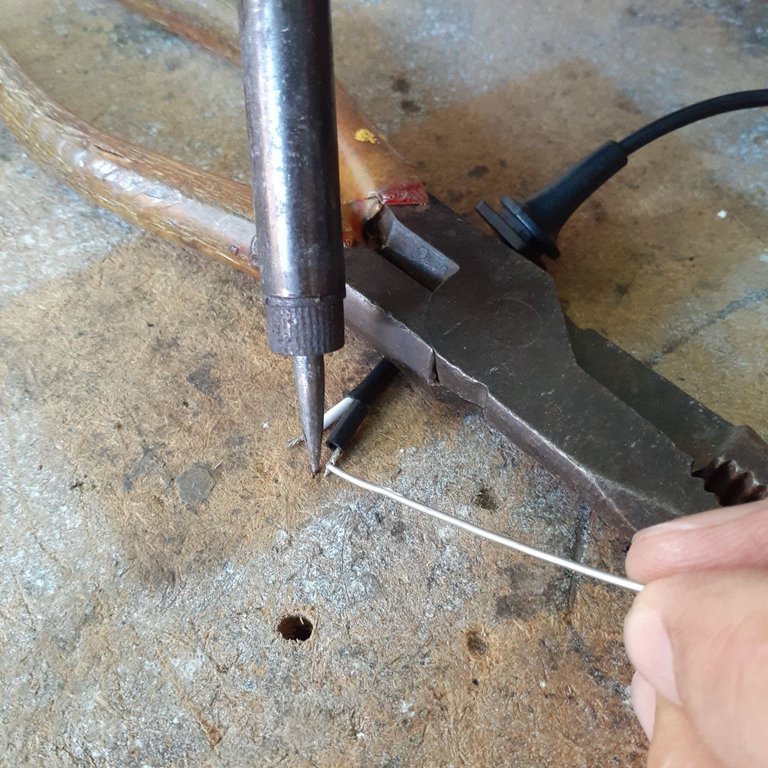
Es importante agregar un poco de estaño en las puntas de los conductores positivo y negativo, pues esto facilitará el proceso de soldarlos en la placa electrónica
It is important to add a little tin on the tips of the positive and negative conductors, as this will facilitate the process of soldering them on the electronic board.
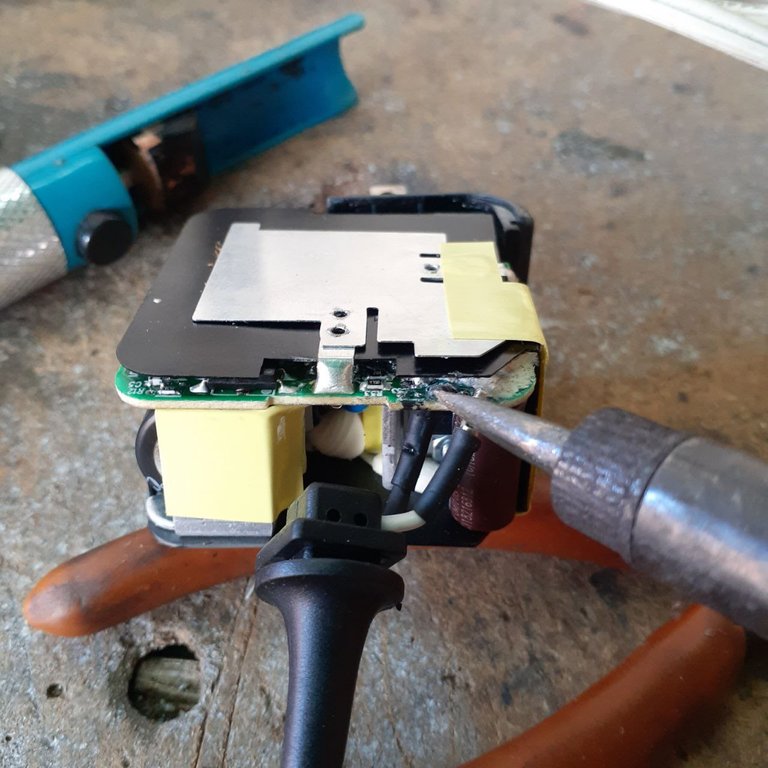
Soldamos el cable en la placa con la ayuda del cautín estaño, asegurándonos de que cada conductor va donde corresponde, positivo con positivo y negativo con negativo.
We solder the wire on the board with the help of the soldering iron and tin, making sure that each conductor goes where it belongs, positive to positive and negative to negative.
Le hice un nudo simple al cable, para que cuando esté armado el cargador y el cable sea halado, éste no se desprenda, sirve como un seguro. También apliqué un poco de silicón caliente en la base de los terminales positivo y negativo para protegerlos.
I made a simple knot in the cable, so that when the charger is assembled and the cable is pulled, it will not come off, it serves as a safety device. I also applied some hot silicone to the base of the positive and negative terminals to protect them.
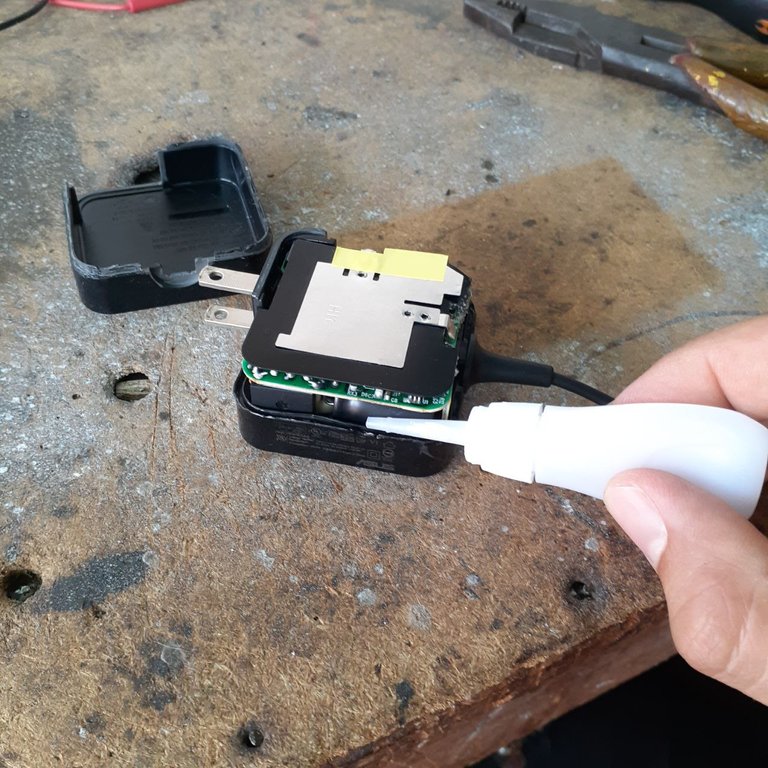
Ahora lo que haré será introducir la placa electrónica en una de las partes de la carcasa, aplicar un poco de pegamento instantáneo a lo largo del borde de esta y luego colocar la otra parte de la carcasa encima.
Now what I will do is insert the electronics board into one part of the housing, apply some instant glue along the edge of the housing and then place the other part of the housing on top of it.

Cubrí el cargador con un paño y apliqué presión sobre dicho cargador con la ayuda de dos prensas manuales y lo dejé así por una hora aproximadamente, esto para asegurar que quede bien pegado.
I covered the charger with a cloth and applied pressure on the charger with the help of two manual presses and left it like that for about an hour, this to ensure that it was well glued.
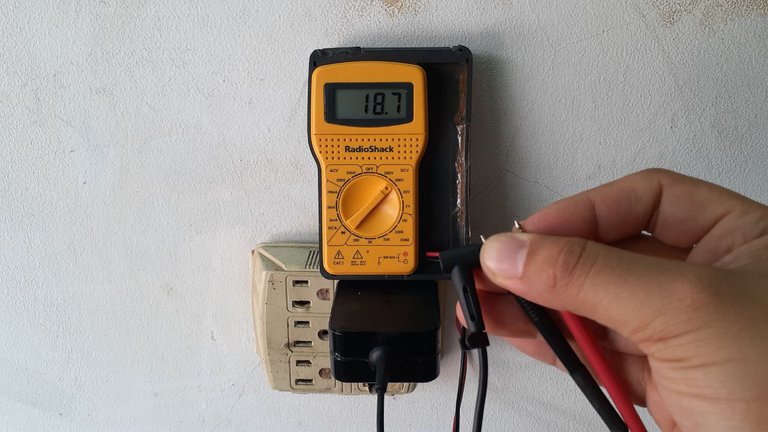
El paso final será comprobar de nuevo el voltaje de salida, pero esta vez lo mediremos en la punta del cable del cargador, en este caso el voltaje de salida que marca la etiqueta es de 19VCD y el multímetro marca 18,7VCD, lo que representa una medida aceptable, ya que el cargador ha funcionado por unos cuantos años y esto va creando desgaste en sus componentes internos.
The final step will be to check again the output voltage, but this time we will measure it at the tip of the charger cable, in this case the output voltage that marks the label is 19VDC and the multimeter marks 18.7VDC, which represents an acceptable measure, since the charger has worked for a few years and this is creating wear in its internal components.
Hasta la siguiente publicación!
Until the next post!
Todas las fotografías fueron tomadas con un celular SAMSUNG Galaxy A20.
All photographs were taken with a SAMSUNG Galaxy A20 cell phone.
El separador de texto y las demás imágenes son de mi autoría.
The text separator and other images are of my authorship.
Portada realizada en / Cover made in: https://www.canva.com/
Translated with: www.DeepL.com/Translator (free version)

https://twitter.com/robertsreinold/status/1491521123724496896
The rewards earned on this comment will go directly to the person sharing the post on Twitter as long as they are registered with @poshtoken. Sign up at https://hiveposh.com.
Congratulations @reinoldroberts! You have completed the following achievement on the Hive blockchain and have been rewarded with new badge(s):
Your next target is to reach 3750 upvotes.
You can view your badges on your board and compare yourself to others in the Ranking
If you no longer want to receive notifications, reply to this comment with the word
STOPCheck out the last post from @hivebuzz:
Support the HiveBuzz project. Vote for our proposal!
Hola @reinoldroberts tienes un ingenio maravilloso 👏.
Gracias 🙌 Mi intención aportar contenido de calidad y que pueda servir de ayuda a quien lo necesite.
Gracias por pasar, leer y comentar!
Hola Reinold! Resulta muy útil la información y la guía que nos trajiste. Por lo general, cuando me suceden este tipo de inconvenientes con los cables, los desecho y me compro uno nuevo, porque siento que es difícil arreglarlos. Pero la próxima voy a tratar de arreglar el cable que se me rompa. Saludos!
Hola Agustín! Que bueno que te guste el contenido.
No eres el único que deshecha estos dispositivos cuando se encuentran en aparente mal estado o "dañados", muchos de estos dispositivos pueden tener una segunda vida. Anímate la próxima a intentar arreglarlo.
Gracias por leer, comentar y valorar el post! Saludos👍
Thank you for sharing this amazing post on HIVE!
Your content got selected by our fellow curator @rezoanulvibes & you just received a little thank you via an upvote from our non-profit curation initiative!
You will be featured in one of our recurring curation compilations and on our pinterest boards! Both are aiming to offer you a stage to widen your audience within and outside of the DIY scene of hive.
Join the official DIYHub community on HIVE and show us more of your amazing work and feel free to connect with us and other DIYers via our discord server: https://discord.gg/mY5uCfQ !
If you want to support our goal to motivate other DIY/art/music/homesteading/... creators just delegate to us and earn 100% of your curation rewards!
Stay creative & hive on!
Thank you so much!🙌
Genial! Con este tutorial más de uno se ahorrará unos cuantos hives pues no generar que visitar al técnico jajajaja
Seguro que si! Solo basta con tener las herramientas necesarias, ya sean propias o prestadas 😅 y un poco de habilidad técnica.