SECOND PART - EXPLANATION OF HOW A LED BULB WORKS AND REPAIRING IT (ENG/SPN)
Having explained briefly but thoroughly how LED Bulbs work in EXPLANATION OF HOW A LED BULB WORKS AND REPAIRING IT - FIRST PART, it is the time to have a look at a LED bulb that does not light up following various steps so as to know what to do in every case.
Let us refresh the stages that an AC current or voltage from the mains undergoes before it is suitable to feed the LEDs in a bulb, so as to prevent you from going back and forward to the First Part of this post in order to make sense out of this one.
Después de haber explicado brevemente pero a fondo el funcionamiento de los bombillos LED en EXPLICACIÓN DEL FUNCIONAMIENTO DE UNA BOMBILLA LED Y REPARACIÓN DE LA MISMA - PRIMERA PARTE, es el momento de echar un vistazo a un bombillo LED que no enciende, siguiendo varios pasos para saber qué hacer en cada caso.
Vamos a refrescar las etapas que sufre una corriente o tensión alterna de la red antes de ser apta para alimentar a los LEDs de un bombillo, para que no tengas que ir y regresar a la Primera Parte de este post para darle sentido a éste.
When an LED Bulb is plugged into an AC current or voltage socket various things happen:
.- Current or voltage is fed to the tiny electronic card that contains the transformer, rectifying diodes or bridge and the capacitors.
Cuando un bombillo LED se conecta a una toma corriente o tensión de CA ocurren varias cosas:
.- La corriente o la tensión llega a la pequeña tarjeta electrónica que contiene el transformador, los diodos rectificadores o el puente, y los condensadores.
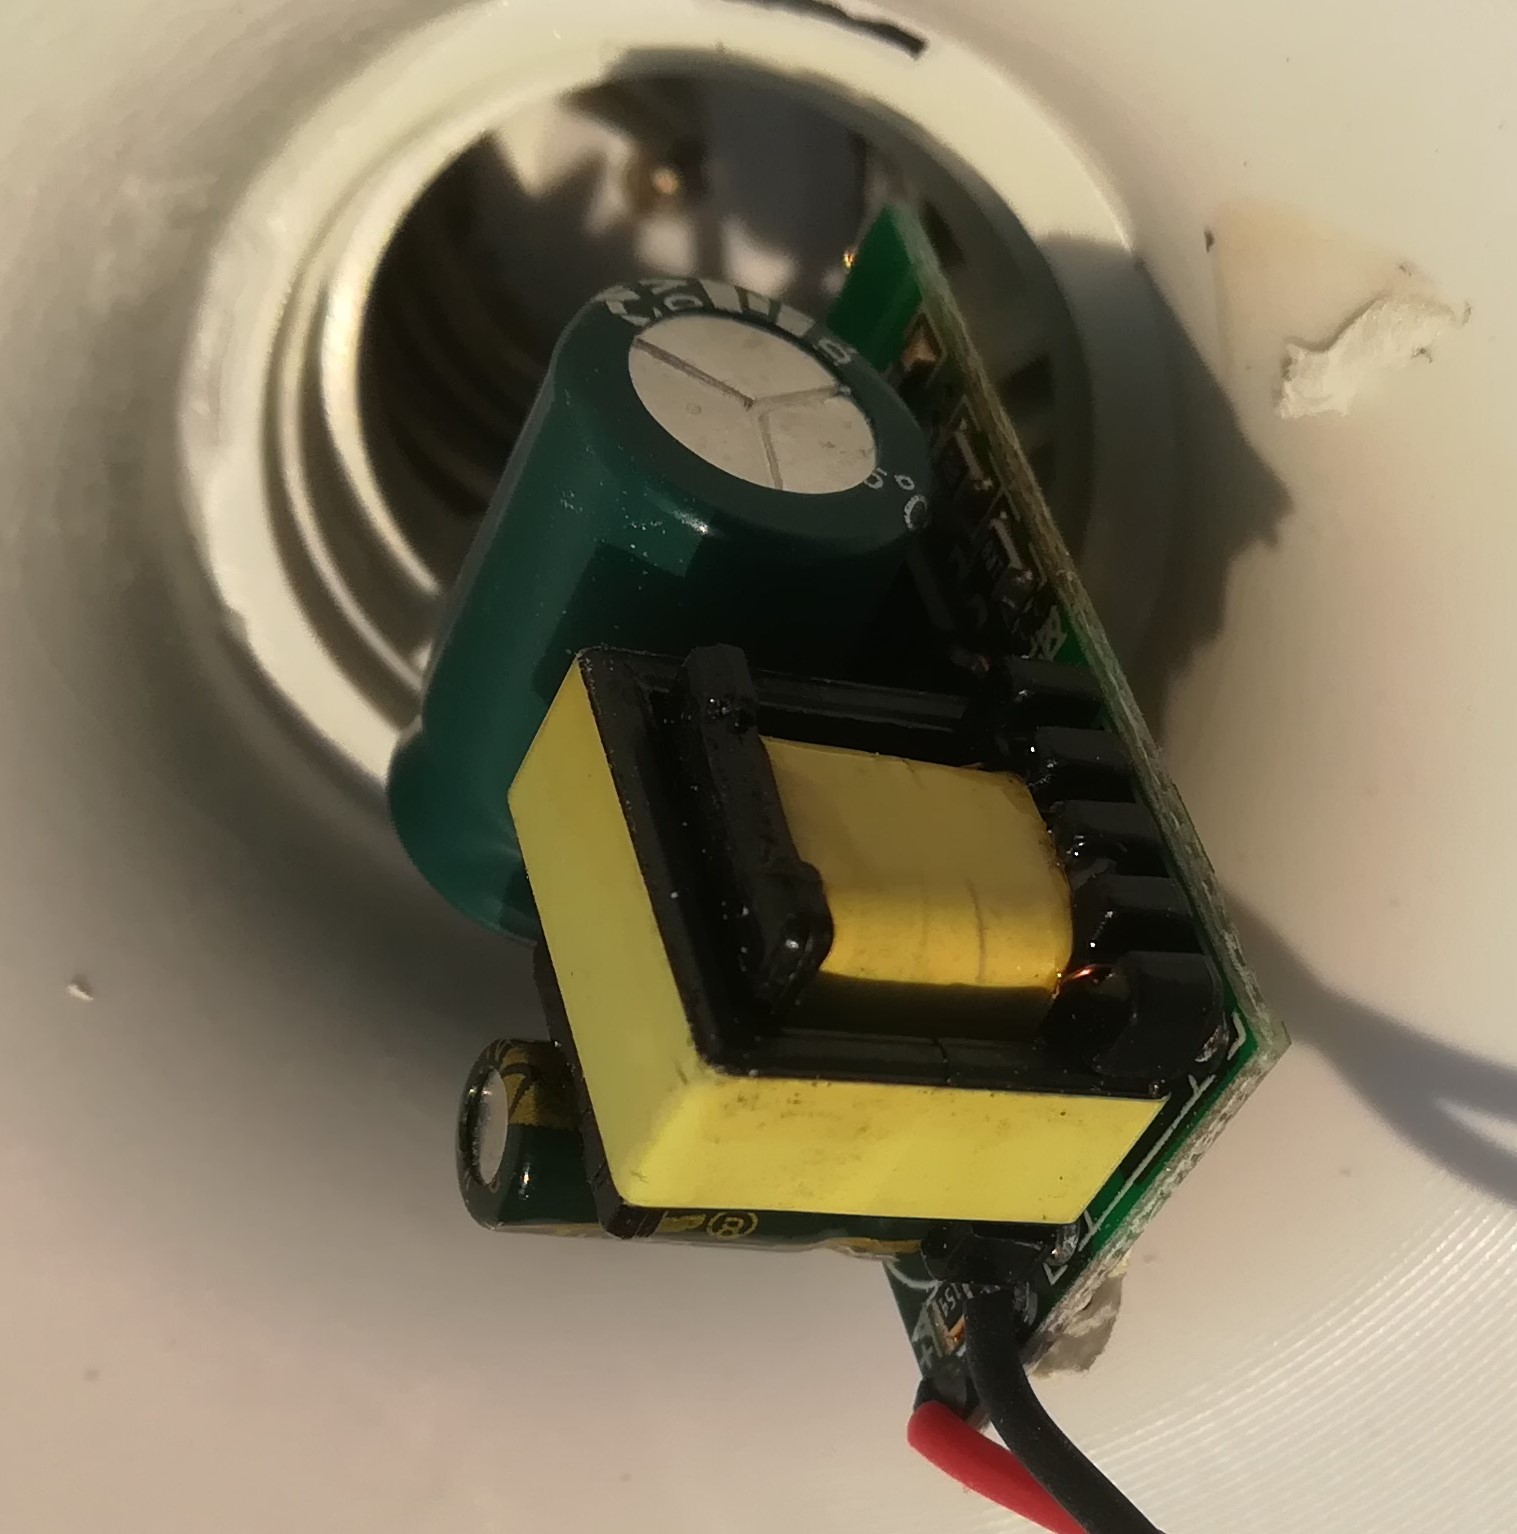
PCB with trnasformer, capacitors, rectifying diode bridge / Tarjeta PBC con transformador, condensadores, puente rectificador de diodos.
.- The AC current or voltage is converted to DC so as to make it suitable for the LEDs to operate and light up.
Let us bear in mind some considerations:
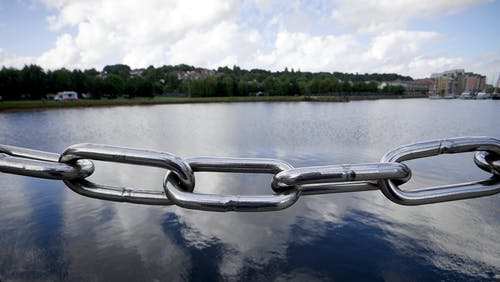
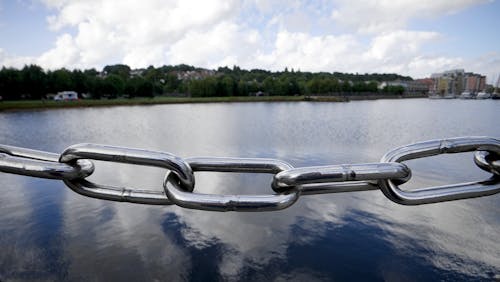
.- LEDs are connected in series. This is to say they form a chain, similar to a metal chain links joined together. Besides, instead of one chain, there could be two of them in parallel, as if they were embraced like dancing. This is done in order to provide the bulb with more power.
.- La corriente o voltaje AC se convierte en DC para que los LEDs funcionen y se iluminen.
Tengamos en cuenta algunas consideraciones:
.- Los LEDs se conectan en serie. Es decir, forman una cadena, similar a los eslabones de una cadena metálica unidos entre sí. Además, en lugar de una cadena, puede haber dos en paralelo, como si estuvieran abrazados como si bailaran. Esto se hace para dotar al bombillo de más potencia.
.- The number of LEDs in that chain would depend upon the bulbs’ wattage.
Depending on the number of Watts or power the LED bulb is supposed to output, so it would be the number of light emitting diodes in the array. Approximately there is between 0.85 W to 1 W per diode. For instance, for a 12 W LED bulb, there are going to be between 12 to 14 diodes connected in series.
.- El número de LEDs en esa cadena dependería de la potencia de los bombillos.
Dependiendo del cantidad de vatios o de la potencia que el bombillo LED deba emitir, así sería la cantidad de diodos emisores de luz de la cadena. Aproximadamente hay entre 0,85 W y 1 W por diodo. Por ejemplo, para un bombillo LED de 12 W, habrá entre 12 y 14 diodos conectados en serie.
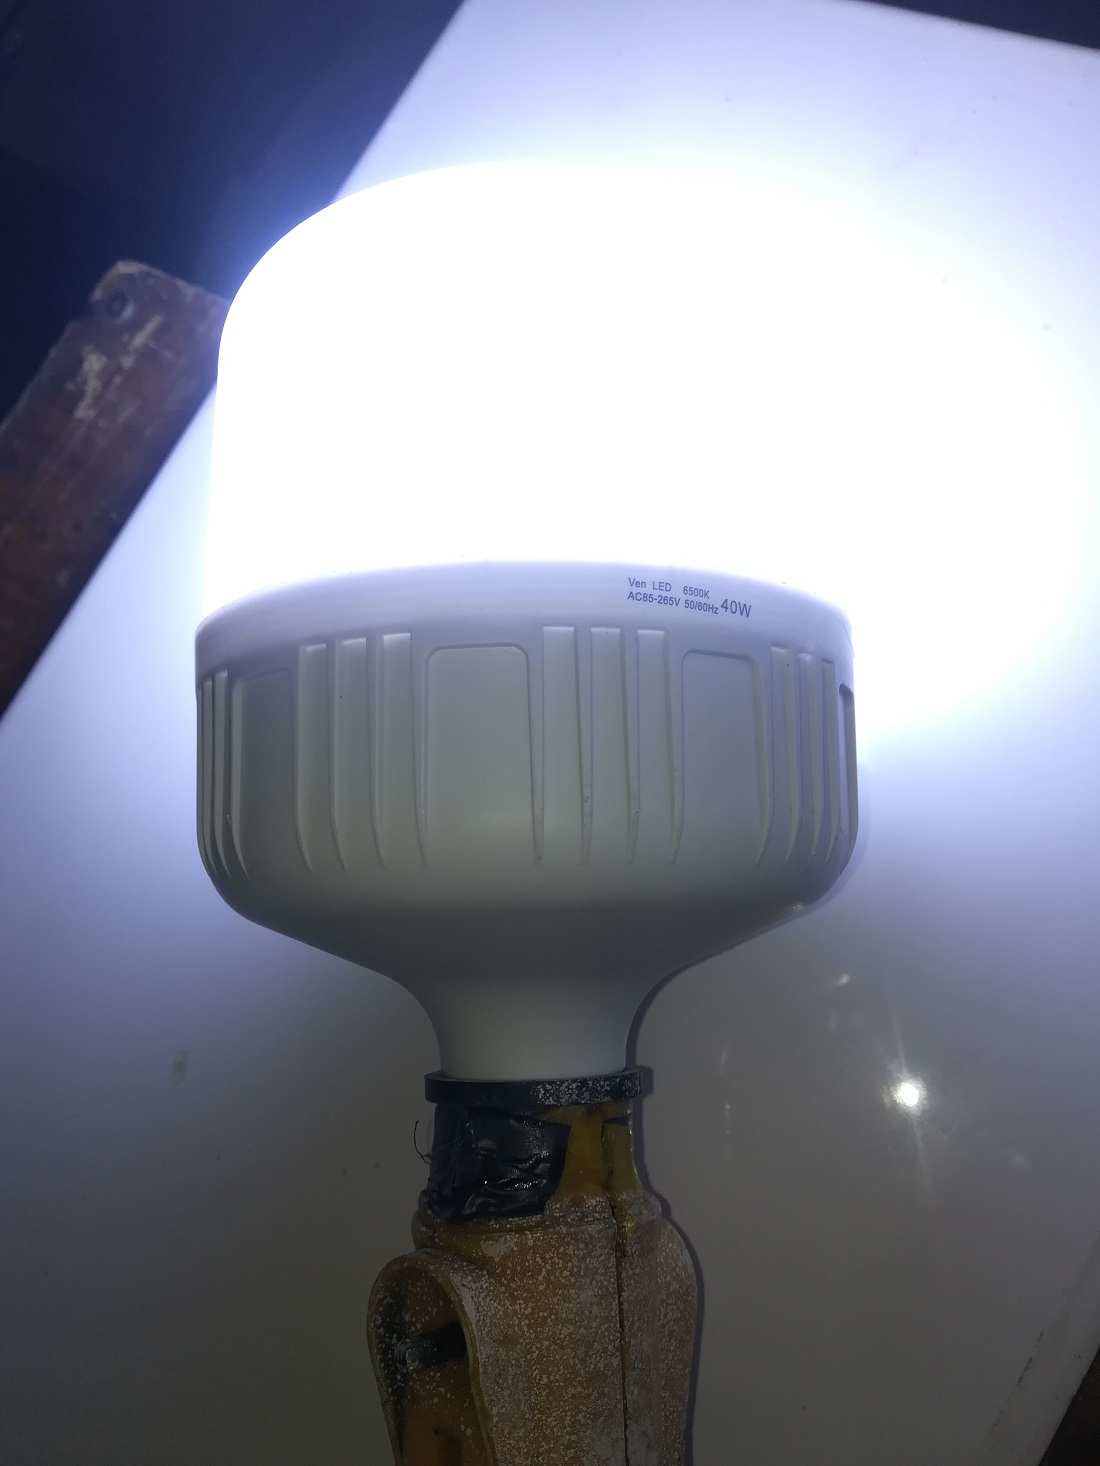
One of the LED bulb I am going to repair is a 40 W bulb, and has two chains of 17 LEDs in series, and they are in parallel. This means that the 40 W is spread in two lines of LEDs, in other words, each line of 17 LEDs in series, takes approximately 20 W. Please, allow me to remind you that in a parallel circuit the total current divides and flows through each branch of the circuit. If the branches have the same number of diodes (or load), then the current would be the same in each branch, and since power depends on load and current, this implies that each branch would dissipate the same wattage or power, i.e., 20 W. This is in accordance with what was said in the previous paragraph about the amount of energy or watts per diode. In this case 17 divided by 20 gives 0.85 W per diode. The other one is a 20 W bulb and has 18 LED in series. For the latter 18 divided by 20 gives 0.9 W per LED.
Uno de los bombillos LED que voy a reparar es de 40 W, y tiene dos cadenas de 17 LEDs en serie, y están en paralelo. Esto significa que los 40 W se reparten en dos líneas de LEDs, es decir, cada línea de 17 LEDs en serie, consume aproximadamente 20 W. Por favor, permítanme recordarles que en un circuito en paralelo la corriente total se divide y fluye por cada rama del circuito. Si las ramas tienen el mismo número de diodos (o carga), entonces la corriente sería la misma en cada rama, y como la potencia depende de la carga y de la corriente, esto implica que cada rama disiparía el mismo vatiaje o potencia, es decir, 20 W. Esto concuerda con lo dicho en el párrafo anterior sobre la cantidad de energía o vatios por diodo. En este caso, 17 dividido entre 20 da 0,85 W por diodo. El otro es un bombillo de 20 W y tiene 18 diodos en serie. En este último caso, 18 dividido por 20 da 0,9 W por diodo.
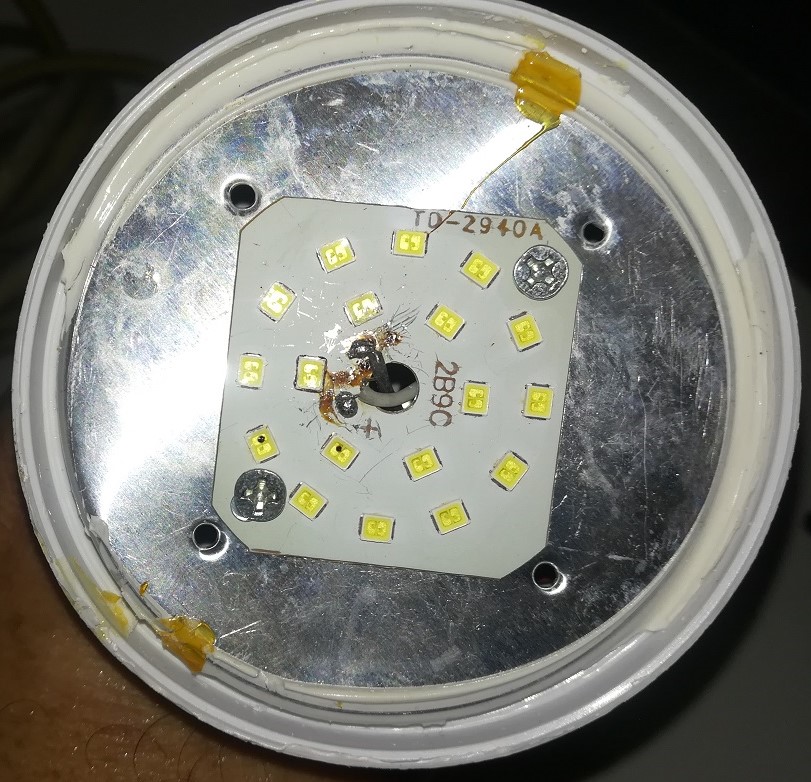
18 LEDs 20 W Bulb / Bombillo de 18 LEDs de 20 W
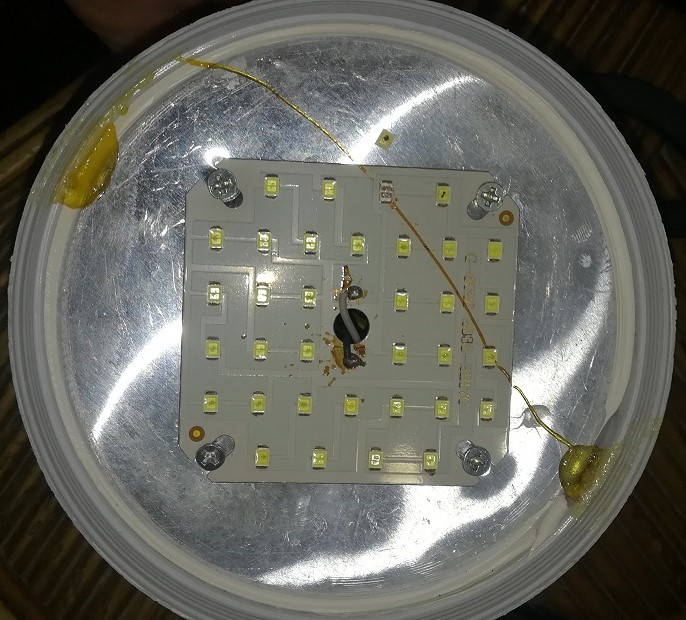
34 LEDs 40 W Bulb / Bombillo de 34 LEDs de 40 W
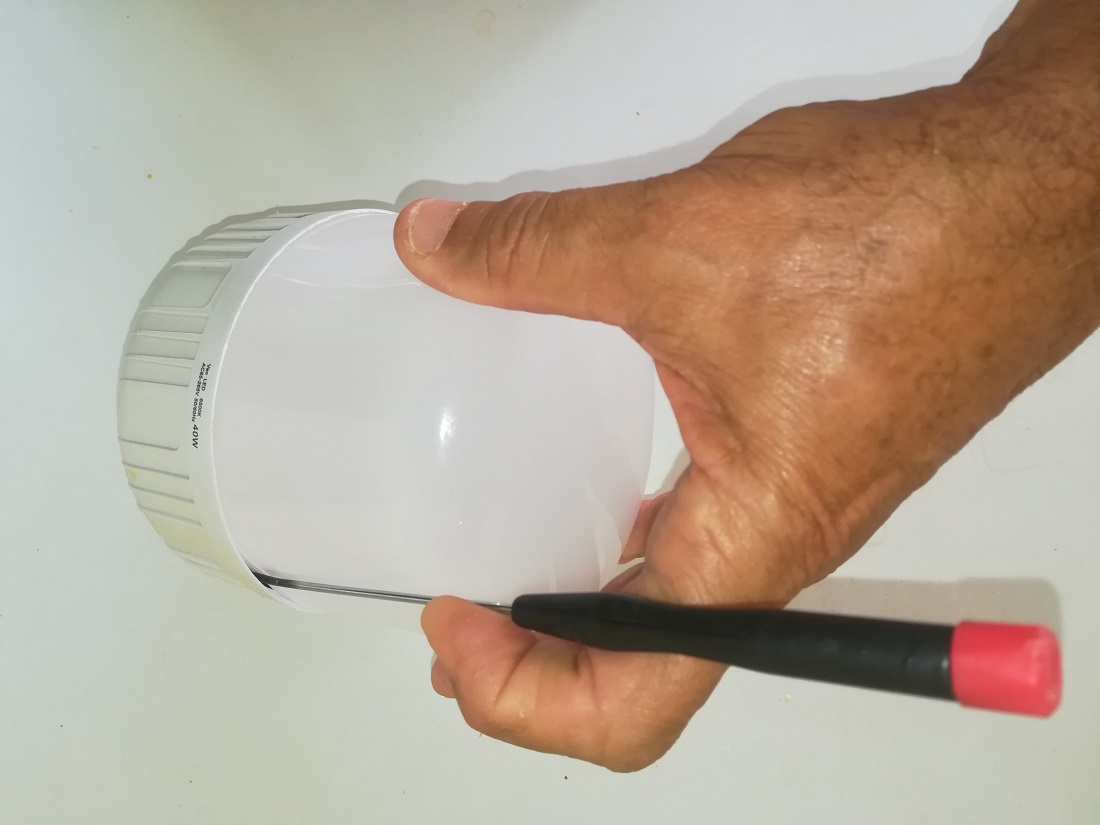
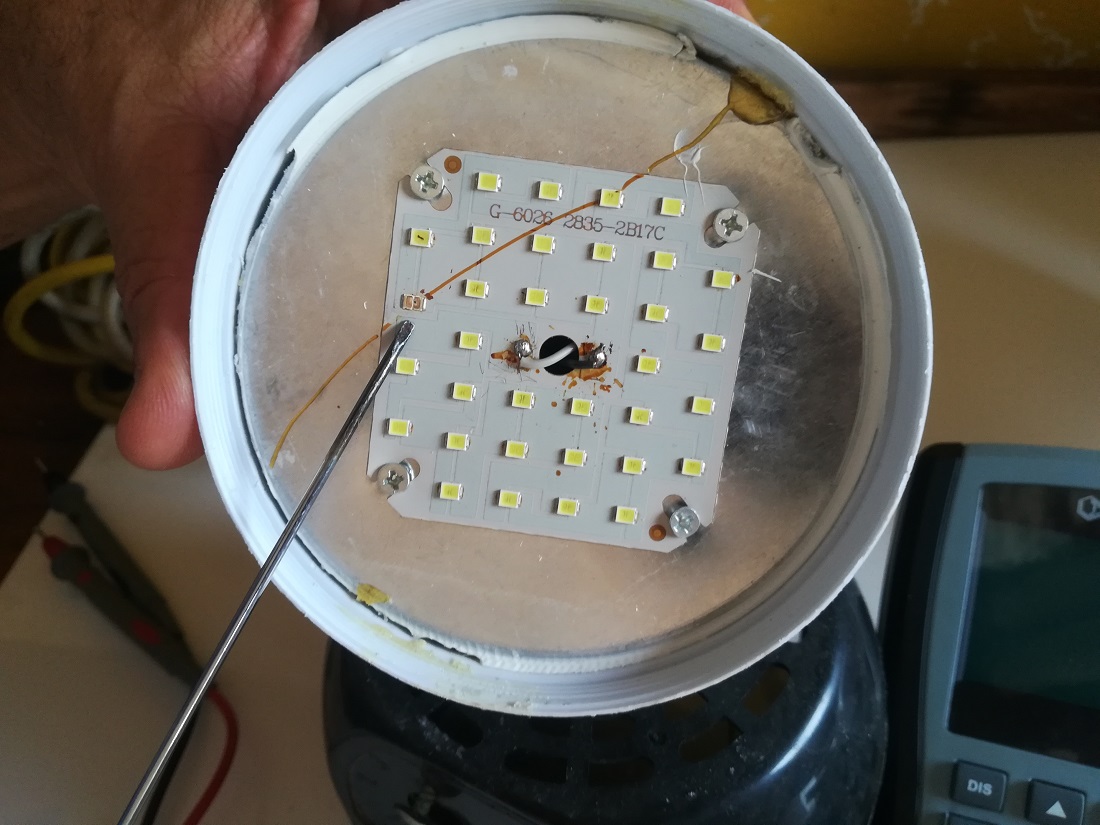
To begin with the repair the shield screen has to be taken off. Sometimes twisting it is enough to loose it. Sometimes it is necessary to use a flat thin screw driver all around the cap to loose it from the bulb, as shown in the picture below.
Para comenzar con la reparación hay que quitar la pantalla o tapa. A veces basta con girarla para soltarla. A veces es necesario utilizar un destornillador plano y fino alrededor de dicha tapa o pantalla para aflojarla del bombillo, como se muestra en la imagen de abajo.
Once the lid or cap is off, the following step is to measure the voltage output from the rectifying stage that feeds the LEDs. For this one I measured 172.4 V. Knowing that the voltage measured is suitable enough, the next step is to find out which of the series LED is burnt out, opening the circuit. As a guide, when an LED is open it tends to have some black spot on the top of it. This is so due to the plastic insulation they have covering them.
Una vez quitada la tapa, el siguiente paso es medir la salida de tensión de la etapa rectificadora que alimenta los LEDs. En este caso he medido 172,4 V. Sabiendo que la tensión medida es lo suficientemente adecuada, el siguiente paso es averiguar cuál de los LEDs en serie está quemado, abriendo el circuito. Como orientación, cuando un LED está abierto suele tener alguna mancha negra en la parte superior. Esto es debido al aislamiento de plástico que tienen cubriéndolos que se quema.
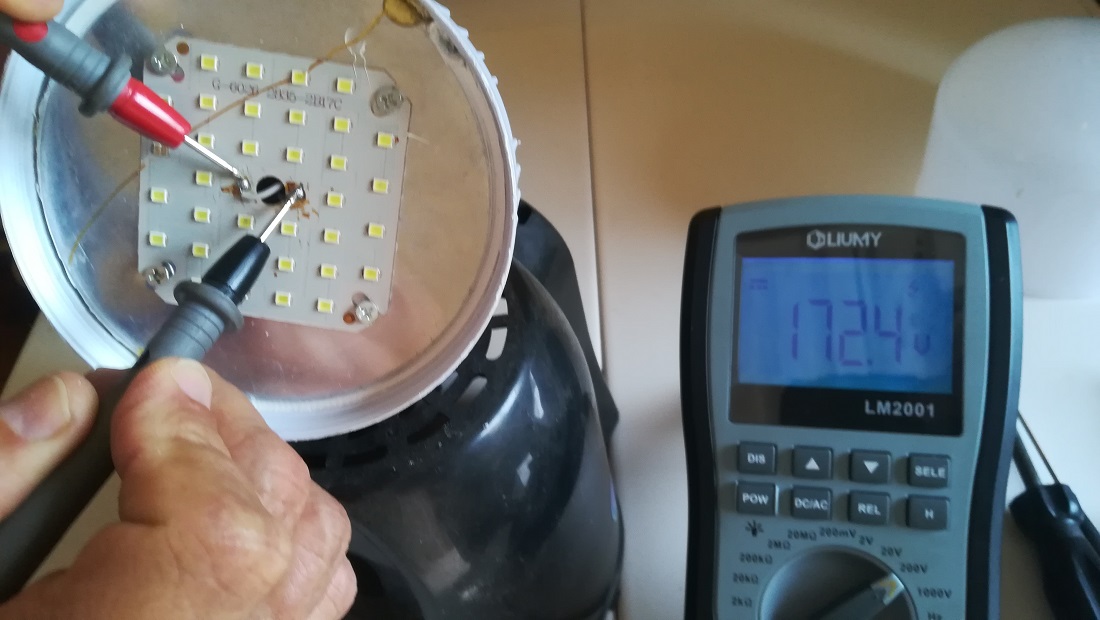
Measuring the voltage feeding the LEDs / Midiendo el voltaje que alimenta los LEDs
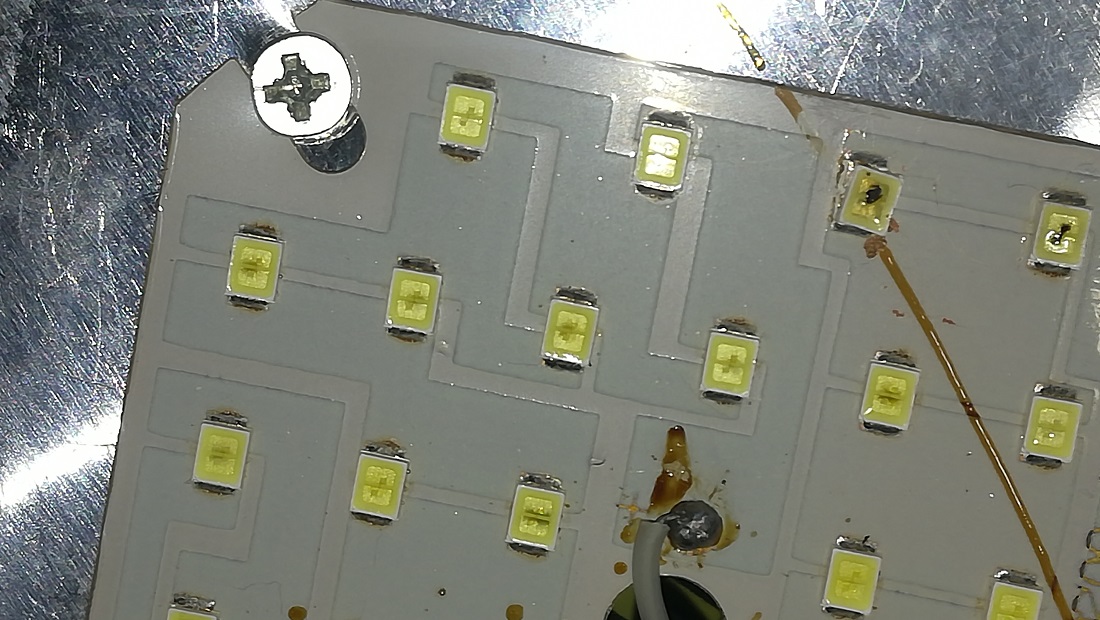
LEDs with a black spot identifying the burnt ones / LEDs con un punto negro identificando los quemados
After defining which possible LED is burnt out, next step is to take the plastic cover off and to make a jumper across the LED. It should light up to make sure this is the diode to make a jumper on.
Después de definir qué LED está quemado, el siguiente paso es quitar la cubierta de plástico y hacer un puente en el LED. Debería iluminarse. Ello confirma que éste es el diodo que hay que puentear.
With a flat screw driver touch both sides of the burnt LED diode / Con un destornillador plano toque ambos lados del diodo LED.
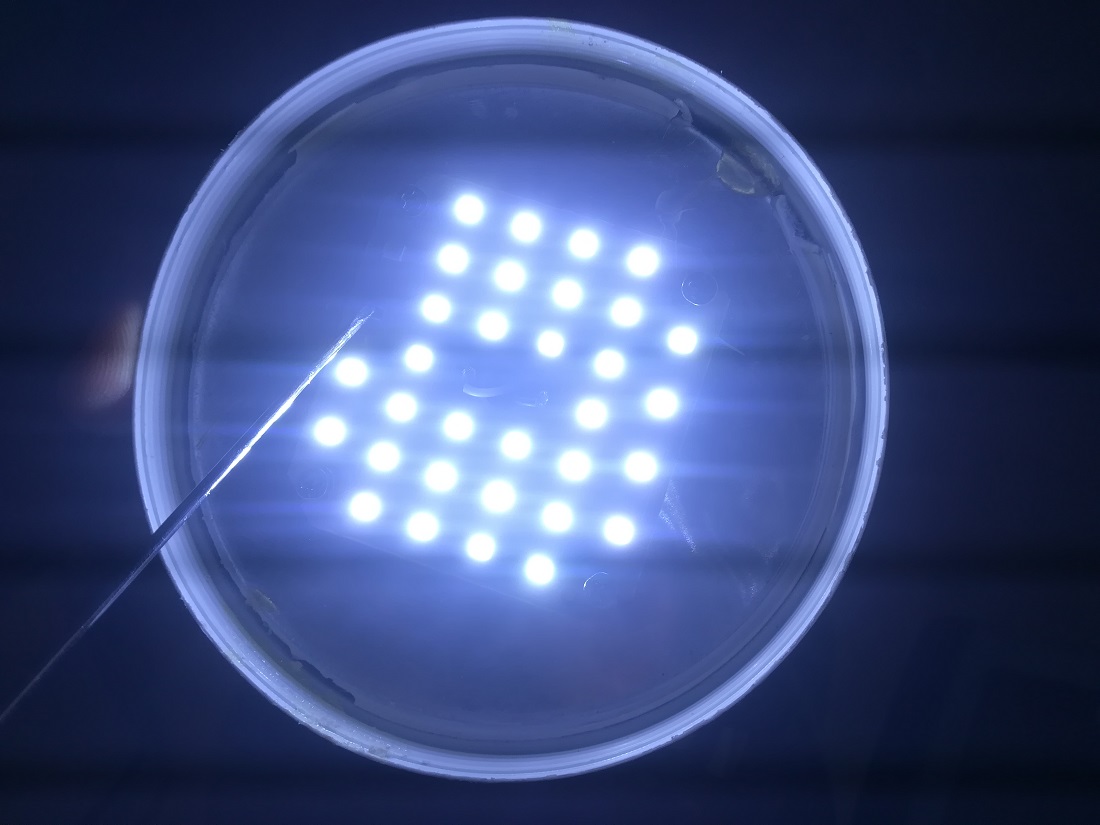
LEDs lightening up as soon as the jumper is made / Los LEDs se iluminan tan pronto se hace el puente electrico.
Once it is tested, place some solder across the two terminals of the diode.
Una vez probado, coloca un poco de soldadura entre los dos terminales del diodo.
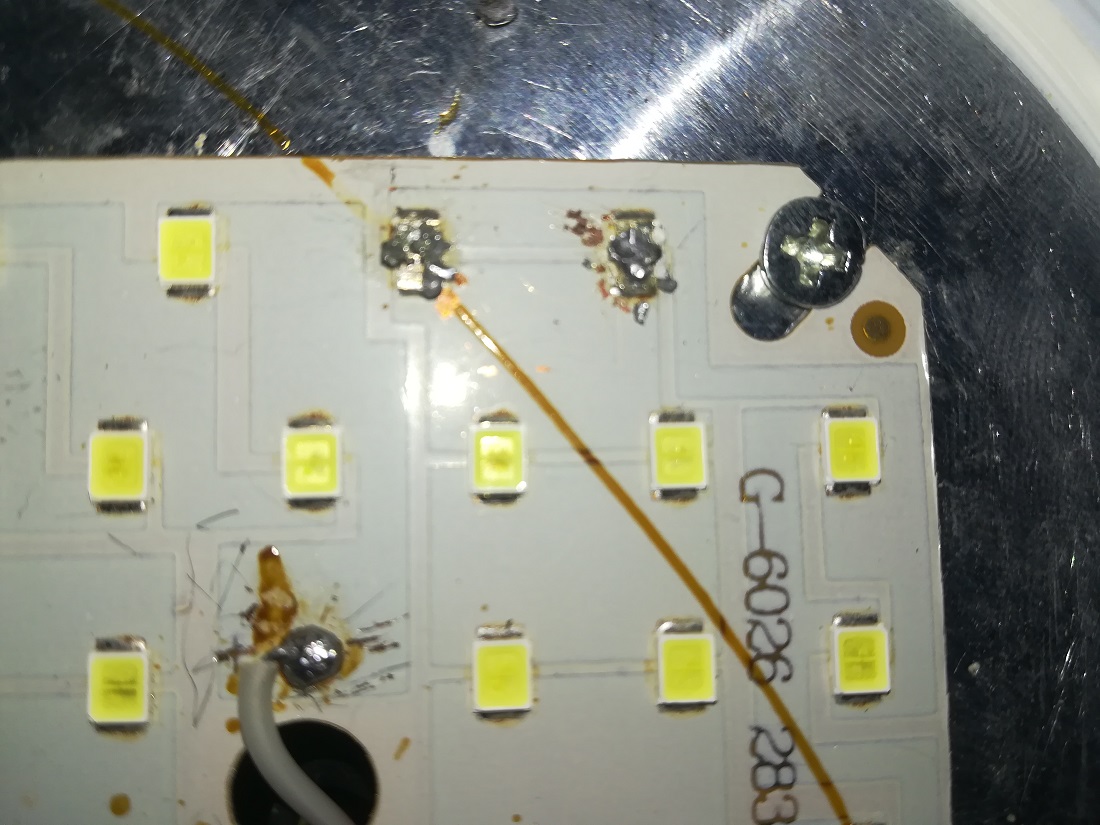
Burnt LEDs with solder on / Diodos LEDs quemados con soldadura sobre ellos
Try lighting up the LED bulb again just to make sure the soldering was done properly. Put the lid or cap back on.
Intenta encender de nuevo el bombillo LED para asegurarte de que la soldadura se hizo correctamente. Vuelva a colocar la tapa.
Now just tell yourself “Job well done”
Ahora dígase a sí mismo "Trabajo bien hecho"
All photographs used are of my own.
Todas las fotografías utilizadas son de mi autoría

Congratulations @ogutierrez! You have completed the following achievement on the Hive blockchain and have been rewarded with new badge(s):
Your next payout target is 500 HP.
The unit is Hive Power equivalent because post and comment rewards can be split into HP and HBD
You can view your badges on your board and compare yourself to others in the Ranking
If you no longer want to receive notifications, reply to this comment with the word
STOPTo support your work, I also upvoted your post!
Check out the last post from @hivebuzz:
Support the HiveBuzz project. Vote for our proposal!
Hola feliz tarde !! Cada vez que leo cosas así me recuerdo que mi predominio es el lado derecho del cerebro y no el izquierdo como el de los ingenieros jajaja.
Saludos y que bien disfruta esas cosas complicadas 🤭
Hola @baptistaeashell, un placer el leer tu comentario. Cuanto me llena tu manera tan genuina, sincera y sencilla de decir lo que sientes, de como ves las las cosas. Seguro no me equivoco al decir que debes resolver tus desafios con rapidez.
Grato tu comentario.
Cuidate...
🤗 saludos cordiales