[ESP- ENG] Tutorial para crear un servidor de Minecraft con Plugins
Saludos a mis amigos de Geek Zone. El día de hoy vengo con un contenido un poco diferente a lo que generalmente acostumbro: Un tutorial.
En esta oportunidad tuve la idea de hacer un tutorial sobre Minecraft, uno de mis juegos favoritos, que me ha regalado muchos buenos momentos especialmente cuando he jugado en servidores con mis amigos. Y cuando pienso en Minecraft y qué era eso que me hacía disfrutarlo tanto, vienen de inmediato a mi mente los plugins y los mods.

¿Qué es un Mod?
En el mundo de los videojuegos, un mod (un acortamiento del inglés modification, «modificación») es una extensión del software que modifica un videojuego original proporcionando nuevas posibilidades, ambientaciones, personajes, diálogos, objetos ,mapas etc.
¿Qué es un Plugin?
Los plugins de minecraft son complementos que agregan nuevas caracteristicas a nuestro minecraft base sin necesidad de mayores cambios a nuestro juego, solo con instalar en el servidor ya funcionaran.
Diferencia entre Mod y Plugin
Un plugin es un añadido a para tu server de minecraft, en este caso se usa el software bukkit. Un plugin puede cambiar prácticamente todas las funciones de Minecraft siempre y cuando sean las que Minecraft tiene por Defecto, es decir, las funciones que el juego incluye de por si.
Los plugins solo tienen funciones basicas en los servidores, no es necesario descargar ni instalar ningún contenido adicional (en el caso de los jugadores de nuestro server). En resumen, un plugin sólo sirve para un server (Bukkit), no para un cliente (Minecraft)
Un mod es una modificación de Minecraft. Con un mod puedes editar el contenido del juego en su totalidad. Existen mods de todo tipo y todos ellos pueden mejorar la experiencia del juego. El único defecto de un Mod es que requiere instalar contenido adicional tanto en el server (en caso de ser un mod multijugador) y también en el cliente del juego.

Entonces ya que les he explicado que significa cada cosa (es importante saberlo y tomarlo en cuenta)
¡¡Que empiece el tutorial!!
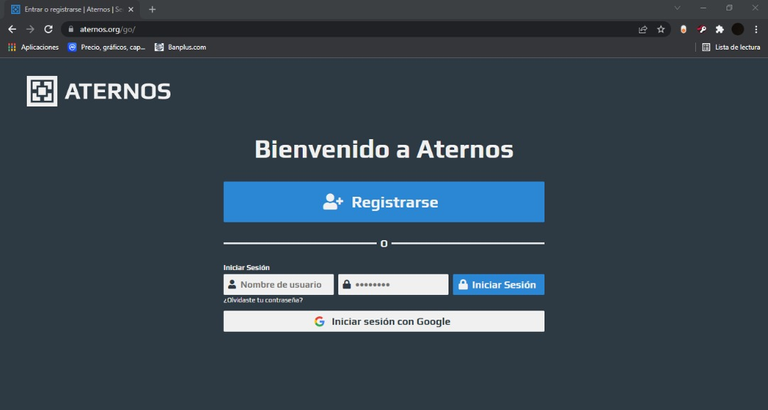
1- Debemos ingresar a https://aternos.org/:es-ES/ y vamos a registrarnos, es preferible que nos registremos con nuestra cuenta de Google.
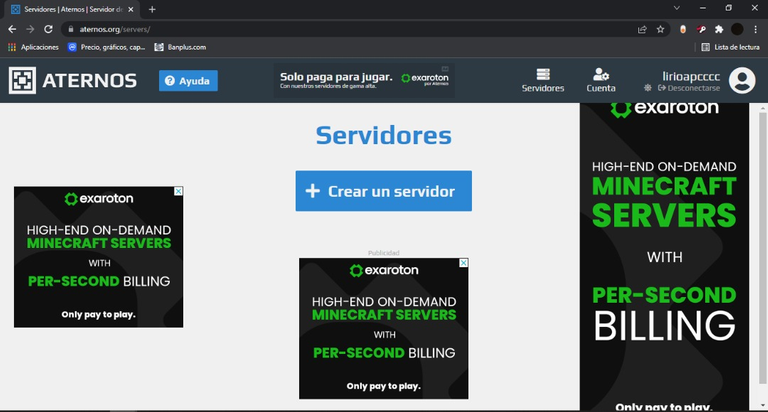
2- Luego de regístrarnos la página nos va a dirigir a esta pantalla en la que nos da la opción de "Crear un servidor".
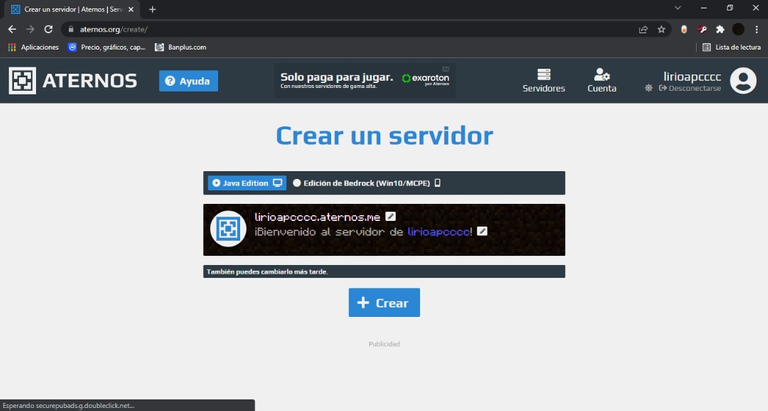
3- Después de presionar el botón "crear un servidor" nos va a dirigir a la siguiente pantalla, en la que se nos mostrará la IP de nuestro servidor y las versiones a seleccionar del mismo. Podemos seleccionar entre Java Edition y Bedrock (Java Edition para jugar en Computador y Bedrock para jugar desde el celular) en esta misma pantalla también podremos cambiar la dirección IP de nuestro servidor, el nombre, la foto de perfil y presentaciones del servidor.
4- Nos va a dirigir a la siguiente pantalla en donde podremos conseguir todas las opciones para configurar nuestro servidor, así mismo en esta pantalla es en donde Iniciaremos nuestro servidor. En caso de querer jugar con amigos que no tengan Minecraft Premium, nos vamos a dirigir a la pantalla "opciones" y vamos a activar la opción de craqueado.
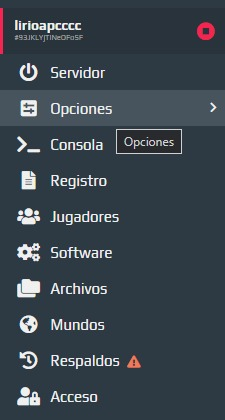
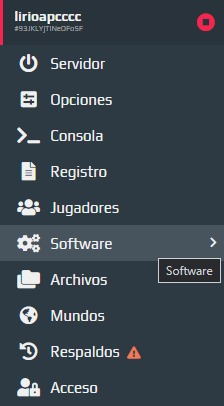
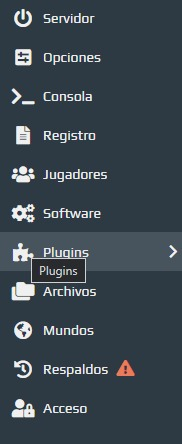
5- En caso de que se quiera configurar con Plugins . Para instalar estos plugins vamos a dirigirnos a "Software", en la parte lateral izquierda.
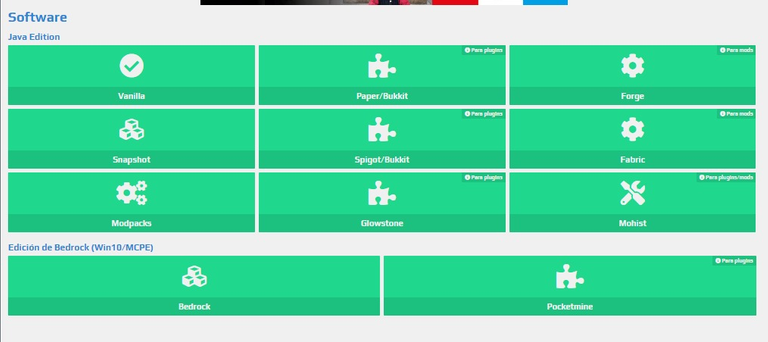
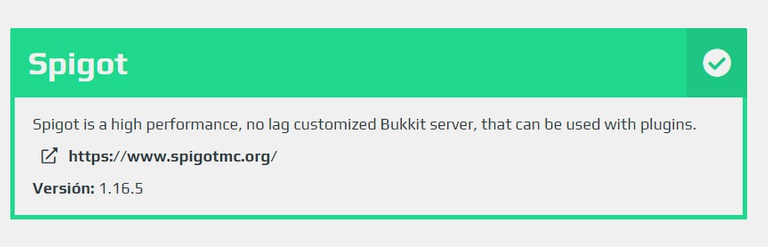
6- Para agregar un plugin nos vamos a dirigir a la ventana software y escogeremos el software bukki (spigot bukkit) ya que es el más sencillo y el más compatible con nuestros servidores.
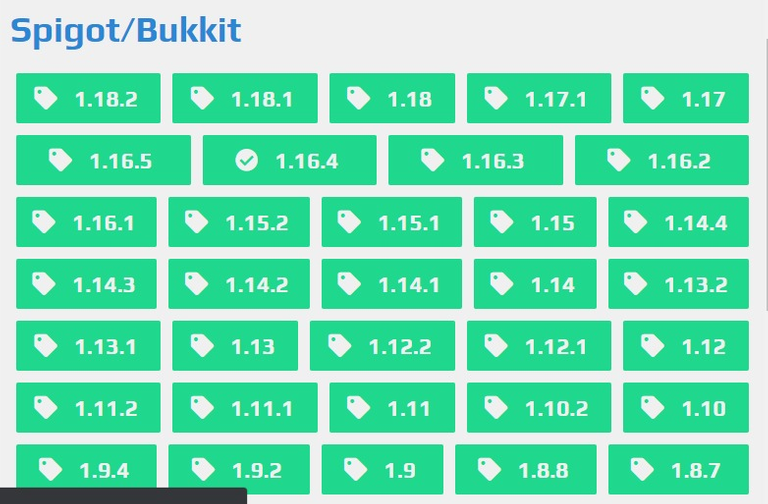
7- Seleccionamos la versión de nuestro servidor.
8- Procedemos a instalar y una vez instalado nos saldrá el check que verifica nuestra instalación.
9- Nos saldrá una nueva opción en nuestro panel de servidor llamado ''plugins''.
10- En la opción "plugins" nos saldrán todos los plugins disponibles para instalar.
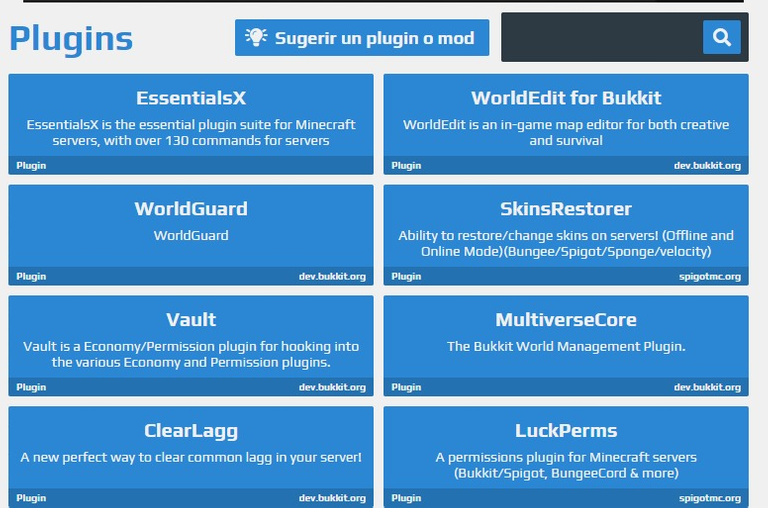
11- Una vez encontremos un plugin que nos guste, solo tendremos que clickear el botón de descarga y automáticamente se instalara en nuestro server en la carpeta archivos.
12- Si queremos desinstalarlo solo tendremos que dirigirnos a la carpeta "plugins" en archivos.
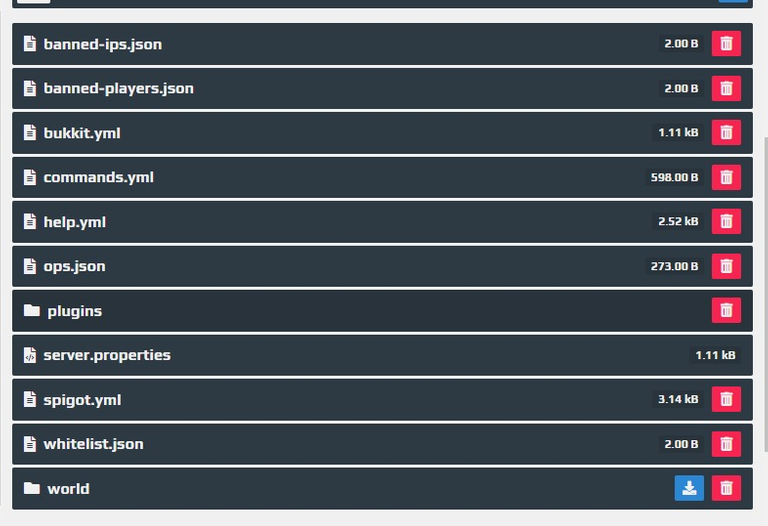
Y proceder a eliminarlo.

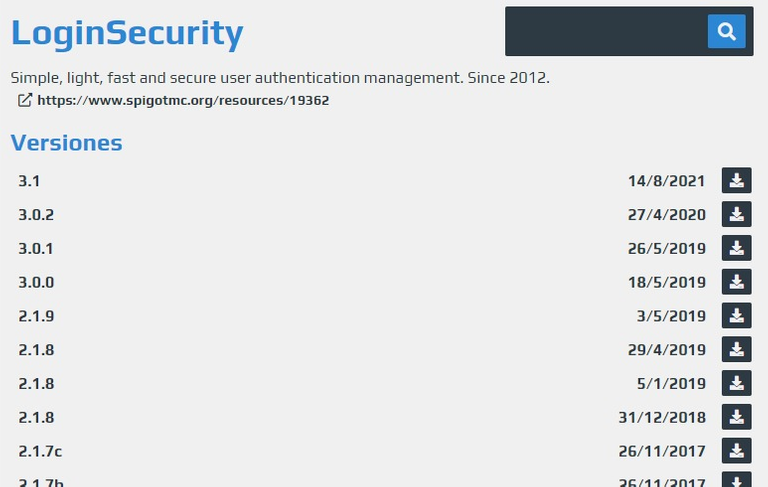
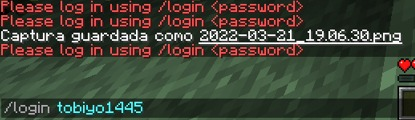
Este plugin sirve para proteger nuestro servidor y que nuestros usuarios tengan una contraseña propia a la hora de entrar, previniendo el robo de sus cuentas.
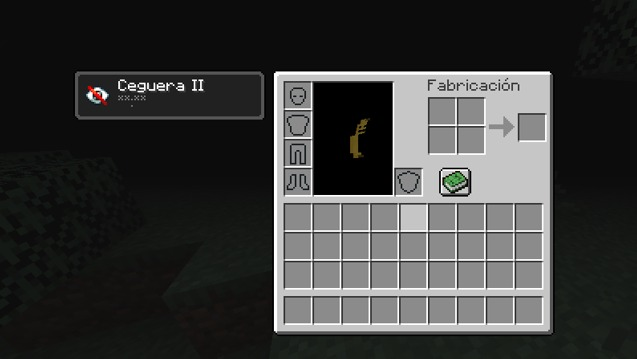
Aplica una ceguera indefinida que se nos quitara cuando nos registremos, igualmente no podremos movernos ni ver el inventario.
Una vez registrados, nos saldrá un mensaje de que nos registramos correctamente.
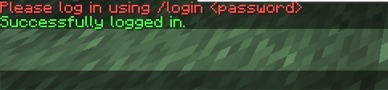
Y se nos quitara la ceguera y podremos jugar con normalidad.
Este es solo un ejemplo de los muchos plugins que existen. Pueden ayudarnos a personalizar nuestro servidor de una manera creativa que puede volver el juego mucho más interesante, especialmente si jugamos normalmente con un grupo de amigos.
Espero que les sea de utilidad este tutorial. ¡¡¡Hasta la próxima!!!
Tutorial to create a Minecraft server with Plugins
Greetings to my friends of Geek Zone. Today I come with a content a little different from what I usually do: A tutorial.
This time I had the idea of making a tutorial about Minecraft, one of my favorite games, which has given me many good moments especially when I have played on servers with my friends. And when I think about Minecraft and what was it that made me enjoy it so much, plugins and mods immediately come to my mind.
¿What is a Mod?
In the world of video games, a mod (a shortening of modification) is a software extension that modifies an original video game by providing new possibilities, settings, characters, dialogues, objects, maps, etc.
¿What is a Plugin?
Minecraft plugins are add-ons that add new features to our base minecraft without the need for major changes to our game, just install on the server and they will work.
Difference between Mod and Plugin
A plugin is an addition to your minecraft server, in this case the bukkit software is used. A plugin can change practically all Minecraft functions as long as they are the ones that Minecraft has by default, that is, the functions that the game includes by itself.
The plugins only have basic functions on the servers, it is not necessary to download or install any additional content (in the case of the players of our server). In short, a plugin only serves for a server (Bukkit), not for a client (Minecraft).
A mod is a modification of Minecraft. With a mod you can edit the content of the game as a whole. There are mods of all kinds and all of them can improve the game experience. The only flaw of a mod is that it requires additional content to be installed both on the server (in case of a multiplayer mod) and also on the game client.
So since I have explained what each thing means (it is important to know and take it into account).
Let the tutorial begin!!!!
1- We must enter https://aternos.org/:es-ES/ and we are going to register, it is preferable that we register with our Google account.
2- After registering the page will direct us to this screen where it gives us the option to "Create a server".
3- After pressing the button "create a server" we will be directed to the following screen, in which we will be shown the IP of our server and the versions to select of the same one. We can select between Java Edition and Bedrock (Java Edition to play in Computer and Bedrock to play from the cellular) in this same screen we will also be able to change the IP address of our server, the name, the profile picture and presentations of the server.
4- It is going to direct us to the following screen where we will be able to obtain all the options to configure our server, likewise in this screen is where we will initiate our server. In case we want to play with friends who do not have Minecraft Premium, we will go to the "options" screen and we will activate the cracking option.
5- In case you want to configure with Plugins . To install these plugins we are going to go to "Software", in the left lateral part.
6- To add a plugin we will go to the software window and choose the bukki software (spigot bukkit) since it is the simplest and the most compatible with our servers.
7- Select the version of our server.
8- We proceed to install and once installed we will see the check that verifies our installation.
9- We will see a new option in our server panel called ''plugins''.
10- In the option ''plugins'' we will see all the available plugins to install.
11- Once we find a plugin that we like, we will only have to click the download button and it will be automatically installed in our server in the files folder.
12- If we want to uninstall it we will only have to go to the folder "plugins" in files.
And proceed to delete it.
This plugin is used to protect our server and that our users have their own password when logging in, preventing the theft of their accounts.
It applies an indefinite blindness that will be removed when we register, but we will not be able to move or see the inventory.
Once registered, we will get a message that we registered successfully.
And the blindness will be removed and we will be able to play normally.
This is just one example of the many plugins that exist. They can help us to customize our server in a creative way that can make the game much more interesting, especially if we normally play with a group of friends.
I hope you find this tutorial useful, see you next time!!!!
Recursos: Canva - Pinterest - Ezgif|| Xiaomi Redmi S2
Traducido con Deepl.com
Todos los Derechos Reservados || © @
2021 -2022
💌 Discord: MyMelody#5297
_
Original content by the author.
Resources: Canva - Pinterest - Ezgif|| Xiaomi Redmi S2
Translation done with Deepl.com
All Rights Reserved || © @ 2021-2022
💌 Discord: MyMelody#5297

Congratulations @lirioapc! You have completed the following achievement on the Hive blockchain and have been rewarded with new badge(s):
Your next target is to reach 40 posts.
You can view your badges on your board and compare yourself to others in the Ranking
If you no longer want to receive notifications, reply to this comment with the word
STOPTo support your work, I also upvoted your post!
Check out the last post from @hivebuzz:
Support the HiveBuzz project. Vote for our proposal!
Excelente tutorial! Tenía esa duda de cómo crear un servidor
Copiar y pegar sin citar una fuente, es considerado plagio. El plagio y abuso en Hive es penalizado.
Te invitamos a leer el FAQ e investigar sobre las reglas escritas y no escritas de Hive.