(ENG/ESP) Unboxing and Installation | Cooler Heatsink H120Z - ALSEYE (RGB) | My New Gamer Acquisition
(Edited)
How are you, colleagues! I hope you are doing well =) Today I will be sharing with you all my new component for my modest PC computer. In my previous content I was presenting my new and nice Gaming Keyboard, for those who have not seen the content can take a look by entering "Here"
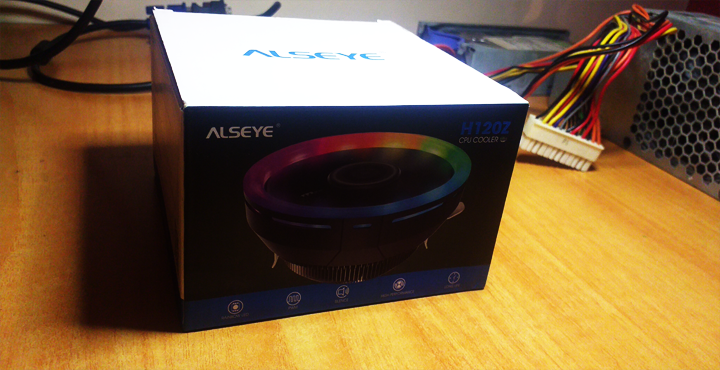
Now then! The new component for my PC is a Heat Sink (RGB) Model H120Z from ALSEYE.
¡Qué tal colegas! Espero se encuentren muy bien =) El día de hoy estaré compartiendo con todos ustedes mi nuevo componente para mi modesta PC ordenador. En mi anterior contenido estuve presentando mi nuevo y lindo Teclado Gaming, para el que no haya visto el contenido pueden echarle un vistazo ingresando “Aquí”
¡Ahora bien! El nuevo componente para mi PC ordenador, es un Disipador de Calor (RGB) Modelo H120Z de la Marca ALSEYE.
My adventure with my modest PC has started a few weeks ago, but I have been doing everything little by little, digging around the web to get all those cool components to give it a better look.
Today it has been the turn of this heatsink which I got for about 25$ here in Venezuela. It is important to mention that it is compatible with Intel Sockets 775 - 1366 - 115X and for the AMD Sockets it is compatible with AM2 - AM2+ - AM3 - AM3+ - AM4.
Mi aventura con mi modesta PC ha empezado desde hace unas cuantas semanas atrás, pero todo lo he ido haciendo poco a poco, indagando por la web para conseguir todos esos componentes geniales que le den una mejor apariencia.
Hoy ha sido el turno de este Disipador de Calor el cual lo he conseguido por unos 25$ aquí en Venezuela. Es importante mencionar que es compatible Con Sockets Intel 775 – 1366 – 115X y por la parte de los Sockets AMD es compatible con AM2 – AM2+ – AM3 – AM3+ – AM4.
To get it I have made some consultations on the web and then I have set off to the city center to visit those places where they sell all kinds of computer components. I must say that I had to walk more than the account, since in several places where I got it they had it a little more expensive, so I had to be patient until I found the ideal place where they had it at that accessible price for me. After so much I managed to get it at the price I mentioned before and I made my purchase =)
Para conseguirlo he hecho algunas consultas por la web y luego me he puesto en marcha al centro de la ciudad para visitar aquellos sitios donde venden todo tipo de componentes informáticos. Debo decir que me toco caminar más de la cuenta, ya que en varios sitios donde lo conseguí lo tenían un poco más caro, así que tuve que ser paciente hasta conseguir el sitio ideal donde lo tuvieran a ese precio accesible para mí. Después de tanto logre conseguirlo al precio que antes mencione e hice mí compra =)

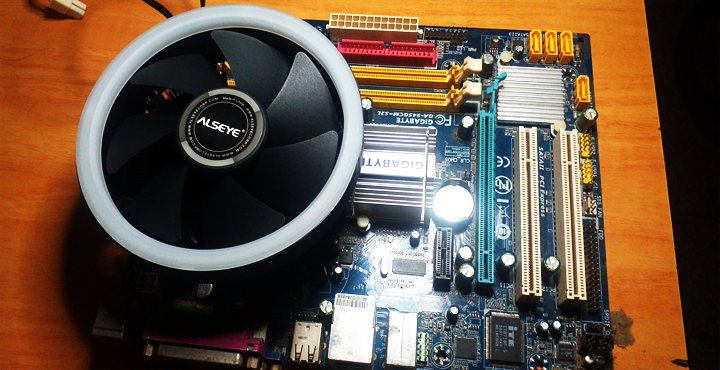
When I got home I got down to work with my new heatsink, at this point I can say that I have been very excited because I have been achieving little by little what I have proposed =) To put it to work and see it in system, I have mounted it on a GIGABYTE GA-945GCM-S2L Socket LGA 775 (INTEL) board. I should mention that this board is not the one I use in my PC, but I decided to test it on this board because it was much easier and I didn't have to disassemble my CPU.
Al llegar a casa me puse manos a la obra con mi nuevo disipador, en este punto puedo decir que me he sentido muy emocionado ya que he ido logrando de a poco lo que me he propuesto =). Para ponerlo a funcionar y verlo en sistema, lo he montado en una Placa Marca GIGABYTE Modelo GA-945GCM-S2L de Socket LGA 775 (INTEL). Debo mencionar que esta placa no es la que uso en mi PC, pero he decido probarla en esta placa ya que se me hacía mucho más fácil y así no tenía que estar desmontando ningún componente de mi CPU.
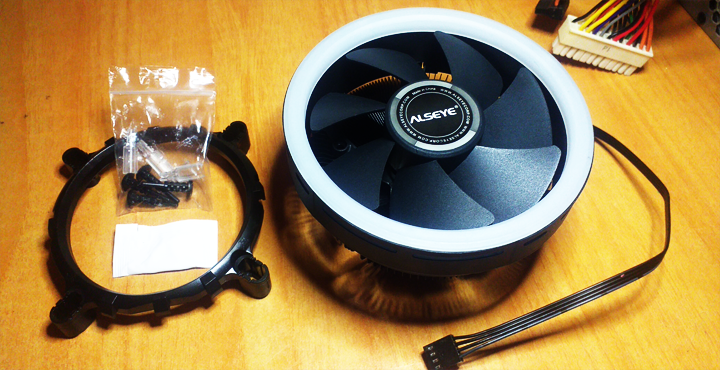
Continuing now with the installation, for the base it has not cost me anything to present it and to adjust them with the supports that it brings, these supports are of plastic material so I had to be a little careful when I was going to make the pressure so that they entered in the opening that is for the base with the plate, the truth was not so complicated this step. After having the base ready I proceeded with the mounting of my cool heatsink =) At this point if I had a little inconvenient, since I could not get how to hook the part of the lever, after giving me a moment and see the full operation of the lever I could realize that I could inflict a good downward pressure until the hook of the lever will fit and hook into the tab of the base.
Siguiendo ahora con la instalación, para la base no me ha costado nada presentarla y ajustarlas con los soportes que trae, estos soportes son de material plástico así que tuve que tener algo de cuidado cuando iba hacer la presión para que entraran en la abertura que separa la base con la placa, la verdad no fue tan complicado este paso. Después de tener lista la base proseguí con la montura de mi genial disipador =) En este punto si tuve un poco de inconvenientes, ya que no conseguía como enganchar la parte de la palanca, después de darme un momento y ver el funcionamiento completo de la palanca pude darme cuenta que podía infligir una buena presión hacia abajo hasta que el gancho de la palanca se ajustará y enganchara en la pestaña de la base.
The mount as such is not difficult at all, I just couldn't figure out how to hook it in the first few attempts xD Later on I realized that it's not complicated at all. I think it is also important to mention that before making the mount I used thermal paste to do the test, I put it on both the processor and the heatsink, this is highly recommended in these cases.
La montura como tal no es nada difícil, solo que de mi parte no conseguía como engancharla en los primeros intentos xD Ya después pude darme cuenta que no es para nada complicado. Creo que es importante que mencione también que antes de hacer la montura he usado pasta térmica para hacer la prueba, le echado tanto al procesador como al disipador, esto es muy recomendable en estos casos.
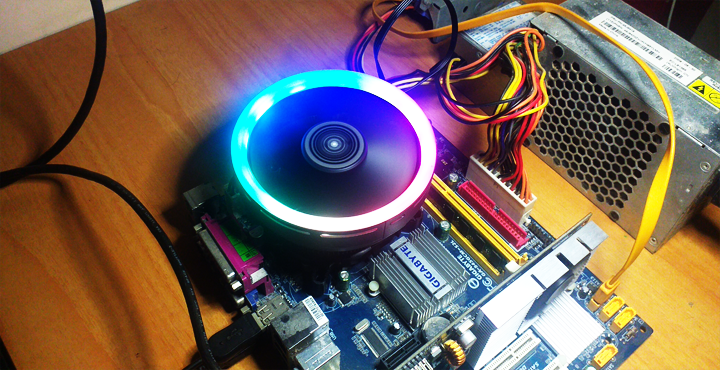
Once I finished with the mount I set out to put the other components to the board, such as ram memory, video card, battery, power supply, hard drive, etc.
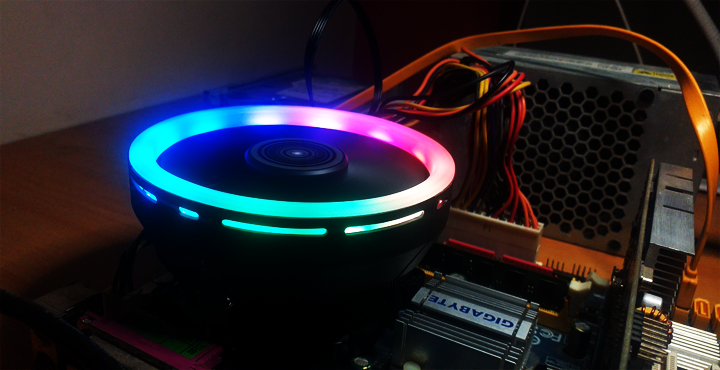
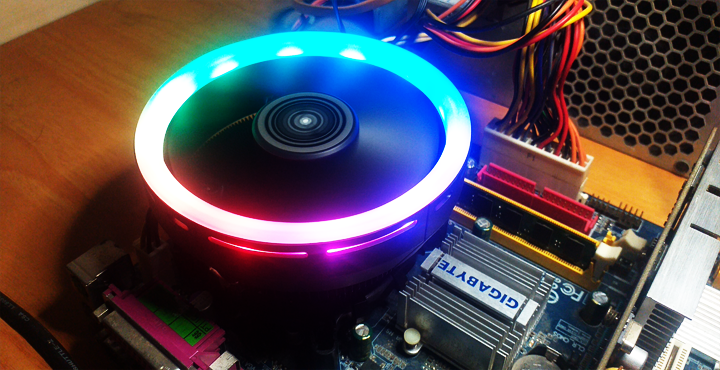
Already at this point after having everything ready, I made the ignition point to the board and the rest would be joy and a great satisfaction for me. Seeing the heatsink working with all those colors has made me very excited, giving me the certainty that soon I will be able to build that Gamer PC with my modest motherboard that has been with me for a long time. That is my goal in reality, to get the most out of my modest motherboard.
Una vez que termine con la montura me dispuse a poner los otros componentes a la Placa, tales como la memoria ram, tarjeta de vídeo, pila, fuente de poder, disco duro, etc.
Ya en este punto después de tener todo listo, le he hecho el puente de encendido a la placa y ya lo demás sería alegría y una gran satisfacción para mí. Ver el disipador funcionar con todos esos colores me ha emocionado mucho, dándome la certeza también que pronto lograré armar ese PC Gamer con mi Modesta Placa Madre que me ha acompañado por tanto tiempo. Esa es mi meta en realidad, llevar a tope y sacar lo máximo de mi modesta Placa.
And in this way I conclude my content today, I hope you liked it and likewise I also hope to bring soon new news about my modest pc computer.
Y de esta forma concluyo mi contenido de hoy, espero que le hayas gustado y del mismo modo también espero poder traer pronto nuevas novedades sobre mi modesto pc ordenador.

All the images that I have shown in this content are of my authorship. Thanks for visiting and reading my content, see you soon!
Todas las imágenes que he mostrado en este contenido son de mi autoría. Gracias por visitar y leer mi contenido, hasta pronto!

 |  |  |
0
0
0.000
Ese cooler se ve espectacular, demasiado grade para la placa jaja.
Seguro ya lo sabes, pero si cargas mucho la placa, tambien tiene que haber una fuente de alimentacion acorde al consumo.
saludos
En realidad el tamaño no es un problema, el cooler consume un máximo de 95w, estoy tranquilo por esa parte. Ando un poco dudoso es por el procesador pero ya lo iré viendo en las pruebas. Igual esa no es la placa base que usaré para mi proyecto.
Gracias por comentar saludos!
Excelente fan pero es ideal para procesadores sencillos dual core o con pocos núcleos si colocas un procesador potente un i5 o i7 de varios núcleos vas tener problema con las temperaturas estéticamente se ven muy bonito a la vista.
Que tal! Puedo decir que en parte tienes razón, aunque el disipador es compatible también con Socket 1155, fácilmente se puede poner a trabajar con procesadores i3, i5 y también los i7. Todo va depender del TDP que maneja los procesadores. Mi PC Actualmente tiene un Core 2 Quad q6600 de 4 núcleos y maneja un TDP 105W, por su parte el disipador maneja un TDP de 95W, hasta el momento en cuanto a temperatura no he tenido ningún tipo de problemas, todo esta balanceado y Mi PC trabaja normal e incluso ha mejorado el rendimiento y los FPS en los juegos han mejorado en parte también.
Gracias por tu comentario, saludos!
En comparación a la placa se ve gigante jajaja en lo personal siempre pensé que agregarle RGB a nuestras maquinas era un malgasto de dinero que podríamos invertir en mejores componentes, pero cuando compre el nuevo gabinete de mi PC lo entendí todo jajaja es muy necesario mostrar lo preciosas que pueden ser. Además que el RGB mejora los FPS claramente, te felicito por tu compra, disfrútalo y cuídalo.
@nitsuga12 Hola que tal! Ya han sido varios los que han dicho lo mismo jajaja... En realidad si, el cooler es un poco grande xD.
Desde que me propuse a repontenciar mi pc ordenador he tenido siempre la idea de darle ese aspecto de PC Gamer =) Así que voy con todo con eso, me gusto mucho el hecho de ver mi CPU lleno de esos colores tan geniales.
Ahora el procesador va a quedar bien enfriado jajaja. Éxitos, espero ver más actualizaciones de esa PC
Ese es un buen punto... La temperatura en el procesador mejora en gran parte y los van más fluidos, los FPS también han aumentado, así que todo va genial en cuanto a mi nuevo disipador =D
Congrats on your colorful new heatsink fan/cooler. :)
!PIZZA
PIZZA Holders sent $PIZZA tips in this post's comments:
@thecuriousfool(2/10) tipped @leogolj (x1)
Please vote for pizza.witness!
Wawu, congrat dear friend.. I actually haven't seen this type of fan but I hope it worth the price you got it
Howdy bro! Nice to see you here... And the truth yes, it has been worth it and I have no complaints. My processor has improved its performance thanks to the cooling capacity that my new heatsink has, now my processor works much better thanks to the temperature that has improved significantly.
Thanks for leaving your comment, best regards!
That's nice and a good one to know
Cooler que se ve Cool, sin lugar a duda, me es super curioso y lo podria amar sin pensarlo dos veces, pero no lo compraria, muchos colores para mi gusto jajaja.
Te entiendo jajaja... El cooler da un toque más a lo gamer =) igual muchas gracias por pasar y comentar, saludos!