Manipulating Green Screen Images using Python |EN/ES|
I'm a newbie in python, and it represents my first experience in programming. I understood so much about how the digital world works is unbelievable! This time, I'd like to share a basic principle regarding images. I created a simple code to manipulate an image under the green screen feature considering every pixel on the images I combined to create a new one.
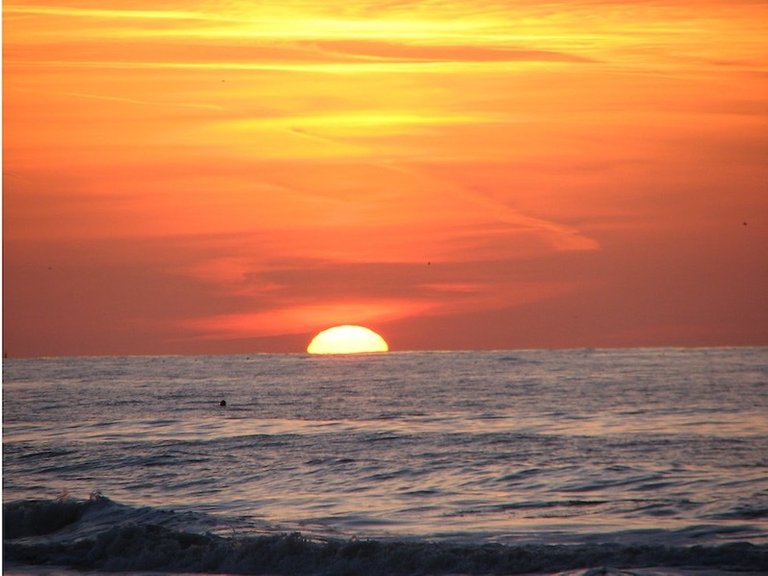
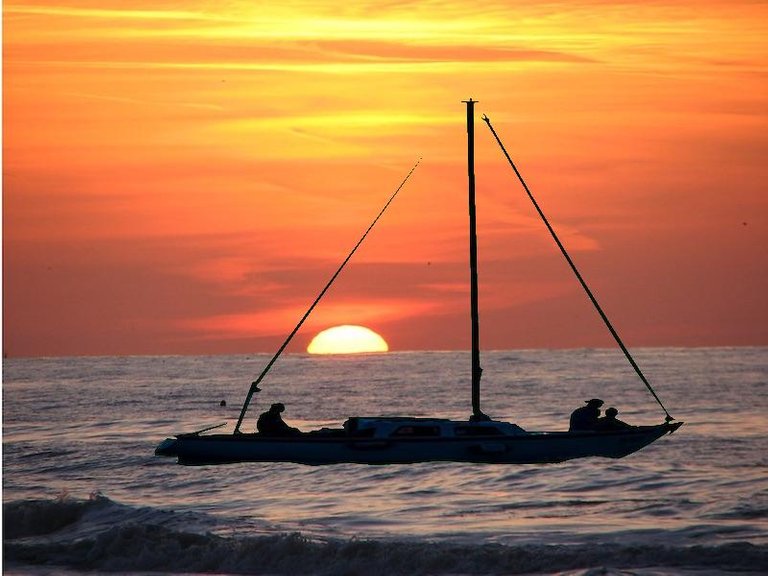
In this code, we fuse two images, one based on a green screen (boat) and the other with a regular background (sea at sunset). Both images are identical in dimensions (800x600) meaning the pixel quantity and configuration is the same.
Soy un novato en Python y representa mi primera experiencia en programación. ¡Entendí tanto sobre cómo funciona el mundo digital que es increíble! Esta vez, me gustaria compartir un principio básico con respecto a las imágenes. Creé un código simple para manipular una imagen debajo de la función de pantalla verde considerando cada píxel de las imágenes que combiné para crear una nueva.
En este código fusionamos dos imágenes, una basada en una pantalla verde (barco) y la otra con un fondo regular (mar al atardecer). Ambas imágenes son idénticas en dimensiones (800x600), lo que significa que la cantidad de píxeles y la configuración son las mismas.
|

|
The objective is to locate the boat over the sea at sunset creating one image. First thing is to understand that we want our program to recognize pixels on one image and replace the ones we tell it with the other ones. The principle of a green screen is based on the color recognition so it can be replaced by something else.
El objetivo es ubicar el barco sobre el mar al atardecer creando una imagen. Lo primero es entender que queremos que nuestro programa reconozca píxeles en una imagen y reemplace los que le decimos por otros. El principio de una pantalla verde se basa en el reconocimiento de color para que pueda ser reemplazado por otra cosa.
#you want the computer to go through all the pixels from the first image.
#If the pixel is not green, you want to keep it, but if it is green,
#you want to use the corresponding pixel value from the other image.

# This line imports or includes the library we will need
from PIL import Image

# This line opens the image and loads it into a variable called "image_original"
image_boat = Image.open("boat.jpg")
image_sunset = Image.open("sunset.jpg")
For this task, we are going to use the PIL library to work with images. First, we open and load the images into variables. The location of the files in your computer is important for the whole process.
Para esta tarea, vamos a utilizar la biblioteca PIL para trabajar con imágenes. Primero, abrimos y cargamos las imágenes en variables. La ubicación de los archivos en su computadora es importante para todo el proceso.
#this charges the pixels into the program
pixels_boat = image_boat.load()
pixels_sunset = image_sunset.load()

#for obtaining image size and format

# print("boat")
# print(image_boat.size)
# print(image_boat.format)
# print("sunset")
# print(image_sunset.size)
# print(image_sunset.format)
Now we load the pixels into another variables related to the images we just load. There are also codes to reassure the image size and format are adequate.
Ahora cargamos los píxeles en otras variables relacionadas con las imágenes que acabamos de cargar. También hay códigos para asegurar que el tamaño y el formato de la imagen son adecuados.
#creating width and height variables to use in my loop
(width, height) = image_boat.size
print(width)
print(height)

#creating a new image
image_combined = Image.new("RGB", image_boat.size)
pixels_combined = image_combined.load()

#this retrieves the pixels at that (x,y) location
#    r, g, b = pixels_original[100, 200]

#this can modify the pixels of a given location by giving the new values in the r, g, b order!
#    pixels_original[100, 200] = (100, 50, 80)
Now, I created width and height variables regarding the boat image, and a new image whose purpose is to serve as canvas for the combined pixels in further steps.
Ahora, creé variables de ancho y alto con respecto a la imagen del barco, y una nueva imagen cuyo propósito es servir como lienzo para los píxeles combinados en pasos posteriores.
#Iterating through the pixels of an image and combining them into the new one
for y in range(0, height):
    for x in range(0, width):
        (r1, g1, b1) = pixels_boat[x, y]
        (r2, g2, b2) = pixels_sunset[x, y]
        (r3, g3, b3) = pixels_combined[x, y]

        #creating a filter on the resulting image by modifying one color of the background image
        b2 = 110 #soft blue filter

        boat = (r1, g1, b1)
        sunset = (r2, g2, b2)
        combined = (r3, g3, b3)

        if r1 <= 120 and g1 >= 90 and b1 <= 120:
            pixels_combined[x, y] = sunset
        else:
            pixels_combined[x, y] = boat


image_combined.show()

#this saves the image and can rename it
#image_combined.save("sunset_boat_filtered.jpg")
The fun part starts here. Using two "For" loops and a "If" condition the program iterates through all the pixels of each image and decides which pixels to keep from one image or the other to finally combine the selection into a new image (whose canvas we just created).
Inside the loop, we create variables for the RGB (Red, Green, Blue) values of the images' pixels. Then, the condition establishes how to recognize the pixels that are green. You can notice the values of green, blue and red so we decide the "tone" of green our boat image is. It is something similar to tolerance in design programs.
La parte divertida comienza aquí. Usando dos bucles "For" y una condición "If", el programa recorre todos los píxeles de cada imagen y decide qué píxeles conservar de una imagen u otra para finalmente combinar la selección en una nueva imagen (cuyo lienzo acabamos de crear).
Dentro del bucle, creamos variables para los valores RGB (rojo, verde, azul) de los píxeles de las imágenes. Luego, la condición establece cómo reconocer los píxeles que son verdes. Puedes notar los valores de verde, azul y rojo, así que decidimos el "tono" de verde de la imagen de nuestro barco. Es algo parecido a la tolerancia en los programas de diseño.
This is the final result. In the case of this boat image with a green background, not all green pixels were of the same color so some of them persisted on the image. By adjusting the value of "g" in the condition we manage to eliminate the majority of green pixels from that image.
Este es el resultado final. En el caso de esta imagen de barco con fondo verde, no todos los píxeles verdes eran del mismo color, por lo que algunos persistieron en la imagen. Ajustando el valor de "g" en la condición logramos eliminar la mayoría de píxeles verdes de esa imagen.
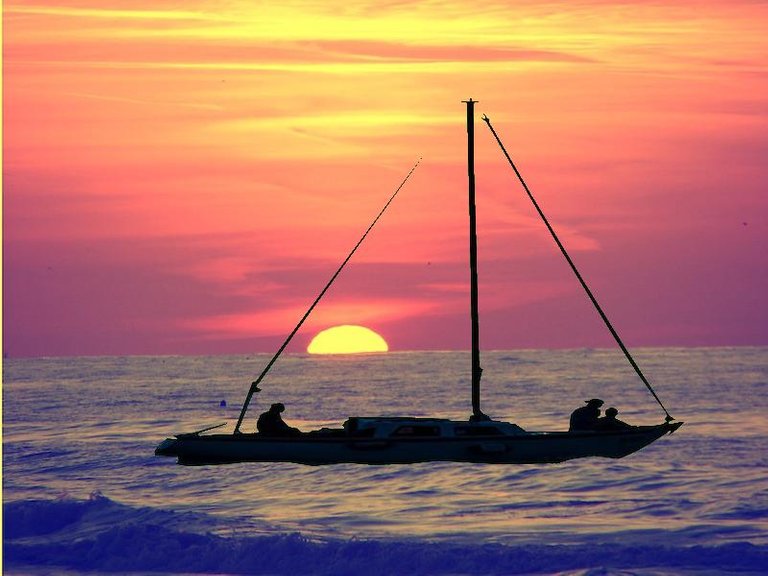
You can also note inside the second loop there is a value prior to the condition. It establishes a blue tone for all pixels as a way of filtering the image. This made me think how actual filters on apps work.
También pueden notar que dentro del segundo bucle hay un valor antes de la condición. Establece un tono azul para todos los píxeles como forma de filtrar la imagen. Esto me hizo pensar en cómo funcionan los filtros reales en las aplicaciones.
@gaeljosser
Code created under Visual Studio Code using PIL library
Images provided by BYUI's Intro to Programming course
https://twitter.com/GaelJosser/status/1418608735879061507
The rewards earned on this comment will go directly to the person sharing the post on Twitter as long as they are registered with @poshtoken. Sign up at https://hiveposh.com.
Esto está maravilloso, estoy segura que pronto veré resultados maravillosos de esta incursión en la programación, sin embargo, sigo a la espera del tan anhelado unboxing...go go go #sisepuede XD
Necesito una caja con olor a nuevo XD