Maintenance and New Mouse [ENG/SPA]
English
I remember when I was studying computer science I was curious to know what a keyboard looked like inside, so I got to work, removed all the screws and got ready to open it. When I did it, all the pieces fell off and jumped all over the place, both keys and a lot of little plastic pieces that were also part of the keys.
I didn't even know how to put everything back in place and ended up putting it in storage until I learned how to put it back together again. Because of them, I would like to share with you a brief guide on how you can clean your keyboards yourself; also, I will show you an unboxing of a new mouse I bought, yes, the ones with little lights.
Enjoy the video:
Español
Recuerdo que cuando estudiaba informática me entró la curiosidad por saber cómo era un teclado por dentro, así que puse manos a la obra, le quité todos los tornillos y me preparé para abrirlo. Cuando lo hice, todas las piezas se cayeron y saltaron por todos lados tanto teclas como un montón de piececillas de plástico que también eran parte de las teclas.
No supe tan siquiera como volver a poner todo en su lugar y terminé guardándolo en el depósito hasta que aprendí cómo volver a armarlos. Por ellos, me gustaría compartir con ustedes una breve guía de cómo pueden ustedes mismos limpiar sus teclados; además, les mostraré un unboxing de un nuevo mouse que compré, si, de esos que tienen lucecitas.
Disfruten el video:
Well, next I will show you how to disassemble the keyboard to clean it. In the video I show you the step by step in a more descriptive way but through pictures you can also get an idea of how to do it.
Bien, a continuación les mostraré cómo desarmar el teclado para limpiarlo. En el video les muestro el paso a paso de manera más descriptiva pero a través de fotos también pueden hacerse una idea de cómo hacerlo.
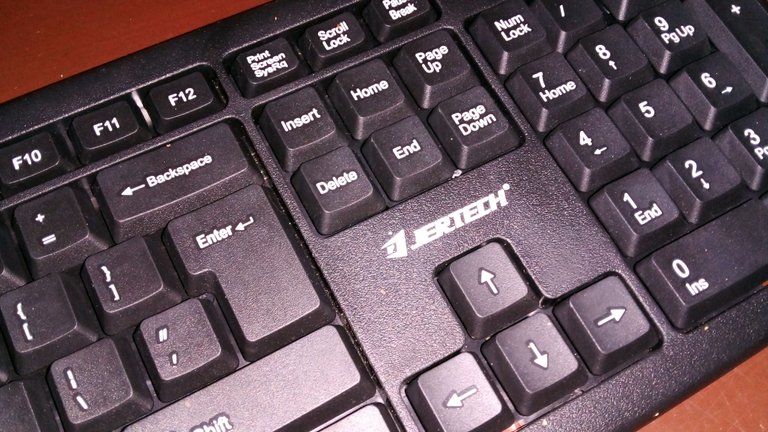
The first thing to do is to place the keyboard with the keys facing down. The part where the screws are should be facing upwards so that we can remove them comfortably and easily, without dropping parts or damaging anything.
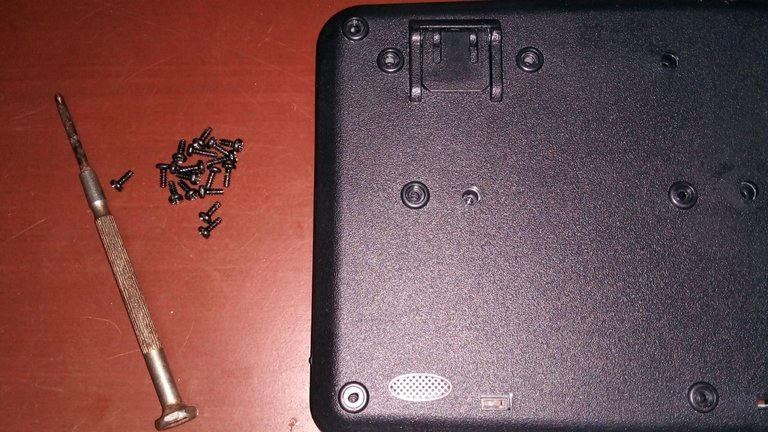
We must be sure to remove each and every one of the screws of the protective cover of the keyboard. Only when we remove all the screws will the plastic cover come off easily; if we have difficulty removing it is because there are still screws to be removed, so never apply force if something does not come off easily, you could break it.
Lo primero que deben hacer es colocar el teclado con las teclas hacia abajo. La parte donde están los tornillos debe estar hacia arriba para que los podamos retirar de manera cómoda y sencilla, sin dejar caer piezas ni dañar nada.
Debemos estar seguros de retirar todos y cada uno de los tornillos de la cubierta protectora del teclado. Solo cuando retiremos todos los tornillos la cubierta de plástico saldrá fácilmente; si tenemos dificultades para quitarla es porque aún faltan tornillos por retirar, así que nunca aplique fuerza si algo no sale fácil, podría romperlo.
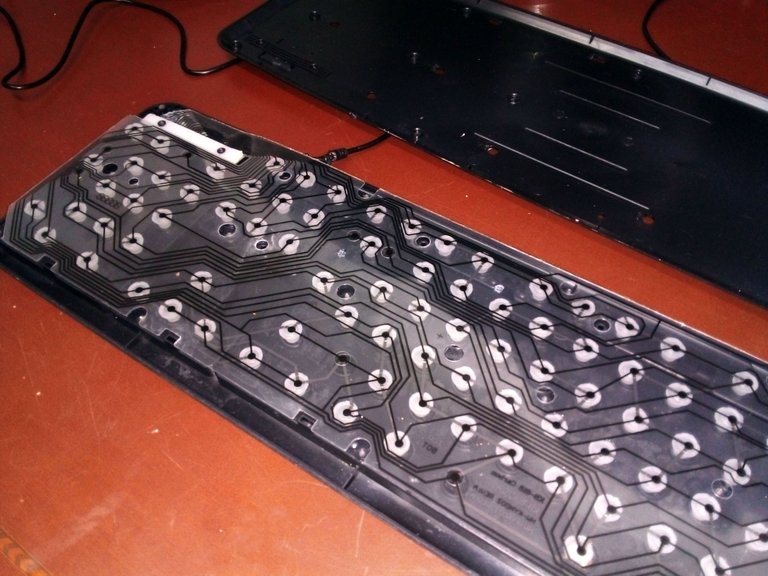
Once the cover can be removed, we find a membrane where the whole keyboard circuit is. In my case, this membrane has some little plastic buttons similar to suction cups glued underneath, this is so that when the key is pressed, the circuit makes contact and sends the information of the pressed key to the small card of the keyboard.
There are keyboards that do not have these little buttons glued, but loose, so you have to be careful when lifting the protective cover because these little buttons could jump and lose a few.
Una vez que la cubierta pueda ser retirada, nos encontramos con una membrana en donde está todo el circuito del teclado. En mi caso, esta membrana trae unos botoncitos de plástico parecidos a ventosas pegados por debajo, esto es para que al presionar la tecla, el circuido haga contacto y envíe la información de la tecla presionada a la pequeña tarjeta del teclado.
Hay teclados que no tienen estos botoncitos pegados, sino sueltos, así que hay que tener cuidado al levantar la cubierta protectora porque estos botoncitos podrían saltar y perder unos cuántos.
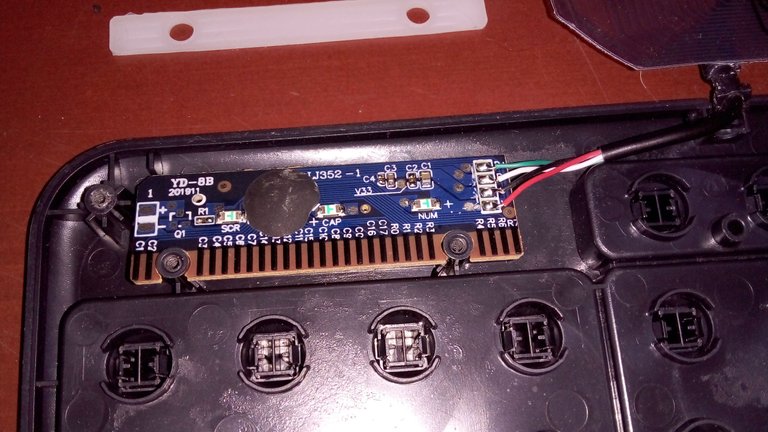
We must remove this membrane carefully, to do this we first remove a small plastic sheet in the upper left corner of the keyboard, where the card is. By removing this sheet, we will be able to remove the membrane.
Debemos retirar esta membrana con cuidado, para ello primero retiramos una pequeña lámina de plástico en la esquina superior izquierda del teclado, donde está la tarjeta. Al retirar esta lámina, podremos retirar la membrana.
Once removed, the keypad card will be exposed, which must also be removed for subsequent maintenance.
Una vez retirada, quedará expuesta la tarjeta del teclado, la cual también debemos retirar para poder hacer el posterior mantenimiento.
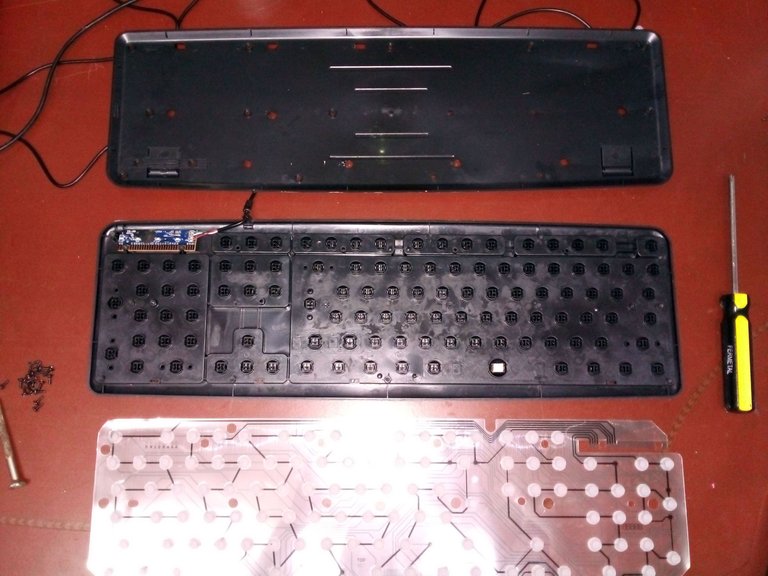
This is what the keyboard looks like once all the parts have been removed. The plastic parts can be washed with soap and water but must be thoroughly dried before reassembly. The membrane and circuitry should NEVER come in contact with water. In the video you can see the process.
De esta manera se ve el teclado una vez que todas las piezas han sido retiradas. Las piezas de plástico se pueden lavar con agua y jabón pero deben secarse muy bien antes de volver a ensamblarlas. La membrana y el circuido no deben tener NUNCA contacto con el agua. En el video pueden ver el proceso.
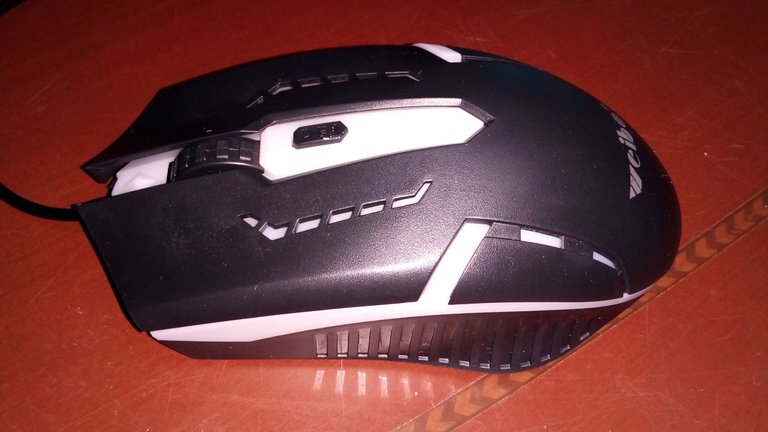
Well, as for the new device I bought, it was an inexpensive mouse that looks pretty good, it is from the Weibo brand and I thought it was very nice in relation to the price, which does not go over $3.
Bien, en cuanto al nuevo dispositivo que compré, fue un mouse económico que luce bastante bien, es de la marca Weibo y me pareció muy bonito en relación al precio, que no pasa de los 3$.
 |  |
|---|
The truth is that I didn't need a new mouse, but I took a walk through a technology store and when I saw it I felt it was telling me "buy me". I couldn't resist and now I have three mice at home. Obviously this will be the one I will use regularly.
Lo cierto es que no necesitaba un mouse nuevo, pero me di un paseo por una tienda de tecnología y cuando lo vi sentí que me decía “comprame”. No pude resistirme y ahora tengo tres mouse en la casa. Obviamente este será el que use habitualmente.
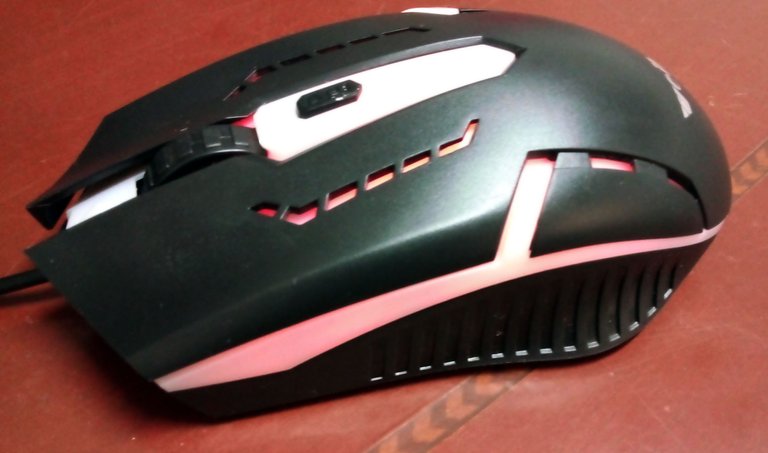
It looks better at night or in the dark, when its colored lights stand out more. To be honest, these lights can be a bit annoying for those who are not used to this type of lighting in a setup, but for those who do enjoy these peripherals with "little lights" it is something that adds a lot.
Luce más en la noche o en la oscuridad, cuando sus luces de colores resaltan más. Siendo honestos, estas luces pueden resultar un poco molestas para quienes no están acostumbrados a este tipo de iluminación en un setup, pero para quienes sí disfrutamos de estos periféricos con “lucecitas” es algo que suma mucho.
Well friends, that's all for now. I hope that both the video and the publication have been to your liking or, at least, that you have found it useful. For my part I invite you to leave your opinions below in the comments, as always I will be happy to read them. Without further ado, I will say goodbye then....
See you next time!
Bien amigos, esto ha sido todo por ahora. Espero que tanto el video como la publicación haya sido de su agrado o, cuando menos, les haya parecido útil. Por mi parte los invito a dejar sus opiniones abajo en los comentarios, como siempre estaré encantado de leerlos. Sin más que agregar, me despido entonces…
¡Hasta la próxima!

Traducido con DeepL
Express Lunch
WE 85 - Photography
Challenge to Gabo #5
Music Source:
Música de https://www.fiftysounds.com/es/
▶️ 3Speak
By the way, there's online video transcription tool. It would be nice to have them subtitled in English since this type of content is helpful for those who want to learn about keyboard maintenance. I tried opening up my keyboard once in a while but I messed up the sensor on the way and broke the bracket since it was a laptop. Muy útil y espero que otros que estén interesados en CS lo vean !
Hi, I didn't know about this tool, what is it called? I could use it for future videos.
Yes, damaging a keyboard is very easy and more if it's a laptop keyboard. I commented there in the post that I also damaged the first keyboard I opened. You have to follow certain techniques to repair a keyboard and not die in the attempt hehe
Greetings and thanks for commenting.
For transcription, you can try using oTranscribe https://otranscribe.com/ it's free to use as well. Using that will get you the option to transcribe directly or manually. Then, you can insert it to the video to include it.
Oh thanks, I'm checking it out to do some tests, so I'll know how to use it for the next video. Thank you very much for the recommendation, I really appreciate it.
https://twitter.com/GaboAMC2393/status/1486628174704357379
The rewards earned on this comment will go directly to the person sharing the post on Twitter as long as they are registered with @poshtoken. Sign up at https://hiveposh.com.
Oh boy, this is one of those things I would really like to do, but too afraid I will jack my keyboard up and ruin it.
Hi, nice to see you here. Maybe you could try it with some old keyboard that you are not afraid of damaging, instead of doing it with the one you are currently using; I mean, for practice. Still, if you don't feel shure, it's always good to go to a professional to avoid damaging our precious equipment hehe....
what keyboard do you use? or do you have a laptop?
It's one of those CM Storm Devastators.
So yeah, I should probably have a replacement ready before I attempt to try it. But, you are right, I could always consult a professional.
Those are great, a mechanical keyboard. It is better to have prior knowledge of how to maintain them; however, you can remove only the keys and clean them with soap (dry them well before putting them back) and use isopropyl alcohol to wipe the outside of the keyboard with a cotton swab. In any case, you should avoid getting the internal components wet.
Un contenido muy útil para todos, a veces llevar a un técnico nuestros equipos por cosas que podemos hacer nosotros mismos con el debido cuidado, termina haciéndonos ahorrar un buen dinero, muy buen trabajo, salud y bendiciones, feliz día.!
Hola! Ciertamente es así. Si podemos hacer algo por nosotros mismos mejor, pero si aclaro que si no estamos seguros siempre es bueno acudir a un profesional ✌😁
Siempre es interesante ver como funcionan las cosas cotidianas, como son por dentro, y esa curiosidad nos puede ayudar más adelante incluso a hacerle mantenimiento a esos objetos y de paso ahorrarnos un buen dinero.
Gracias por compartir este tipo de contenido.
Hola si, esta es una manera de repararlos a fondo pero igual hay que tener cuidado con los componentes. Son delicados los teclados.
Saluditos.
Una vez lo hice, me sobraron tornillos y mi teclado murió para siempore, jajajaj.
Suele pasar jajajaja a veces por un mal manejo del circuito o de la membrana. Hay que tener cuidado con todos los componentes jeje.
Saludos, gracias por comentar.
El mantenimiento es muy importante, alarga la vida útil de los dispositivos que tenemos, sobre todo del teclado que lo usamos muchísimo y agarra mucho polvo, grasa y demás de nuestras manos. Gracias por compartir esto en la comunidad.
Saludos José, no había visto este comentario, se me pasó por alto en las notificaciones disculpa. Muchas gracias por pasar a comentar. Ciertamente em teclado es una de los dispositivos que mas se ensucia y uno de los que menos se limpia adecuadamente, ojalá el video le sea de utilidad a alguien jeje. Saludos.
Un trabajo de mucho cuidado para no estropear el teclado, pero muy necesario el mantenimiento para alargar la vida útil de este. Buen post!
Hola amig un gusto que haya leído mi publicación. Sí, ciertamente este tipo de mantenimiento preventivo es necesario y espero le sea de utilidad algún día. Saludos cordiales.