Proyecto pinball, etapa de carpintería en su 3er día (ESP/ENG)
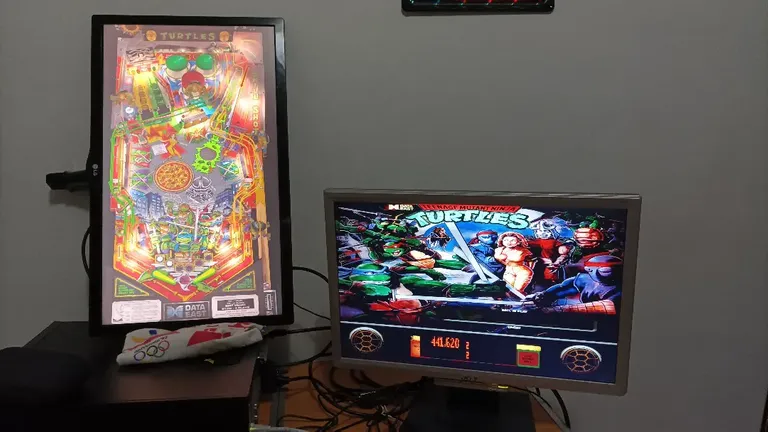
Luego de instalar y configurar las mesas de pinball y el front end con todos los archivos de media (imágenes, sonidos y video).
Llegó la hora, manos a la obra
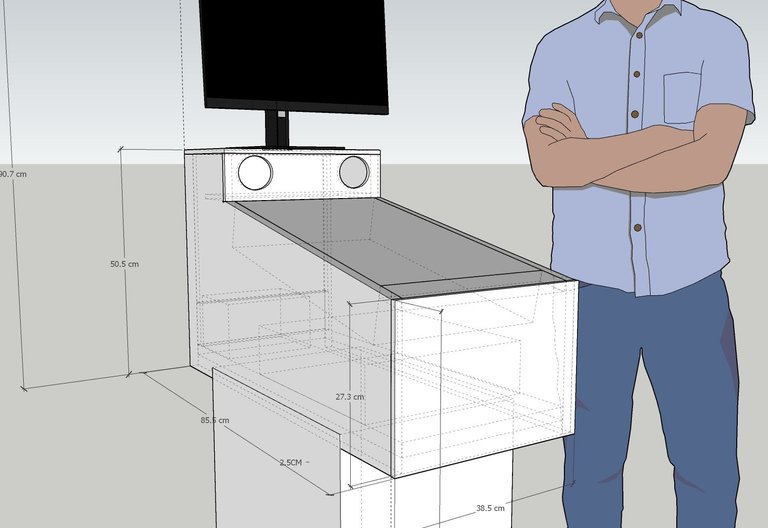
Después de diseñar en digital el gabinete del pinball con medidas reales para poder contemplar el ensamblaje y cortes de madera, y después de un tiempo soñando con materializar este proyecto, llegó la hora de la verdad.
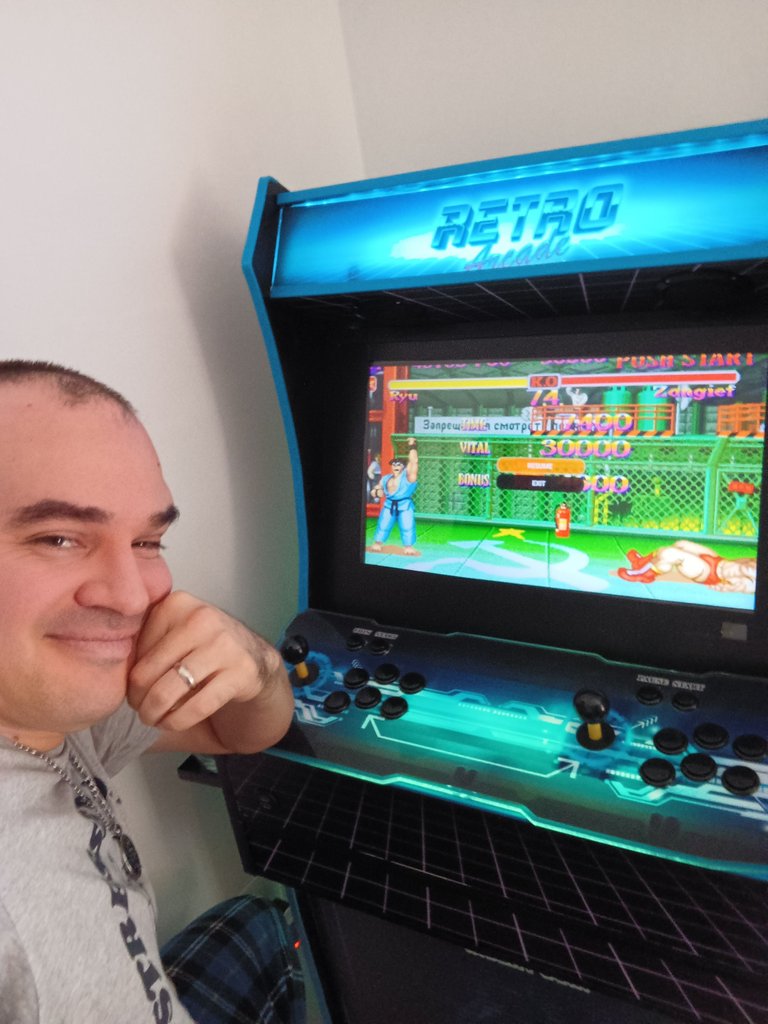
Debo decir que después de haber construido mi propia maquina arcade obtuve experiencia valiosa para decidir embarcarme en esta nueva aventura pues cometí errores, los solucioné y aprendí técnicas de carpintería básica además de soluciones, herrajes y accesorios. Por eso tengo la confianza de que este proyecto nuevo saldrá según mis proyecciones y que se realizan de la manera más fiel posible.
Espero tener un virtual pinball funcional y estéticamente profesional además de entretenido pues no solo será un pinball multi mesas sino que también será un vídeo rockola (jukebox) de música retro.
After installing and configuring the pinball tables and the front end with all the media files (images, sounds and video).
After designing in digital the pinball cabinet with real measures to be able to contemplate the assembly and wood cuts, and after some time dreaming about materializing this project, the moment of truth arrived.
I must say that after having built my own arcade machine I gained valuable experience to decide to embark on this new adventure because I made mistakes, I solved them and I learned basic carpentry techniques as well as solutions, hardware and accessories. That is why I am confident that this new project will come out according to my projections and that they will be realized as faithfully as possible.
I hope to have a functional and aesthetically professional virtual pinball as well as entertaining because it will not only be a multi-table pinball but also a jukebox with retro music.
Estoy súper entusiasmado por el avance del proyecto y quiero compartir paso a paso cómo se va encaminado.
En esta publicación verán el avance físico en tres días de construcción.
Lo primero que hice fue pedir mis maderas cortadas a medida gracias a una empresa que está en Tarragona llamada cortemaderas, en su página puedo especificar las medidas exactas de cada parte del proyecto para luego recibirlas por envío directo a mi casa, cosa muy conveniente pues el trabajo de corte de la madera desde la plancha grande es muy laborioso y requiere de herramientas, espacio y experiencia para no hacer una cagada de centímetros o milímetros en los cortes. Los cortes exactos son la base para el éxito del proyecto.
I am super excited about the progress of the project and I want to share step by step how it is coming along.
In this post you will see the physical progress in three days of construction.
The first thing I did was to order my wood cut to size thanks to a company that is in Tarragona called cortemaderas, in their page I can specify the exact measurements of each part of the project and then receive them by direct shipment to my house, which is very convenient because the work of cutting the wood from the big plank is very laborious and requires tools, space and experience to not make a mess of centimeters or millimeters in the cuts. Accurate cuts are the basis for the success of the project.
—
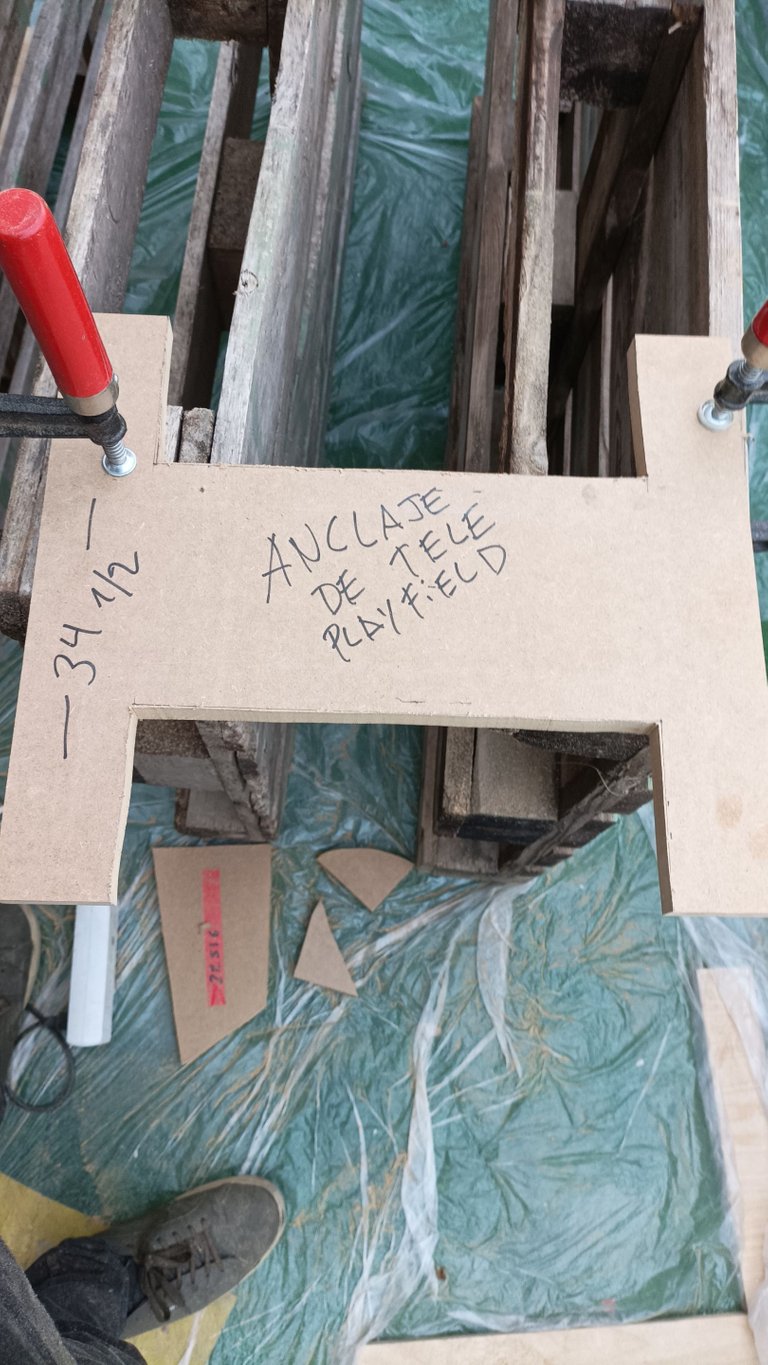
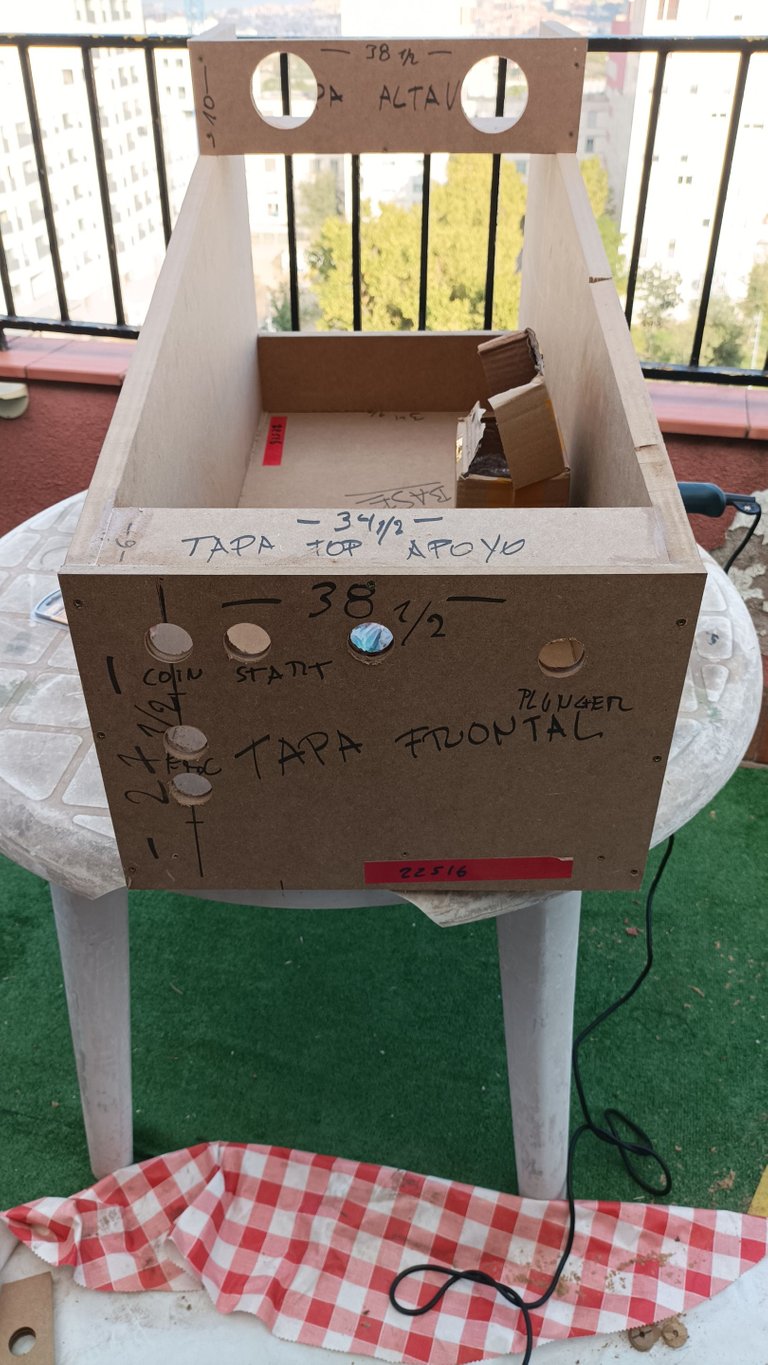
Una vez recibido el material el paso más importante es desembalar, medir y etiquetar o marcar cada tabla con su respectivo nombre.
Este paso nos ayuda muchísimo para no confundir tablas y de esta manera evitar errores de ensamblaje, créanme cometer un error por confundir una pieza con otra es muy fácil.
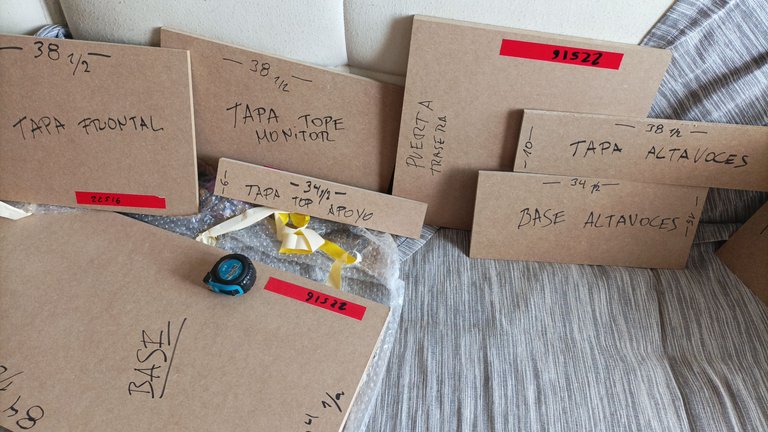
Todo esto lo hice el primer día. Claro además de revisar herramientas, el resto de materiales y accesorios.
Once the material is received, the most important step is to unpack, measure and label or mark each board with its respective name.
This step helps us a lot to avoid confusing boards and thus avoid assembly errors, believe me making a mistake by confusing one piece with another is very easy.I did all this on the first day. Of course, besides checking tools, the rest of the materials and accessories.
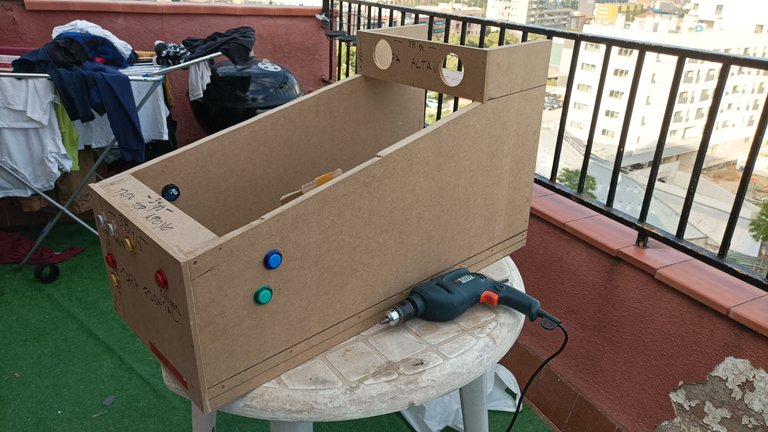
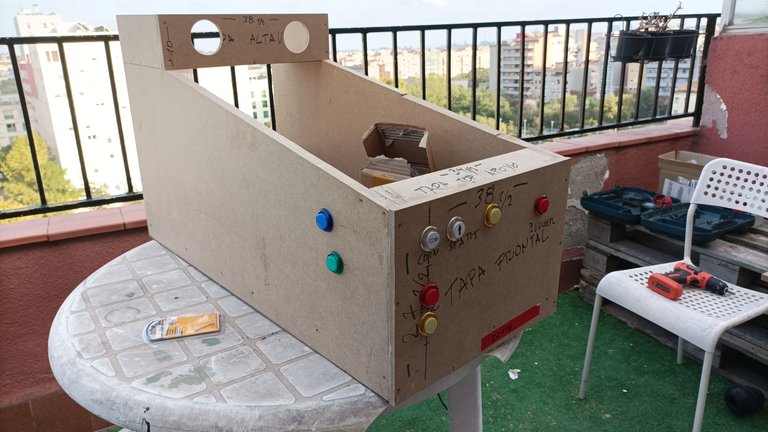
En el día 2 me puse manos a la obra, después de revisar el diseño en 3d reiteradas veces establecí el orden de ensamblaje de cada pieza, me tocó medir, dibujar y hacer el corte diagonal de los laterales con una sierra caladora. Lo hice a mano y es importante tener una mesa de trabajo que te permita usar "sargentos" o sujetadores para que la madera este fija y no vibre ni se mueva durante el corte.
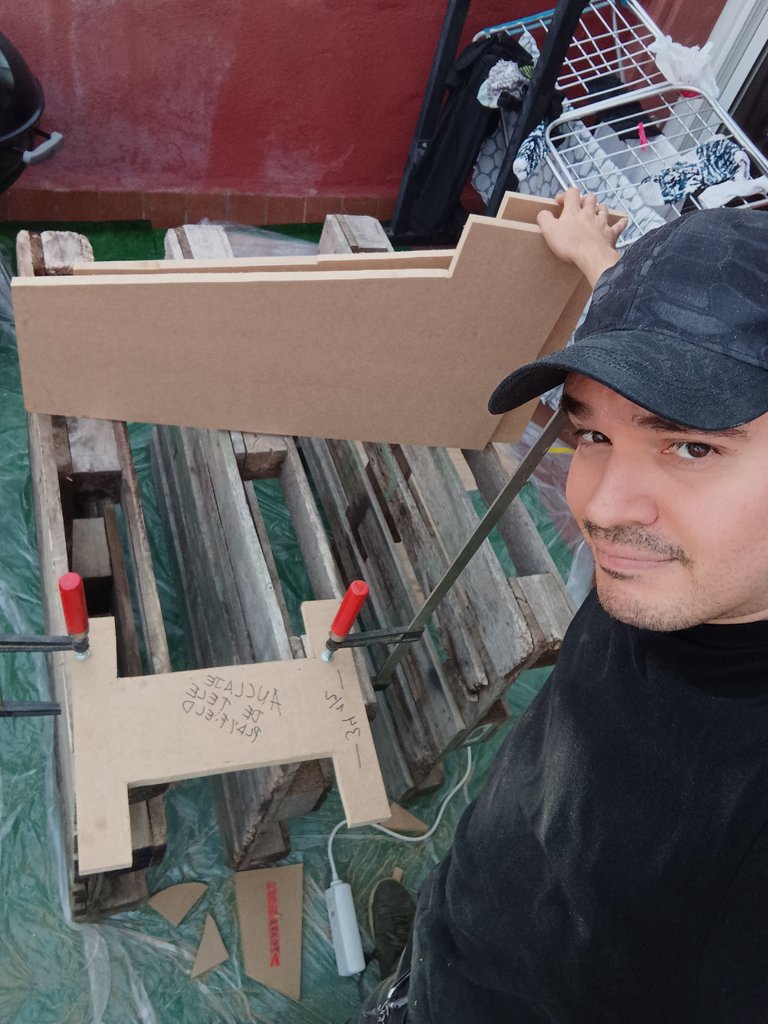
Una vez cortadas las piezas procedí con el ensamblaje, la tapa frontal fue la primera pieza que fije a uno de los laterales.
Para esto estoy usando pegamento hightac que es un pegamento muy versátil y fuerte, además de hacer una guía con taladro y luego poner tornillos. La guía para el tornillo la hago con una mecha o broca delgada. Esto lo hago para evitar desviación del tornillo y que se abombe mucho la madera por el espacio que este ocupa.
Luego fijé el segundo lateral al panel frontal para poder fijar la base, de esta forma ya tendría suficiente rigidez para manipularlo y agregar las partes siguientes.
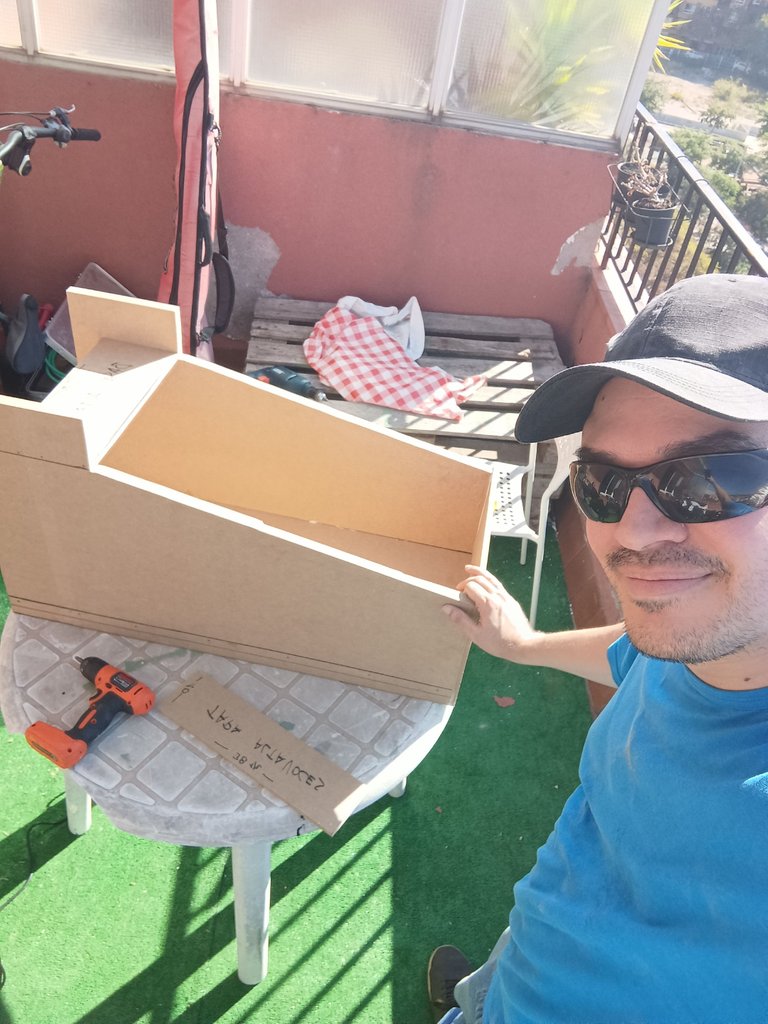
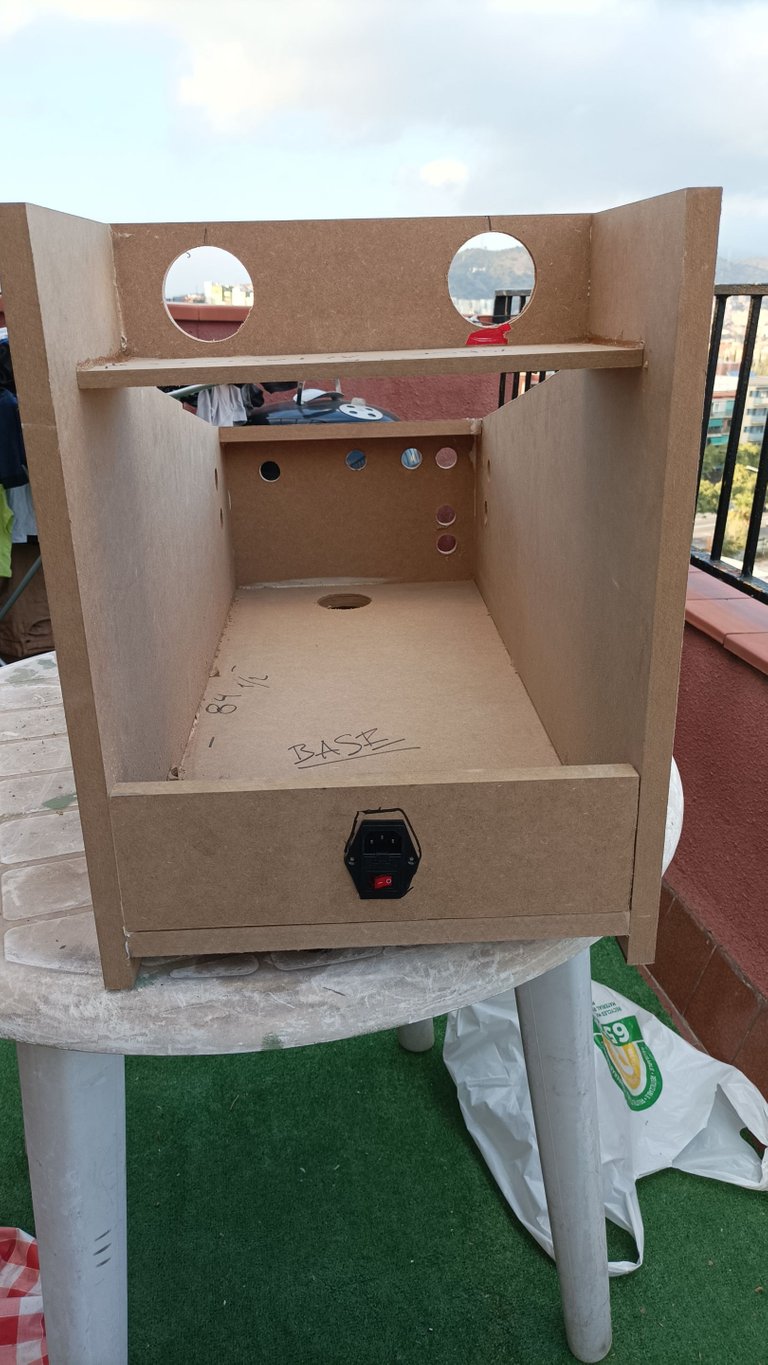
La base del pinball tiene un pequeño truco y es que deja por debajo de sí 2.5cmts. Este espacio en la parte de abajo fue contemplado durante el diseño para la instalación de cinta LED luminosa, una rejilla de ventilación y el botón de encendido empotrado para la PC. De esta forma el botón de encendido de la PC tiene acceso restringido durante el uso de la máquina evitando apagados o reinicios accidentales, además de que la iluminación inferior quedará más vistosa y oculta entre los cantos laterales inferiores.
A continuación fijé la tablilla trasera donde va el switch IEC de encendido general, en ese switch va un único cable de corriente que alimenta toda la electrónica de la máquina.
Luego fijé la tablilla superior delantera que sirve como apoyo para las manos y la parte baja del monitor.
Todo esto fue en el día dos.
On day 2 I got down to work, after reviewing the design in 3D several times I established the order of assembly of each piece, I had to measure, draw and make the diagonal cut of the sides with a jigsaw. I did it by hand and it is important to have a work table that allows you to use "clamps" or fasteners so that the wood is fixed and does not move during cutting.
Once the pieces were cut I proceeded with the assembly, the front cover was the first piece that I fixed to one of the sides.
For this I am using hightac glue which is a very versatile and strong glue, besides making a guide with a drill and then put screws. The guide for the screw is made with a thin drill bit. I do this to avoid deviation of the screw and to prevent the wood from bulging too much because of the space it takes up.
Then I fixed the second side to the front panel to be able to fix the base, this way I would have enough rigidity to manipulate it and add the following parts.
The base of the pinball has a little trick and it is that it leaves 2.5cm underneath. This space at the bottom was contemplated during the design for the installation of the LED strip light, a ventilation grill and the recessed power button for the PC. This way the power button of the PC has restricted access during the use of the machine avoiding accidental shutdowns or restarts, plus the bottom lighting will be more visible and hidden between the lower side edges.Next I fixed the rear panel where the IEC general power switch is located, in this switch there is a single power cable that feeds all the electronics of the machine.
Then I attached the front upper board that serves as a hand rest and the lower part of the monitor.All this was on day two.
—
En el día tres tenía la vaga esperanza de poder pintar el gabinete por dentro y por la parte inferior, pero no fue así.
Me tocó medir y abrir agujeros, muchos agujeros y vaya trabajo tan preciso.
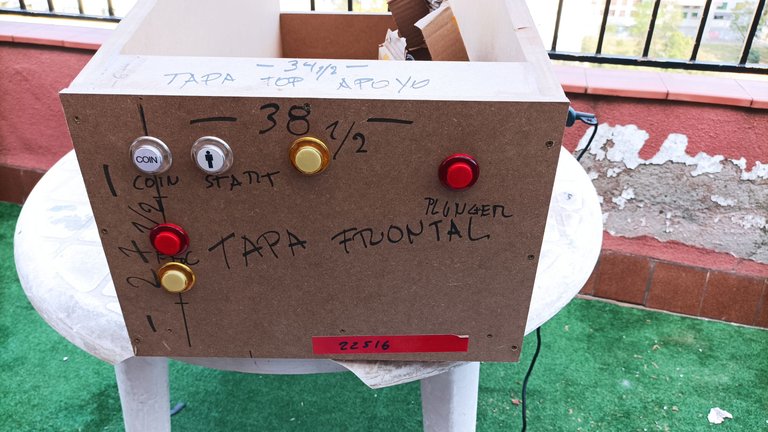
En los agujeros frontales y laterales van los botones de juego y algún accesorio como una extensión USB empotrada para usar la PC sin abrir ni desmontar el gabinete.
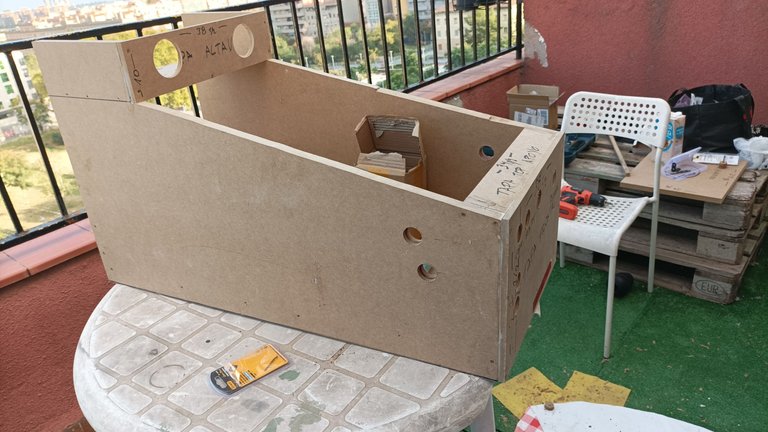
Luego abrí un agujero interno para permitir la entrada de aire, aire que será succionado por el ventilador extractor que colocaré en la puerta trasera. Mas no me dio el tiempo para abrir el hueco donde irá instalado el extractor.
Además abrí los huecos de los altavoces, cosa que ya le da mejor forma al gabinete y por último presenté los botones en el gabinete para hacerme una idea de cómo quedan y tomarle las fotos.
On day three I had the vague hope of being able to paint the cabinet inside and underneath, but it was not to be.
I had to measure and drill holes, lots of holes and what a precise job.
In the front and side holes go the game buttons and some accessory like a recessed USB extension to use the PC without opening or disassembling the cabinet.Then I opened an internal hole to allow air intake, air that will be sucked by the exhaust fan that I will place in the rear door. But I did not have time to open the hole where the exhaust fan will be installed.
I also opened the speaker holes, which gives a better shape to the cabinet and finally I put the buttons on the cabinet to get an idea of how they look and take pictures.
—
Estos tres días han sido de trabajo duro. Llego a casa reventado pues salgo de trabajar por la mañana para trabajar en el proyecto pinball por la tarde y es un no parar. Pero debo confesar que me acuesto pensando en los siguientes pasos y mientras más lo veo avanzar más me entusiasma terminarlo para tenerlo en casa y disfrutar en familia, un aparato que solo podía soñar tener en casa en mi juventud.
En cuanto avance más el proyecto lo compartiré en otro post de esta aventura. Los plazos más próximos son los de pintar, instalar las pantallas y colocar decoración pero a cada paso surgen obstáculos que requieren de ingenio, nada que no se disfrute durante el proceso.
Saludos a todos.
These three days have been hard work. I get home exhausted because I leave work in the morning to work on the pinball project in the afternoon and it's non-stop. But I must confess that I go to bed thinking about the next steps and the more I see it progressing the more I am excited to finish it to have it at home and enjoy it with my family, a device that I could only dream of having at home in my youth.
As soon as the project progresses further I will share it in another post of this adventure. The closest deadlines are to paint, install the screens and place decoration but at every step obstacles arise that require ingenuity, nothing that will not be enjoyed during the process.
Greetings to all.
—
Hermano que buen post. Se nota bastante que te gusta contruir esta cosa.. la verdad yo nunca jugue uno de esos asi autentico como el que fabricas pero que, solo uno que jugue en el telefono y me gusto mucho siempre lo juguaba hasta que yo no tengo el tiempo para hacerlo jejejej...
Me impreciona mucho la delicadeza de la fabricacion para este trabajo es bueno. Muy bueno gracias por traerlo 🙂
De nada, esta es como una versión digital en tamaño reducido de las máquinas electromecánicas originales. Yo he jugado muy poco las originales, eran caras hasta pagango las fichas para jugar en su época pero estos emuladores de verdad son muy divertidos. Cuando lo termine haré un vídeo para que lo vean. Saludos.
Que fino amigo bueno espero el video jejehe
la verdad que increíble es algo que me encantaría tener alguna vez en mi vida... me encanto! !PGM !LOL
BUY AND STAKE THE PGM TO SEND A LOT OF TOKENS!
The tokens that the command sends are: 0.1 PGM-0.1 LVL-0.1 THGAMING-0.05 DEC-15 SBT-1 STARBITS-[0.00000001 BTC (SWAP.BTC) only if you have 2500 PGM in stake or more ]
5000 PGM IN STAKE = 2x rewards!
Discord
Support the curation account @ pgm-curator with a delegation 10 HP - 50 HP - 100 HP - 500 HP - 1000 HP
Get potential votes from @ pgm-curator by paying in PGM, here is a guide
I'm a bot, if you want a hand ask @ zottone444
lolztoken.com
They're just so immersive.
Credit: reddit
@diegoaudio, I sent you an $LOLZ on behalf of @pablodare
Delegate Hive Tokens to Farm $LOLZ and earn 110% Rewards. Learn more.
(2/8)
Bueno a parte de mi hay mucha información en internet, pero es de llevarlo con calma y poco a poco, e tren electrónica, configuración y carpintería es de disfrutarlo con paciencia
Oye que increible, yo recuerdo que jugaba esto en Windows XP pero nunca tuve la oportunidad de jugarlo en la vida real, que increible revivir viejos juegos, genera mucha nostalgia.
Este pinball es un software de emulación que se llama visual pinball y es genial, tiene mesas basadas en las reales. Saludos
¡Felicidades! Esta publicación obtuvo upvote y fue compartido por @la-colmena, un proyecto de Curación Manual para la comunidad hispana de Hive que cuenta con el respaldo de @curie.
Si te gusta el trabajo que hacemos, te invitamos a darle tu voto a este comentario y a votar como testigo por La Colmena.
Si quieres saber más sobre nuestro proyecto, te invitamos a acompañarnos en nuestro servidor de Discord.
Impresionante proyecto, también me gustan las obras de bricolage y este pinball te ha quedado genial!
Aún queda proyecto, espero terminar en diciembre porque solo le dedico una tarde de sábado pero lo publicaré más adelante y verán el resultado final cuando lo termine. Saludos.
Congratulations @diegoaudio! You have completed the following achievement on the Hive blockchain and have been rewarded with new badge(s):
Your next target is to reach 2500 upvotes.
You can view your badges on your board and compare yourself to others in the Ranking
If you no longer want to receive notifications, reply to this comment with the word
STOPSupport the HiveBuzz project. Vote for our proposal!