Utilizando estampadora PRINTGATE e impresora EPSON L3110 para sublimar | Mi Experiencia | Esp/Eng

¡Hola! ¿Qué tal, crypto amigos? ¿Cómo están? ¡Yo espero que muy bien! Hoy les traigo un contenido un poco inusual para el canal. Como ya les había comentado en mi introducción a Hive, tengo un emprendimiento de sublimación, pero ¿Qué es la sublimación? se estarán preguntando algunos. La sublimación es un método o una técnica de impresión digital donde se fusiona ésa impresión sobre materiales específicos para lograr así un producto personalizado. Los materiales en específico pueden ser: acetato, cordura, cuerina, dry, fibroplus, friselina, ketten, lanilla, lycra, microfibra, entre tantos otros, si les interesa saber más sobre que materiales se pueden sublimar les dejo un link para que accedan a esa información. En este ocasión, vengo a traerles una sublimación que hicimos sobre una remera de poliéster blanca (material apto para sublimación), a comentarles el proceso y a mostrarles los materiales utilizados en el mismo. Vamos a empezar entonces con lo que nos compete.
Para aclararles me gustaría decir que en la sublimación se utilizan tintas y hojas específicas para el oficio, a continuación paso a dejarles unas fotos que saqué con mi celular para que las vean.
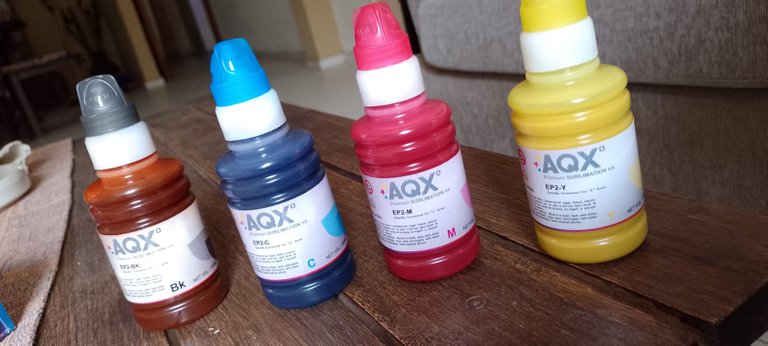
Las tintas en cuestión, aptas para sublimar. Colores Negro, Cyan, Magenta y Amarillo. No son iguales a las tintas comunes, la diferencia está en su consistencia. La marca es una muy buena en relación precio-calidad. No recomiendo ninguna en particular si queres iniciarte en éste negocio pero si aconsejo siempre utilizar la misma marca una vez elegida.
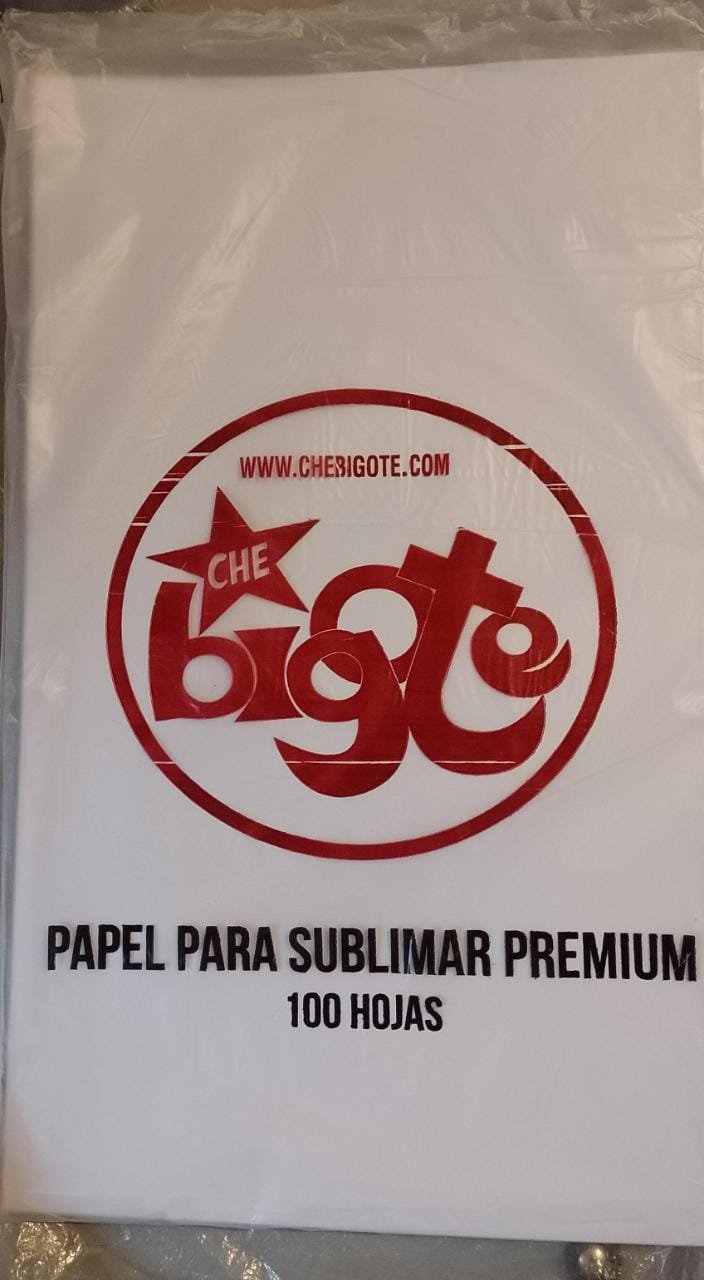
Aquí les muestro las hojas que utilizamos para realizar las impresiones, como pueden ver en el paquete, son calidad PREMIUM para SUBLIMAR. El tamaño de las mismas es de 8,5 * 14 pulgadas, a éste tamaño se llama Legal. En realidad el tamaño no influye directamente sino que aporta mas espacio para lo que queramos sublimar, aunque tranquilamente se puede sublimar en una hoja tamaño A4 mientras sea de sublimación, claro está.
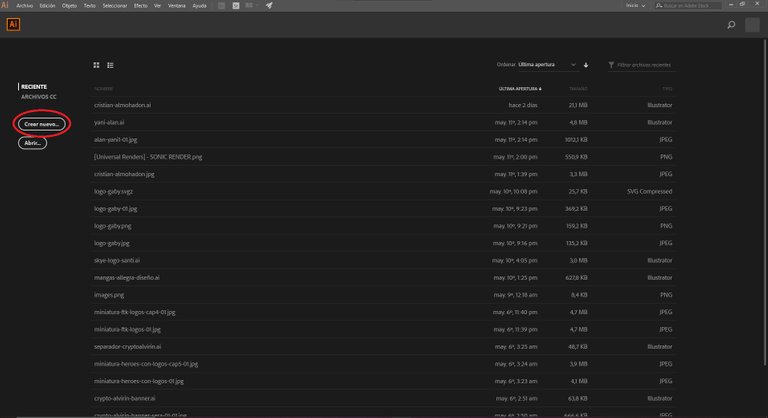
Teniendo los materiales básicos para sublimar, ahora toca usar nuestra computadora. Lo primero que tendríamos que hacer es abrir nuestro editor de imágenes favorito, en este caso yo eligo Illustrator, lo considero un programa muy completo para el oficio que estoy realizando ya que me permite vectorizar las imágenes para mejorar mucho su calidad y por ende, a la hora de plasmarla en el producto, se ven excelentes.
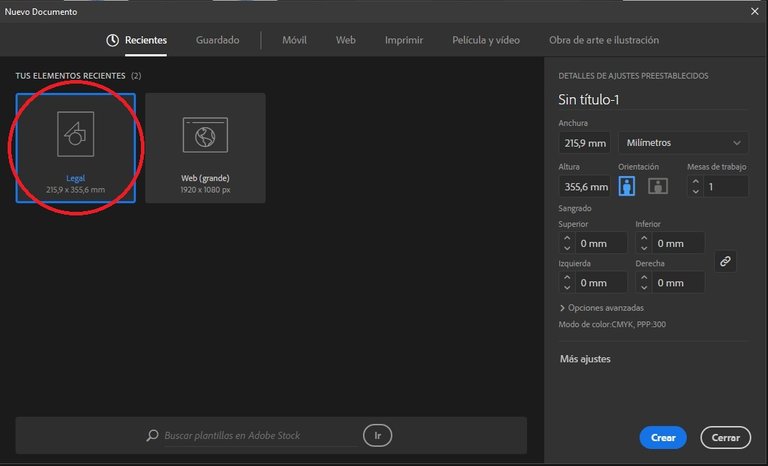
Dentro del programa mencionado, vamos a crear un documento nuevo haciendo click en donde se ve el círculo rojo.
Luego tendremos que configurar nuestro documento de acuerdo al tamaño de hoja que estemos usando. En mi caso, como les comenté mas arriba, utilizo tamaño Legal (8,5 * 14 pulgadas). Seleccionamos entonces el formato deseado.
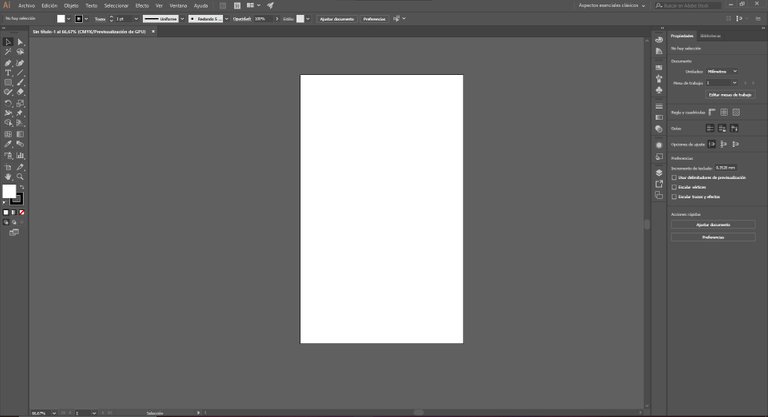
Veremos a continuación una hoja en blanco que es donde colocaremos nuestras imágenes, las vectorizaremos y les daremos el tamaño que nosotros más necesitemos.
Realmente no quiero profundizar tanto en el uso de Illustrator ya que de eso no trata la publicación, es por eso que voy a explicar como si ya supieran usarlo, aunque más adelante si les parece podría traer un tutorial de como utilizarlo.
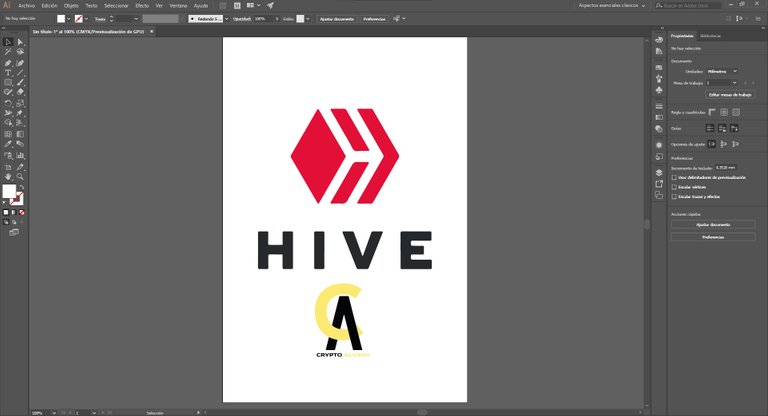
En éste caso ya coloque, vectorice y les di el tamaño deseado a lo que queremos sublimar sobre la remera. En éste caso, la remera es para mi (supongo que se habrán dado cuenta xd), voy a sublimar mi logo en una manga y el logo de Hive en la parte de adelante e la remera.
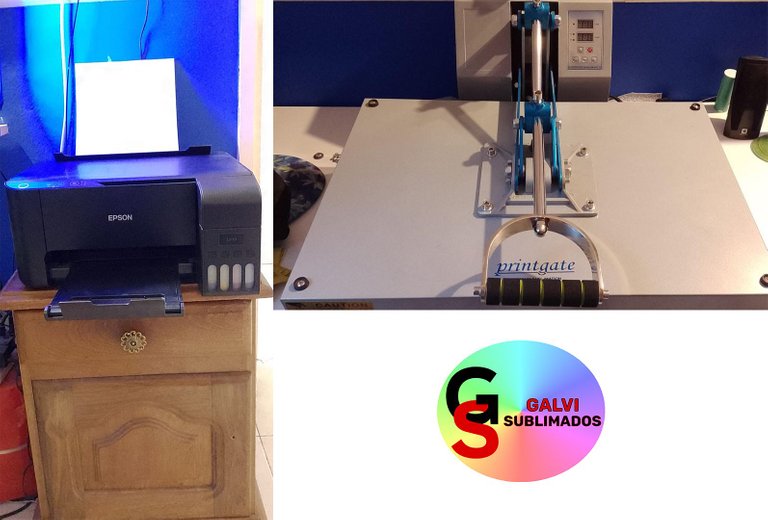
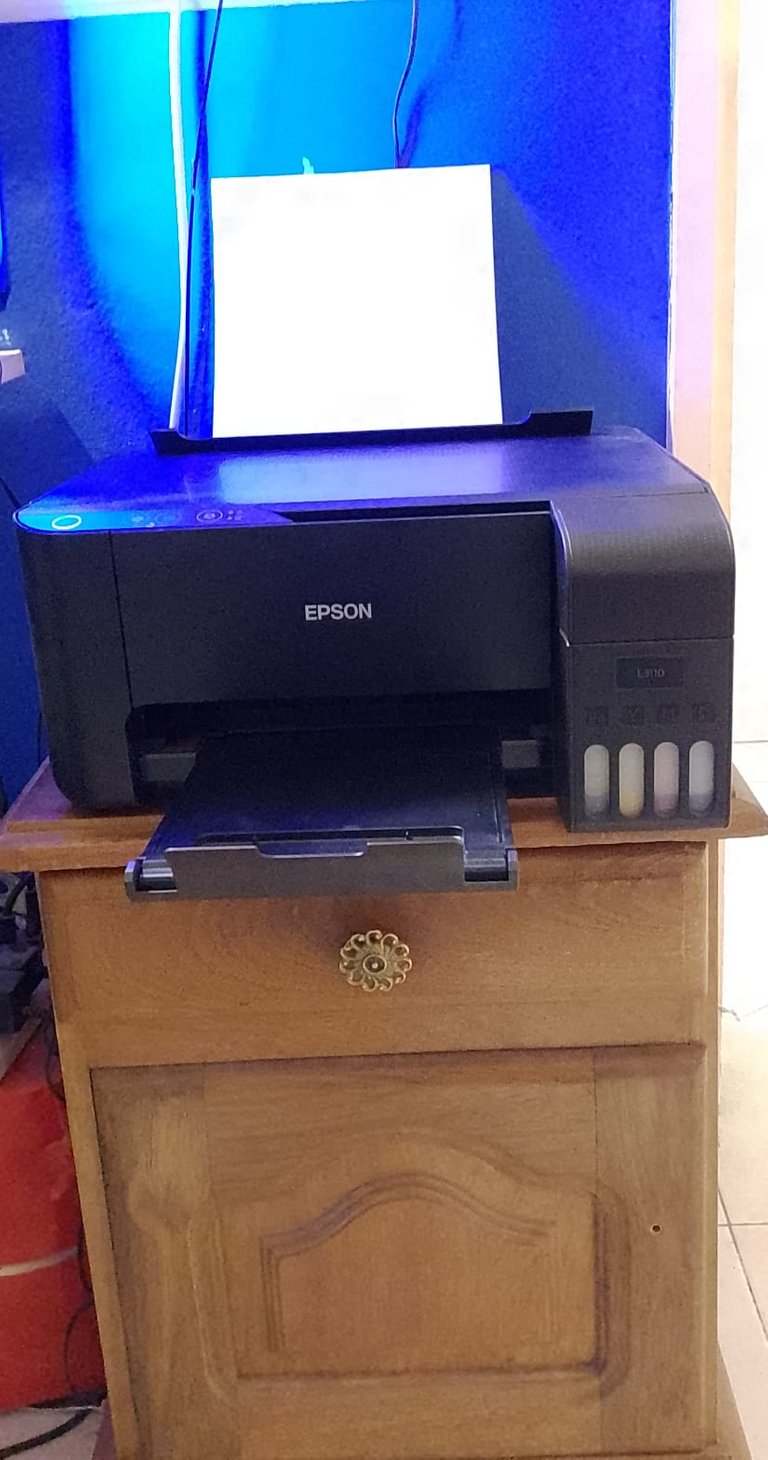
Vamos a volver a nuestro espacio físico y procederemos a preparar nuestra impresora la cuál es una Epson L3110, aquí les dejo especificaciones técnicas sobre la impresora. Ésta máquina no viene preparada para sublimar aunque si tiene los compartimentos llamados "Eco Tank" para colocar la tinta, esto nos da la posibilidad de poder usar tinta para sublimar en vez de la común lo que la hace muy cómoda para poder usarla en éste oficio, es una de las mas recomendadas por todo el que se dedica a ésto. Pero hay un pequeño problema acá y es que sí nuestra impresora es usada y ya tuvo tinta común, no se puede utilizar para el fin que buscamos porque ya estaría "contaminada" con la otra tinta.
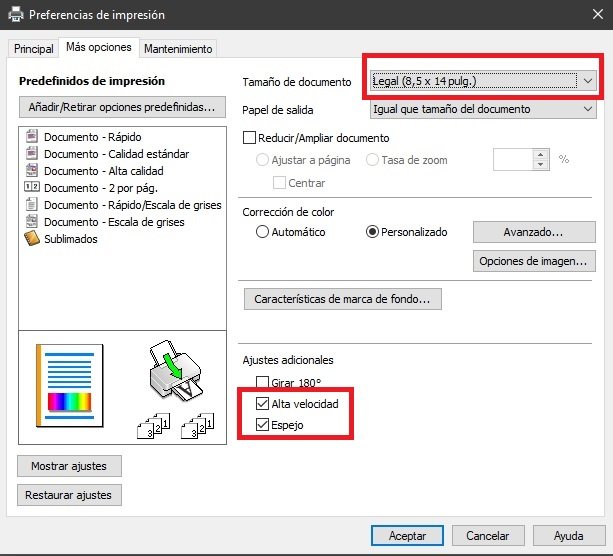
Luego vamos a volver a nuestra computadora porque tenemos que seleccionar las preferencias de impresión. Lo más importante es aclararle al programa que el tamaño a usar es de las hojas que hemos elegido, en este caso Legal (8,5 * 14 pulgadas), y además debemos decirle que utilice las opciones de "Espejo" y "Alta Velocidad". Habiendo seleccionado todas éstas opciones hacemos click en aceptar y luego imprimimos.
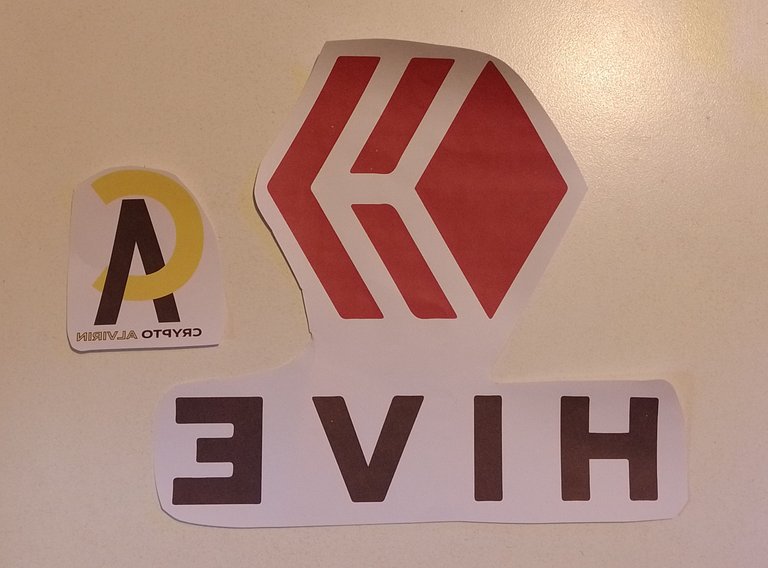
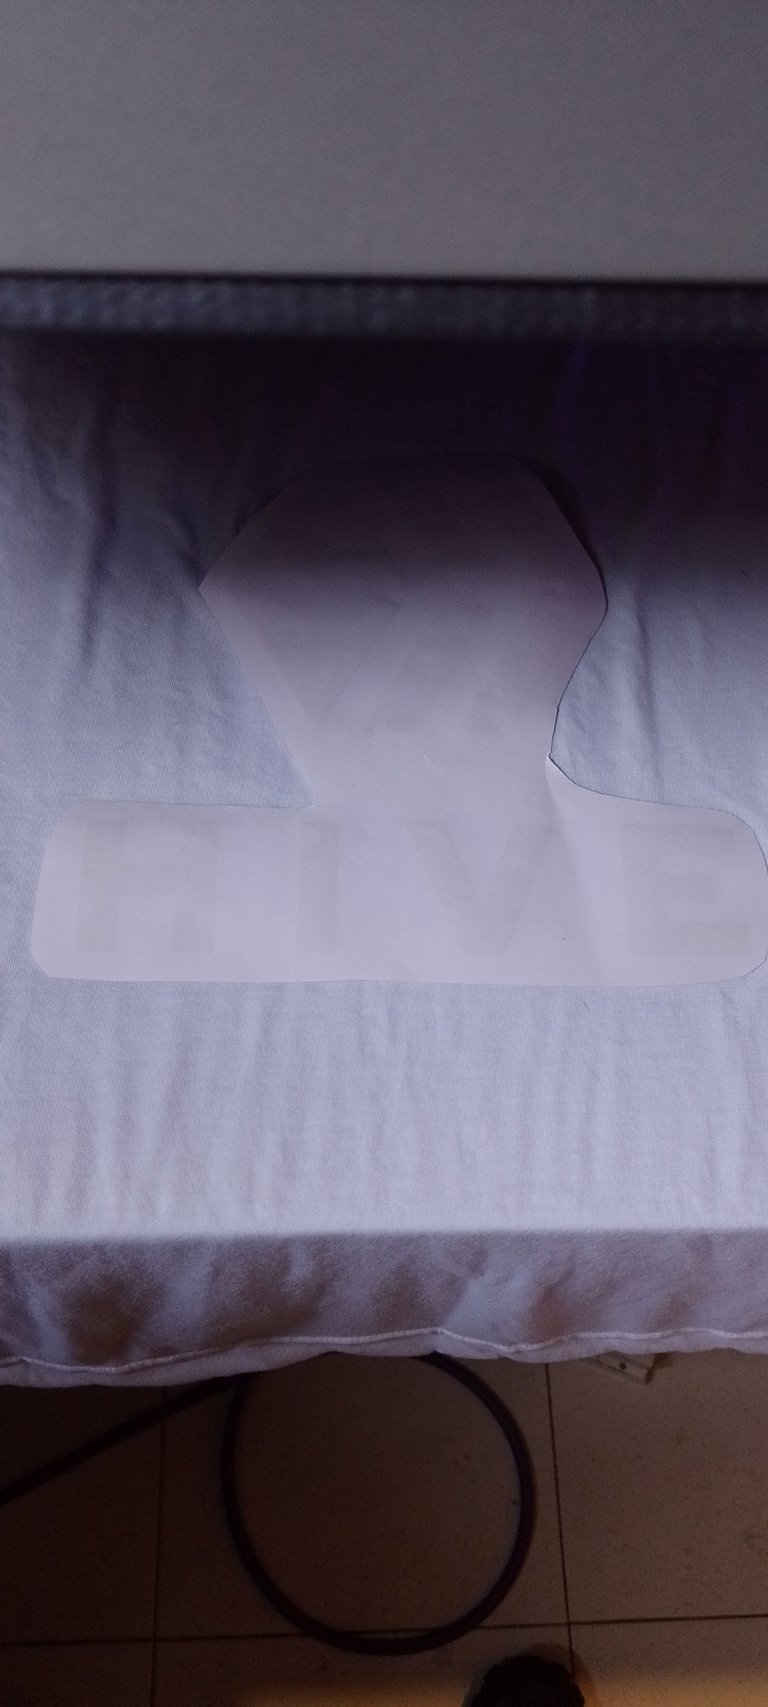
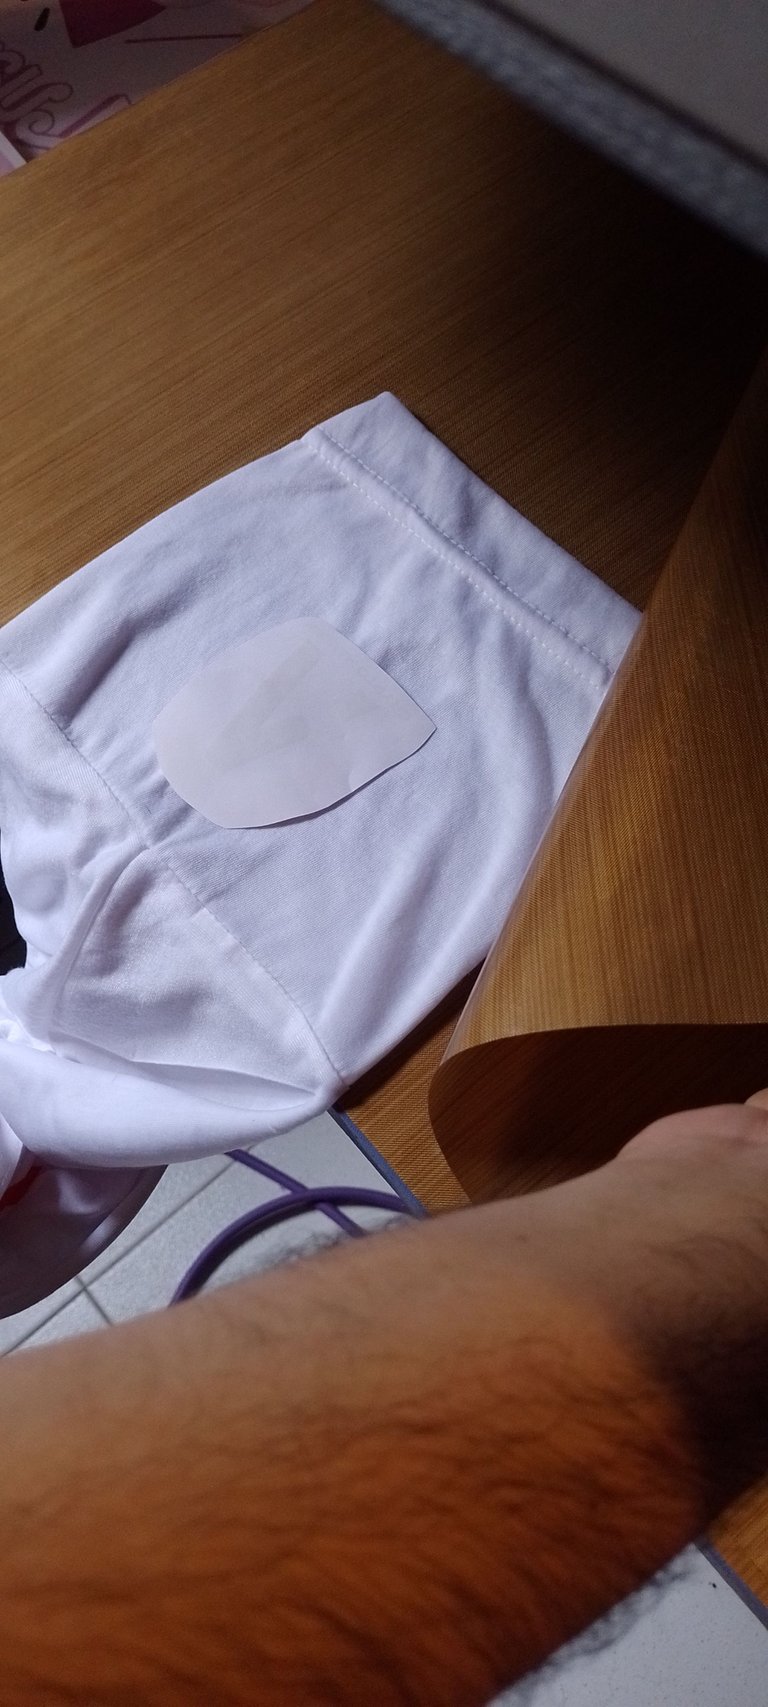
Una vez realizada la impresión, prefiero recortar las hojas y que queden de un tamaño manejable y más cómodo, porque en realidad no haría falta recortarlas ya que el blanco de la hoja no se pasa a la remera, pero lo hacemos porque es incómodo para manipularla. Como pueden ver, se han impreso al revés y eso es lo que le indicamos al programa que hiciera con el modo espejo, ya que vamos a colocar la hoja sobre la remera y si no está en modo espejo nos va a quedar al revés sobre la indumentaria.
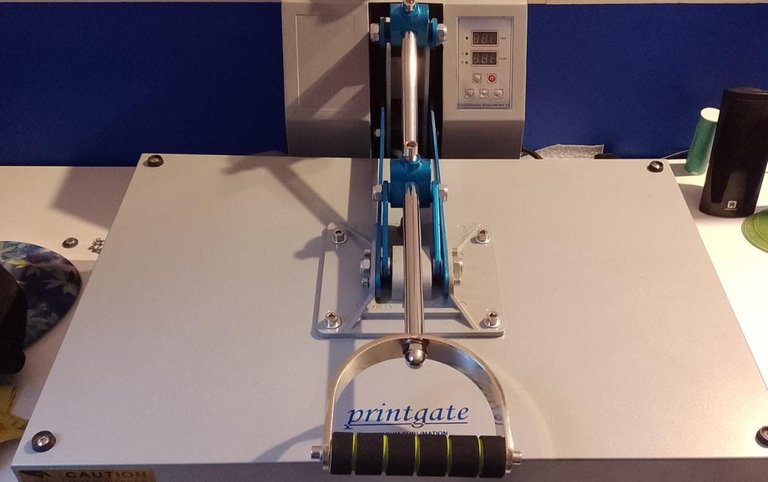
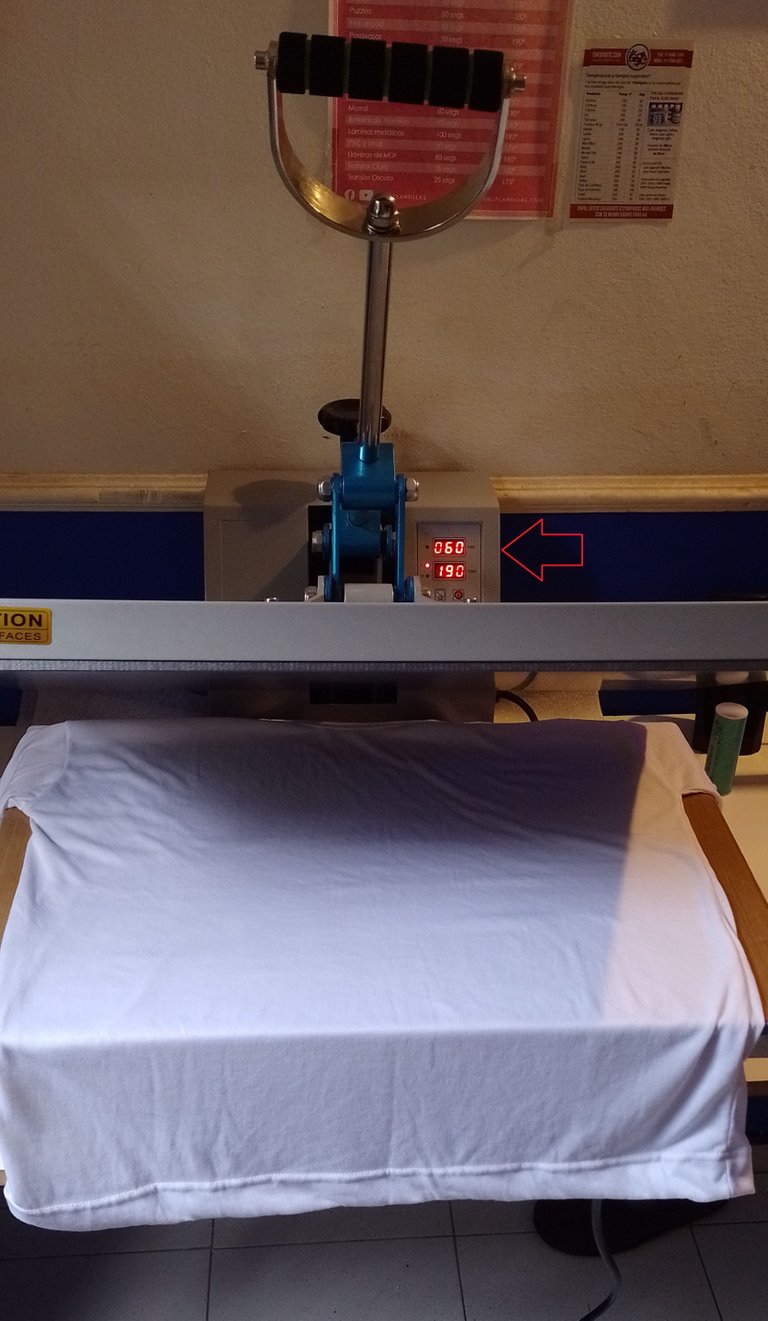
Pasamos directamente a utilizar nuestra estampadora por transferencia térmica o como se le dice vulgarmente, la plancha para sublimar. En este caso tenemos una PRINTGATE en su modelo EST-08 con un área sublimable de 60x40cm, si quieren saber más sobre las características de ésta estampadora, les dejo éste link. Realmente es una estampadora que tiene un excelente comportamiento, su calor cubre toda la superficie sublimable sin ningún problema y además tiene un panel digital que nos facilita la configuración a la hora de sublimar.
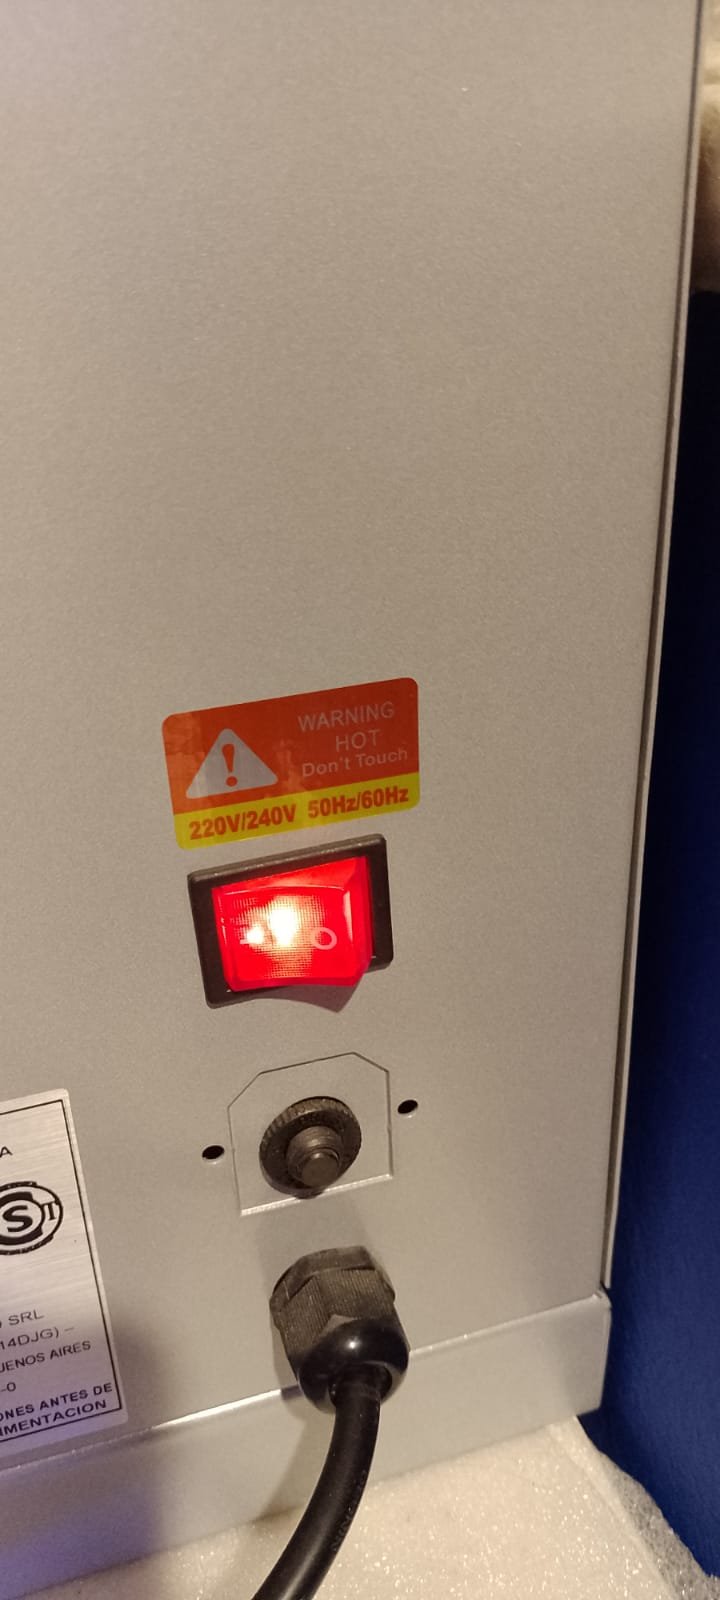
Procederemos a encender la máquina presionando un botón que se encuentra en el costado derecho de la máquina y otro que se encuentra en el panel que se ve en la parte del frente de la máquina.
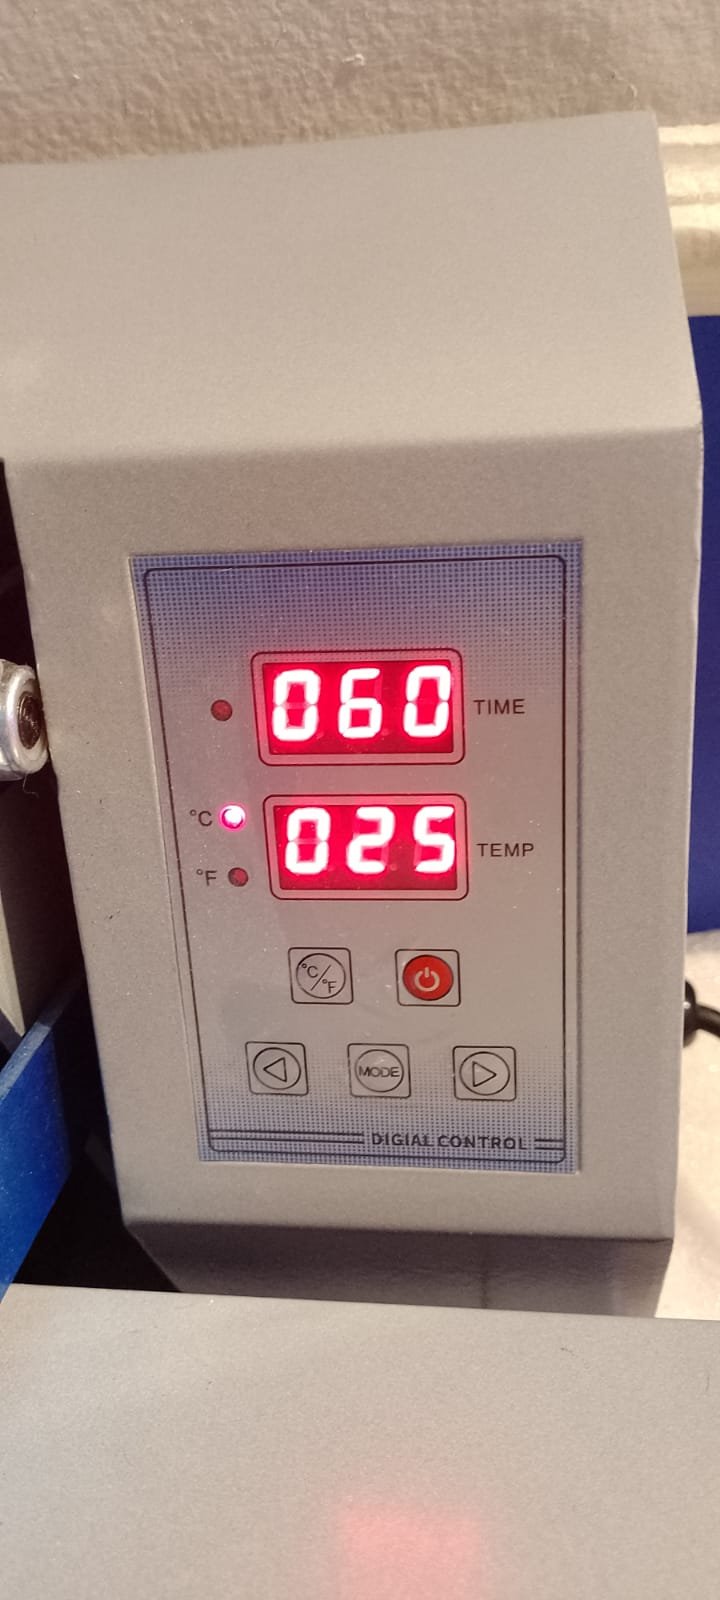
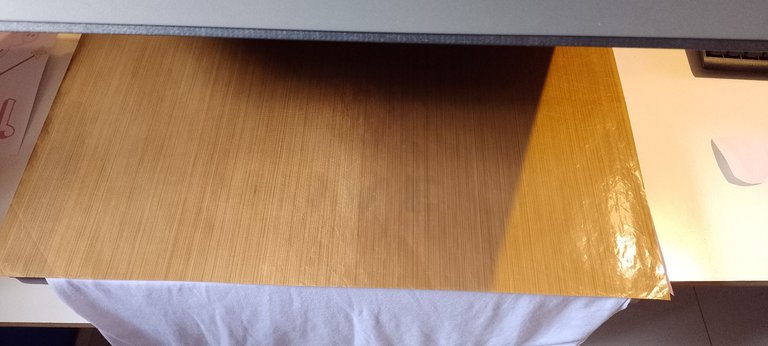
Luego de encenderla, configuraremos en el panel para que llegue a la temperatura deseada que serían 190 grados Celsius y que nos avise, con una alarma que viene incorporada en la máquina, cuando lleguemos a esa temperatura. Después de que la máquina llegue a la temperatura deseada, colocaremos primero una tela teflonada en la parte de abajo que sirve como aislante térmico para proteger la parte de abajo de la plancha de la tinta que pueda arrojar nuestra hoja, luego colocamos la remera en cuestión y por último le pondremos que nos avise cuando pasen 60 segundos una vez cerrada la plancha. Éste sería el tiempo y la temperatura exacto para sublimar una remera de poliéster. Si quieren saber más sobre los tiempos y temperaturas necesarias para sublimar diferentes tipos de materiales les dejo éste link.
Después colocamos nuestra impresión sobre la remera en la ubicación deseada.
Y por último otra tela teflonada por encima de la remera y la impresión para proteger la parte superior de la máquina.
Cerramos la plancha y esperamos los 60 segundos, una vez cumplido ese tiempo, repetimos el proceso pero con la manga de la remera.
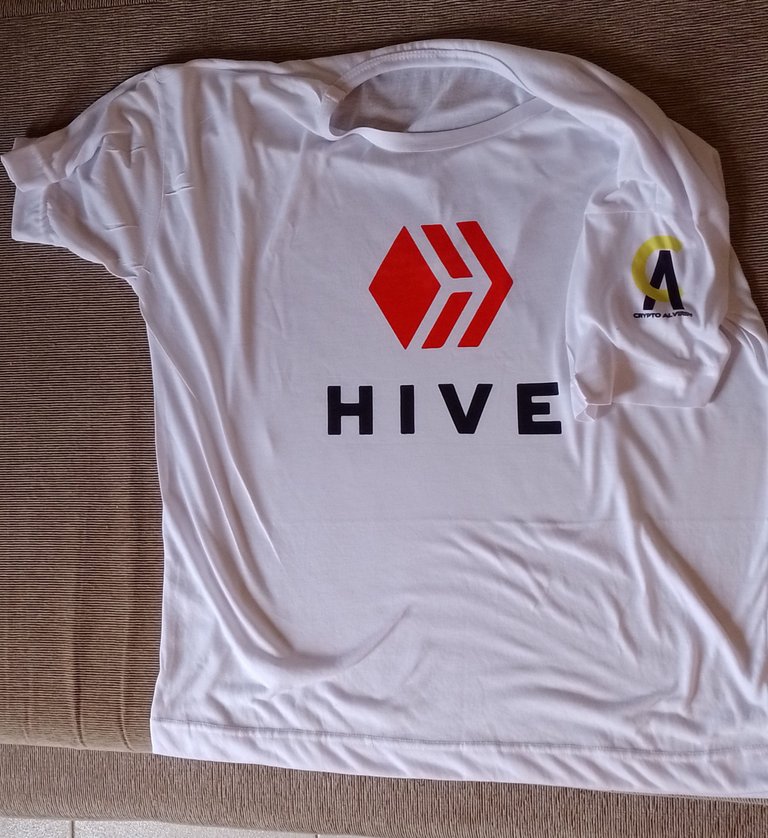
¡Y listo! Después de esos sencillos pasos nuestra remera estará terminada y lista para usarse.
Bueno gente, hasta acá llegaría el blog, mi intención con esto es animarlos a intentar cosas en la vida, a descubrirse y a enfrentar sus miedos. Siendo sincero, yo lo veía un negocio muy complicado, mas estando en la situación que se encuentra mi país donde todo es más difícil, donde todo es más caro, pero gracias al apoyo de mi novia acá estamos, hace una semana cumplimos un año de nuestro increíble negocio y estamos creciendo cada vez más.
Les deseo un hermoso fin de semana y espero que les haya gustado la publicación.
Créditos
Las imágenes utilizadas en el post son fotos sacadas con mi celular Motorola G20.
El separador que dice "ENGLISH" fue realizado en mi computadora por mi persona en el programa Illustrator.
Los separadores que dicen "CRYPTO ALVIRIN" fueron realizados en mi computadora en el programa Illustrator.
El logo del canal fue realizado por mi persona en mi computadora y con Illustrator.

Hello! What's up, crypto friends? How are they? I hope very well! Today I bring you some unusual content for the channel. As I had already told you in my introduction to Hive, I have a sublimation business, but what is sublimation? some may be wondering. Sublimation is a digital printing method or technique where that print is fused onto specific materials to achieve a personalized product. The specific materials can be: acetate, sanity, leatherette, dry, fibroplus, friselina, ketten, fleece, lycra, microfiber, among many others, if you are interested in knowing more about what materials can be sublimated, I leave you a link to access this information. On this occasion, I come to bring you a sublimation we did on a white polyester t-shirt (material suitable for sublimation), to tell you about the process and to show you the materials used in it. Let's start then with what concerns us.
To clarify, I would like to say that in sublimation specific inks and sheets are used for the trade, then I will leave you some photos that I took with my cell phone so that you can see them.
The inks in question, suitable for sublimation. Colors Black, Cyan, Magenta and Yellow. They are not the same as common inks, the difference is in their consistency. The brand is a very good price-quality ratio. I do not recommend any in particular if you want to get started in this business, but I always advise using the same brand once chosen.
Here I show you the sheets that we use to make the prints, as you can see in the package, they are PREMIUM quality to SUBLIMATE. The size of them is 8.5 * 14 inches, this size is called Legal. In reality, the size does not have a direct influence, but rather provides more space for what we want to sublimate, although it can easily be sublimated on an A4 size sheet as long as it is sublimation, of course.
Having the basic materials to sublimate, now it's time to use our computer. The first thing we would have to do is open our favorite image editor, in this case I choose Illustrator, I consider it a very complete program for the work I am doing since it allows me to vectorize the images to greatly improve their quality and therefore, to when it comes to putting it into the product, they look excellent.
Within the mentioned program, we are going to create a new document by clicking where the red circle is seen.
Then we will have to configure our document according to the sheet size that we are using. In my case, as I mentioned above, I use Legal size (8.5 * 14 inches). We then select the desired format.
We will see next a blank sheet that is where we will place our images, we will vectorize them and we will give them the size that we most need.
I really don't want to delve too deeply into the use of Illustrator since that's not what the publication is about, that's why I'm going to explain it as if you already knew how to use it, although later if you think I could bring a tutorial on how to use it.
In this case I already placed, vectorized and gave the desired size to what we want to sublimate on the shirt. In this case, the shirt is for me (I guess you've noticed xd), I'm going to sublimate my logo on a sleeve and the Hive logo on the front of the shirt.
We are going to return to our physical space and proceed to prepare our printer which is an Epson L3110, here I leave you technical specifications about the printer. This machine is not prepared to sublimate although it does have the compartments called "Eco Tank" to place the ink, this gives us the possibility of being able to use ink to sublimate instead of the common one, which makes it very comfortable to be able to use it in this job. , is one of the most recommended by everyone who is dedicated to this. But there is a small problem here and that is that if our printer is used and already had common ink, it cannot be used for the purpose we are looking for because it would already be "contaminated" with the other ink.
Then we're going to go back to our computer because we have to select the printing preferences. The most important thing is to make it clear to the program that the size to use is from the sheets we have chosen, in this case Legal (8.5 * 14 inches), and we must also tell it to use the "Mirror" and "High Speed" options. . Having selected all these options, we click on accept and then we print.
Once the printing is done, I prefer to cut the sheets so that they are of a manageable and more comfortable size, because in reality it would not be necessary to cut them since the white of the sheet does not go through to the shirt, but we do it because it is uncomfortable to handle . As you can see, they have been printed upside down and that is what we told the program to do with the mirror mode, since we are going to place the sheet on the shirt and if it is not in mirror mode it will be upside down on the shirt. dress.
We go directly to use our thermal transfer printer or as it is commonly called, the sublimation iron. In this case we have a PRINTGATE in its EST-08 model with a sublimable area of 60x40cm, if you want to know more about the characteristics of this stamper, I leave you this link. It really is a stamper that has an excellent performance, its heat covers the entire sublimatable surface without any problem and it also has a digital panel that facilitates the configuration when sublimating.
We will proceed to turn on the machine by pressing a button that is on the right side of the machine and another that is on the panel that is seen on the front of the machine.
After turning it on, we will configure the panel so that it reaches the desired temperature, which would be 190 degrees Celsius, and it will notify us, with an alarm that is built into the machine, when we reach that temperature. After the machine reaches the desired temperature, we will first place a Teflon cloth on the bottom part that serves as thermal insulation to protect the bottom part of the plate from the ink that our sheet may throw, then we place the shirt in question and finally we will tell you when 60 seconds have passed once the iron is closed. This would be the exact time and temperature to sublimate a polyester shirt. If you want to know more about the times and temperatures necessary to sublimate different types of materials, I leave you this link< /A>.
We then place our print on the t-shirt in the desired location.
And finally another teflon coated fabric over the shirt and the print to protect the upper part of the machine.
We close the iron and wait for 60 seconds, once that time has elapsed, we repeat the process but with the sleeve of the shirt.
And ready! After these simple steps our t-shirt will be finished and ready to wear.
Well folks, this is the end of the blog, my intention with this is to encourage you to try things in life, to discover yourself and face your fears. To be honest, I saw it as a very complicated business, but being in the situation that my country is in where everything is more difficult, where everything is more expensive, but thanks to the support of my girlfriend here we are, a week ago we celebrated a year of our amazing business and we are growing more and more.
I wish you a beautiful weekend and I hope you liked the publication.
Créditos
Las imágenes utilizadas en el post son fotos sacadas con mi celular Motorola G20.
El separador que dice "ENGLISH" fue realizado en mi computadora por mi persona en el programa Illustrator.
Los separadores que dicen "CRYPTO ALVIRIN" fueron realizados en mi computadora en el programa Illustrator.
El logo del canal fue realizado por mi persona en mi computadora y con Illustrator.
Que hermosa te quedó la remera, alguien tenía que tener una de estas en el equipo. Me alegro mucho de que le tengas tanto cariño y respeto a la plataforma
Gracias amigoo! Si quede conforme, por suerte salió bien. Cuando te vas a hacer la tuya? (guiño guiño)
cuando hive me de el dinero suficiente para pagarte el sublimado broh, la verdad ahora a duras penas voy a pagar el medicamento que necesito para la gripe de mis padres
!LUV Y !PGM
BUY AND STAKE THE PGM TO SEND TOKENS!
Discord
Support the curation account @ pgm-curator with a delegation 10 HP - 50 HP - 100 HP - 500 HP - 1000 HP
Get potential votes from @ pgm-curator by paying in PGM, here is a guide
I'm a bot, if you want a hand ask @ zottone444
@nahueldare3627(1/3) gave you LUV. H-E tools | discord | community | <>< daily
Tremendo!
Tremebundo amigo, gracias por comentar!
Al fin logro comprender un poco como funciona tu emprendimiento amigo, ya hace un tiempo que sabía que trabajabas en diferentes sublimados. Veo que tuviste que aprender un montón de técnicas nuevas para lograr la calidad de tus productos. Es todo un prueba y error en éste tipo de cuestiones.
Me gustó mucho y te felicito por la calidad del post, está muy bien logrado 😊.
!LUV !PGM
BUY AND STAKE THE PGM TO SEND TOKENS!
Discord
Support the curation account @ pgm-curator with a delegation 10 HP - 50 HP - 100 HP - 500 HP - 1000 HP
Get potential votes from @ pgm-curator by paying in PGM, here is a guide
I'm a bot, if you want a hand ask @ zottone444
@bananasfallers(3/10) gave you LUV. H-E tools | discord | community | <>< daily
Gracias por pasar amigo como siempre. Si, a puro prueba y error, y muchas puteadas pero se logró mejorar jaja.
Bueno ya se quien será el encargado del estampado de nuestras franelas de Geek Zone jajaja
Desconocía el proceso completo, muy buen tip lo de la impresora Epson para quienes se quieran iniciar en el mundo del sublimado.
Éxitos.
Hola @gorayii, cuando quieran! El único inconveniente creo que va a ser el envío, a no ser que quieran venir a buscarlas por acá y de paso nos comemos un asado 🤣🤣
Es un tip que me hubiera gustado que me den porque fue lo que me pasó a mi con la impresora :(
Gracias por pasar querida, siempre más que bienvenida! Un saludo y éxitos para vos también.
Imagina todo lo que podemos hacer, aplicando este método.
Ha quedado bien definido y sobre todo, aplicable a nuestro andar en la plataforma.
Saludos
¡Me encantó! Necesitamos algunas remeras con el logo de Hive, desde hace mucho tiempo las añoramos. ¡Excelente trabajo!
Muchas gracias por pasar y por tu comentario querido!
Por favor su ayuda, ¿ todas las epson sirve para sublimar?
Hola alasia, como estás? Mira mientras tenga el Eco Tank y NUNCA haya sido usado con otra tinta que no sea de sublimación te sirve! Igual te recomiendo muchísimo ésta, es la mejor precio-calidad que vas a encontrar en el mercado.
Tienes unos buenos equipos, hace varios años tenía un emprendimiento de sublimación, compre las máquinas en Valencia, si recuerdo que trabajaba con Photoshop principalmente y en cuanto a las planchas, tenía una 10 en 1, con adaptación para vasos, platos, gorras, tazas normales y cónicas, mi plancha era más pequeña, creo que de 38*40 cm o algo así, todavía queda el cadáver de algunos de esos equipos que posteriormente regalé a un familiar y ahora tiene equipos más especializados (plóter de 1,40 m y Calandra), ya esos equipos son otro nivel y te imprimen la prenda completa de punta a punta.
Actualmente me dedico a otra cosa pero ese negocio de sublimación me ayudó a mi y a mi familia a crecer. Mucho éxito y felicidades que si se puede.
Muchas gracias por tu comentario querido. Si, es un negocio complicado ya que es a puro prueba y error, gracias por tus buenos deseos, éxitos para vos también!
Excelente 😃👍🏼...me gustaría una sería genial....
Gracias por compartir
💜🌸⭐🌹🌙🍁🌳🌟🌲🌈🏵️🌵🍀💫💫🍂🥀✨🌺🎊💙🐞💮🌷🌱🌼🎉☺️😉😃🥰🤗😘😊👍🏼