Cómo realizar un Diseño en Inkscape para la Técnica de Subliminación [ESP/ENG]
Actualmente existe diferentes herramienta en la cual podemos realizar diseño para el proceso de subliminación, en este caso vamos a trabajar con el programa vectorial Inkscape, el cual se puede instalar en diferentes sistemas operativos como Linux, Windows y Mac.
A continuación les presento una definición de Subliminación:
La sublimación es una de las técnicas de impresión digital que te permite crear productos personalizados de modo muy sencillo. Consiste en plasmar una imagen fotográfica sobre un soporte (camiseta, taza, portafotos, carcasa de teléfono, bolso, azulejos, etc.) consiguiendo crear un artículo personalizado único y exclusivo.
Cómo realizar un Diseño en Inkscape para la Ténica de Subliminación
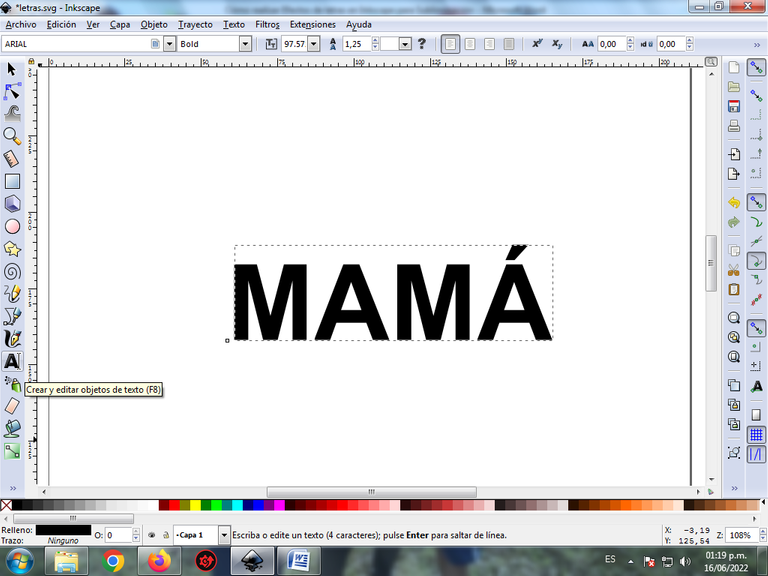
Paso 1:
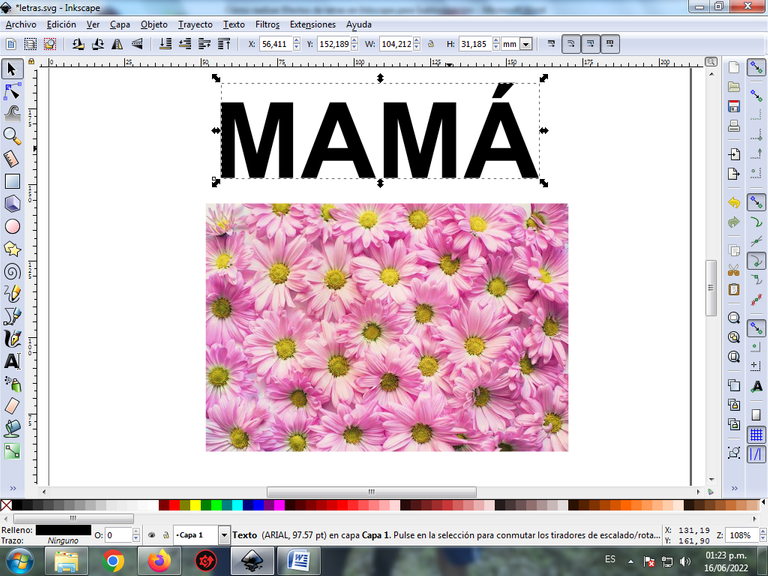
Abrimos el programa Inkscape y escribimos la siguiente palabra “Mamá” con la opción de crear y editar cuadro de texto de la barra de herramientas.
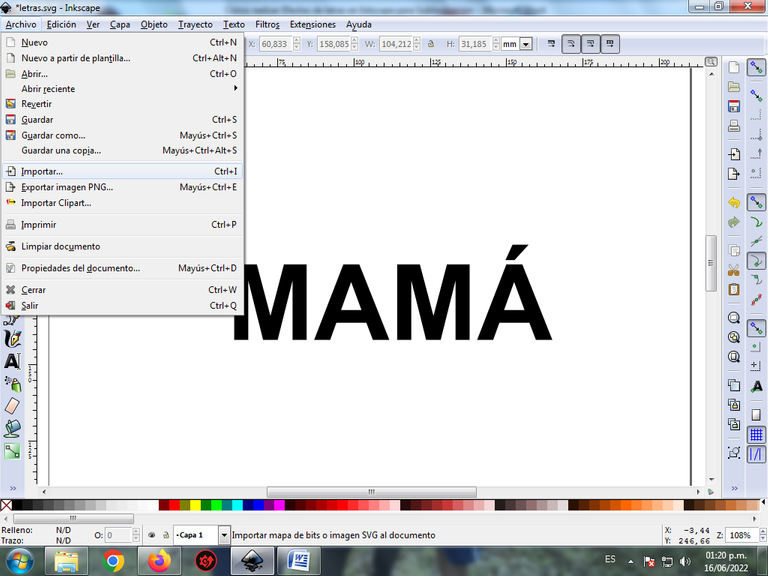
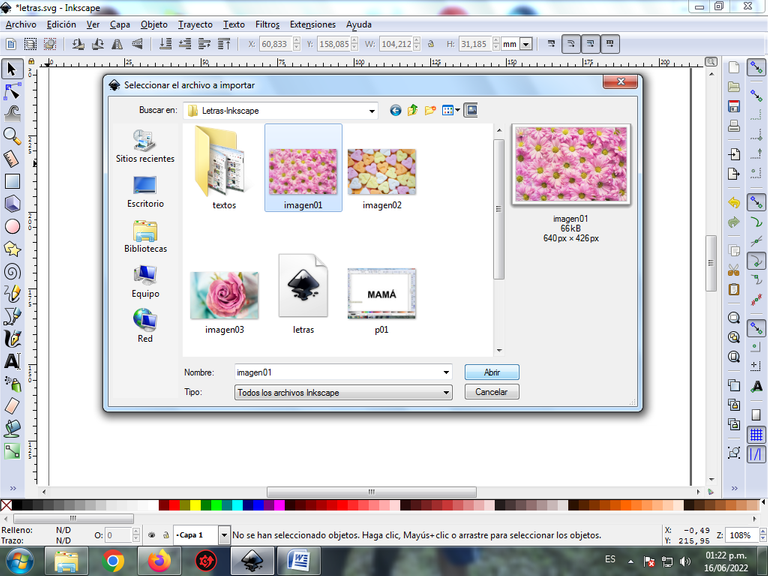
Paso 2:
Desde la barra de menú Archivo en la importar, la imagen que vamos a utilizar para realizar este primer efecto.
Paso 3:
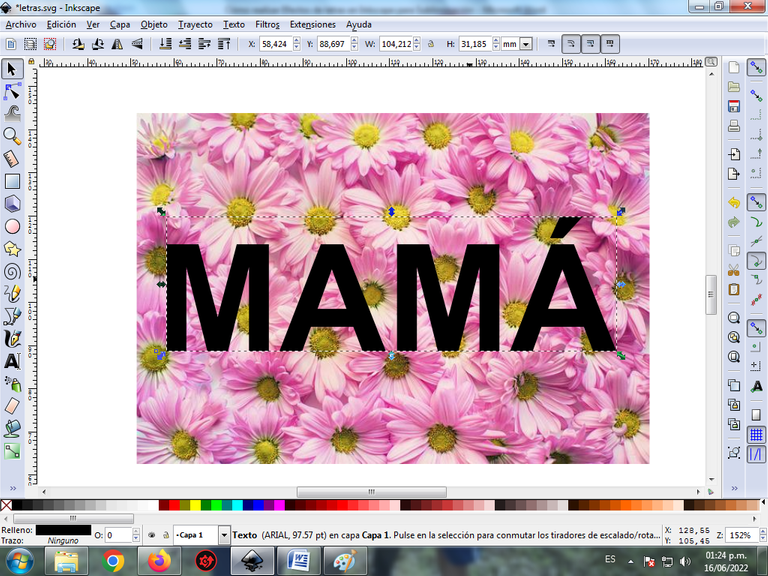
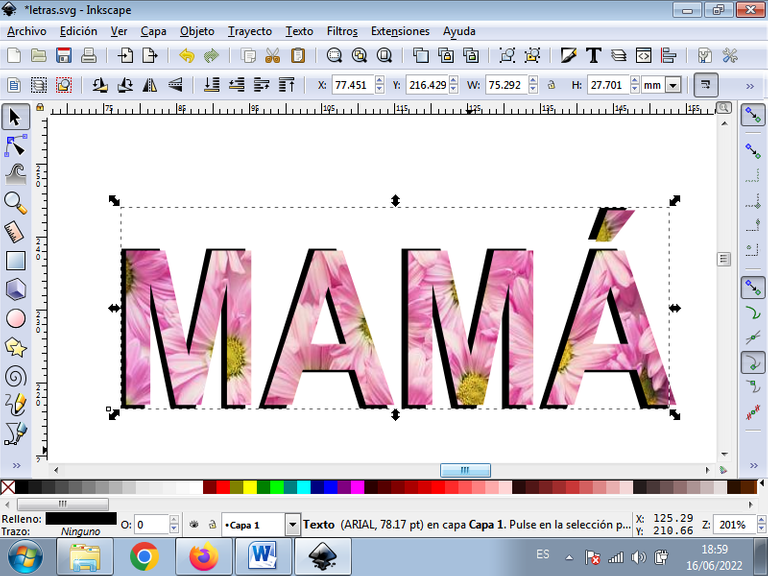
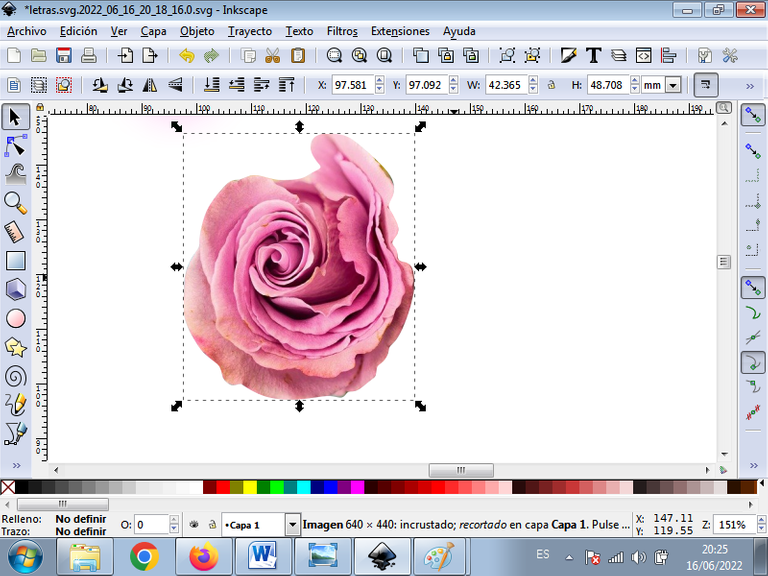
Agrandamos la imagen que se insertó y luego desplazamos el texto encima de la misma.
Paso 4:
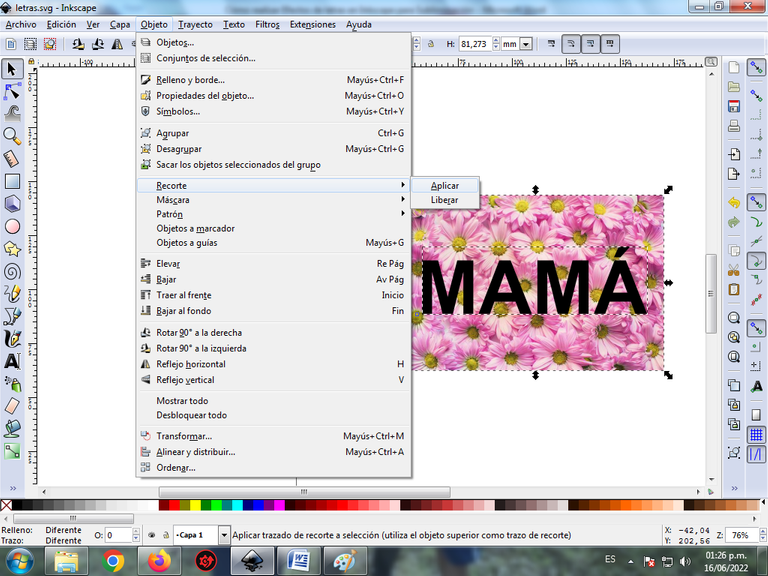
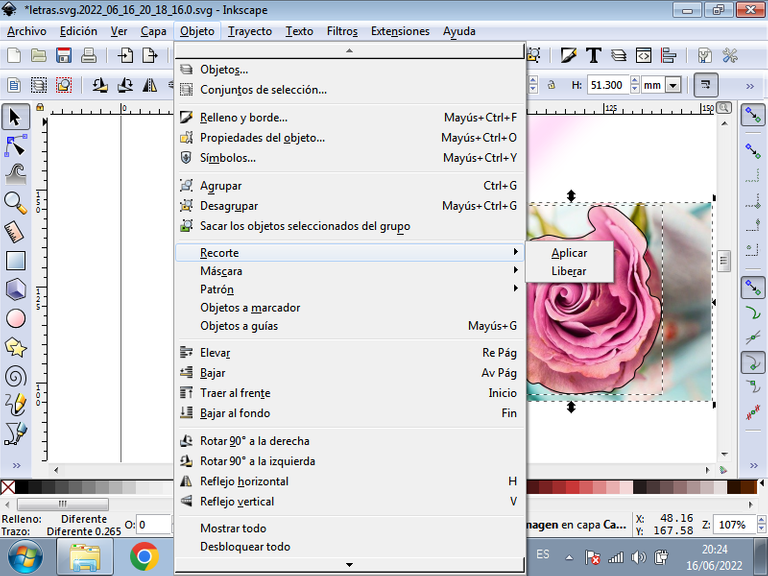
Seleccionamos la imagen y el texto, luego le damos clic en la barra de menú Objeto – Recorte y aplicar.
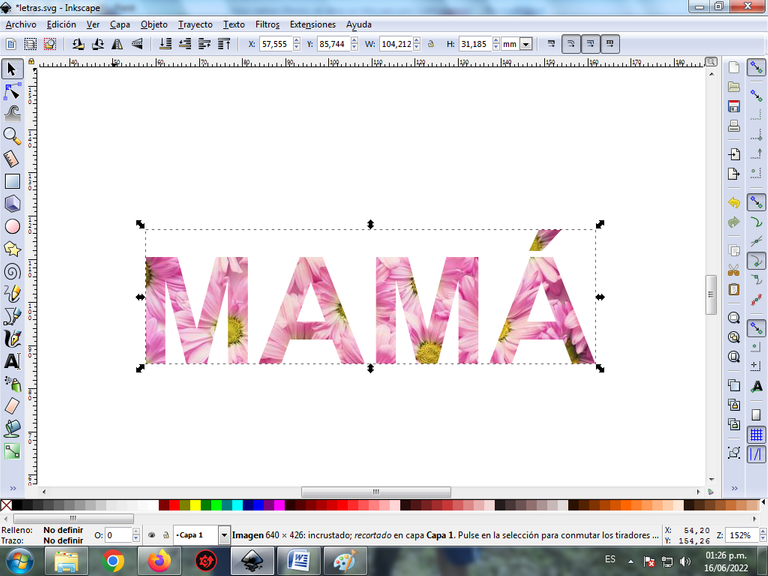
Quedando de esta forma.
Paso 5:
Después insertamos nuevamente el texto “Mamá”
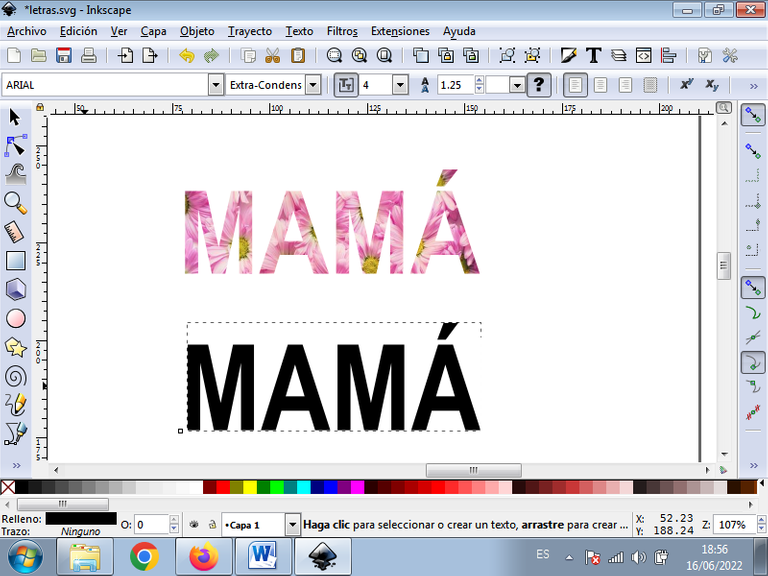
Desplazamos el texto encima de la anterior, y lo enviamos al fondo, y luego lo agrupamos presionando la combinación de teclas Control + D, quedando de esta forma.
Paso 6:
Se traza la siguiente figura en forma de corazón con la herramienta de curvas Bézier.
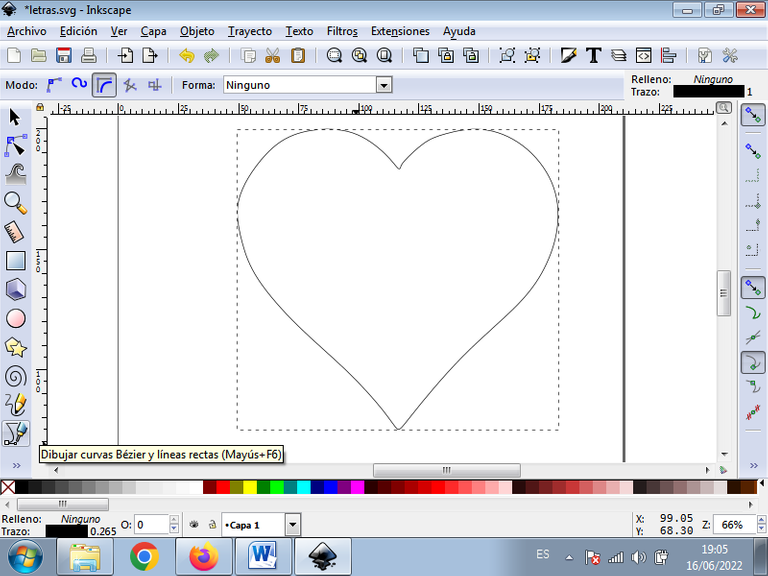
En esta parte se utiliza la opción de crear Trayecto Bspline.
Paso 7:
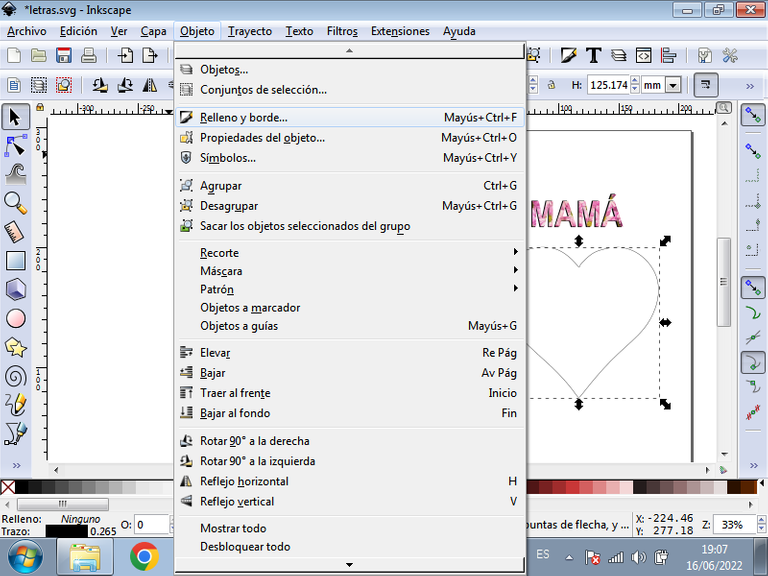
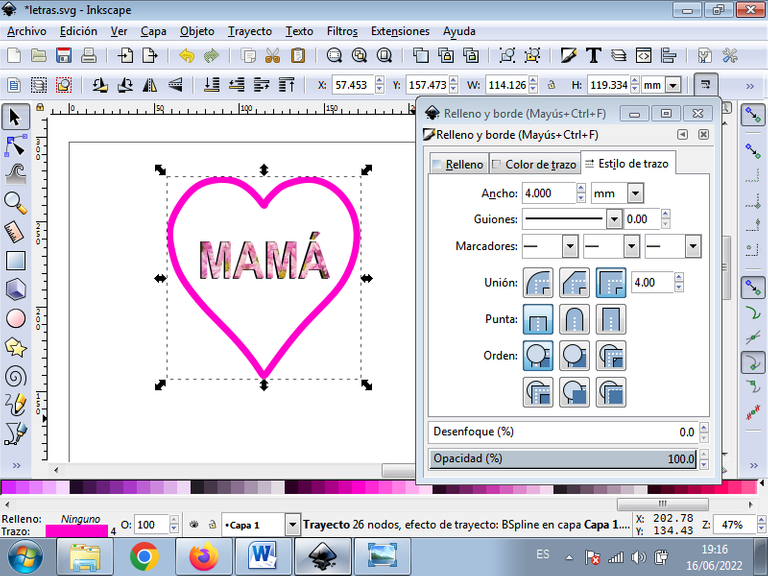
Ahora procedemos a colocar un color a los bordes del corazón, para esto lo seleccionamos y le damos clic a la barra de menú Objeto – Rellenos y Bordes.
Le damos clic en color de trazo y escogemos el color.

Paso 8:
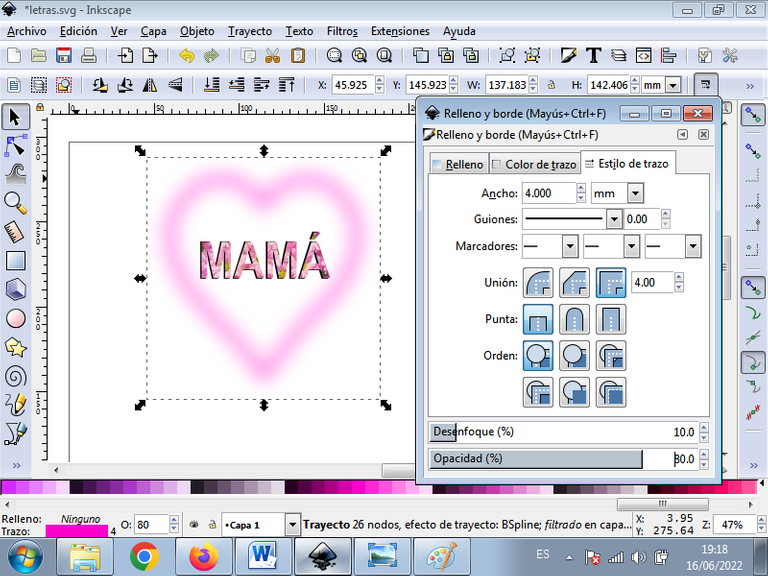
Aumentamos el grosor de los bordes, para le damos clic en la pestaña Estilo de trazo y se aumenta en 4.
Aplicamos un desenfoque de 10% y se reduce la opacidad al 80%.
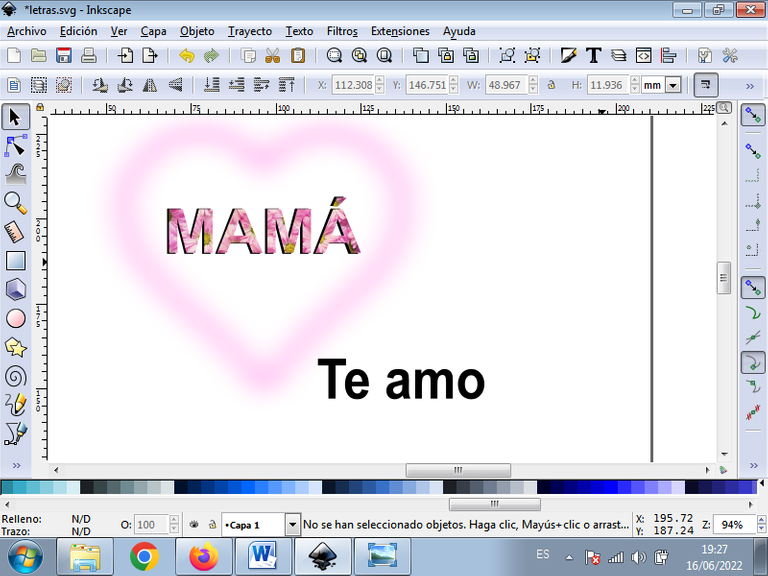
Paso 9:
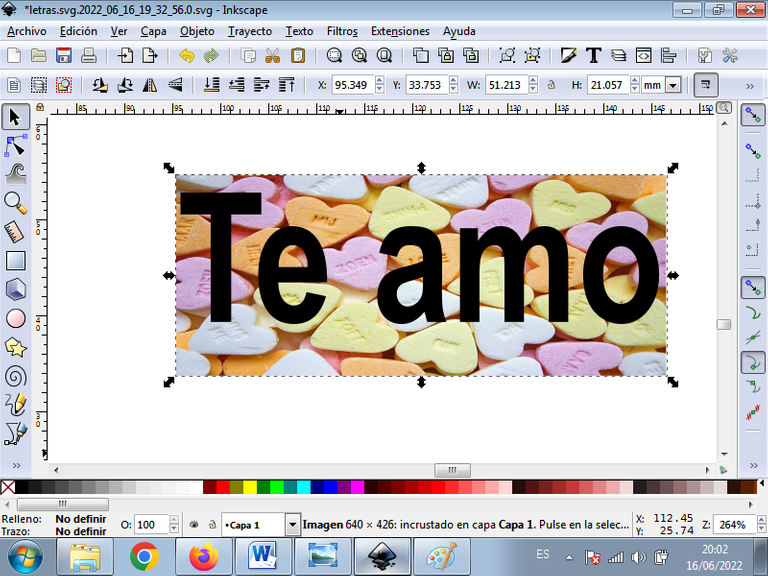
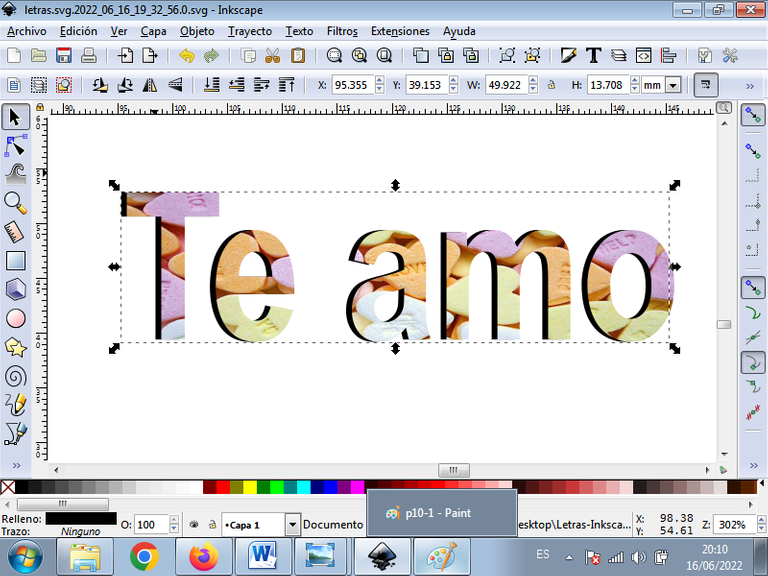
Insertamos el texto “Te Amo” con la opción de crear y editar objeto de texto de la barra de herramientas.
Ahora procedemos a insertar una imagen, para esto le damos clic en Archivo – Importar y seleccionamos la ubicación de la imagen.
Una vez que tenemos la imagen, se reduce el tamaño y se envía al fondo.
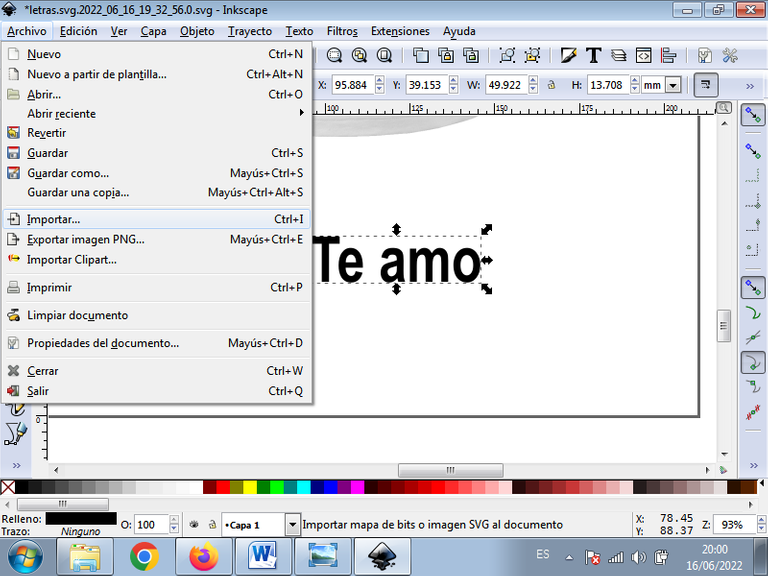
Paso 10:
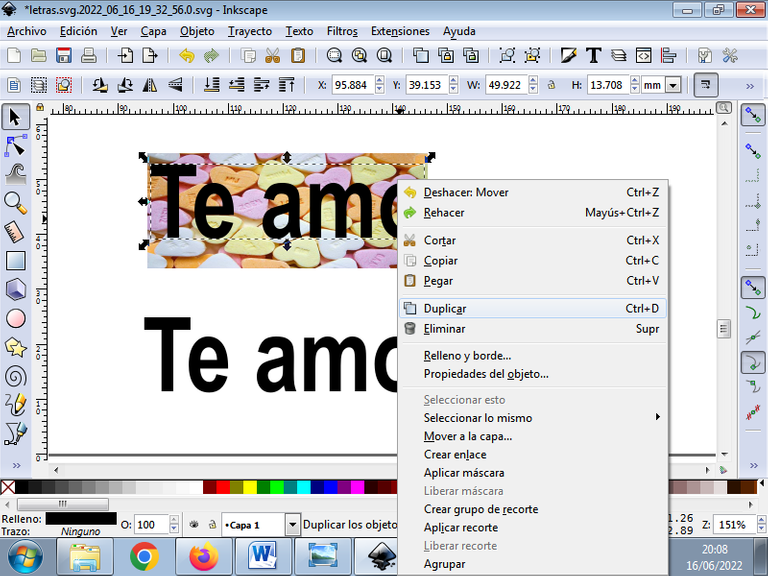
Se selecciona el texto, presionamos botón derecho y lo duplicamos, para tenerlo allí se desplaza a la parte inferior.
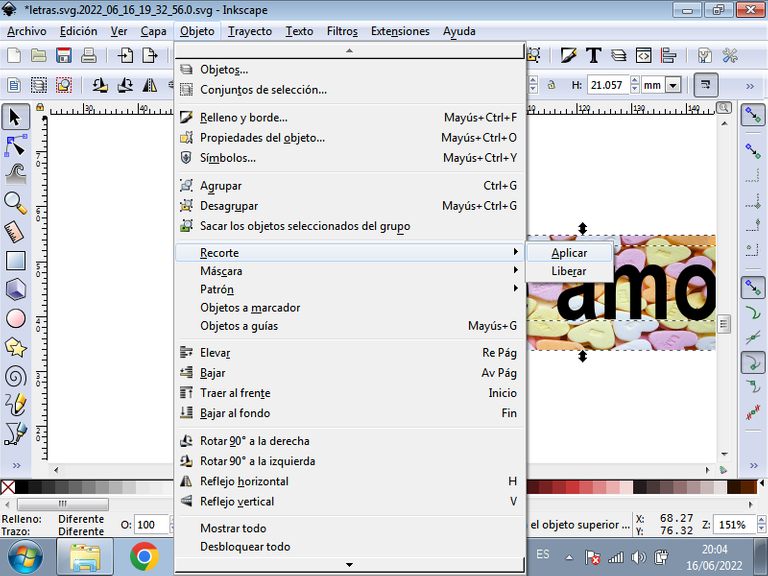
Le damos clic en la barra de menú Objetos – Recortes – Aplicar
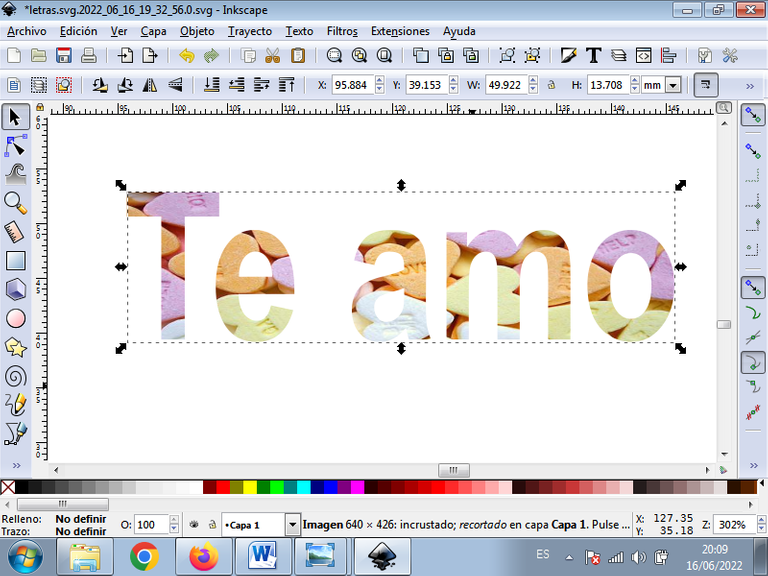
Así nos queda este texto.
Paso 11:
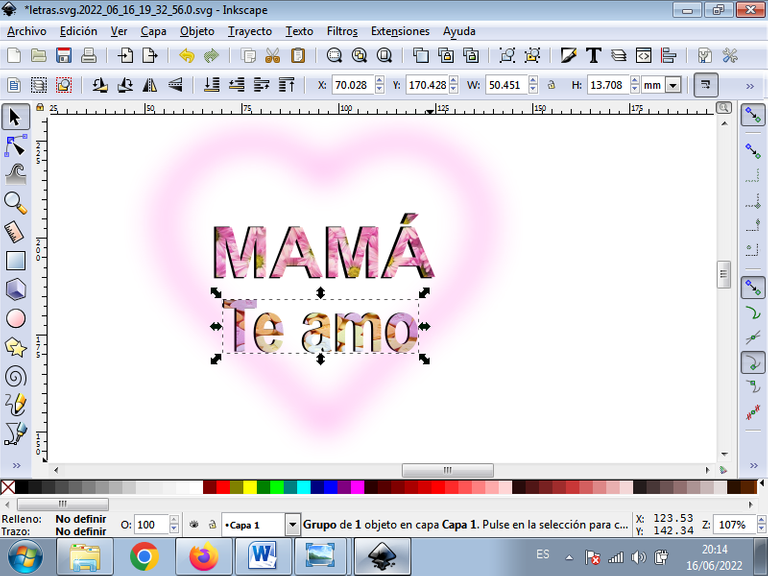
Desplazamos el texto en color negro a la parte de atrás del anterior y quedaría así y luego lo agrupamos con la combinación de teclas Control + G.
Paso 12:
Se desplaza el texto debajo de la palabra Mamá.
Importamos otra imagen
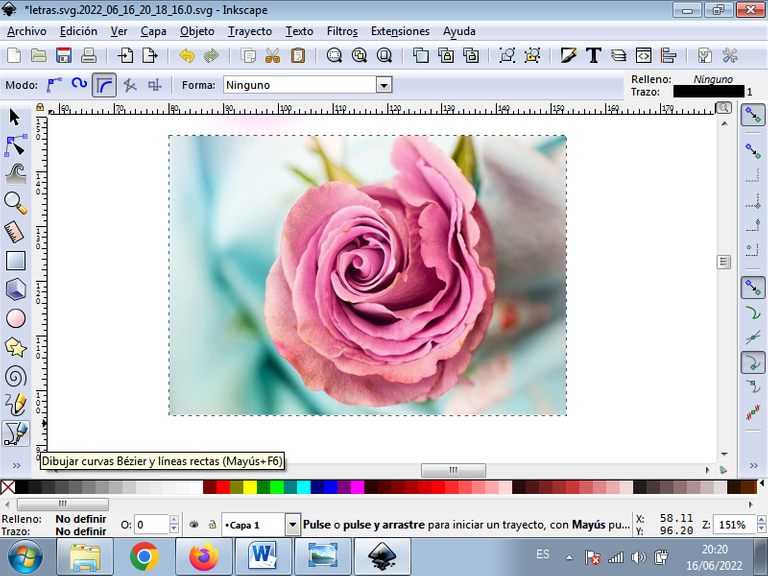
La dibujamos con la herramienta de curvas Bézier, realizando cada uno de los trazos.
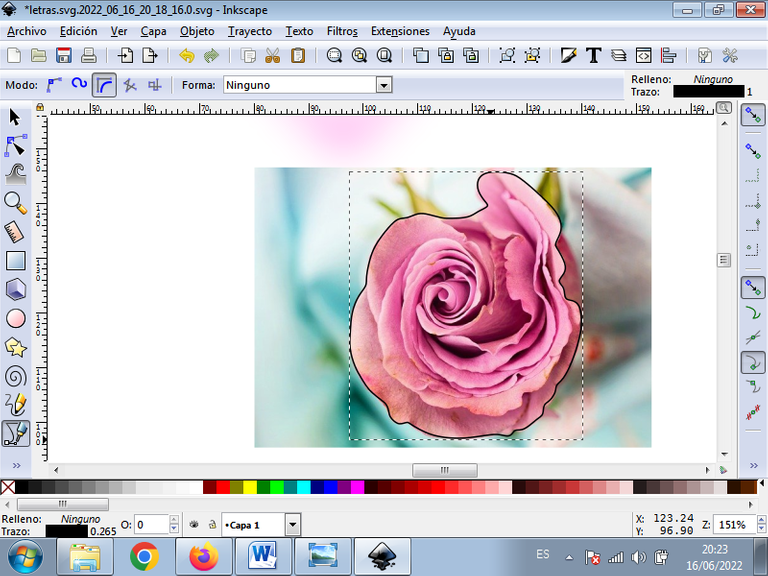
Paso 13:
Se selecciona las dos imágenes y luego le damos clic en la barra de menú Objeto – Recorte y aplicar.
Este es el resultado obtenido:
Paso 14:
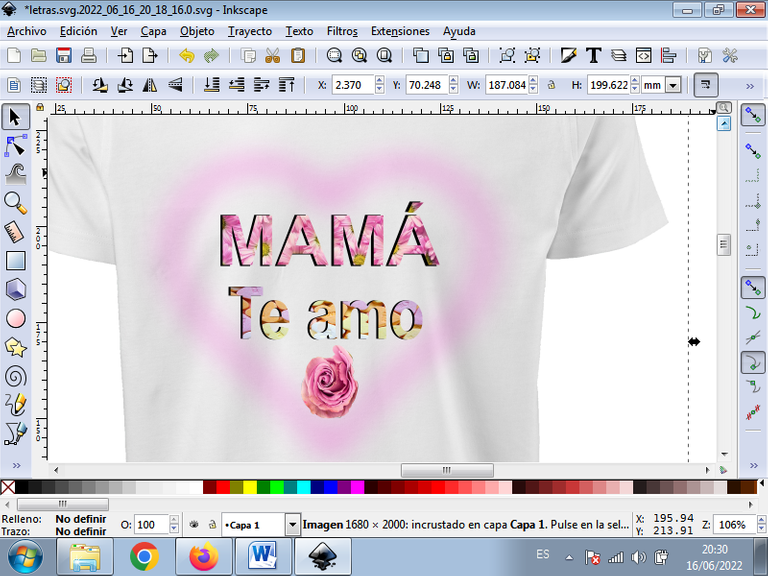
Reducimos el tamo de la flor y la desplazamos en la parte de abajo del corazón y luego importamos la imagen de nuestra franela blanca y tenemos listo nuestro diseño en la camisa.

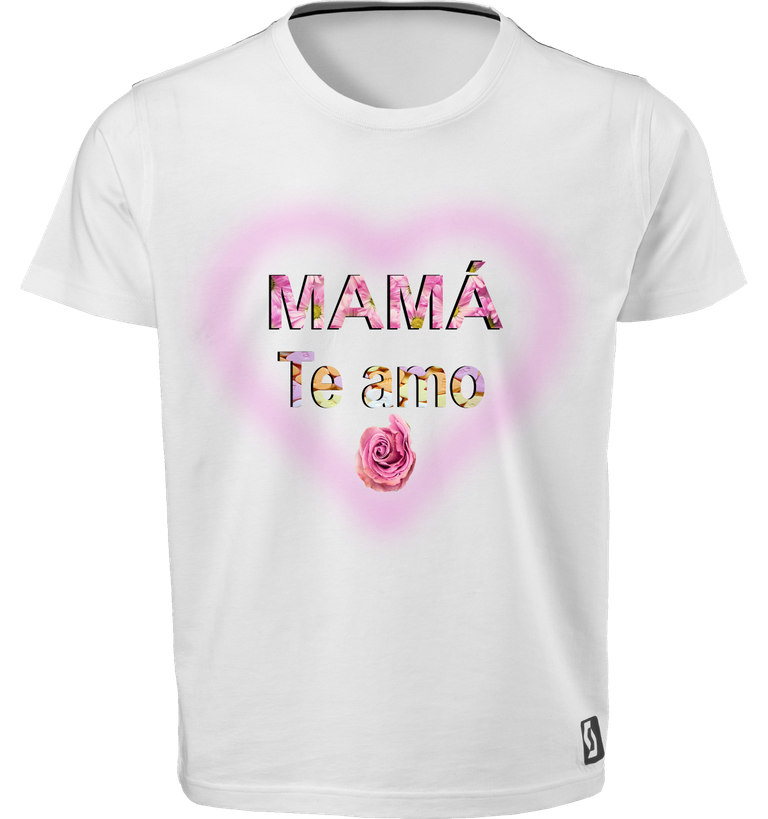
De esta forma tenemos listo nuestro diseño listo para imprimirlo con la técnica de subliminación.
Referencia consultada:
Fuente 1
Imágenes utilizadas:
Imagen 1 Fuente
Imagen 2 Fuente
Imagen 3 Fuente
Espero que les haya gustado mi tutorial, nos vemos en una próxima publicación.
English
Currently there are different tools in which we can make the design for the sublimation process, in this case we are going to work with the vector program Inkscape, which can be installed on different operating systems such as Linux, Windows and Mac.
Here is a definition of Sublimination:
Sublimation is one of the digital printing techniques that allows you to create personalized products very easily. It consists of capturing a photographic image on a support (t-shirt, mug, photo frame, phone case, bag, tiles, etc.) managing to create a unique and exclusive personalized item.
How to make a Design in Inkscape for the Sublimation Technique
Step 1:
We open the Inkscape program and type the following word “Mom” using the create and edit text box option on the toolbar.
Step 2:
From the File menu bar in the import, the image that we are going to use to make this first effect.
Step 3:
We enlarged the image that was inserted and then moved the text on top of it.
Step 4:
We select the image and the text, then we click on the menu bar Object – Crop and apply.
Staying this way.
Step 5:
Then we insert the text “Mom” again
We move the text on top of the previous one, and send it to the bottom, and then we group it by pressing the key combination Control + D, being this way.
Step 6:
The following heart-shaped figure is traced with the Bézier curves tool.
In this part the option to create Path Bspline is used.
Step 7:
Now we proceed to place a color on the edges of the heart, for this we select it and click on the menu bar Object – Fills and Borders.
We click on stroke color and choose the color.
Step 8:
We increase the thickness of the edges, to click on the Stroke Style tab and it increases by 4.
We apply a blur of 10% and reduce the opacity to 80%.
Step 9:
We insert the text “I Love You” with the option to create and edit text object from the toolbar.
Now we proceed to insert an image, for this we click on File – Import and select the location of the image.
Once we have the image, it is reduced in size and sent to the background.
Step 10:
The text is selected, we press the right button and duplicate it, to have it there it moves to the bottom.
We click on the menu bar Objects – Clippings – Apply
So we have this text.
Step 11:
We move the black text to the back of the previous one and it would look like this and then we group it with the Control + G key combination.
Step 12:
The text below the word Mom scrolls.
We import another image
We draw it with the Bézier curves tool, making each of the strokes.
Step 13:
The two images are selected and then we click on the menu bar Object – Crop and apply.
This is the result obtained:
Step 14:
We reduce the size of the flower and move it to the bottom of the heart and then we import the image of our white flannel and we have our design ready on the shirt.
In this way we have our design ready to print it with the sublimation technique.
Reference consulted:
Source 1
Images used:
Image 1 Source
Image 2 Source
Image 3 Source
I hope you liked my tutorial, see you in a next post.

https://twitter.com/cbit_roxana_mdh/status/1537634690730958850
The rewards earned on this comment will go directly to the people(@cetb2008) sharing the post on Twitter as long as they are registered with @poshtoken. Sign up at https://hiveposh.com.