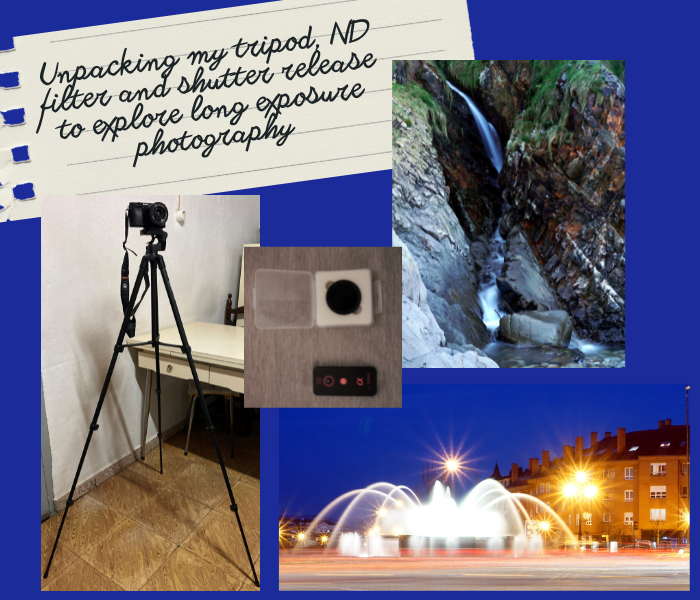
Unpacking my tripod, ND filter and shutter release to explore long exposure photography (ENG-ESP)

Hi friends,
On how many occasions have you seen amazing photographs of rivers with a totally silky water appearance?
How many times have you seen pictures of fountains whose water seemed to foam out of it?
Since I discovered #Hive and the #photographylovers community I have seen a multitude of photos of this style and since I got my camera a few months ago I was eager to take this kind of photos that they call long exposure photography.

Long exposure photography
Long exposure photography, as its name suggests, consists of letting light pass through the camera for a long time with the intention that everything that happens is captured in a single photograph, providing an effect in the photographs usually very striking.
However, in order to avoid blurred images, it is necessary that there is no movement or vibrations in the camera while taking the pictures, so the use of a tripod makes it much easier to take this kind of pictures.
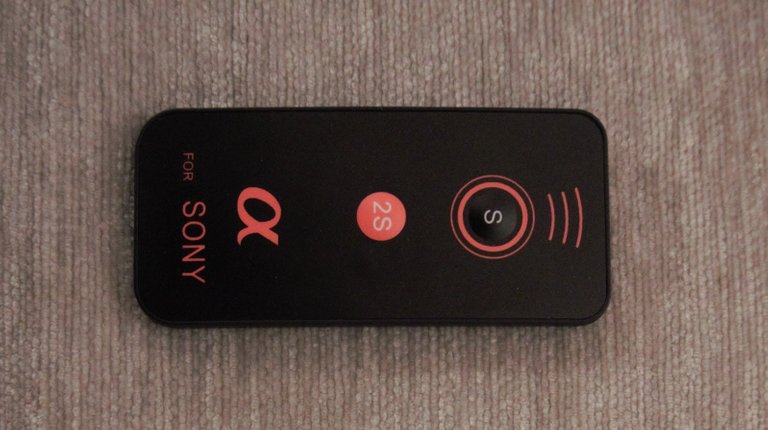
At the same time, even with the use of a tripod, the vibrations when pressing the shutter release button of the camera may cause our photograph to come out slightly shaky. Therefore, it is advisable to use the camera's delayed shutter release option or even better a remote shutter release.
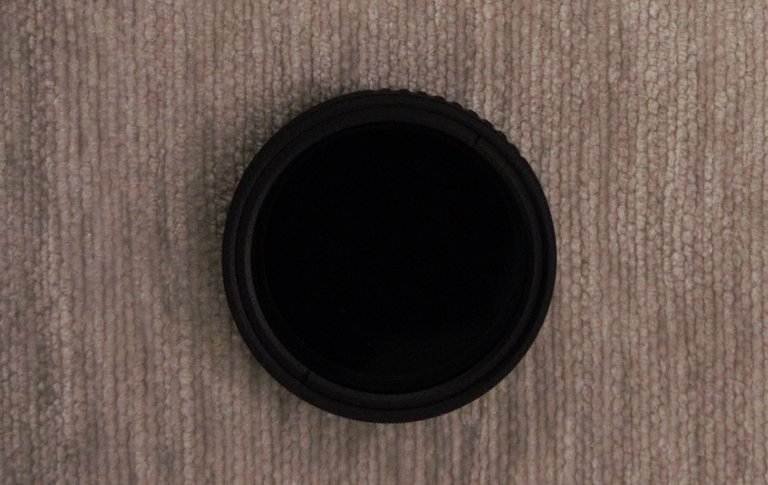
Finally, as in long exposure photography we are using a very low shutter speed, it is advisable to close the aperture of the camera and select a very low ISO value to avoid the photographs coming out with too much light. However, on many occasions, when the photographs are taken in very bright hours, it is necessary to reduce the amount of light reaching our lens, so we can use neutral density filters that act like sunglasses so that not so much light reaches the lens.
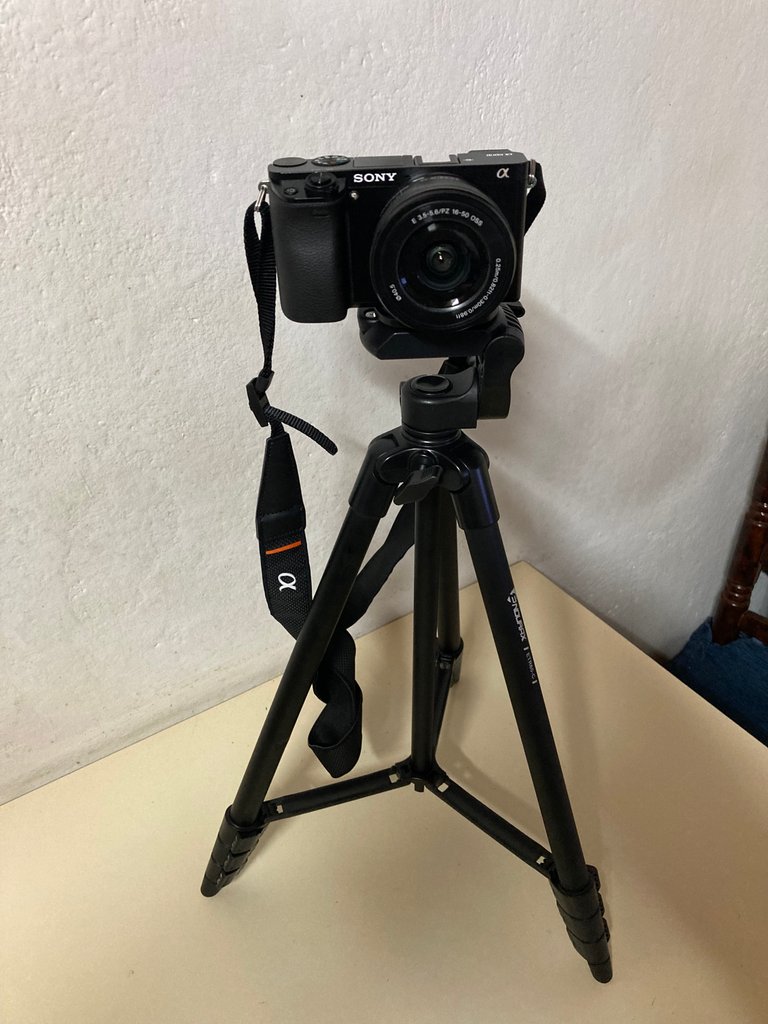
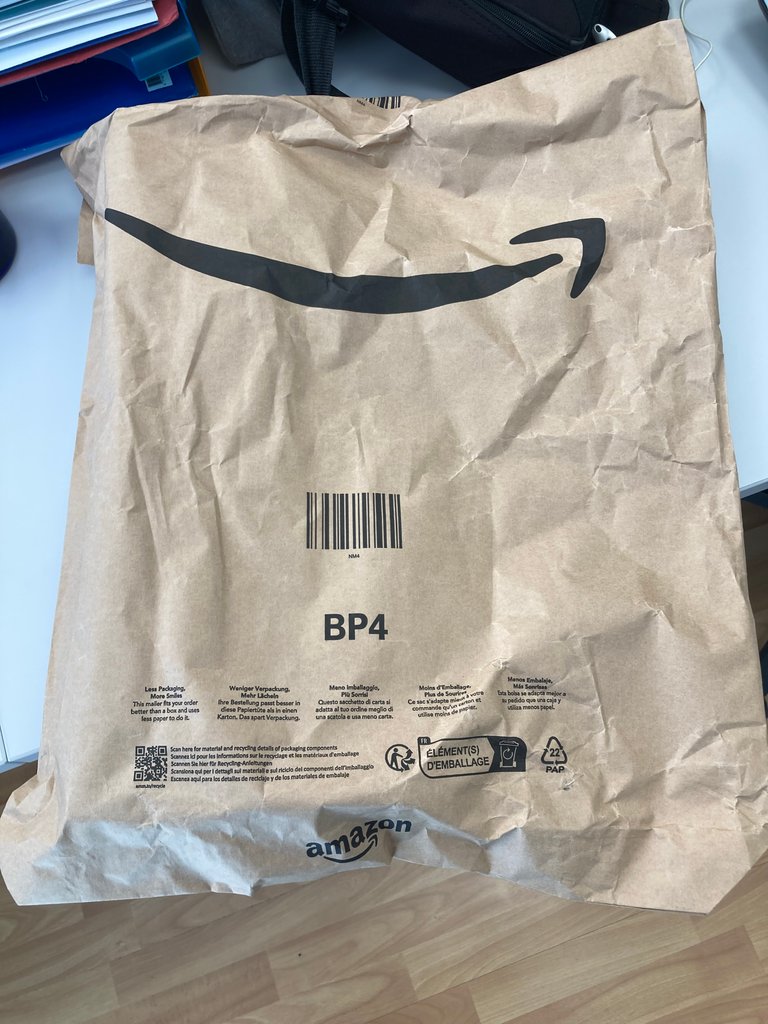
For all these reasons, a week ago I invested 80 euros to buy a tripod, a variable ND filter and an infrared shutter release for my Sony Alpha 6000L camera through Amazon.
My unboxing
Endurax 153cm Tripod
This tripod has come in a large protective bag from Amazon and inside was a cardboard box in which you could see the size specifications of the tripod once extended, the size when folded, the weight of the tripod and the maximum weight it can support.

At the same time, inside this cardboard box there was a very discreet black bag containing the folded tripod, a camera support, a cell phone support, a set of additional screws and the installation instructions. In particular, the detail of including some of the additional screws seemed to me a great idea.
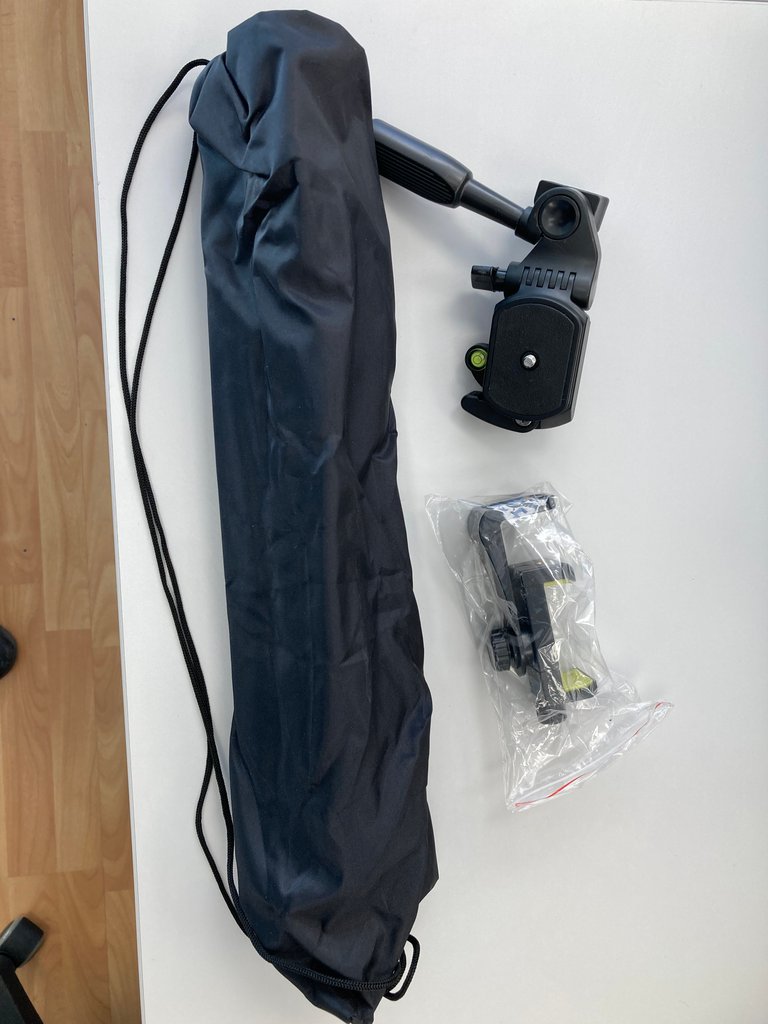
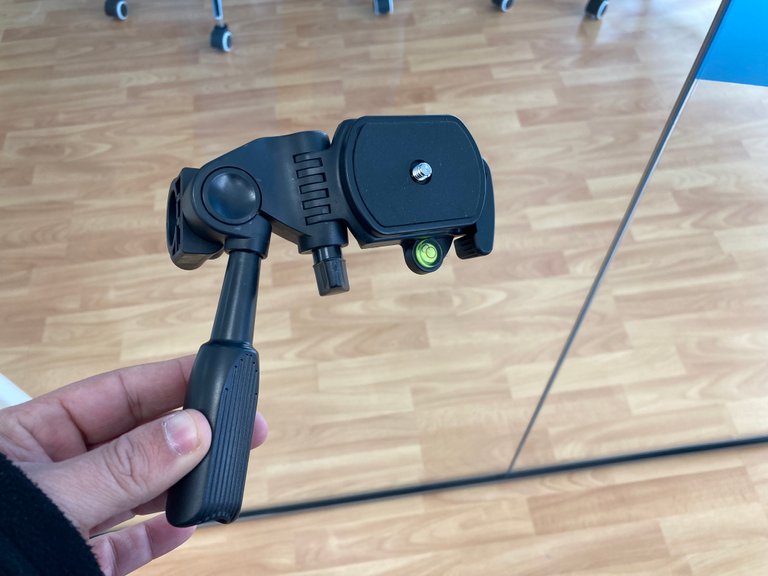
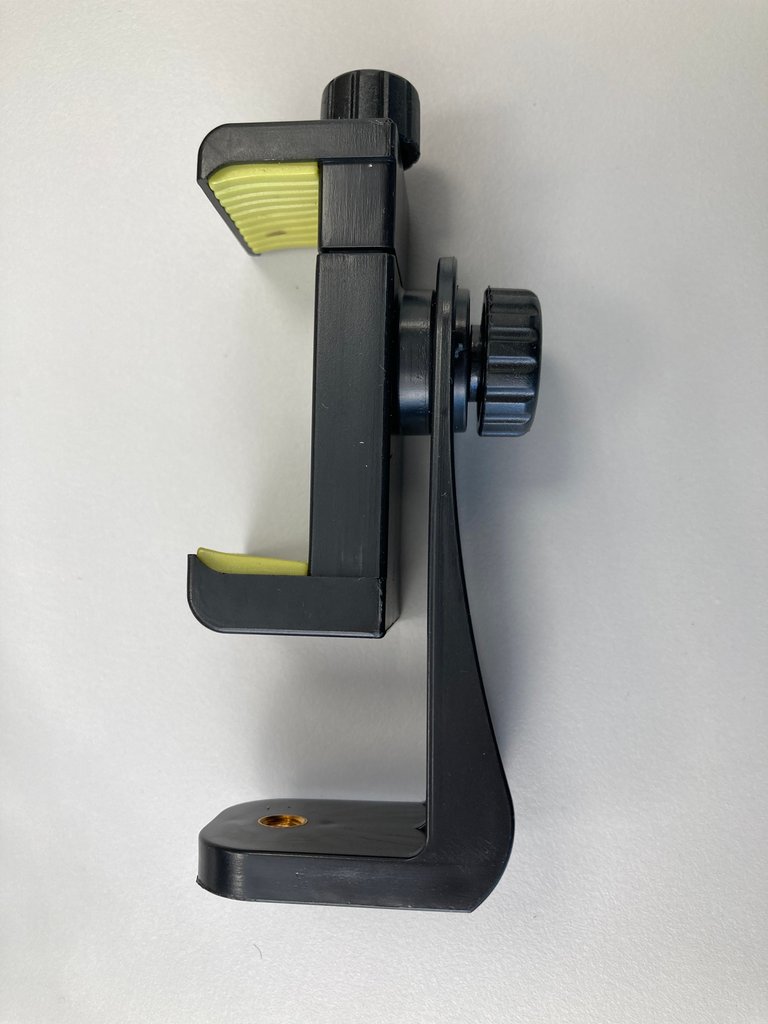
The truth is that the tripod is very intuitive to assemble in which it is only necessary to fit the support we want, such as the one for the camera and directly the camera can be screwed to the support.

At the same time, because it has three folding sections, the tripod becomes a versatile accessory and I loved how light it is to carry it.
ND filter
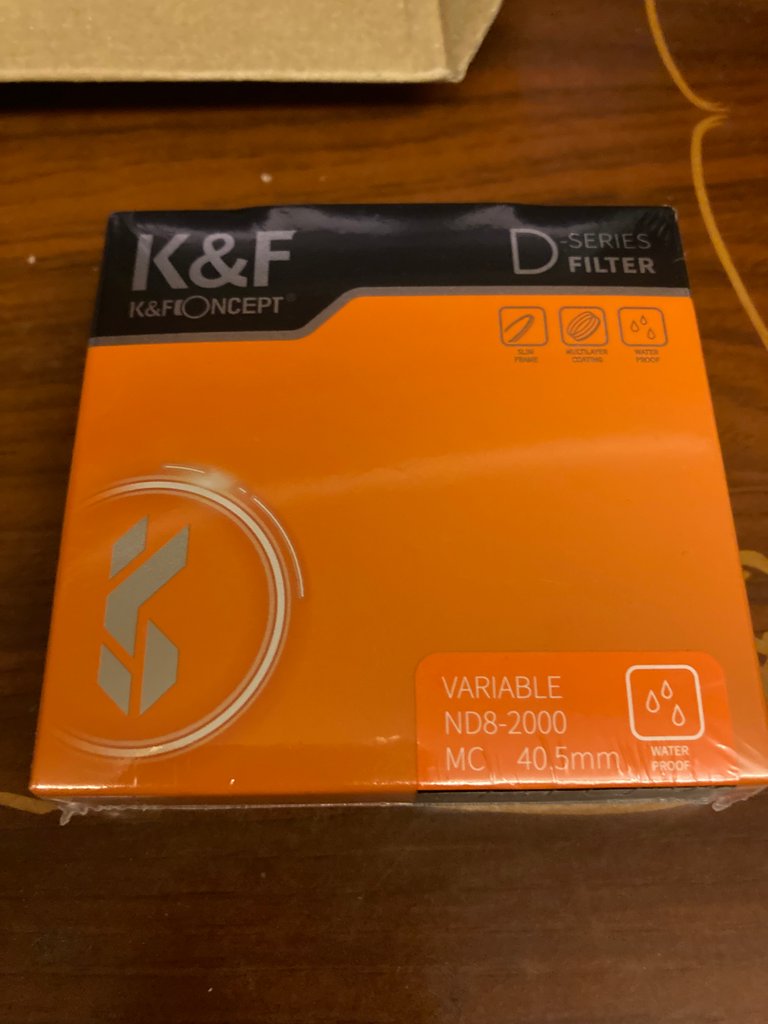
The ND filter I purchased is a variable neutral density filter from ND-8 to ND-1000 made up of 28 layers of nanometric coating.
This filter came in a package along with the infrared trigger that I will tell you about later.

At the same time, the filter came in a cardboard box from the manufacturer where the characteristics of the filter, size of 40.5 mm, water resistance, etc. were listed.
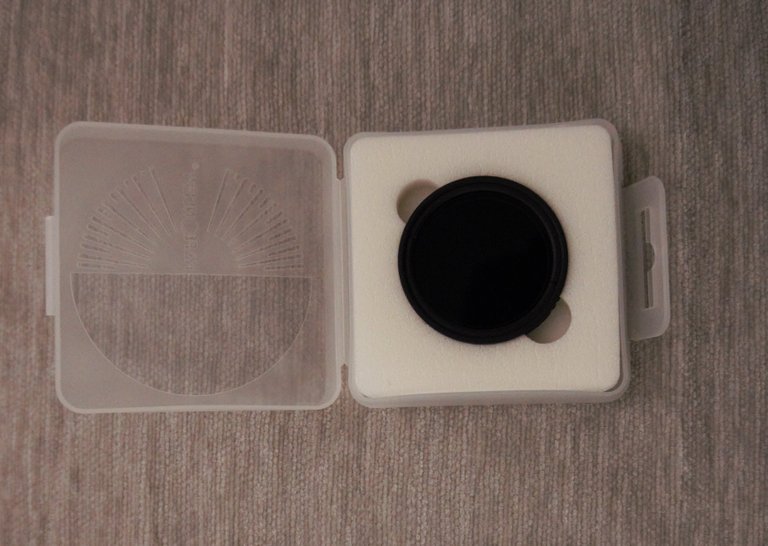
Inside the box, the filter came in turn in a plastic box where the filter is fully protected and in turn serves as a carrying case inside my camera bag. On a negative note, I wish they had included a microfiber cleaning wipe to clean the filter before use.
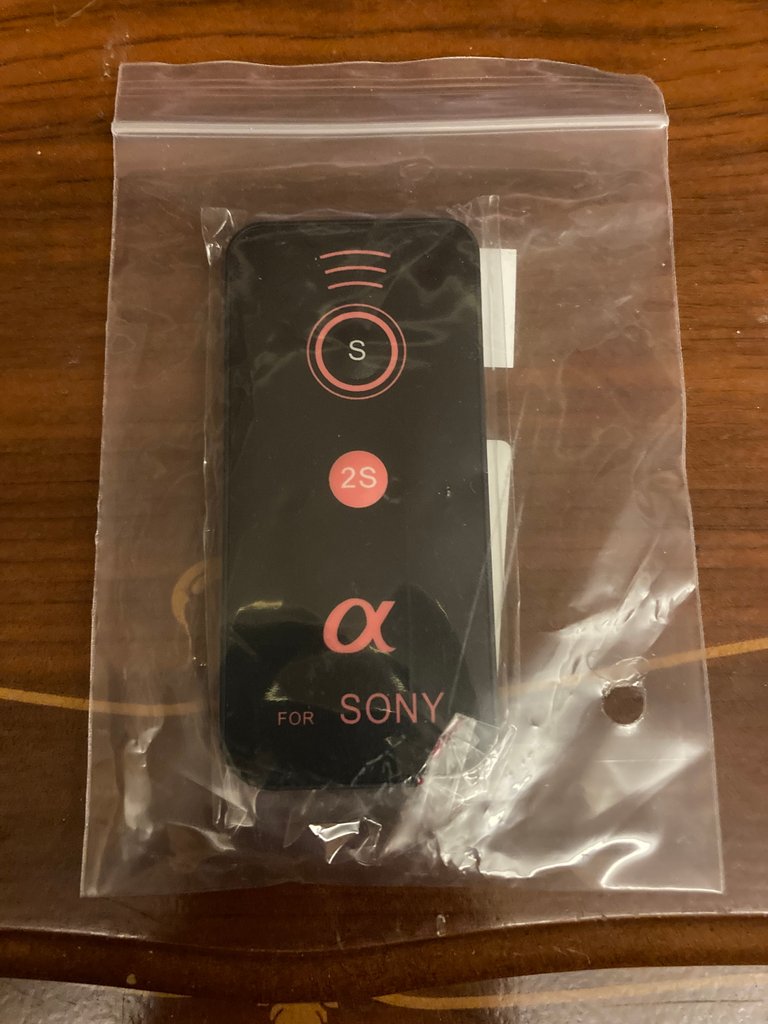
Infrared shutter
The infrared trigger was the worst packaged accessory. It contained only a resealable plastic bag. However, the detail of including the remote control battery made up for the poor packaging of this accessory.
First test with the photographic kit
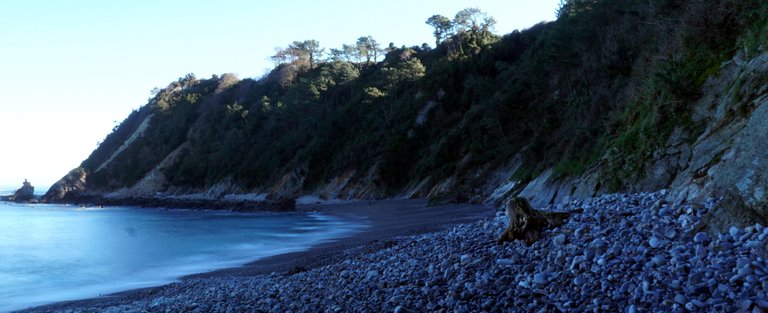
The first use I made of all the photographic kit was on the beach of Castello at 12:30 pm on a slightly cloudy day, but in conditions that allowed me to evaluate the potential of the three accessories purchased.
My first test was photographing directly the beach, the sea was not very rough, but after adjusting the focus on a log that was on the beach, increasing my exposure time to 20 seconds, selecting an ISO 100 which is the lowest that my Sony Alpha 6000 allows me, selecting an aperture of F-20 and placing the ND filter in one of the positions that filtered more light I got a slight silky effect of the sea water.
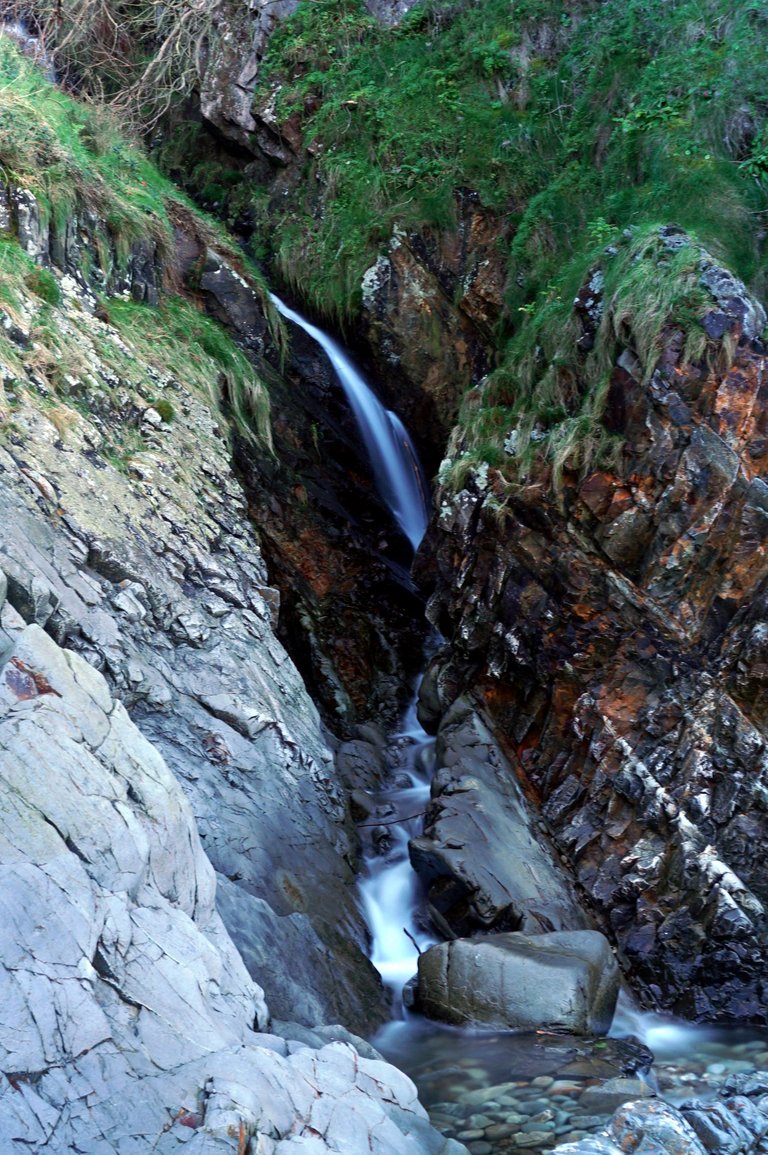
Not satisfied with this trial, I went to the side of the beach where a small creek flows into a small stream that due to the drought does not carry much water. The advantage of this stream photographically speaking is that there is a drop of about 5 meters along the cliff side, which causes the water to be agitated. So, adjusting the parameters of my camera, as in the previous case, with an exposure time of 20 seconds and helped by the stability of the tripod, the infrared shutter and the ND filter I got the desired silky effect of the water.
The next day, once I returned to the city of Oviedo, I decided to make a double use of long exposure photography. I say double use because I took advantage of the long exposure to get the silky effect of the water of a fountain in the middle of a traffic circle and at the same time with the long exposure I captured the light trails of the vehicles driving around the traffic circle.
As on the previous day, I used my tripod, my shutter release and, because of the light from the street lamps, also the ND filter.

Satisfied with my purchase and with my unpacking and even more with the results I have obtained. Now to continue practicing and perfecting the technique.
Best regards

Hola amigos,
¿En cuántas ocasiones habéis visto fotografías asombrosas de ríos con un aspecto del agua totalmente sedoso?
¿Cuántas veces habéis visto fotografías de fuentes cuya agua parecía espuma que brotaba de ella?
Yo desde que descubrí #Hive y la comunidad #photographylovers he visto multitud de fotos de este estilo y desde que me regalaron mi cámara de fotos hace unos meses estaba deseoso de hacer este tipo de fotografías que denominan fotografías de larga exposición.
Fotografía de larga exposición.
La fotografía de alta exposición, como su nombre indica, consiste dejar pasar la luz a través de la cámara durante un largo tiempo con la intención de que todo lo que suceda sea captado en una única fotografía, proporcionando un efecto en las fotografías por lo general muy llamativo.
Sin embargo, para que las imágenes no queden movidas es necesario que durante la toma de las fotos no haya movimiento ni vibraciones en la cámara, por lo que el empleo de un trípode facilita muchísimo la realización este tipo de fotografías.
A su vez, aun con el empleo de un trípode, las vibraciones a la hora de accionar el disparador de la cámara puede provocar que nuestra fotografía salga ligeramente movida. Por ello, es recomendable emplear la opción del disparador con retardo de la cámara de fotos o aún mejor un disparador remoto.
Por último, como en la fotografía de larga exposición estamos empleando una velocidad del obturador muy baja, es recomendable cerrar el diafragma de la cámara de fotos y seleccionar un valor de ISO muy bajo para evitar que las fotografías salgan con demasiada luz. Sin embargo, en muchas ocasiones, cuando las fotografías son tomadas en horas con mucha luz, es necesario reducir la cantidad de luz que llega a nuestro objetivo, por lo que nos podemos ayudar de filtros de densidad neutra que actúan como unas gafas de sol para que no llegue tanta luz al objetivo.
Por todos estos motivos, hace una semana invertí 80 euros en hacer la compra de un trípode, un filtro ND de ajuste variable y de un disparador infrarrojo para mi cámara de fotos Sony Alpha 6000L a través de Amazon.
Mi desempaquetado
Trípode Endurax de 153 cm
Este trípode ha venido en una gran bolsa protectora de Amazon y en su interior se encontraba una caja de cartón en la que se podía ver las especificaciones de tamaño del trípode una vez extendido, el tamaño cuando se encuentra plegado, el peso del trípode y el peso máximo que puede soportar.
A su vez, en el interior de esta caja de cartón se encontraba una bolsa negra muy discreta en la que dentro de ella se encontraba el trípode plegado, un soporte para cámara de fotos, un soporte para teléfonos móviles, un set de tornillos adicionales y las instrucciones de instalación. En concreto, el detalle de incluir algunos de los tornillos adicionales me ha parecido una gran idea.
La verdad, que el trípode es muy intuitivo de montar en la que únicamente es necesario encajar el soporte que deseamos, como por ejemplo el de la cámara de fotos y directamente la cámara de fotos la podemos atornillar al soporte.
A su vez, debido a que tiene tres tramos desplegables, el trípode se convierte en un accesorio muy versátil y me encantó lo ligero que es para poder trasportarlo.
Filtro ND
El filtro ND que he comprado es un filtro de densidad neutra variable desde ND-8 hasta ND-1000 formado por 28 capas de revestimiento nanométrico.
Este filtro venía en un paquete junto con el disparador infrarrojo del que os hablaré más tarde.
A su vez, el filtro venía en una caja de cartón del fabricante donde figuraban las características del filtro, tamaño de 40.5 mm, resistencia al agua, etc.
En el interior de caja, venía a su vez el filtro dentro de una caja de plástico donde el filtro se encuentra totalmente protegido y a su vez sirve como caja de transporte dentro de mi bolso para la cámara de fotos. Por poner una nota negativa, me gustaría que hubiesen incluido una toallita limpiadora de microfibra que permita la limpieza del filtro antes de su uso.
Disparador infrarrojo
El disparador infrarrojo fue el accesorio peor embalado. Solo contenía una bolsa de plástico con cierre hermético. Sin embargo, el detalle de incluir la pila del mando compenso el pobre embalaje de este accesorio.
Primer ensayo con el kit fotográfico
El primer uso que hice de todo el kit fotográfico fue en la playa de Castello a las 12:30 h en un día un poco nublado, pero si en una condiciones que me permitió evaluar el potencial de los tres accesorios comprados.
Mi primer ensayo fue fotografiando directamente la playa, el mar no estaba muy agitado, pero tras ajustar el enfoque en un tronco que estaba en la playa, aumentar mi tiempo de exposición a 20 segundos, seleccionar un ISO 100 que es el más bajo que me permite mi Sony Alpha 6000, seleccionar una apertura de F-20 y colocar el filtro ND en una de las posiciones que filtraba más luz conseguí un ligero efecto sedoso del agua de mar.
No conforme con este ensayo, me dirigí a un lateral de la playa en donde desemboca un pequeño arroyo que debido a la sequía no lleva mucha agua. La ventaja de este arroyo fotográficamente hablando es que hay una caída aproximadamente de 5 metros a lo largo de la ladera del acantilado, lo que provoca que el agua esté agitada. De forma que , ajustando los parámetros de mi cámara, como en el caso anterior, con un tiempo de exposición de 20 segundos y ayudado de la estabilidad del trípode, el disparador infrarrojo y del filtro ND conseguí el ansiado efecto sedoso del agua.
Al día siguiente, una vez regrese a la ciudad de Oviedo, decidí hacer un doble uso de la fotografía de larga exposición. Digo doble uso porque aproveche la larga exposición para conseguir el efecto sedoso del agua de una fuente que se encuentra en el medio de una rotonda y a la vez con la larga exposición capté las estelas de luz los vehículos que circulaban por la rotonda.
Al igual que el día anterior, emplee para estas fotografías mi trípode, mi disparador y debido a la luz de las farolas también el filtro ND.
Satisfecho por mi compra y con mi desempaquetado y aún más con los resultados que he obtenido. Ahora a seguir practicando y perfeccionando la técnica.
Un saludo


View or trade
BEER.Hey @castri-ja, here is a little bit of
BEERfrom @pixresteemer for you. Enjoy it!Learn how to earn FREE BEER each day by staking your
BEER.I envy you for that tripod. I've been planning to buy one for ages and telling this to people who bought one (on Hive), yet, I never make the necessary steps. Enjoy yours as it's going to help you a lot, especially when you're shooting long exposure photos.
The investment was very small. The tripod only cost 20 euros and 5 euros shipping and handling on Amazon.
It is not the sturdiest tripod in the world but with enough care and in situations without strong wind I think it will give me the stability I need.
!ALIVE
@erikah! You Are Alive so I just staked 0.1 $ALIVE to your account on behalf of @castri-ja. (1/10)
The tip has been paid for by the We Are Alive Tribe through the earnings on @alive.chat, feel free to swing by our daily chat any time you want.

Once I took the time to look for the appropriate one, then I bought another phone, so I need to do my research again.
Good luck with the choice you make.
The model I have fits sony, nikon and cannon cameras.
For phones it only uses one clamp so it is multibrand.
nice equipment
!1UP
Thanks
!LUV
@gwajnberg, @castri-ja(1/3) sent you LUV. | tools | discord | community | HiveWiki | NFT | <>< daily
You have received a 1UP from @gwajnberg!
@stem-curator, @neoxag-curator
And they will bring !PIZZA 🍕.
Learn more about our delegation service to earn daily rewards. Join the Cartel on Discord.
I gifted $PIZZA slices here:
@curation-cartel(9/20) tipped @castri-ja (x1)
Send $PIZZA tips in Discord via tip.cc!
Yay! 🤗
Your content has been boosted with Ecency Points, by @castri-ja.
Use Ecency daily to boost your growth on platform!
Support Ecency
Vote for new Proposal
Delegate HP and earn more
Siempre he sido un coleccionista de imágenes de casi todo tipo, y las que usted nos presenta en su publicación son bastante buenas.
Felicidades, si estos son sus trabajos iniciales, espero a ver como será cuando tenga más experiencia. Le deseo mucho ánimo y buena suerte.
Gracias
Son mis primeras fotos de larga exposición.
Espero ir mejorando también en la composición y en la edición de imágenes
Un saludo