Personalizar tipografías con Illustrator
Adobe Illustrator es una herramienta uy potente, tanto que la máquina se quedó colga da un par de veces durante la elaboración de este tutorial, después de lo cual perdí el archivo madre en el cual estaba trabajando, y eso que cuento con 8GB de memoria RAM, lo que si es imperdonable es que siempre olvide guardar los documentos en los que trabajo.
Hoy les traigo un pequeño tutorial con un bono, este está destinado a los que no conocen todas las fantásticas herramientas a las que tenemos acceso gracias a Adobe. Comencemos:
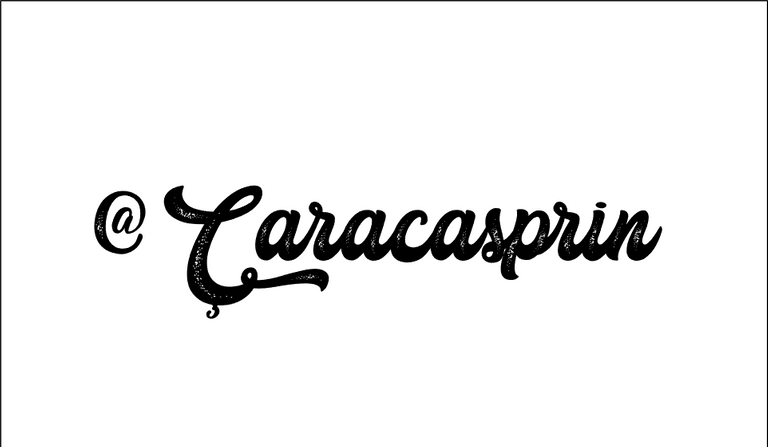
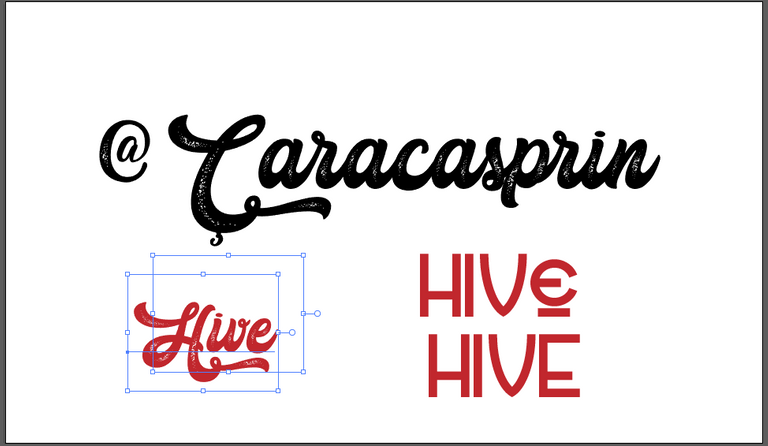
Lo primero que haremos es escribir la frase o palabra, inclusive nuestra marca con la tipografía de tu preferencia para esto elegí una fuente tipo scrip, y procederemos a cambiar la apariencia. Esta tipografía ya tiene esos hermosos trazos que le dan una apariencia vintage, le voy a afincar ese aspecto.
Adobe Illustrator is a very powerful tool, so much so that the machine crashed a couple of times during the development of this tutorial, after which I lost the mother file in which I was working, and that I have 8GB of RAM, what is unforgivable is that I always forget to save the documents in which I work.
Today I bring you a small tutorial with a bonus, this one is intended for those who don't know all the fantastic tools we have access to thanks to Adobe. Let's get started:
The first thing we will do is write the phrase or word, including our brand with the typography of your preference for this I chose a scrip type font, and we will proceed to change the appearance. This font already has those beautiful strokes that give it a vintage look, I'm going to refine that aspect.
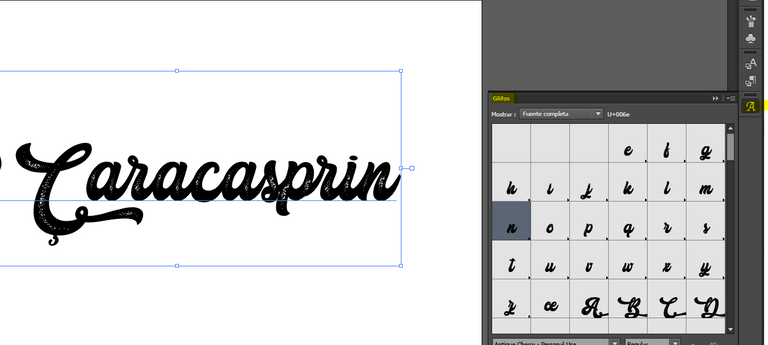
Casi todas las tipografías traen Glifos ocultos, son pequeños cambios en las letras a los que no tenemos acceso por el teclado, para verlos simplemente vamos al panel de herramientas y damos clic al cuadrito con una A muy elegante, se desplegará una pestaña con todos los caracteres ocultos, y a medida que vamos seleccionando cada letra de la palabra, la vamos a encontrar sombreada en la pestaña de glifos, buscamos la variante que más nos agrade y vamos sustituyendo haciendo doble clic.
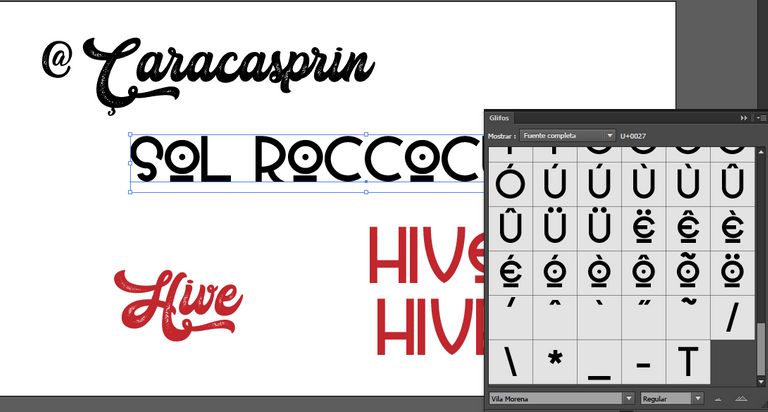
Esta es la primera opción, en la que podemos convertir la apariencia de cualquier frase, se puede hacer este proceso con las familias tipográficas que sean de descarga legal y contemos con la licencia, ya que las que descargamos solo en su versión "Demo" nunca traen más glifos que los que usamos mediante el teclado.
Almost all typefaces have hidden glyphs, they are small changes in the letters to which we do not have access through the keyboard, to see them we simply go to the tools panel and click on the little square with a very elegant A, a tab with all the hidden characters will be displayed, and as we select each letter of the word, we will find it shaded in the glyphs tab, we look for the variant that we like the most and we replace it by double clicking.
This is the first option, in which we can convert the appearance of any phrase, this process can be done with the font families that are of legal download and we have the license, since the ones we download only in their "Demo" version never bring more glyphs than the ones we use through the keyboard.
 |  |
|---|
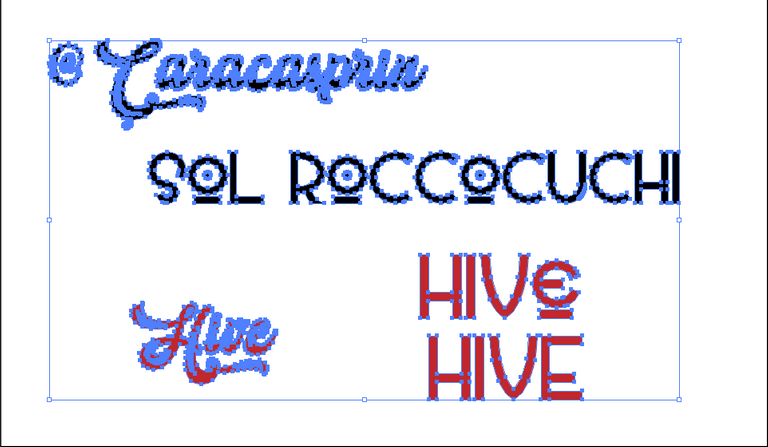
Acá una pequeña muestra de la diferencia entre usar la tipografía original y con el uso de los glifos ocultos. Como no todas las tipografías que usamos tienen caracteres ocultos, no hay manera de cambiarlos con este método, contamos con la posibilidad de mosificar la fuente manualmente.
Here is a small sample of the difference between using the original font and using the hidden glyphs. As not all the fonts we use have hidden characters, there is no way to change them with this method, we have the possibility of modifying the font manually.
 |  |
|---|
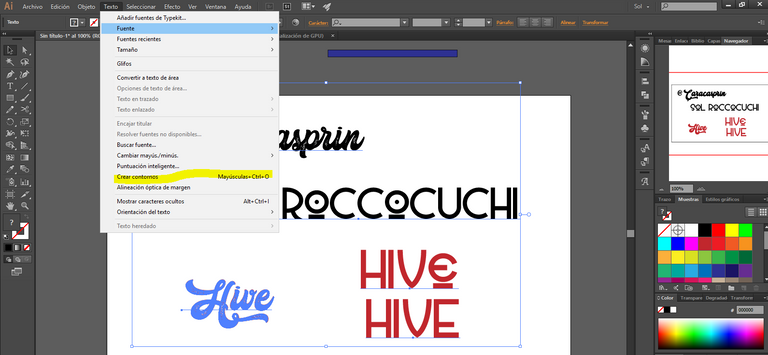
Lo primero que haré es vectorizar el texto, esto lo haremos mediante la herramienta Texto ubicada en el menú principal. Allí damos clic a crear contornos y la tipografía dejará de ser editable, quiero decir que ya no podemos cambiar la frase, pues pasará a ser un vector. Pero podemos editar de otra manera.
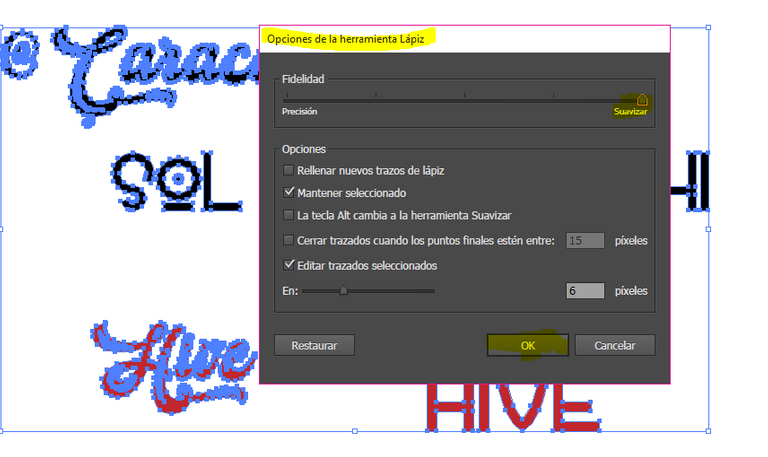
Una vez estos contornos se hagan visibles podremos editar con varias herramientas, pero hoy vamos a aprender a usar el lápiz, que se encuentra en el panel de herramientas de la izquierda. Después de seleccionarlo le vamos a dar doble clic, para que se desplieguen las preferencias de la herramienta, allí vamos a darle el máximo a la opción de suavizar, para que nuestro trazo se vea derecho aún cuando nos tiemble la mano.
The first thing I will do is to vectorize the text, we will do this by using the Text tool located in the main menu. There we click on create outlines and the typography will stop being editable, I mean that we can no longer change the sentence, because it will become a vector. But we can edit in another way.
Once these outlines become visible we can edit with several tools, but today we are going to learn how to use the pencil, which is located in the left tool panel. After selecting it we are going to double click on it, so that the tool preferences are displayed, there we are going to give the maximum to the smooth option, so that our stroke looks straight even when our hand shakes.
 |  |
|---|
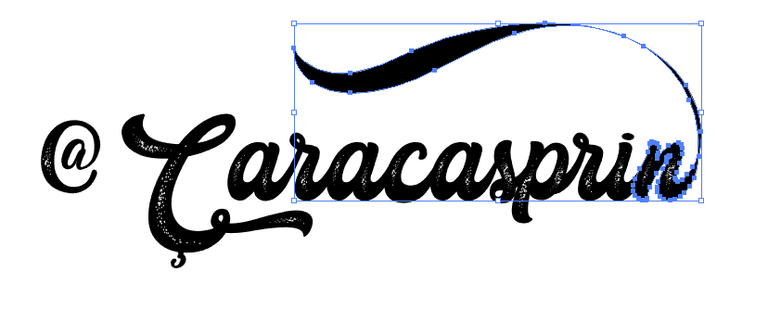
Con el lápiz podemos hacer esta pirueta que nace a partir de la N final del nombre de mi cuenta @caracasprin, dibujamos con el lápiz partiendo siempre de un nodo, para que quede pegada a la palabra y comience a ser parte integral del logo, frase o palabra que queremos modificar, y gracias a la opción de suavizado se ve fluido el trazo que hice a mano con el ratón.
With the pencil we can make this pirouette that is born from the final N of the name of my account @caracasprin, we draw with the pencil always starting from a node, so that it is attached to the word and begins to be an integral part of the logo, phrase or word that we want to modify, and thanks to the smoothing option the stroke that I did by hand with the mouse looks fluid.
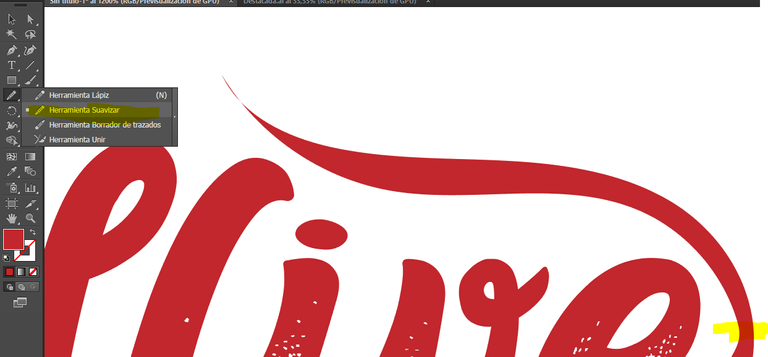
A la palabra Hive también le añadí una pirueta, y en la zona donde el trazo se ve un poco desnivelado, le volví a aplicar el suavizado, esta vez con otra herramienta dentro de las herramientas del lápiz, accedemos a ella haciendo un clic largo para que se despliegue el resto de las opciones. Al pasar el cursor y hacer clic por la zona afectada esta se suavizará, debemos tener seleccionado el vector.
To the word Hive I also added a pirouette, and in the area where the stroke looks a little uneven, I applied the smoothing again, this time with another tool within the pencil tools, we access it by a long click to display the rest of the options. When you pass the cursor and click on the affected area it will be smoothed, we must have the vector selected.
  |  |
|---|
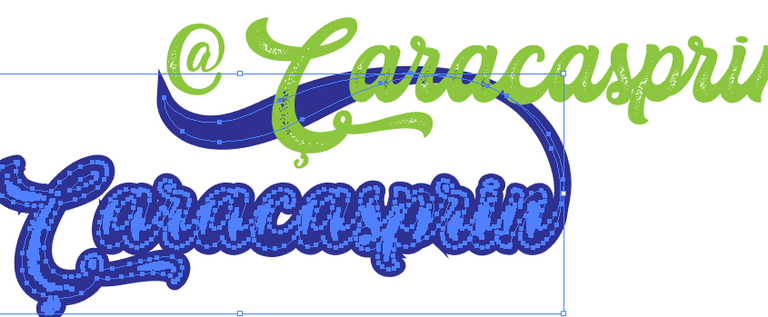
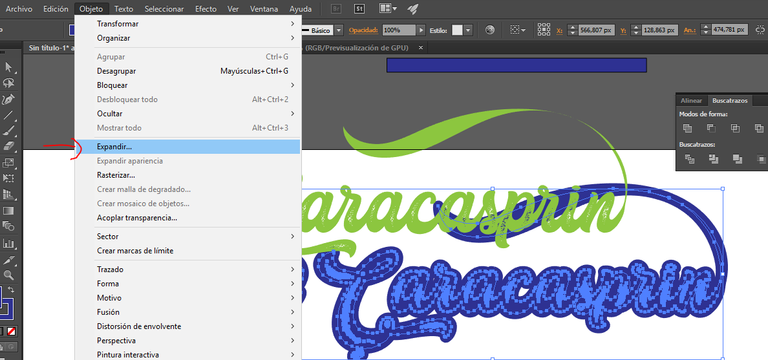
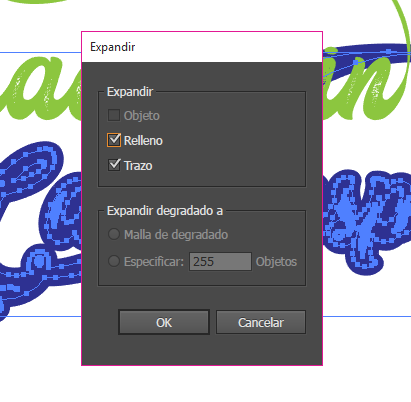
También, para darle más dramatismo a mi logo dupliqué la palabra (Alt+Clic y arrastrar la selección), le cambié el color y le coloqué un borde de 8ptos, para que al sobresalir sirviera de contorno al logo. Luego, para disminuir peso al archivo lo expandí con la herramienta del mismo nombre ubicada en el menú principal en el apartado de Objeto. Al alinear las dos formas, da un efecto muy bonito al logo.
Also, to give more drama to my logo I duplicated the word (Alt+Click and drag the selection), changed the color and placed a border of 8pt, so that it would serve as an outline of the logo. Then, to reduce the weight of the file I expanded it with the tool of the same name located in the main menu in the Object section. By aligning the two shapes, it gives a very nice effect to the logo.
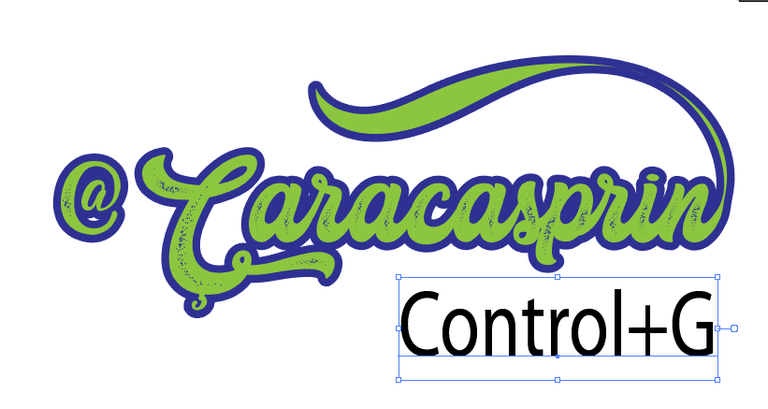
Alineamos y seleccionamos ambas formas y con control+G Los unimos en uno solo, esto para no andar tomando uno solo de ellos al querer mover el logo de un lugar a otro.
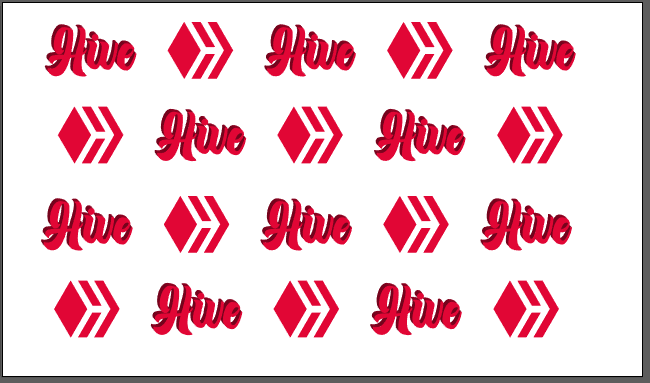
Hasta aquí dejo el pequeño tutorial de hoy, espero que sea de provecho, lamentablemente no puedo compartir el resultado final del intento de logo de Hive, pues se me cerró el ilustrator al tratar de aplicar el efecto de 3D, pero hice un patrón con el panal de Hive y su nombre, para dar muestra de las infinitas posibilidades a las que tenemos acceso con Illustrator. Hasta la próxima!
We align and select both shapes and with control+G we join them in one, this to avoid taking only one of them when we want to move the logo from one place to another.
Unfortunately I can't share the final result of the Hive logo attempt, because I was locked out of Illustrator when trying to apply the 3D effect, but I made a pattern with the Hive honeycomb and its name, to show the infinite possibilities we have access to with Illustrator. See you next time!

El contenido aquí presentado es de mi autoría.
Las fotografías fueron tomadas con mi teléfono.
La imagen de portada fue editada en Illustrator con una Foto de Emily Bernal en Unsplash
Los separadores y banner fueron hechos por mi en Illustrator
The content presented here is my own.
The photographs were taken with my phone.
The cover image was edited in Illustrator using a photo de Emily Bernal en Unsplash
- The separators and banner were made by me in Illustrator.

Tu lectura es un gran honor para mi
Your reading is a great honor for me
Follow me


Admiro mucho el trabajo del diseño gráfico y me encanta que hayas tomado este trabajo para mostrar cómo lograr estos efectos maravillosos. Te sigo leyendo 😊
Gracias bella!! es un absoluto honor! Me siento honrada que aprecies lo que hago!!
Un abrazo!!
https://twitter.com/130183078/status/1621643709514235909
The rewards earned on this comment will go directly to the people( @alteramelia ) sharing the post on Twitter as long as they are registered with @poshtoken. Sign up at https://hiveposh.com.
Excelente, algo similar se hace en PSD, esot es muy importante, principalmente al momento de elegir la tipografía para un logo, en donde con pequeños cambios estéticos, podemos crear una fuente completamente original, bendiciones!
Yay! 🤗
Your content has been boosted with Ecency Points, by @caracasprin.
Use Ecency daily to boost your growth on platform!
Support Ecency
Vote for new Proposal
Delegate HP and earn more
Qué increíble trabajo, está brutal!
Muchas gracias!!! que placer tan ameno que gustes de mi trabajo!!!
Muchisimas gracias por este gran post, me es muy util porque pienso en comenzar a diseñar en photoshop
Photoshop e Ilustrador son casi iguales, comparten muchos efectos y filtros, si necesitas ayuda en algo... no dudes en escribirme!!
Si me había dado cuenta que eran muy parecidos, yo al principio usaba mucho Paint tool sai, lo usaba para digitalizar dibujos, pero ahora quiero aprender a editar tipografías e imágenes en general y un amigo medio que usar cualquiera de esas dos aplicación.
Me alegra poder contar con tu apoyo, gracias.