Aprende a hacer Mockup's para tus productos /// [ESP - ENG]
Saludos queridos geeker's hoy les traigo un tutorial para quienes tienen un emprendimiento y necesitan crear imágenes para exponer sus productos o simplemente dar a conocer la marca exponiendo el logo de su emprendimiento.
Existen muchas páginas en internet que ofrecen estas maquetas para descarga,
de estos recursos están disponibles, unos son pagos y otros gratuitos con atribución al autor. La página que prefiero para descargar estas maquetas es https://www.freepik.es/, una página española que ofrece estos recursos que fueron creados por diseñadores y que Freepik pone a la disposición de todos. También tiene la opción en inglés en https://www.freepik.com.
Los mockup's o maquetas vienen en archivos Photoshop y son completamente editables, por lo que podemos incluir en ellos nuestras imágenes y gracias a esto podemos darle una identidad a nuestra marca comercial, también podemos apreciar como quedaría nuestra ilustración impresa u sublimada en una franela, y quizás ofrecerla a posibles clientes o inversores. Hoy vamos a descubrir este sencillo proceso.
Greetings dear geeker's today I bring you a tutorial for those who have a business and need to create images to expose their products or simply to publicize the brand by exposing the logo of your business.
There are many pages on the internet that offer these mockups for download,
of these resources are available, some are paid and others are free with attribution to the author. The page that I prefer to download these mockups is https://www.freepik.es/, a Spanish page that offers these resources that were created by designers and that Freepik makes available to everyone. It also has an English option at https://www.freepik.com.The mockups come in Photoshop files and are fully editable, so we can include in them our images and thanks to this we can give an identity to our brand, we can also see how our illustration would look printed or sublimated on a T-shirt, and perhaps offer it to potential customers or investors. Today we are going to discover this simple process.
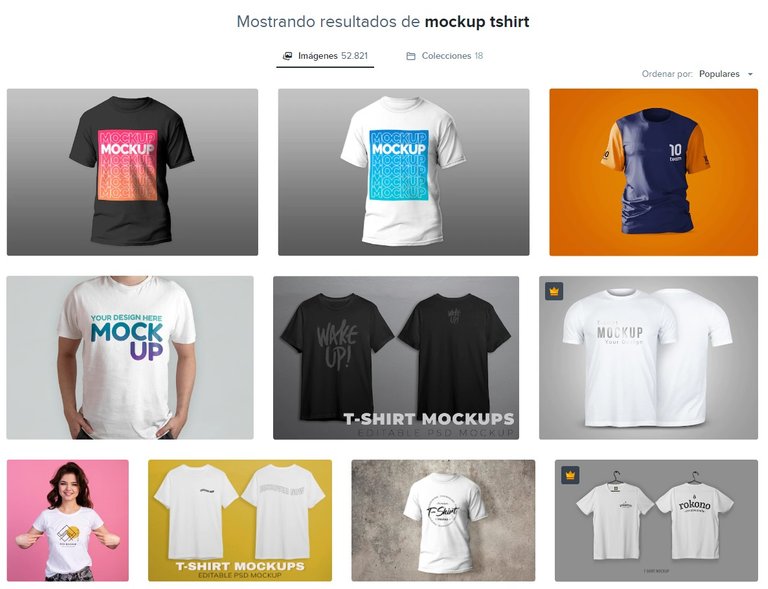
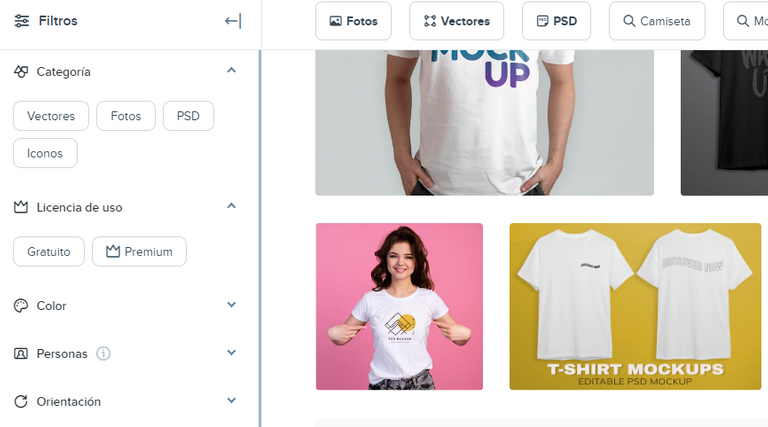
Existen muchas opciones de maquetas libres de derecho de uso (con atribución), con una simple búsqueda es la página podemos acceder a cientos, existen muchas maquetas, no solo franelas y tazas, encontraremos maquetas de marquesinas, vasos, pancartas, botellas y muchos otros más.
Después de decidir la maqueta que queremos utilizar y descargarla, pasamos a descomprimir el archivo, pues siempre estos vienen en formato WinRAR, luego abrimos el archivo Photoshop para proceder con la edición.
Debemos recordar copiar el mensaje para la correcta atribución, al descargar el archivo. Aquí en Hive tenemos mucha experiencia en eso.
There are many options of royalty free mockups (with attribution), with a simple search on the page we can access hundreds, there are many mockups, not only T-shirt and mugs, we will find mockups of marquees, glasses, banners, bottles and many others.
After deciding the mockup we want to use and downloading it, we decompress the file, because they always come in WinRAR format, then we open the Photoshop file to proceed with the edition.
We must remember to copy the message for correct attribution, when downloading the file. Here at Hive we have a lot of experience in that.
 |  |
|---|
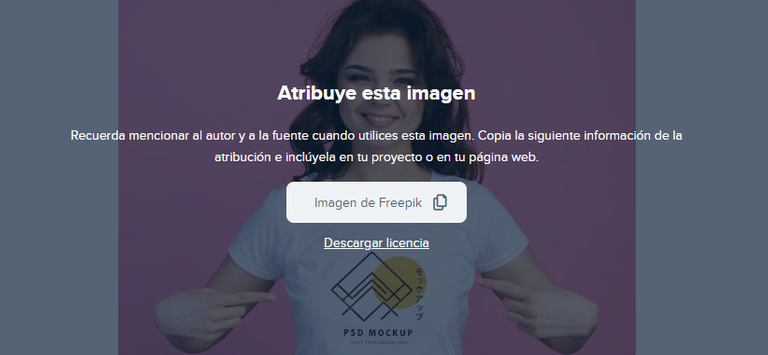
Imagen de Freepik
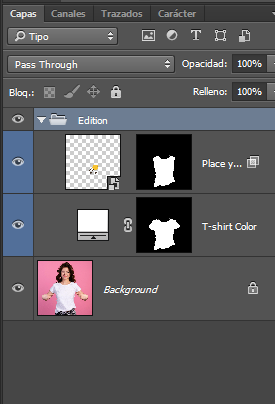
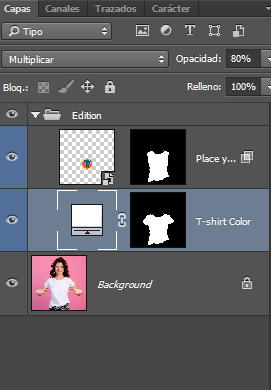
Al abrir el archivo en Photoshop nos aparecen todas las capas que compones el mockup, la zona están creadas como un Objeto Inteligente lo que hace posible la edición o adición de imágenes propias en la imagen original, en este caso la zona a editar está dividida en la imagen (con el dibujo de la franela) y una máscara (imagen en blanco).
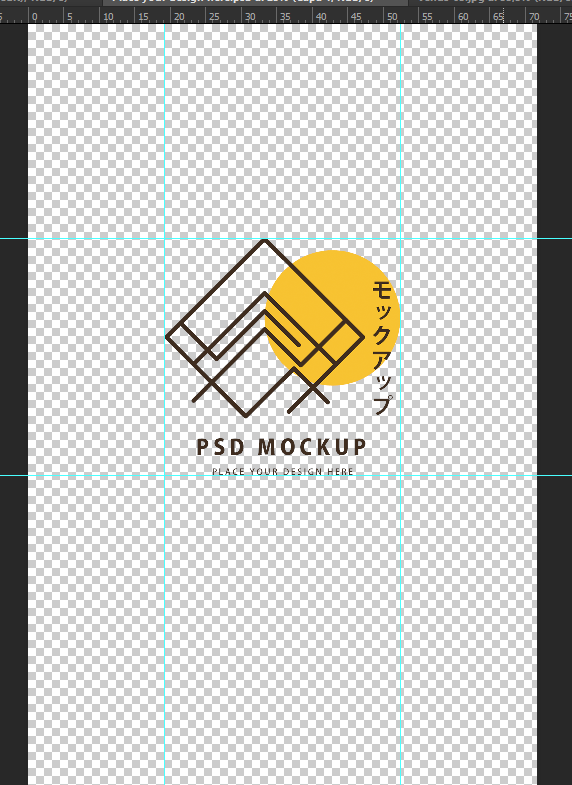
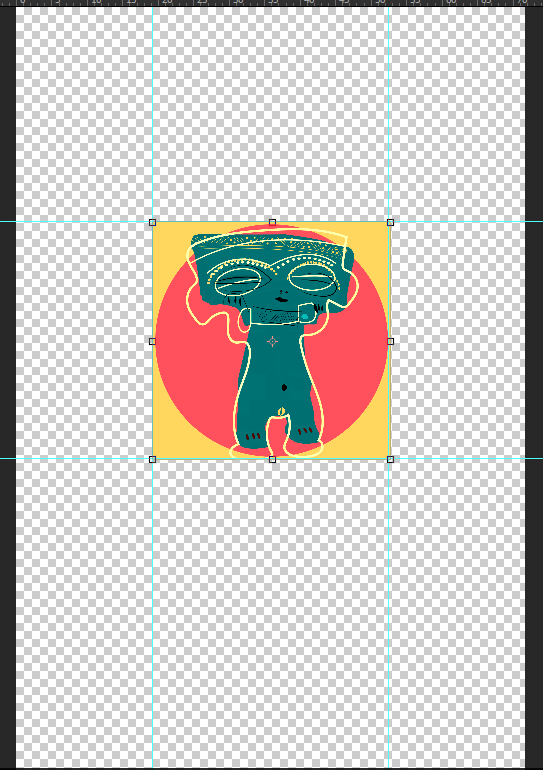
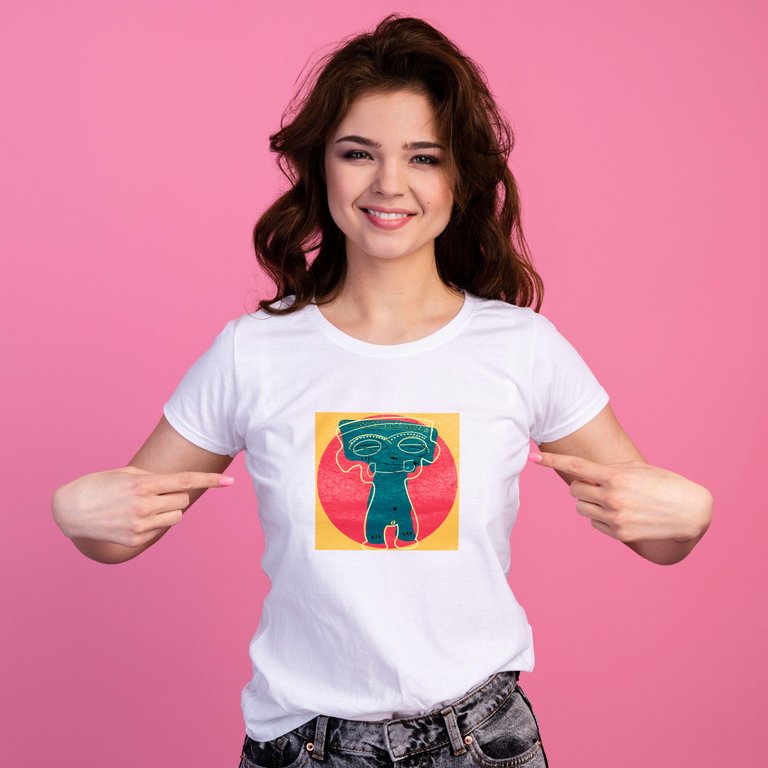
Al dar doble clic sobre el dibujo de la franela se nos abre otra pestaña con el diseño previo que viene con el archivo. Lo que hice (y siempre hago) es colocar las medidas para ubicar nuestra propia imagen, depende de nosotros si ocupamos el mismo espacio del diseño, o lo hacemos más grande, todo depende de nuestras intenciones. Si nos fijamos en el dibujo de la capa notamos que incluso podemos todo el frente de la franela.
When we open the file in Photoshop all the layers that compose the mockup appear, the area is created as a Smart Object which makes it possible to edit or add your own images in the original image, in this case the area to edit is divided into the image (with the drawing of the flannel) and a mask (blank image).
Double clicking on the flannel drawing opens another tab with the previous design that comes with the file. What I did (and I always do) is to place the measures to place our own image, it depends on us if we occupy the same space of the design, or we make it bigger, everything depends on our intentions. If we look at the drawing of the layer we notice that we can even make the whole front of the T-shirt.
 |  |  |
|---|
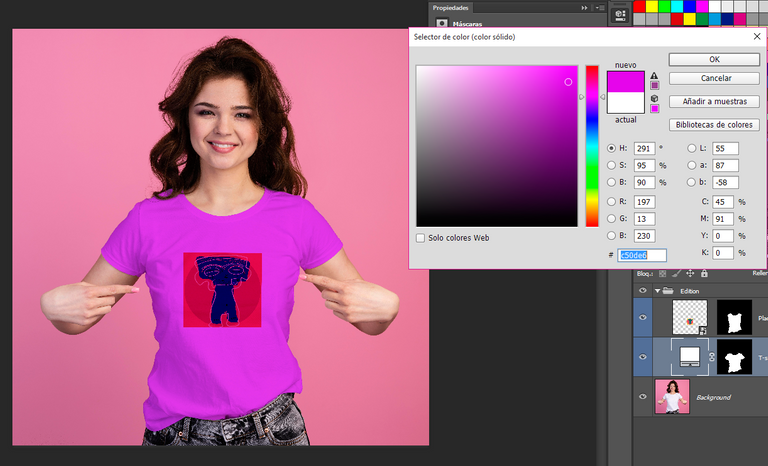
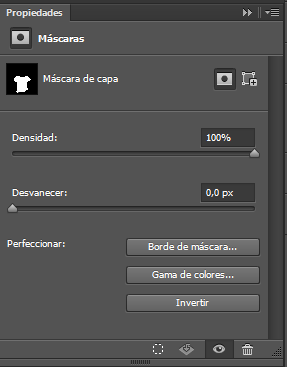
También podemos cambiar el color de la franela con solo hacer doble clic sobre la capa de la máscara. Se nos abrirá una ventana con una paleta de colores, y mientras vamos moviendo el cursor por los colores y dando clic a nuestra selección el archivo nos va a dar la vista previa con el nuevo color. Como ya vieron en la imagen de portada dejé el color original pues la ilustración ya es bastante colorida.
We can also change the color of the flannel by double clicking on the mask layer. A window will open with a color palette, and as we move the cursor over the colors and click on our selection the file will give us the preview with the new color. As you saw in the cover image I left the original color as the illustration is already quite colorful.
 |  |  |
|---|
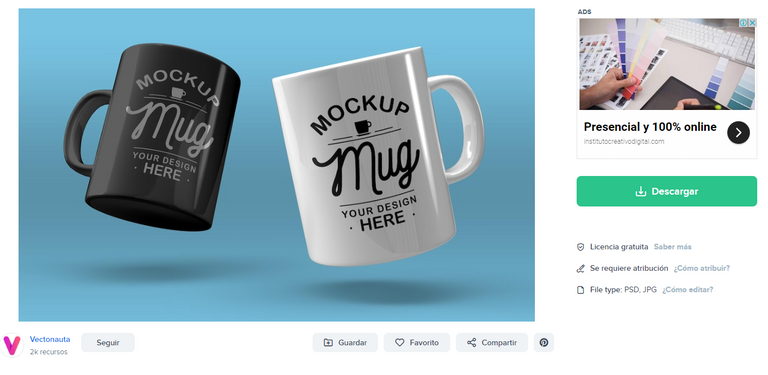
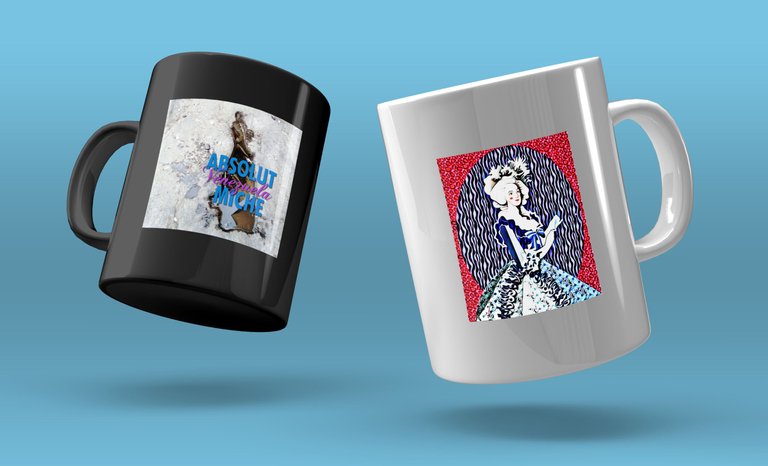
Imagen de Vectonauta en Freepik
Con esta otra maqueta, esta vez de tazas, podemos repetir todo el proceso al agregar nuestra propia imagen a la taza, cambiar el color del producto y guardar como una imagen JPG o PNG o simplemente guardar como archivo PSD (Photoshop) para continuar editando más adelante o cambiar el color del producto o cualquier otra cosa.
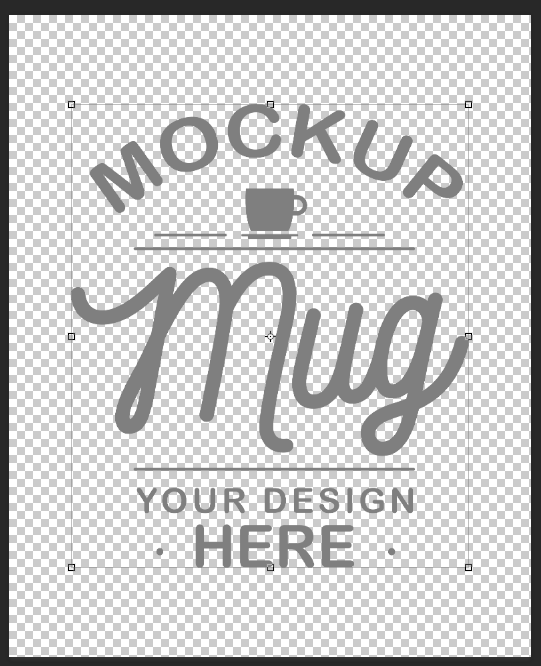
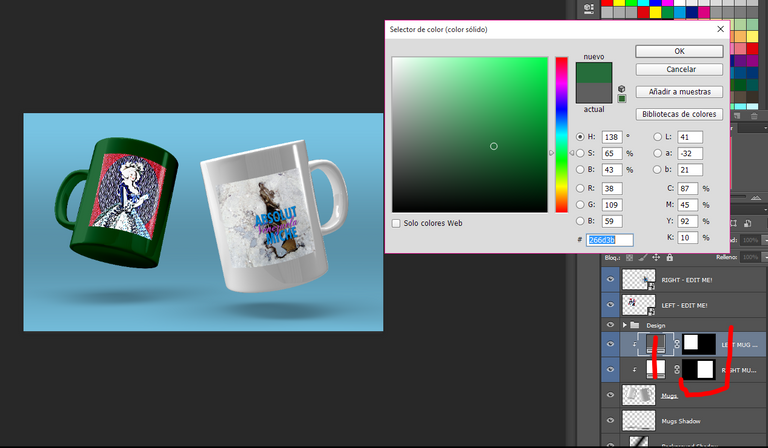
En las capas de las tazas, podemos notar una diferencia. las capas sombreadas son las capas editables, aunque con un poco de práctica podemos cambiar el color de fondo también. Las dos primeras capas son para editar el diseño impreso en estas tazas, y las dos capas de abajo son las máscaras para cambiar el color al producto, para eso daremos doble clic al apartado delimitado con una línea recta, que como ya vimos antes abrirá una ventana y podremos cambiar el color de la taza, sin que esta pierda los valores de la sombra.
With this other mockup, this time of mugs, we can repeat the whole process by adding our own image to the mug, change the color of the product and save as a JPG or PNG image or simply save as a PSD (Photoshop) file to continue editing later or change the color of the product or anything else.
In the layers of the mugs, we can notice a difference. The shaded layers are the editable layers, although with a little practice we can change the background color as well. The first two layers are to edit the design printed on these cups, and the two layers below are the masks to change the color of the product, for that we will double click on the section delimited with a straight line, which as we saw before will open a window and we can change the color of the cup, without losing the values of the shadow.
 |  |
|---|
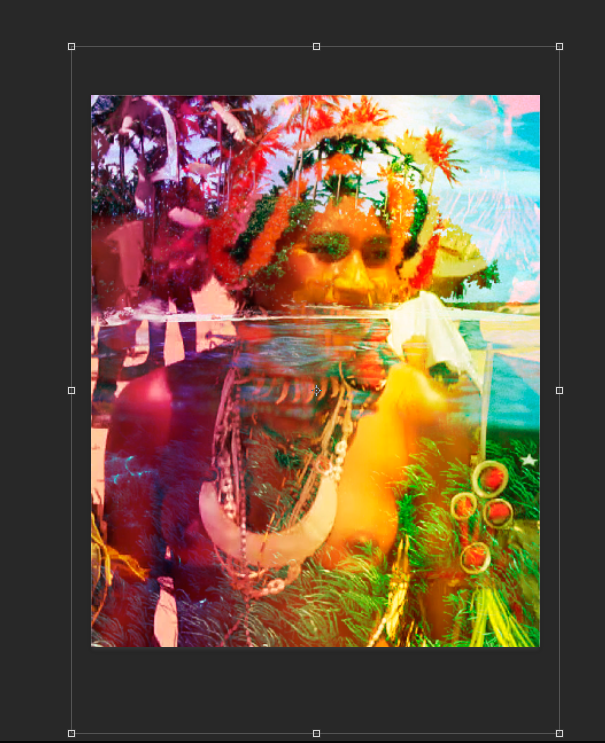
Resultado final /// Final result
 |  |
|---|

El contenido aquí presentado es de mi autoría.
Las imágenes son capturas de pantalla del proceso de descarga de la página y del proceso de edición en Photoshop.
La imagen de portada fue editada en Illustrator con el resultado final del proceso de edición en Photoshop.
Las imágenes descargadas tiene si vínculo y atribución debajo de estas.
Las ilustraciones que se colocaron en las maquetas, son mis propios NFT's.
Los separadores y banner fueron hechos por mi en Illustrator
The content presented here is my own.
The images are screenshots of the download process of the page and the editing process in Photoshop.
The cover image was edited in Illustrator with the final result of the editing process in Photoshop.
Downloaded images have their link and attribution below them.
The illustrations that were placed on the models, are my own NFT's.
The separators and banner were made by me in Illustrator.

Tu lectura es un gran honor para mi
Your reading is a great honor for me
Follow me


https://twitter.com/CaracasPrin/status/1575836876124352512
The rewards earned on this comment will go directly to the people( @caracasprin ) sharing the post on Twitter as long as they are registered with @poshtoken. Sign up at https://hiveposh.com.
Muy bueno amiga, luego me paso por la página a ver qué tal, saludos
Es buenísima esa página, tiene fotos, vectores, ilustraciones, es muy buena
Esta interesante, yo ni sabia que era un Mockup hasta que lei el post, gracias por culturizarme :)
jajajajaja es un placer amigo!
Al fin encontré la respuesta a muchas preguntas que tenía sobre cómo era que se realizaban los mockup´s de muchos productos. Gracias.
Un placer inmenso haber sido de ayuda!!! Saludos!!!
Congratulations @caracasprin! You have completed the following achievement on the Hive blockchain and have been rewarded with new badge(s):
Your next target is to reach 8000 upvotes.
You can view your badges on your board and compare yourself to others in the Ranking
If you no longer want to receive notifications, reply to this comment with the word
STOPTo support your work, I also upvoted your post!
Check out the last post from @hivebuzz:
Getting ready for the power up day
No sabía que es un Mockup, ahora estoy es pensando en las posibilidades de mercadeo.
Gracias por compartir tus herramientas y apoyarnos con esta información.
Una abrazo 🤗🤗
Un grato placer que se te llene la cabeza de ideas y propuestas a través de mi humilde post, porque en realidad es la idea, contribuir a la inteligencia colectiva que hace vida aquí en Hive!
Su interfaz se me parece a la de Canva, la verdad es que por más que sepamos usar PSD o cualquier otro programa de diseño, siempre se agradecen las herramientas que facilitan el trabajo, hoy en día tenemos un catálogo amplio de soluciones con descargas seguras, sin duda que las de freepik es una de ellas, me gusta las plantillas que vi mientras exploraba un poco, gracias por compartir esto, un abrazo y bendiciones!
Yo nunca he usado Canva, la verdad es que al dominar los programas de Adobe se me dificulta mucho el cambio, además me gusta mucho tener el control del proceso total de la imagen, Un abrazo y gracias por las bendiciones! Todos los lindos deseos de vuelta para ti! Gracias por tu comentario!!
Esto siempre me ha llamado la atención, aún no me he puesto, pero está entre mis planes, es lo bueno de contar con estas páginas, una gran herramienta, gracias por compartirlo, aqui aprendemos, estamos, saludos.😍
Si, acá estamos para aprender, también es mi filosofía!!!
Congratulations @caracasprin! You received a personal badge!
Wait until the end of Power Up Day to find out the size of your Power-Bee.
May the Hive Power be with you!
You can view your badges on your board and compare yourself to others in the Ranking
Check out the last post from @hivebuzz:
Boca abierta por Aquí quedé del asombro! No conocía de esto y me mma.l basta te la atención sobre todo el nombre 👏 me gusta colmo te quedó.
jeje me alegra mucho que conocieras una nueva manera de expresión para dar a conocer nuestras marcas, saludos!!!
Oye que herramienta asombrosa! Me encantó y la verdad es fácil de usar, voy a ponerme a crear a partir de ya 😅💜
jajajajajaja no podemos perder más tiempo, adelante!!
Que interesante no tenia noción sobre esto, pero veo que es una manera alternativa de buscar generar un diseño que permita a largo plazo optar a emprender.
Exacto! Al mismo tiempo logras entender como ves en los catálogos de moda la misma imagen de un vestido (la misma foto) con diferentes colores o estampados. Así no recurres a costosos diseñadores para que te monten los diseños de tu emprendimiento.
Me encanta porque sirve para ponerte creativo y llegar solo a imprimir en el formato que elegiste!
Y pensar que a veces te cobran un realero para hacerlo cuando puedes hacerlo tu mismo, y más aún si te gusta el diseño y te aplicas un poco