Worm Farming 2.0 – The Worm Transfer
About four weeks ago, I published a post showing the prep work I have done for my new worm farm. I had my first worm farm five years ago and for this time around, I am trying a new substrate (chopped banana stalks) as shown in the video below. While the video showed the whole process, my previous post only dealt with preparing the substrate.
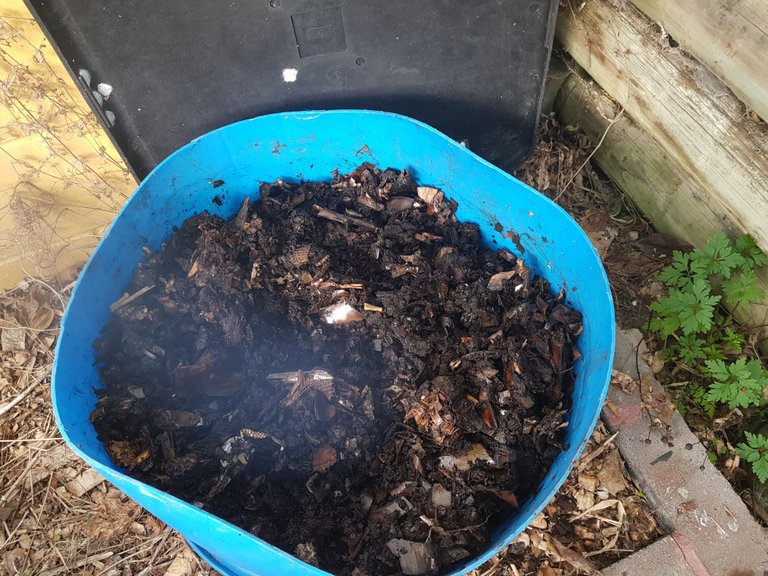
In this post, I will show the next steps that I have done after the prep work. Basically, after the substrate mixture has been transferred to your worm farm, in my case, the top cut section of an industrial plastic drum. I put the worm farm in a roofed area (a canopy at the back of our house) and also covered it with a plastic lid. I don’t want the neighbor’s cats and dogs.
Every five days, I check the substrate if it has gone dry and make sure I hose it with water to maintain its moisture. It is important to make the substrate moist but not wet and soggy.
Based on the video, the time the worms should be transferred to the “matured” substrate is 30 days. I did it in 28 days to time it during weekends as it is always dark already when I get home from work. I believe that 2-day difference will be that bad.
When I checked my substrate this weekend, it looked really good. Many of the chopped banana stalks already decomposed and what I see is a rich, black organic matter that is actually ready to be used as a garden mulch, if I want to. But that is not the purpose of producing that substrate, it is for the worms to inhabit. So here’s the next step… ADDING THE WORMS!
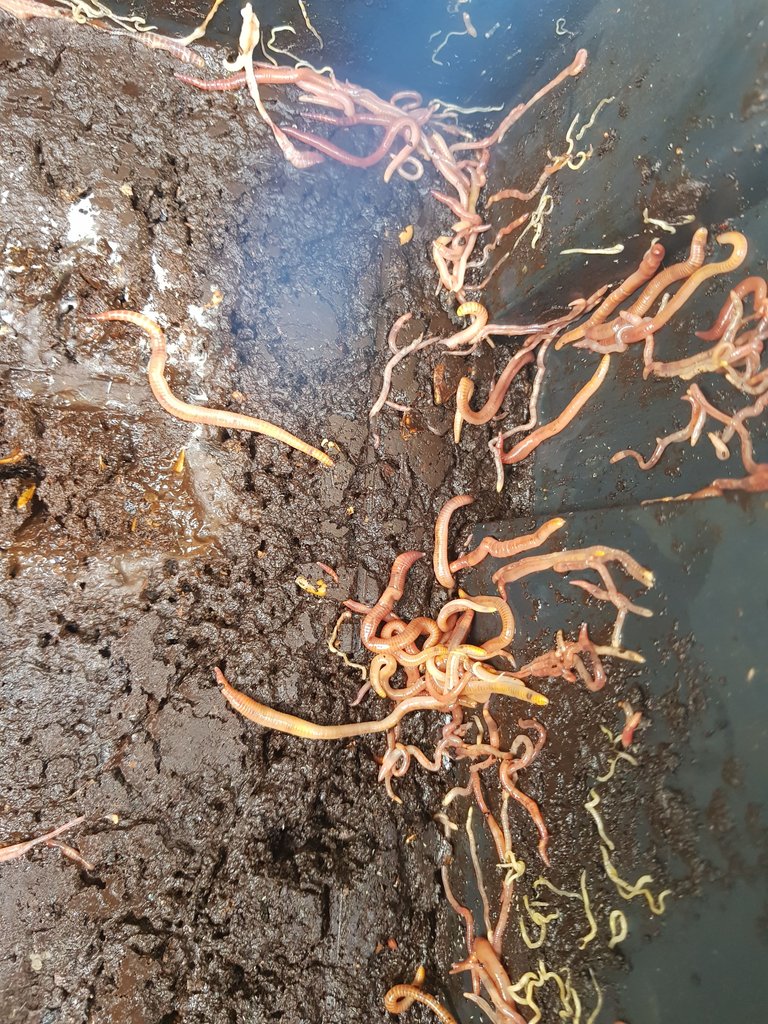
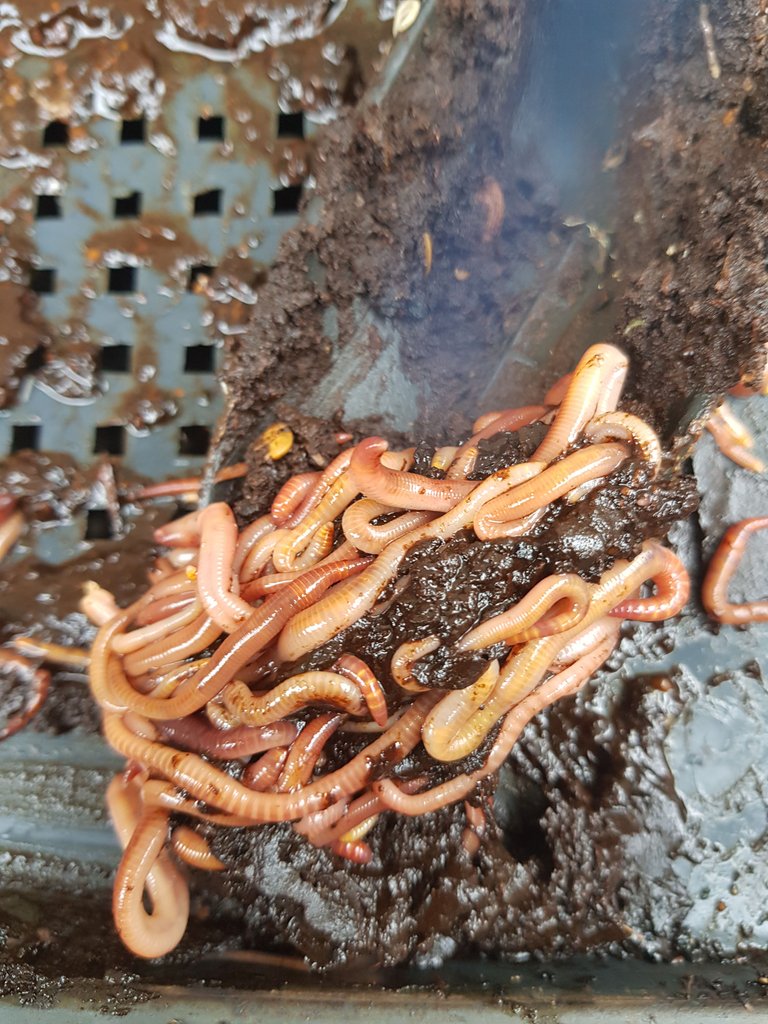
The population of my worms actually dwindled in the past two weeks. I didn’t realize the old worm bin is situated in a partially covered space and since it was raining in most days, the bin got too much water and many of the worms drowned after being submerged in soggy substrate. Worms do not like very environments and they die if exposed in these areas.
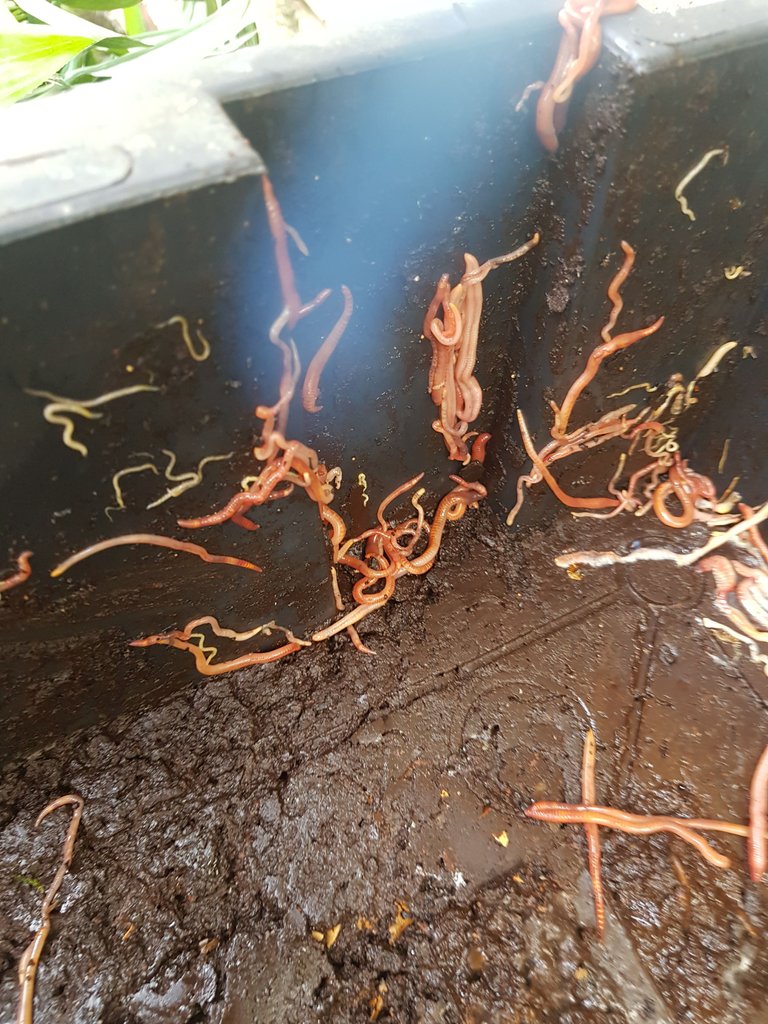
I still have many worms but they used to be much much more! I have some in the bottom tray but I will just get the worms from the topmost tray.
The next thing to do is just wait for another 30 days to see how fast the worms have multiplied. What I will do is to take a photo of the bin every week so we can see the weekly progress, but I will post an update to this worm farming series after the fourth week.
That’s all for now folks. I hope you enjoyed reading and I appreciate your feedback by commenting below.
Thank you and I hope you enjoyed reading my post. I will post an update after four weeks when we check how much the worms have multiplied since I added them into the matured substrate.
A Little About Me
Please feel free to follow my account if you like my post.


Meron dito sa may amin african night crawler, binebenta nila ng ₱250 per kilo.
Pakain nila ebs ng baboy o baka, ihahalo sa lupa.
Mura na yan sa P250 isang kilo. Presyo dito is around P1000, 250g lang.
Pero walang ANCs dito, tiger worms lang
Kusa po ba yan nabubuhay sa mga nabubulok na gulay? Nagkaganyan din dati yung ginawa kong compost sa Pasig. Laman lahat nung gulay, balat ng prutas at lupa. Nagulat nalang ako nagkauod na.
Yung nakita mo dati, most likely common earthworm yun. Yang nasa post ko, specific species ng composting worms yan, called Tiger Worms. Other species include African Night Crawlers, Alabama Jumpers, European Night Crawlers.
Giant worms roam Australia
I have no idea if that is true but it sounds Australian...